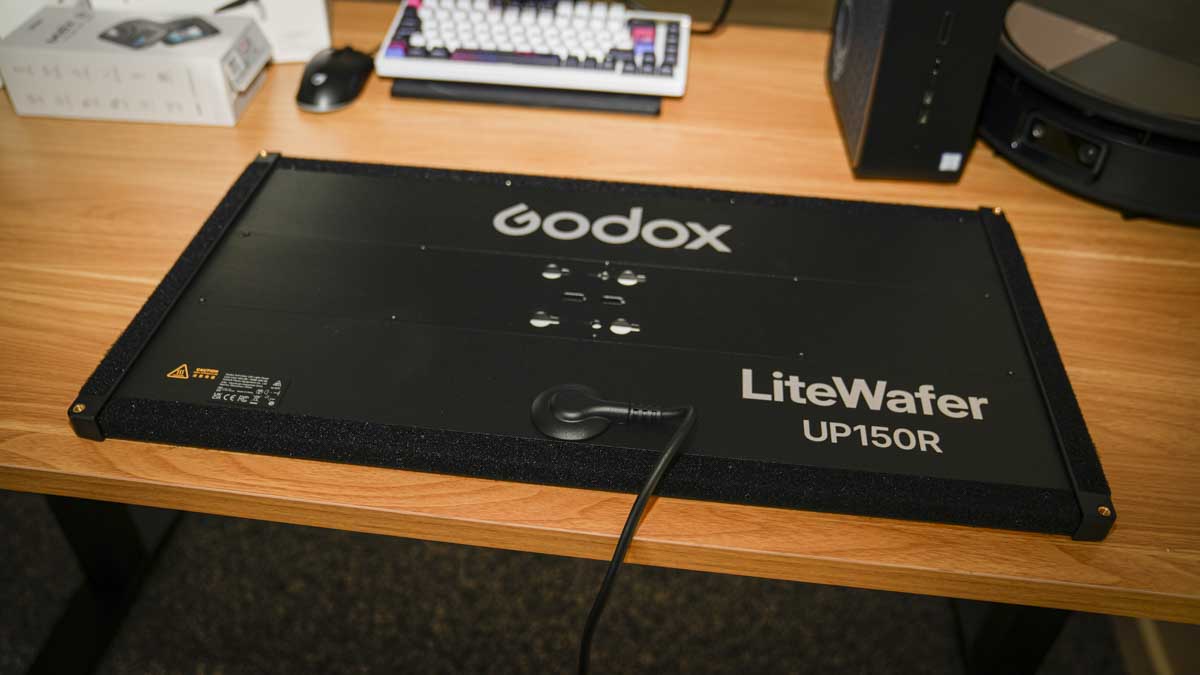
The Godox LiteWafer UP150R combines a beautifully slim wafer design with full-colour control, V-mount battery flexibility, and exceptional output, making it a near-perfect interview and panel light for solo creators.
What is the Godox LiteWafer UP150R?
The Godox LiteWafer UP150R is a slim-profile full-colour LED panel light from Godox’s premium continuous lighting range. It’s designed for professional video, photography, and live streaming use, with a thin 354 × 24 × 680mm light body and a separate UP-C150 controller that connects via cable.
The system delivers 20,400 lux at 1m at 5,600K, with a colour temperature range from 1,800K to 10,000K, full HSI and RGBW colour control, and 14 built-in FX effects. CRI is approximately 97, and TLCI is approximately 98, for accurate colour reproduction.
The light panel is aimed at solo videographers, content creators, small production teams, and professional photographers who need a versatile interview, portrait, or general-purpose panel light.
The headline practical features are the genuinely slim design, direct V-mount battery support eliminating the need for external power solutions, the quick-release mounting system for fast setup, and the Godox Light App with NFC pairing for instant wireless control.
Two UP150R units can also be joined via a straight connector to form a larger combined panel either horizontally or vertically.
Specification
Type: Slim panel full-colour RGB LED light
Output: 20,400 lux at 1m (5,600K)
Power draw: 180W (AC controller spec)
Colour temperature range: 1,800K – 10,000K
Dimming range: 0.0% – 100.0%
Colour modes: HSI, RGBW, GEL
Control methods: Onboard controller, Godox Light App (Bluetooth, 30m), wired DMX/RDM, NFC pairing
Power options: AC mains, V-mount battery (direct via plate), portable power station
Light body dimensions: 354 × 24 × 680mm (1.16ft × 0.08ft × 2.23ft)
Light body weight: 3.2kg (7.05lb)
Build and Handling
My first impressions of the UP150R were of a properly professional piece of kit, very much in line with the other Godox panels I have looked at recently and a long way from the basic LED panels we saw just a few years ago.
The light arrives in a semi-hard case that includes the panel, extension cable, and the UP-C150 controller with V-mount battery plate, with everything you need to get started, except a lighting stand. It is worth flagging early that you do need a slightly heavier-duty stand for this light. At just over 3.2kg total, it is a decent weight, and a standard lightweight lighting stand will strain under that load. The build itself compares extremely well with the Nanlite Pavo Slim panels, which are popular with content creators and professionals, though the UP150R is slightly heavier.
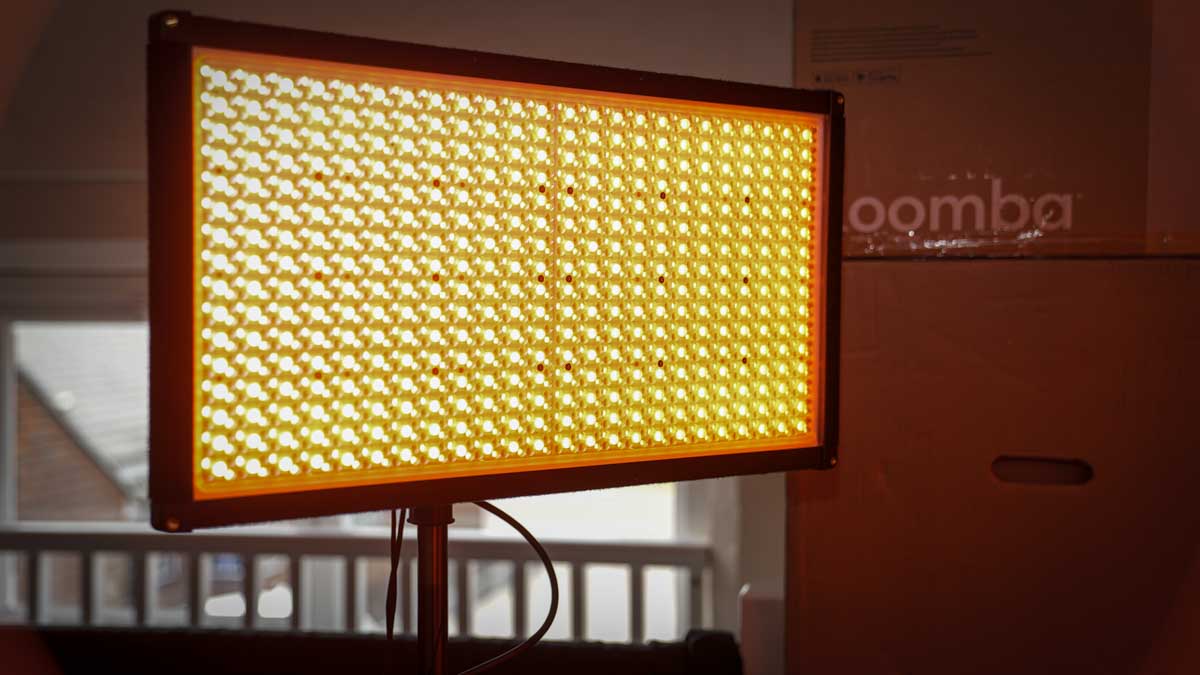
The reinforced, full-metal housing instantly gives the light a premium feel and doubles as a heatsink for passive cooling. After two months of regular use across studio and location work, the housing has held up well with no marks, wear, or fatigue beyond what you would expect from any working piece of kit.

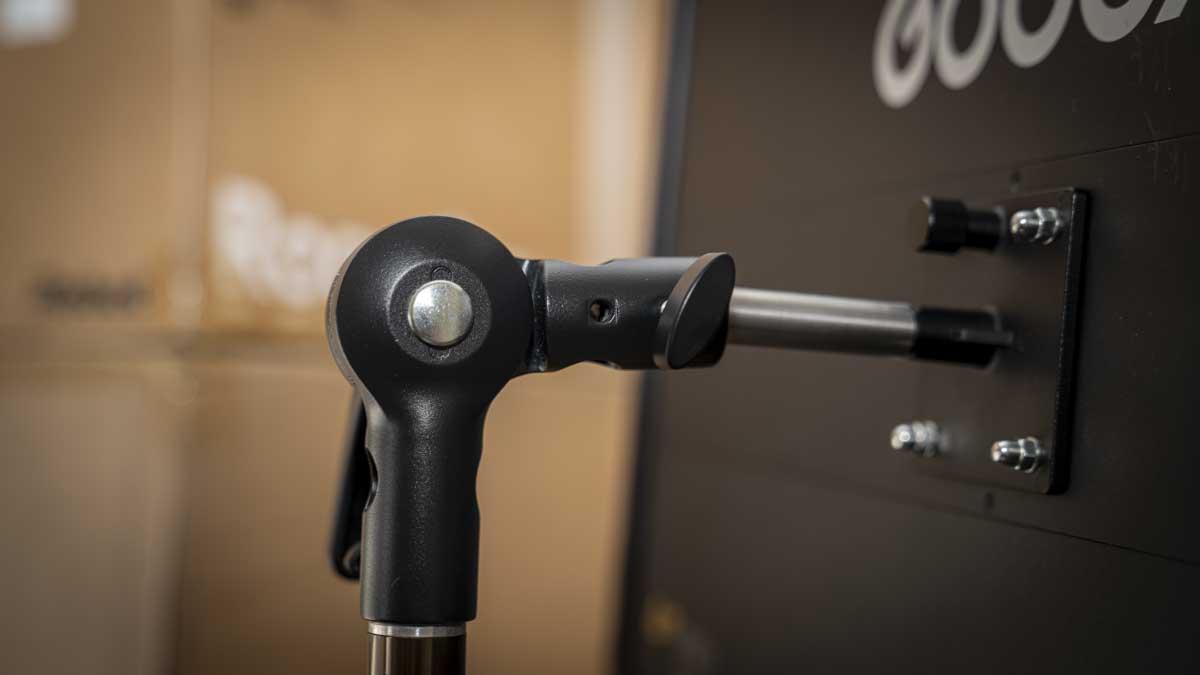
What I really like is the quick-release mount on the back fits into a standard lighting stand or into the articulated mount also supplied in the box, and the supplied light modifier is impressively shallow. Small details like the four Velcro strips that help keep everything packed down in the case, and the diffuser that can be stuck in place with a grid if you want to direct the light, all add up to a properly considered package.
The two-piece design with the panel and the separate UP-C150 controller works neatly in practice. The semi-hard case has dedicated sections for each component, with the controller in one section and the light fitting over the top, all very neat and tidy.
The only thing that does not fit in the case alongside the light is the lighting stand, and that is fine because you need a slightly more robust option than would normally fit anyway. The quick-release mount really is quick. A spring-loaded knob locks in place once you slot in the four prongs, and mounting or removing from the stand takes around 30 seconds at most, which is comparable to the Nanlite Pavo Slim I have used in the past.
With every shoot, the LEDs need diffusing, and the diffuser and shallow soft box that come in the box attach easily and can be left in place once fitted. There is also the option to add a grid if you want to focus the light more, but I have found the diffused panel’s throw ideal for running interviews or two-person setups with a high angle above the subjects.
One light is a good solution for most situations, and you can pop in just a little extra fill with something like the Godox RS60R if needed. The fact that you can also plug in a V-mount battery without running mains power adds significantly to the kit’s flexibility and versatility. For solo shooters and small production teams, the combination of high-quality build, slim form factor, and quick setup is exactly what’s needed for both photographers and videographers in 2026.
Features
The UP150R offers HSI, RGBW, and GEL modes, a colour temperature range of 1,800K to 10,000K, and 14 FX effects. Across two months of use, I have mostly used the bi-colour mode, adjusting between approximately 4,000K and 6,000K depending on the lighting situation and ambient light.
The amount of flexibility is excellent, and the colour accuracy is generally pretty good, although I always colour-check with the Datacolor light meter to confirm. My standard practice is to leave any light on for 5 to 10 minutes to fully warm up before checking and adjusting, and if you are running multiple lights in a setup, I would recommend setting them all up together, leaving them on for 5 to 10 minutes, then checking each colour temperature against your meter and noting any variation. Once you know the differences between your lights, you can match them all to roughly 5,600K, and your lighting will look significantly better in almost any situation.
On colour fidelity, what I have found over the years is that unless you are using extremely expensive lighting, the colour temperature shown on the controller and the actual colour temperature falling on your subject is always going to be a little out. With the UP150R mixed against daylight measuring around 5,000K, I needed to adjust the panel to about 5,300K to get an accurate match on the subject, around a 300K difference between the readout and reality.
Some of this is reflective light in the room, which would normally bring the difference down to around 150K. Compared against other Godox lights, the UP150R matched well, and the only consistent adjustment I had to make was when mixing with Nanlite panels, where there was again around a 150K to 300K difference.
The Godox Light App with NFC pairing is one of the standout features for me. Once you have the app installed, you essentially just tap your phone to the light, and pairing happens almost immediately. Once connected, you can set up the UP150R alongside other Godox lights as part of a coordinated rig.
If you are using an iPad, iPhone, or Android device, you can build a lighting control board on your screen and adjust each light separately or in groups. For solo shooters, this is genuinely valuable because being able to adjust your lighting without having to walk over to each light and fiddle with the onboard controls is a real workflow advantage. The 30m Bluetooth range was more than enough for everything I have done with the light, although I have not pushed it to the limit.
Wired DMX/RDM control is also supported and is the right choice for larger productions running multiple lights through a DMX board. For my use, the Godox Light App on the iPad has been the primary control method and worked reliably, with only a couple of occasions where the connection between the light and the iPad needed a few attempts to re-establish.
Direct V-mount battery support is one of the headline features and one of the most practically important for me. When you are working on location, you cannot always be guaranteed a plug socket, so having a V-mount or another battery solution that connects directly is genuinely useful. During this two-month test, there was only one occasion when I plugged into the AC mains, and for the rest of the time I used either the DJI Power 1000 Mini I have been reviewing recently or three SmallRig V-Lock batteries I carry in my backpack.
On the SmallRig V-Lock side, I have mainly been using the SmallRig VB155 (155Wh), which has been a perfect physical fit for the UP150R, alongside one SmallRig x Caleb Pike VB212 (212Wh) when I needed extra capacity. The VB212 has great runtime but is heavier and harder to hold. With the UP150R at full power, I get just under an hour from a single VB155, dropping to around an hour and a half at 50% output, which means three VB155 batteries get me through most of a day’s shoot. When I needed longer continuous runtime, the DJI Power 1000 Mini provided the backup, giving approximately 5 hours at full output, around 9 hours at 50%, and almost 18 hours at 25% for ambient lighting use.
The dual-light expansion via a straight connector is something I could only assess theoretically because I have only had the one UP150R for the test. A single light is a great solution, but it can be slightly limiting. For professional work, I would absolutely go for two units, possibly three, with the panel positioned about 2 feet from the subject for a natural look. A second UP150R as a back light from a high angle would add useful ambience, and a further pair of smaller panels would create properly cinematic lighting.
The advanced dimming options, including linear, S-curve, exponential, and logarithmic curves alongside the 0.0% to 100.0% range and -100% to +100% GM adjustment, offer plenty of flexibility for creative work. To be honest, I have not used the dimming curve options much in my work, but they are there if you need to progressively dim the light for cinematic effects, and the full RGB and FX modes has been useful when I have needed them.
Performance
The UP150R is rated at 20,400 lux at 1m at 5,600K, and in practice, this is ideal for interview situations and close-up work. The large flat panel produces good, even natural light and helps reduce the shadows you can get from more directional sources.
There are two main ways I have been using the light. For interviews, I set it to 25%-50% depending on the ambient light, position it high and about 2 feet from the subject, and the result is exactly the kind of soft, natural illumination that makes interviewees comfortable while giving the camera plenty of light to work with.
For situations where I need the light as the main lighting source, I have positioned it directly at the ceiling and used the ceiling as a reflector to bounce light back into the room at full power, which works exceptionally well. Compared with the Nanlite Pavo Slim 120C, output is comparable, though the Nanlite is slightly lighter for transport, while the UP150R offers a better softbox fit.
Heat management has been excellent across two months of regular use. Compared with the redhead lights I used to use for interview situations, where you essentially had to sit and have a coffee while waiting for them to cool down before packing up, the UP150R is pretty much ready to pack as soon as you switch it off.
I still leave it out for five minutes out of habit while packing the camera kit first, but the housing remains relatively cool, with the controller box taking most of the heat, and the controller itself never gets uncomfortably hot.
The other advantage over older lighting is that the redhead used to make things genuinely uncomfortable for the interviewee, whereas now the only thing to worry about is the brightness and whether you might be blinding the subject.
Mounting the UP150R high has been my preferred working configuration for most of the test, and the slim profile is genuinely well-suited to overhead and top-down setups. Compared with thicker panel lights, especially with a light modifier fitted, the UP150R can be tucked right into the corner of a room because the panel itself is beautifully slim, and the diffuser and soft box only add a few inches to the depth.
It’ss easy to position in both portrait and landscape orientations, and the quick-release mount on the back works with a lighting stand clamp if you need that flexibility. Over the last five years, I have completely changed how I light interviews, going from traditional redhead lights and Kino Flo through to theNanlite FS-60B, and now more often than not, just a large panel like the UP150R, simply because it is so much quicker and easier to use, especially when shooting solo without a camera team.
In two months of regular use, I have run two major projects through the UP150R. The first was a corporate video project featuring interviews in both commercial offices and the field. In the offices, the panel sat on a stand pushed into the corner of relatively small rooms, and its slim form factor genuinely saved space compared with even smaller traditional lights would have occupied.
The second project was product videos for national papers, where I took the light out into the field with just one VB155 to travel light, carrying everything in a backpack with the lighting stand alongside my camera kit and tripod. For a five-minute walk to the location, the load was fine, although I would not want to carry it for hours. What the large panel gave me over a smaller light was the additional power needed to balance my subject against the sky, which would have been very difficult with smaller lights.
Connection reliability with the Godox Light App was generally excellent. Most of my work was at close quarters within a few metres of the iPad, and I have not pushed the 30m Bluetooth range limit. What I have appreciated is being able to control the UP150R alongside the smaller RS60R lights from a single iPad mounted on my tripod, adjusting everything from behind the camera without having to walk to each individual light. For solo work, this is a meaningful workflow advantage.
Compared with the SmallRig RC 120D I previously used, the UP150R sits in a different category. The RC 120D is a more traditional COB light, better suited to focusing light in on subjects and creating back-light situations, and while you can attach a large modifier to achieve a similar effect to a panel, for my money, getting a dedicated light panel like the UP150R is the better option for interview and flat-light work, even at almost double the price.
Final Thoughts
After two months of regular use, the Godox LiteWafer UP150R has earned a permanent place in my lighting kit, and I will be looking to add more for future work, possibly replacing some of the older Rotolight Anova II panels I have been using for years.
The competition in this space is genuinely strong, with the Aputure Nova P300C, Amaran F22c, and the Nanlite Pavo Slim 120C all worth considering, but the UP150R holds its own across build quality, output, and the Godox Light App ecosystem that lets you coordinate multiple Godox lights through a single iPad. The colour temperature accuracy is good, but it’s worth checking with a Datacolor light meter, which I recommend every six months for any working light kit.
For me, the standout feature is the design itself. The fact that everything packs down into a semi-hard case with dedicated sections for each component means you can stack three of these panels in a van, ready to go, and know that everything you need is contained within.
Beyond the design, the light spread is beautifully soft, so when you are lighting a subject, you do not have to worry too much about reflection from skin or hotspots, just position the light and concentrate on getting the camera right. For enthusiasts shooting portraits and still life, or for semi-pros and professionals working solo or in small teams, the UP150R is an exceptionally well-rounded piece of kit that I can recommend without hesitation.