


Nikon’s Picture Controls have been around for ages on its digital cameras to give Jpegs a particular look that suits the scene or the photographer’s mood. Initially, the list of options included Standard, Neutral, Vivid, Monochrome, Portrait and Landscape, with Auto being added to let the camera decide the most appropriate choice and Flat coming along for use when shooting video. More recently, a collection of 20 Creative Picture Controls have been added and you can find them on cameras such as the Nikon D780, Nikon Z5, Nikon Z6 II and Nikon Z7 II. They have names like Dream, Morning, Pop, Sunday, Silence and Bleached, and they go beyond the usual minor tweaks of sharpness, saturation and contrast to produce more creative images that can be dramatically different from the standard result.
Although you can still edit the images to some extent, the effect produced by a Picture Control is ‘baked’ into a Jpeg, but the raw files still have all the colour data. As well as applying the Picture Controls to Jpegs at the shooting stage, it’s possible to apply them using the Nikon camera’s NEF (RAW) processing controls in the Retouch Menu, or using the controls in Adobe Lightroom Classic and Adobe Camera Raw.
Naturally, not everyone will like all of the effects created by Nikon’s Creative Picture Controls and they don’t work with every scene, but they can be a great way of enhancing the mode of a scene or creating an interesting image in less than perfect conditions. Here’s how it’s done.
Standard 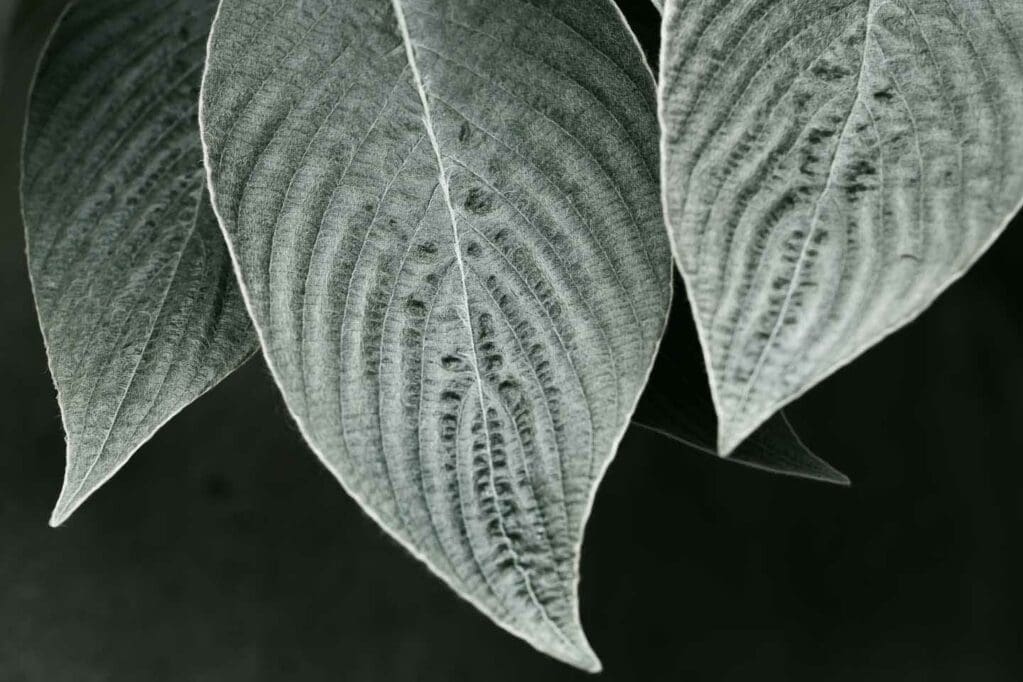
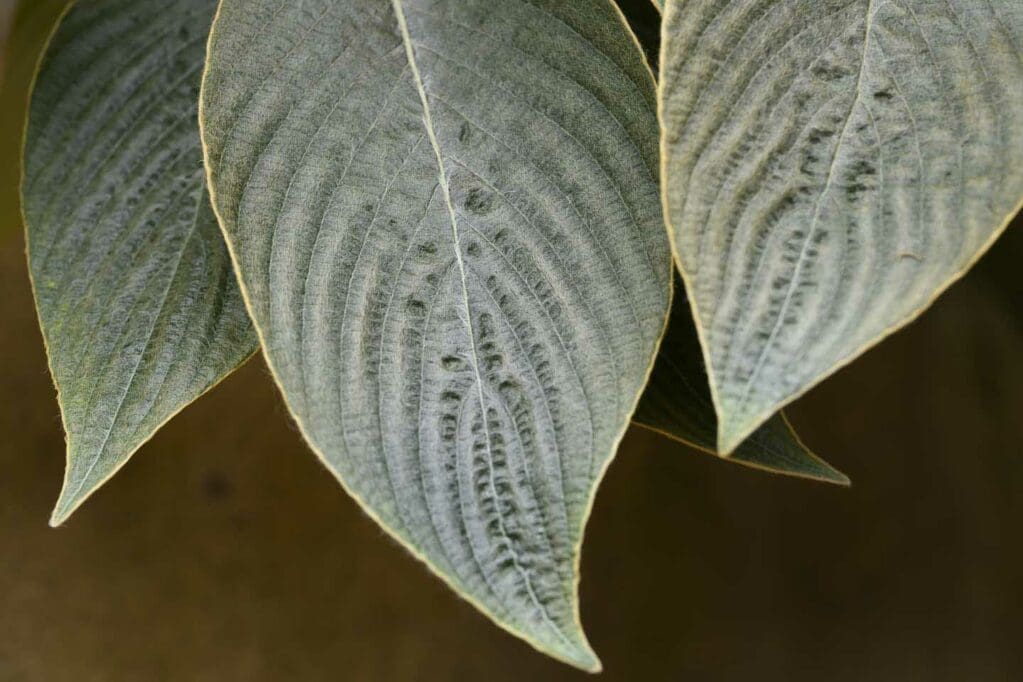
Bleached 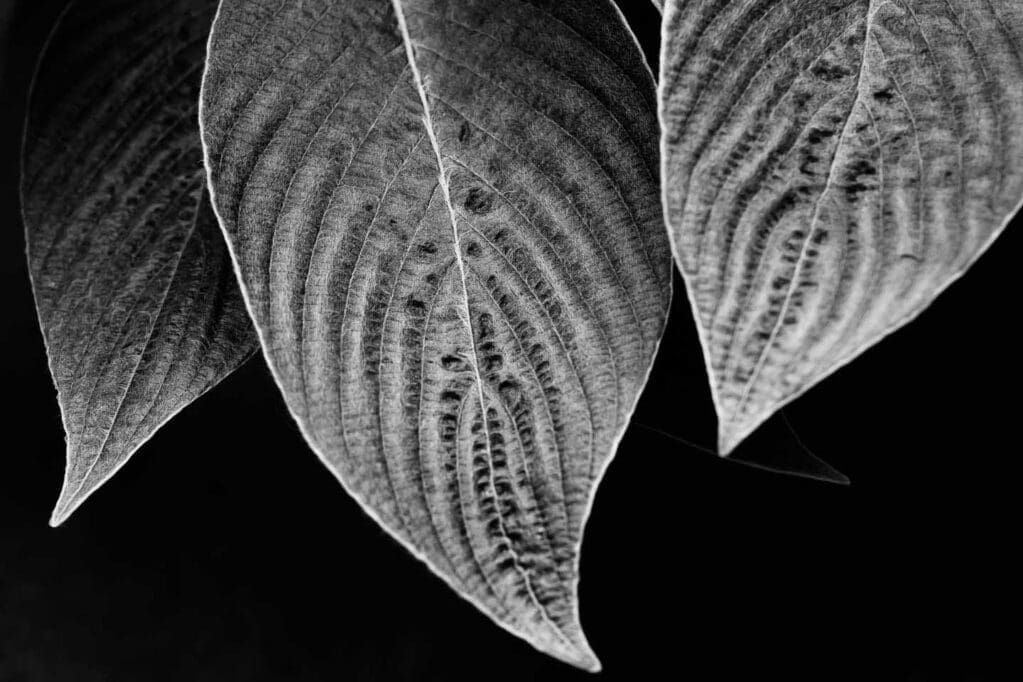
Graphite
How to use Nikon’s Picture Controls in-camera at the shooting stage
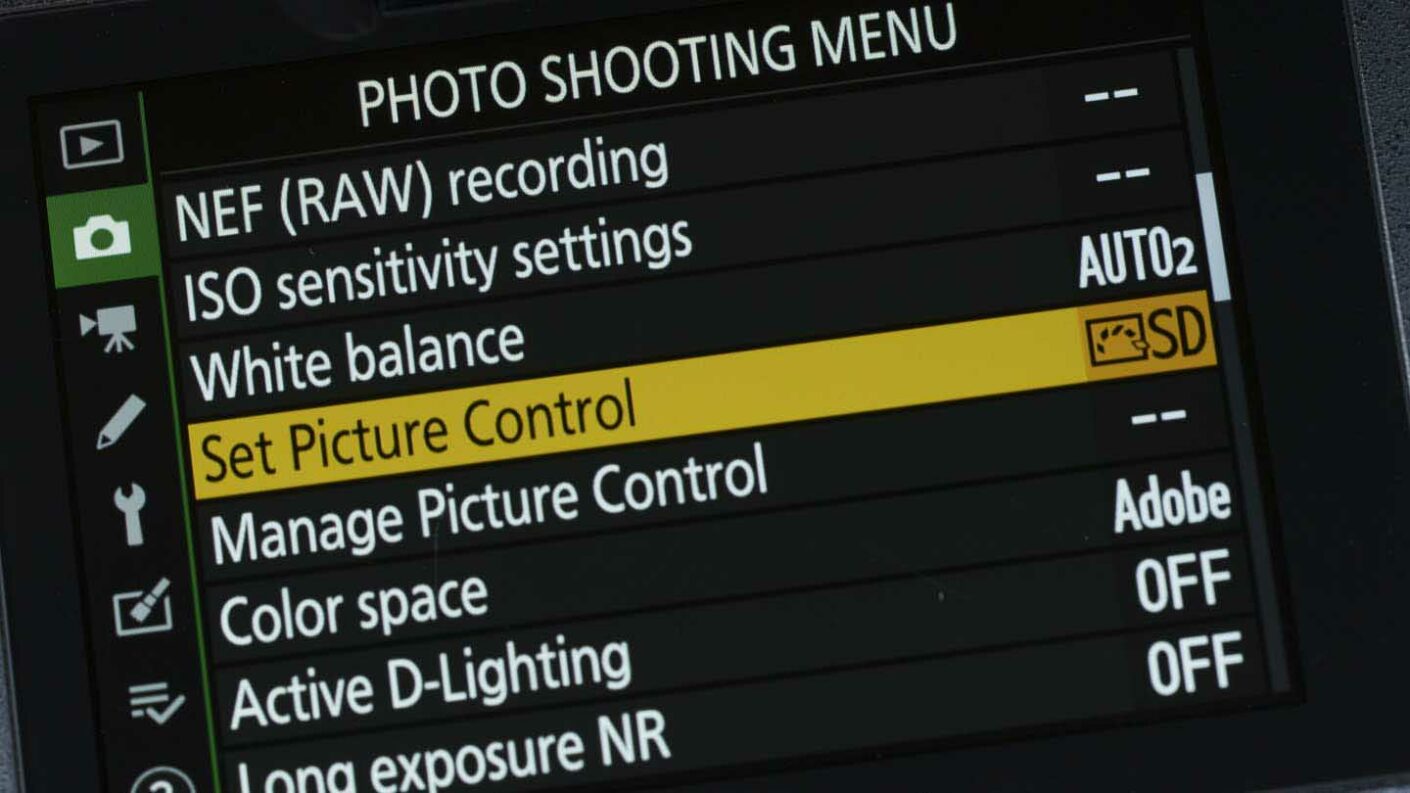
01 Shoot raw and Jpeg
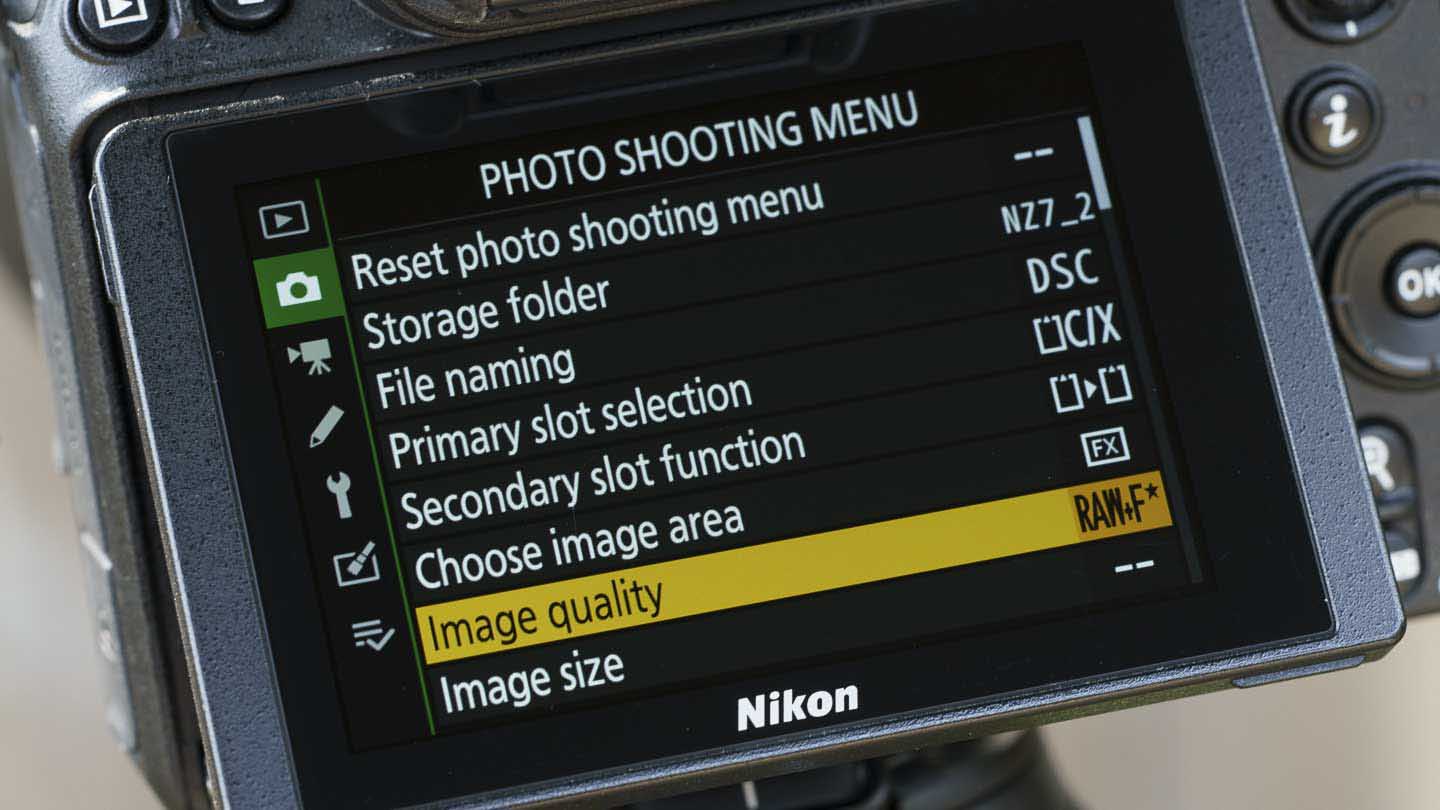
Because the effect of the Picture Controls is baked into Jpegs, it’s a good idea to shot raw and Jpeg files simultaneously as this gives you greater flexibility to change the look of your images.
Press the menu button and navigate to ‘Image Quality’ in the Shooting Menu. Then press the ‘OK’ button or tap on ‘Image quality’ in the menu to reveal the options. To get the best possible quality, select ‘NEF (RAW) + JPEG fine’ and press the ‘OK’ button again.
Then select ‘Image size’ below ‘Image quality’ in the menu and make sure that you’ve set both Jpeg and raw files to be recorded at the large (L) size.
02 Select the Picture Control
By default, the Picture Controls can be accessed via the ‘i’ menu that’s accessed by pressing the ‘i’ button on Nikon cameras, but if you’ve customised that menu and removed the option, you’ll find it in the main menu.
Simply locate ‘Set Picture Control’ in either menu and either press the ‘OK’ button or tap on it on the screen. Then scroll through the options until you find the one that you want to use (or try). 08 Bleached is a favourite of mine.
03 Adjust the settings
You can use any of the Creative Picture Controls in their default set-up, but as with the other Picture Controls you can adjust their settings. To do this, navigate to the Picture Control in the same way as in step 2 and with the Picture Control that you plan to use highlighted, press the down navigation key on the camera.
This brings up a list of parameters for adjustment, including the ability to reduce the level of effect that’s applied.
Either select the parameter that you want to adjust using the up/down controls, or tap on the screen, then use the left/right buttons or tap on the scale on the screen to adjust the value. Once you’re happy, press the ‘OK’ button.
04 Shoot
If you have a Nikon mirrorless camera, you’ll see the impact of your selected Picture Control in the viewfinder and on the screen. If you’re using a DSLR, you need to switch to Live View mode to see the scene with the Picture Control applied.
Standard 
Toy 
Silence at 80
Applying a Picture Control post-capture in-camera
01 Locate the Retouch Menu
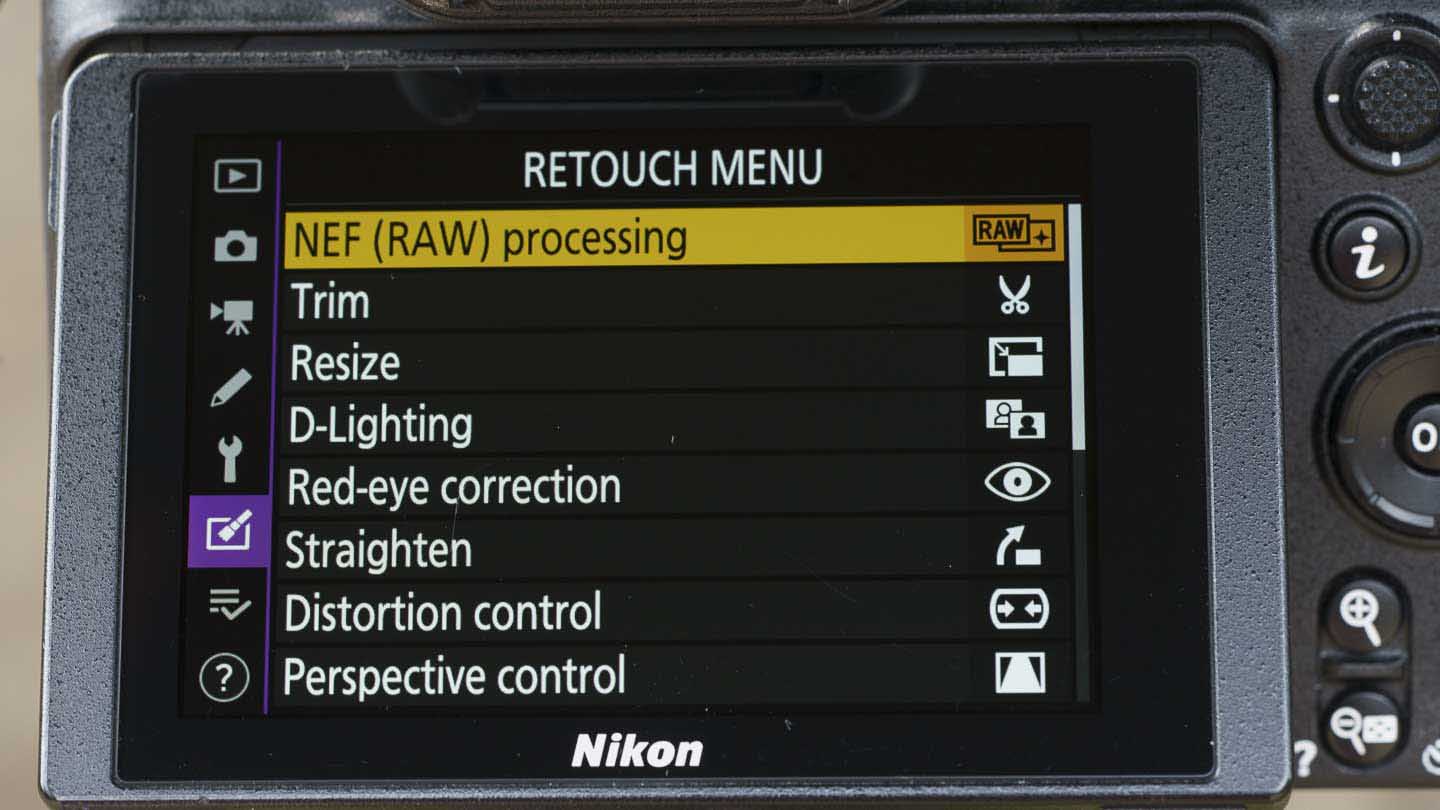
After you’ve finished shooting, press the ‘Menu’ button and scroll to, or tap on, the ‘Retouch Menu’ icon. Locate and select ‘NEF (RAW) processing’ at the top of the screen. Then tap on ‘Select image(s)’ or selected it in the menu and press ‘OK’.
02 Select the image(s)
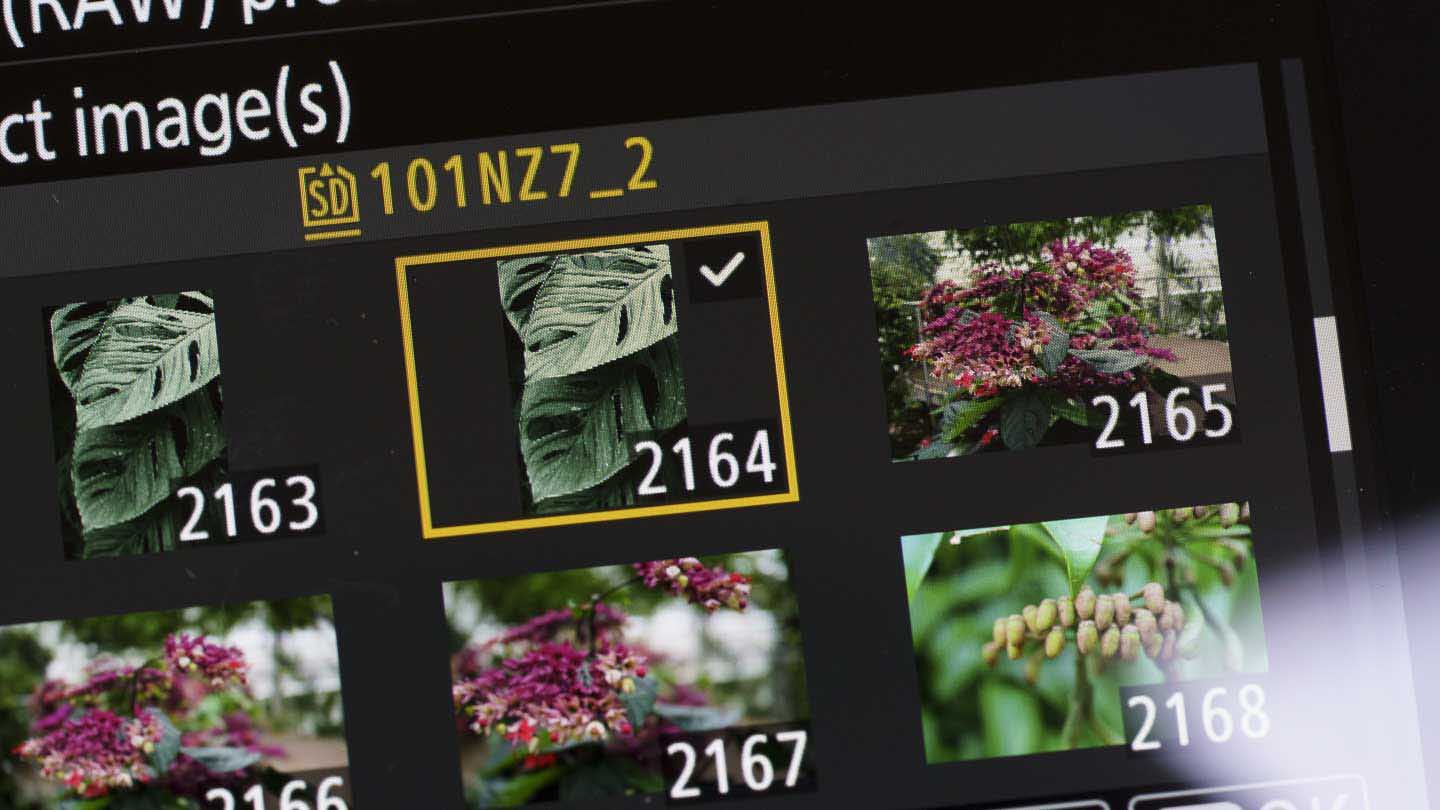
Browse through the images and use the zoom out button to add a tick to the thumbnail(s) of the one(s) you want to edit. Alternatively, tap once on the image to select it and tap again to add the tick.
Once you’ve selected the image(s) you want to edit, press the ‘OK’ button.
03 Make the edits
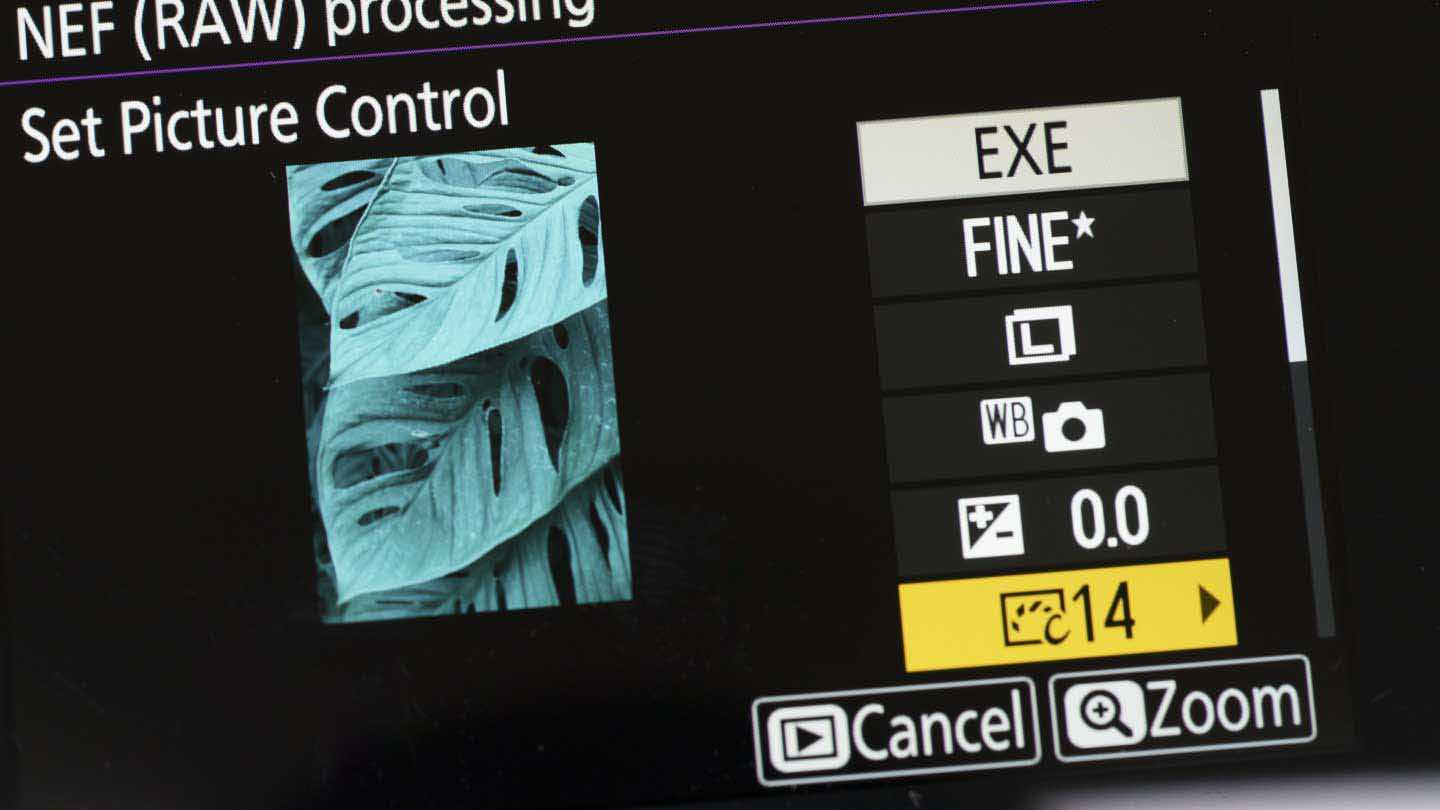
You’ll now see a screen with one of the images and a short list of the parameters available for adjustment. The Picture Control is at the bottom of the first page of the list. Tap on it or use the right navigation key to see a list of all the available Picture Controls.
As you tap on any of the alternative Picture Controls, or navigate up and down using the navigation controls, you’ll see the image change as the new effect is applied. When you’ve find the one you want, you can either press ‘OK’ to apply it or you can press the right navigation button to access the same adjustment controls that are available for tailoring the image when using the Picture Controls at the shooting stage.
Make any edits that you want before pressing ‘OK’ and then scrolling up to ‘EXE’ to save the image as a Jpeg.
Standard 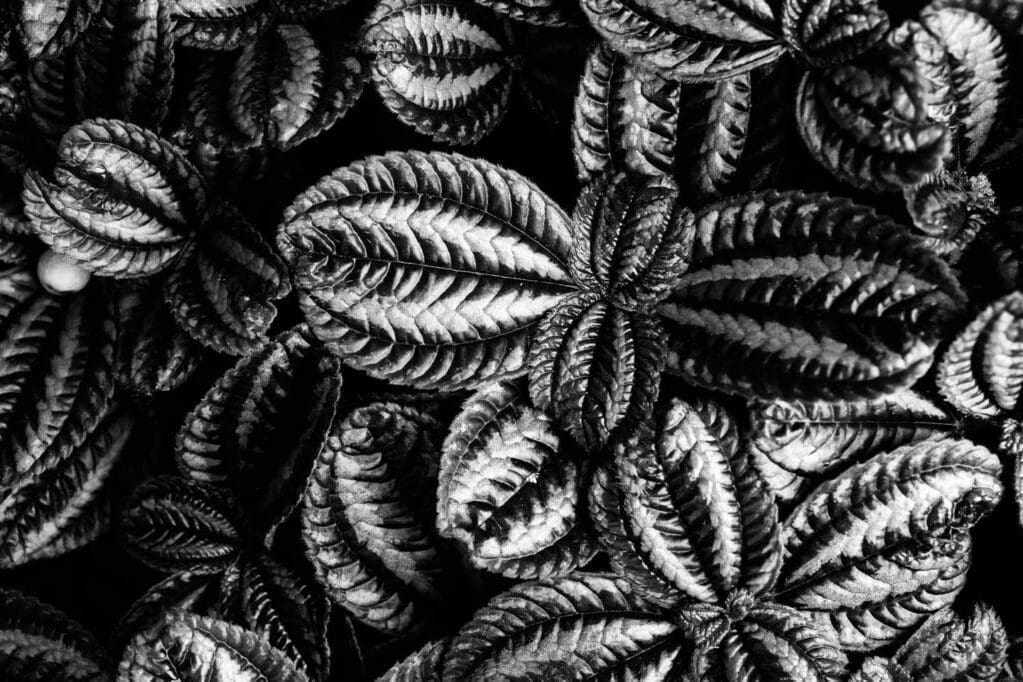
Graphite 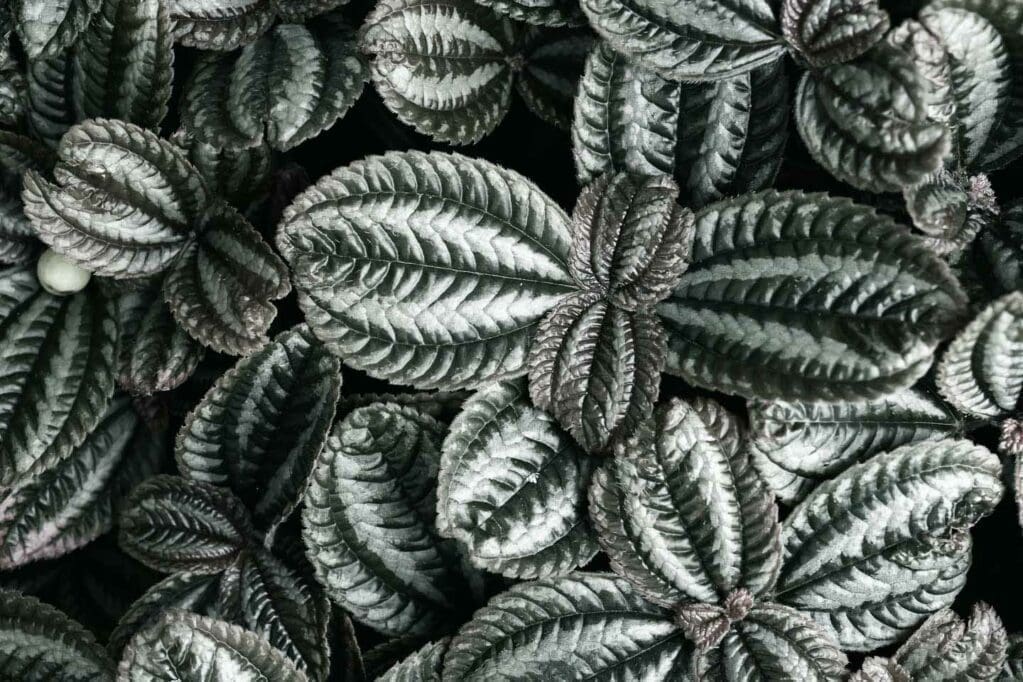
Bleached
Using Nikon Picture Controls with raw files
Adobe Lightroom Classic and Adobe Camera Raw, which is the raw file editor supplied with Adobe Photoshop, both have the profiles to replicate the impact of using Nikon’s Picture Controls with Nikon camera raw files at the processing stage. It’s really easy to apply them in either software package and you can use them in combination with all the usual editing controls. Here’s how it’s done:
01 Open the image
If you’re using Adobe Lightroom you first need to import the images to the software, but if you’re using Adobe Photoshop you just need to locate the file(s) you want to work on and then open it/them. Photoshop automatically opens Adobe Camera Raw when you attempt to open a compatible raw file.
02 Select the profile in Adobe Camera Raw
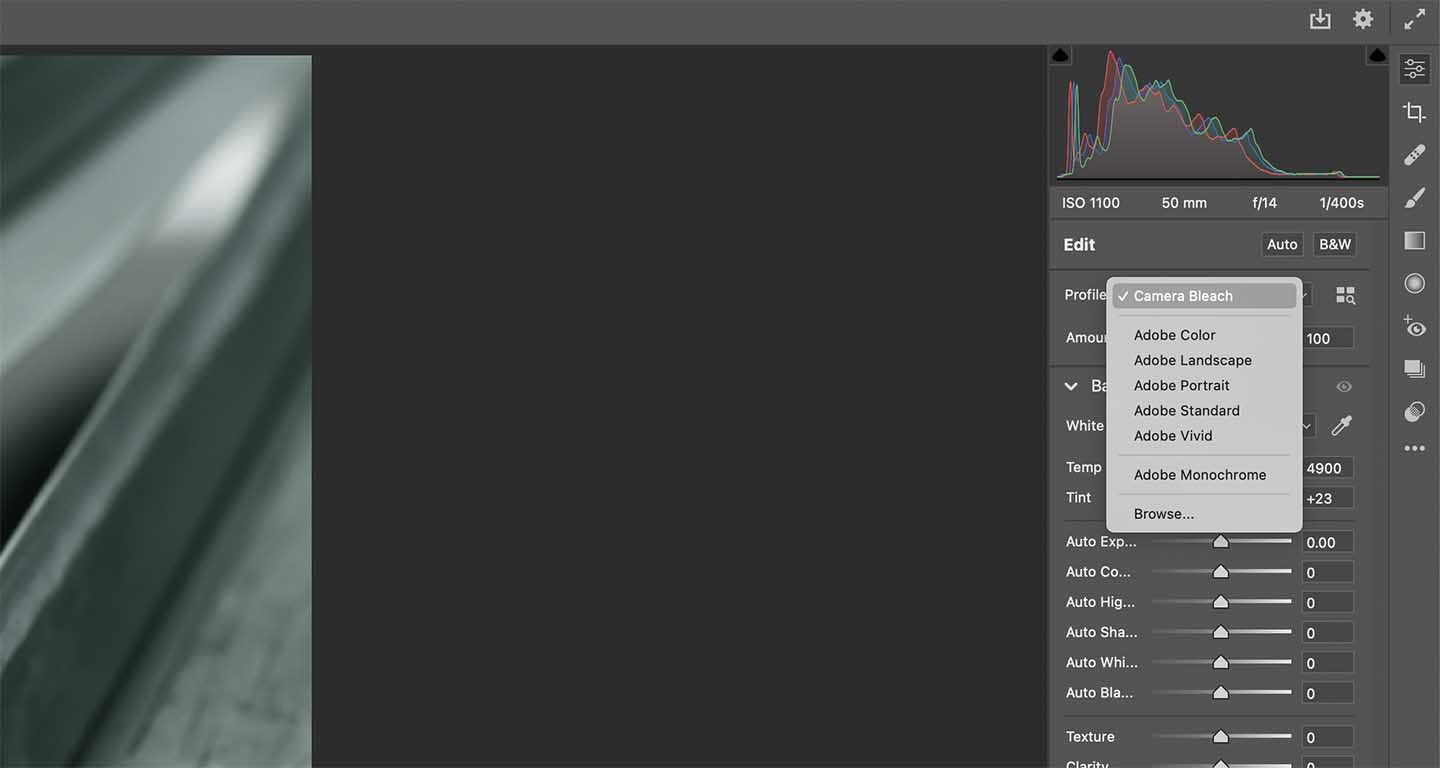
With the image open in Adobe Camera Raw, select the ‘Edit’ icon at the top of the adjustment icons and then find ‘Profile’ near the top of the adjustment panel, it’s immediately under ‘Edit’. It will show ‘Camera’ and the name of the Picture Control that you used originally.
Click on the dropdown arrow to the right of the profile name to reveal the options available. You’ll see a short list of Adobe options followed by ‘Browse’. Click on ‘Browse’ and, if necessary, ‘Camera Matching’. This will reveal thumbnails of all the Picture Controls available. Just scroll until you find the one you want – the main image on the screen while change to show a preview if you hover over any of the thumbnails.
Once you’ve selected the Picture Control you want, you’ll see a sliding control to let you reduce the degree of the effect. After setting the level you want, click on ‘Back’ near the top of the panel to get access to all the usual Adobe Camera Raw Controls and process your image as normal.
Or
02 Select the profile in Lightroom CC
With your images imported into Lightroom CC, select the one you want to edit and click on ‘Develop’. Make sure that the Basic adjustment panel is open and click on the profile dropdown arrow. This is to the right of where it says ‘Profile’ followed by ‘Camera’ and the name of the Picture Control that was used at the shooting stage.
Click on ‘Browse’ beneath the Adobe options, and if necessary expand the ‘Camera Matching’ section to see the available Picture Control settings. As you hover over the thumbnails for each Picture Control settings, the main image will preview the effect. Simply click on the one you want to use. You can then use the control at the top of the panel to reduce the level of the effect. When you’re finished, click on ‘Close’ to return to the usual Lightroom editing panel and finsih your image as normal.
Thank you for this