


Snap Verdict
While the GH5 is largely known as a video camera, it’s also a very capable stills camera. The fact that the Panasonic Lumix G9 has the same sensor and processing engine, but has been tuned for stills rather than video is, therefore, good news for photographers. It also feels like a high-quality camera, being light yet sturdy with a good-sized grip while the touch-control is accompanied by a healthy array of physical controls.
For Panasonic G9:
- Compact weather-sealed body
- Stabilisation system rated at 6.5EV
- High-quality EVF and screen
Against Panasonic G9:
- Sub-full-frame sensor
- Awkwardly positioned joystick controller
- 400-shot battery life in standard mode
What is the Panasonic G9?
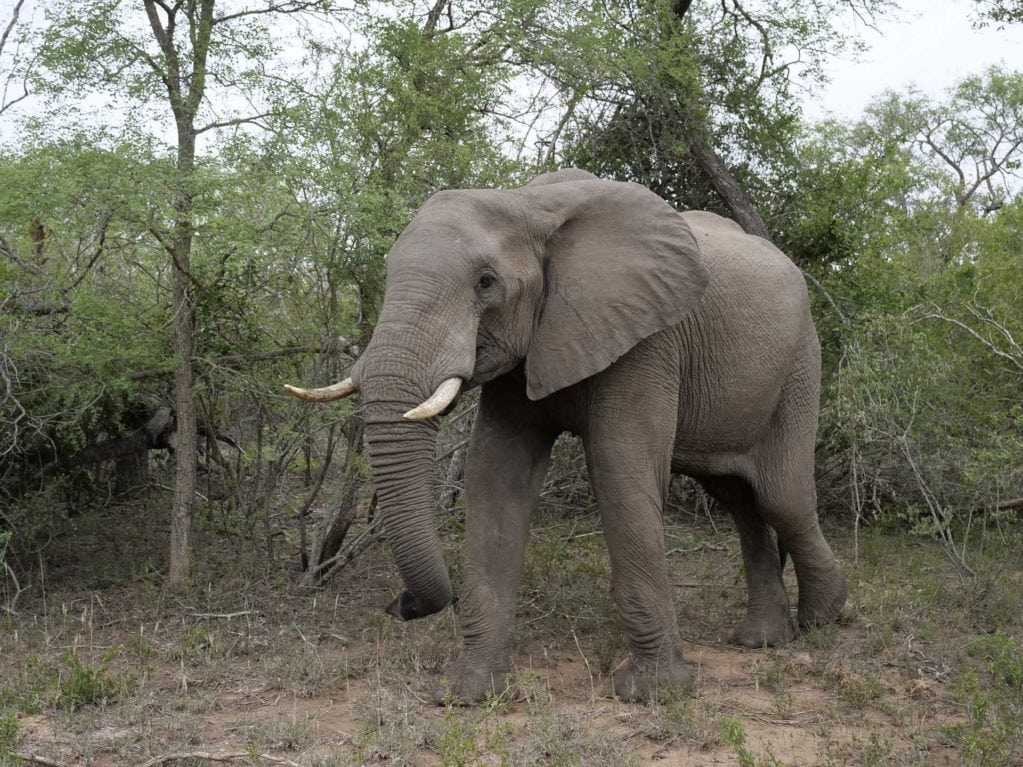
The Panasonic Lumix G9 is Panasonic’s flagship stills-camera and it sits alongside the GH5 at the top of the company’s interchangeable lens camera line-up. Like the GH5, the G9 is a mirrorless camera with a Four Thirds Type sensor and a Micro Four Thirds lens mount. Panasonic says the camera is aimed at enthusiast outdoor and wildlife photographers.
The GH5 was a massive launch for Panasonic’s Lumix brand, it was widely anticipated, warmly welcomed and accompanied by the promise of firmware upgrades to give additional functionality. Now those upgrades have been released and the GH5 is fully-formed.
However, while it’s a good stills camera, its advanced video specification means it’s widely regarded as a video camera. Consequently, Panasonic has to turn its attention to its more stills-orientated cameras and introduced the G9 as its flagship stills model.
Shortly before its official announcement, I got to see the G9, so let’s take a look at what it has to offer.
Sensor and processing engine
Panasonic tends to put its sensors in several cameras so it comes as no surprise that the G9 has the same 20.3Mp sensor and Venus 10 processing engine as the GH5. However, according to Barney Sykes, Panasonic UK’s Senior Product Marketing Manager, the sensor and processor have been tuned very differently to suit the G9’s stills-shooting focus.
To boost detail resolution, sensor has no optical low-pass filter.
While 20Mp images will suffice for many situations, the G9 also has a High Resolution mode that enables 80-megapixel images to be created in jpeg and raw formats in-camera. In this mode the camera takes a sequence of 8 images in quick succession, shifting the sensor a little between each shot. These images are then merged to create a single larger image with more detail.
According to Panasonic UK, this is a tripod-only mode and it takes approximately 4 seconds to process the image – that’s about half the time that the Olympus OM-D E-M1 Mark II takes
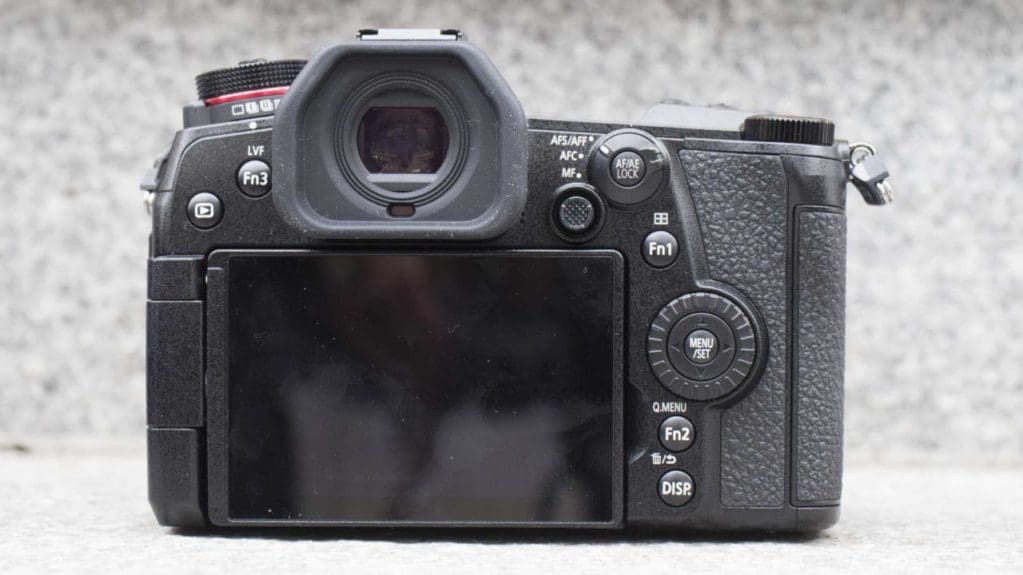
Image Stabilisation
Like the GH5, the G9 has Dual IS, a system that can combine 5-axis sensor shifting-stabilisation and lens-based stabilisation. The lens based-stabilisation aspect is particularly important with long lenses.
The GH5’s IS is very effective with a claimed shutter speed compensation factor of 5EV. In the G9, however, the Dual IS delivers a claimed correction of 6.5EV at all focal lengths, which puts it on a par with the Olympus OM-D E-M1 Mark II. It also functions in both stills and video mode.
Sensitivity (ISO) Range
Like the GH5, the G9 has a native sensitivity range of ISO 200-25,600 with ISO 100 offered as an expansion setting.
For comparison, the Olympus OM-D E-M1 Mark II has a range of ISO 64-25,600 while the Fuji X-T2 has a native range of 200-12,800 that can be expanded to 100-51,200.
I’m a little surprised that Panasonic hasn’t incorporated the lowest setting into the native range or added a lower value, but there’s always a lot of attention paid to the higher values.
Autofocus
Prior to the arrival of the GH5, Panasonic was using a 49-point contrast detection system in its mirrorless system cameras. The GH5 introduced a 225-point system and this has now been used in the G9.
It gives good coverage across the imaging area and it compares well numerically with the 121-point system in the OM-D E-M1 II, but it’s important to remember that the Olympus camera has a hybrid AF system that combines phase detection and contrast detection. Will the G9’s be able to match the tracking capability? Panasonic certainly seems to think so.
Panasonic has reduced the time that the G9 takes to process the information required for autofocusing and this brings a claimed focus acquisition time of just 0.04sec, the World’s Fastest according to Panasonic.
In addition, there are a few refinements that have been made to the AF system including an
AF-point Scope mode that enlarges the area to allow you to check that the right area has been targeted, focus point switching for when you swap between horizontal and vertical shooting and loop movement of the AF point so you can scroll continuously through the points rather than having to go from one side to the other and back.
Perhaps the most exciting introduction, however, is Custom AF mode which allows you to tailor the response of the AF system to suit the subject and shooting conditions. That’s something we increasingly expect to see with a high-end camera that’s capable of shooting action.
Continuous shooting
We’ve seen an escalation in continuous shooting rates recently with electronic shutters also allowing silent shooting. When the electronic shutter is in use, the G9 can shoot at up to 20fps (frames per second) with continuous autofocusing (AFC), that puts it level with the full-frame Sony A9. That’s good news for wildlife photographers who don’t want a clicking shutter to disturb their prey.
If you want to shoot faster still, the G9 can shoot full-resolution images at an incredible 60fps in single-AF mode, that is, with the focus set at the start of the sequence. That’s good news for shooting static action like water splashes or fleeting facial expressions.
At full-pelt, the G9’s buffer enables up to 50 raw files to be captured. If you switch to use the mechanical shutter, the maximum shooting rates drop to 9fps with AFC and 12fps with AFS, but the burst depth expands to 60 raw files.
In addition, Panasonic’s 4K Photo and 6K Photo modes are on hand with their convenient modes to help with capturing brief bursts of action. These modes use video technology to capture sequences of images which can then be extracted to create 8Mp (4K) or 18Mp (6K) still images.
The G9 can shoot 6K Photo images at 30fps for up to 10minutes. Alternatively, 4K Photo mode can be used at 60fps for 10 minutes or 30fps for a maximum of 30 minutes. Shooting for 10 minutes at 60fps produces a lot of 8Mp images!
Video
The G9 may be the stills version of the GH5, but it would be very odd for a Panasonic camera to not have 4K video capability. However, not wishing to eclipse the GH5 and the fact that the G9 is tailored to still shooting means that the video spec is a little parred back in comparison with the video camera.
Nevertheless, the G9’s video spec makes pleasant reading as 4K (3840×2160) footage can be shot at 24, 25, 30, 50 or 60p at a maximum of 150Mbps in MP4 format. Those interested in slow motion playback can shoot 4K footage at 60fps or Full-HD (1920×1080) at 180fps.
Predictably, the G9 can’t match the bit-depth of the GH5 and records 8-bit colour in 4:2:0 to the SD card (except for 4K at 60/50p). Both headphone and mic sockets are provided and are the standard 3.5mm type.
Dual Card Ports
Dual card ports have been flourishing recently with the Sony A9, Olympus OM-D E-M1 II, Fuji X-T2 and Fuji X-Pro2 all having them. Naturally, Panasonic has followed suit and the G9 has dual SD/SDHC/SDXC ports. Even better news is that both of these ports are UHS-II compliant to help maintain the high shooting rate and bust depth as well as 4K video recording.
Screen and Viewfinder
Like other Panasonic G-series cameras, the G9 has an electronic viewfinder built-in and located in the centre of the top-plate like a mini-DSLR. It’s a similar 21mm 3,680,000-dot OLED device as is found in the GH5 but it has a variable magnification factor that can be set to 0.83x, 0.77x or 0.7x.
Also, at 120fps the refresh rate is double that of the GH5’s EVF and there’s a lag of just 0.005sec, which should combine to make it easy to follow fast-moving subjects.
There’s also a 3-inch touch-sensitive vari-angle OLED screen with 1,040,000 dots on the back of the camera.
Connectivity
In common with several other recent cameras, including the Fujifilm X-E3, the Panasonic G9 has Bluetooth and Wi-Fi connectivity built-in to simplify image sharing and remote operation.
The Bluetooth 4.2 (BLE: Bluetooth Low Energy) system allows a constant connection with a smartphone or tablet for easy reconnection to the Wi-Fi system for image transfer. In addition, we’re told that images can be transferred automatically between the camera and a smartphone.
Key Specifications
Build and Handling
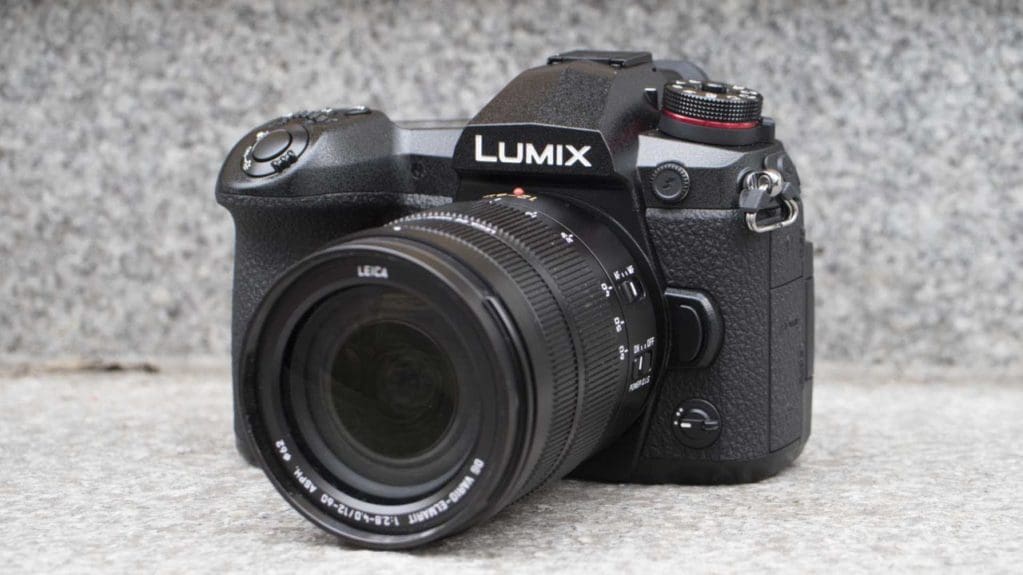
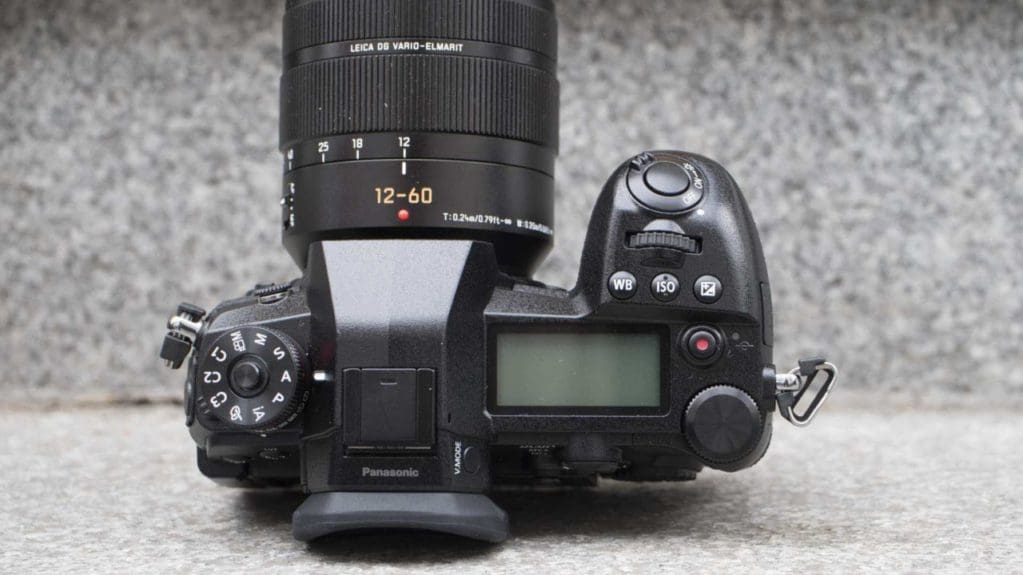
As you would expect with a camera aimed at outdoor and wildlife photographers, the G9 has a magnesium alloy body with weatherproof seals, plus it can operate at down to -10C. It also has the familiar mini-DSLR styling of the GH5, with a slightly old-school angular look.
Although the G9 looks a lot like the GH5 and it sits alongside it as a flagship model, Panasonic hasn’t used the same body for the new camera. I’m told that this is partly because the high-end video specification of GH5 means it needs to be able to dissipate more heat than the still-orientated G9.
A close look at the two cameras reveals a few key differences. The G9 is a little slimmer, for instance, but the grip is deeper and wider to provide a more secure grip with long, heavy lenses.
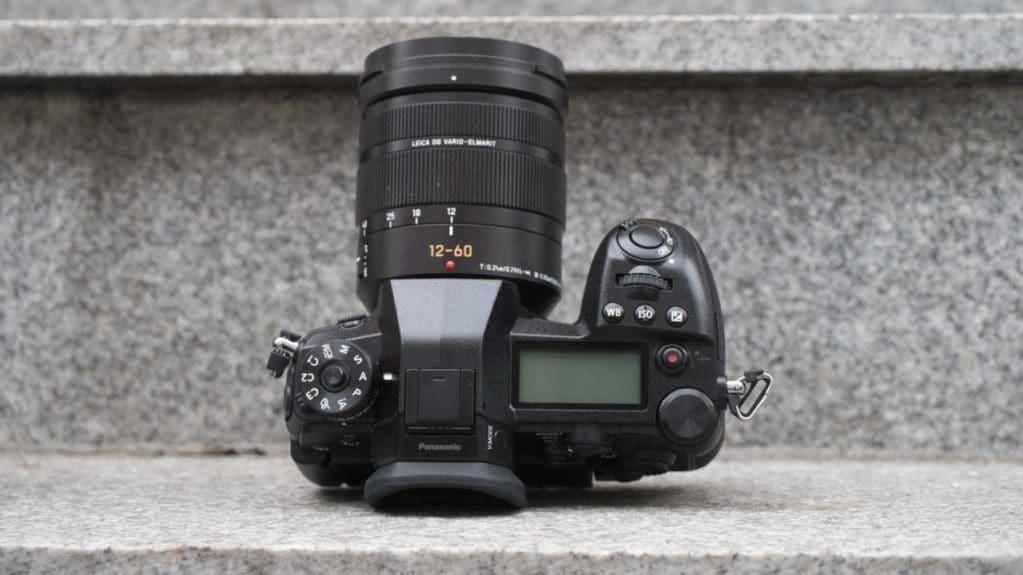
The G9 is also the first Panasonic Lumix G-series camera to feature a top-plate LCD screen to show key settings. Flicking the power switch that surrounds the shutter release beyond the ‘on’ point illuminates the screen.
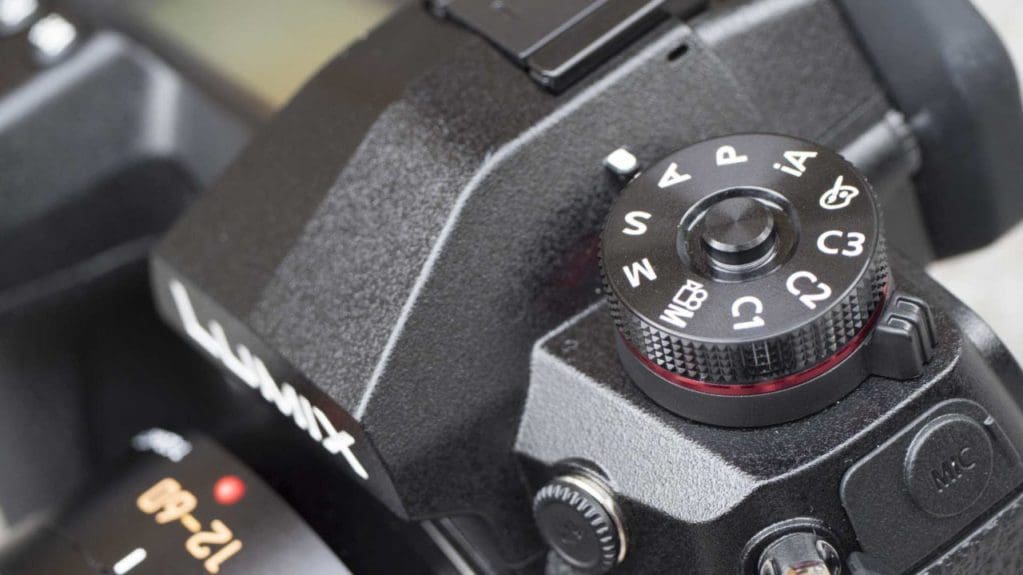
Control Layout
As the status screen is located on the right of the top-plate (as you hold the camera), the lockable mode dial is located on the left with the drive mode dial beneath it.
A row of three buttons just behind the shutter release and control dial on the top-plate gives quick access to the white balance, sensitivity (ISO) and exposure compensation controls, with the video record button sitting a little further back.
Another command dial sits on the near-right corner of the top-plate making it convent for use when the camera is on a tripod and below head-height, or when you’re shooting with the camera held to your eye.
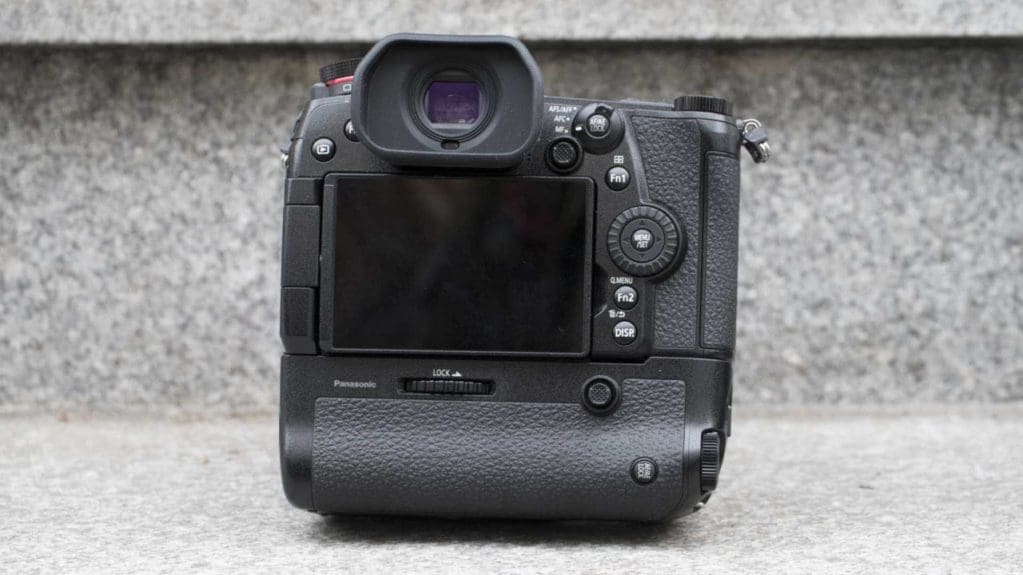
Turning to the back of the G9, there’s a reasonable-sized thumb-ridge with no buttons in the way for accidental pressing – the GH5’s Display button is prone to being depressed accidentally by my thumb.
A third command dial and navigation pad surround the menu button on the back of the camera, falling within easy reach of your thumb. If you reach out your thumb a little it’s likely to find the focus/AF/AE control first, but if you stretch a bit further you’ll find the mini-joystick for selecting the AF point.
Ideally, these two controls need to be switched around so the AF point controller is within more convenient reach.
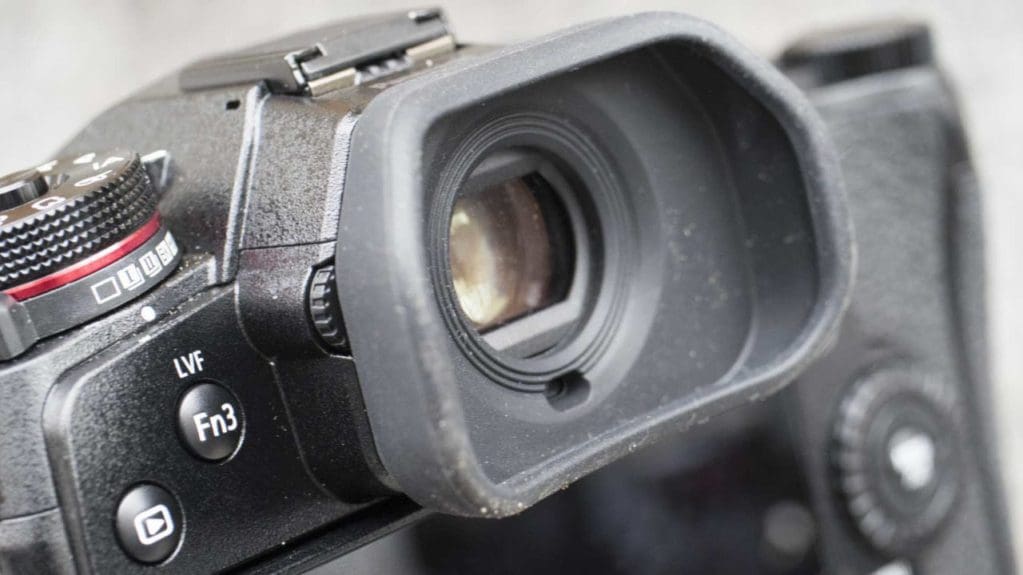
Viewfinder and screen
According to Panasonic, the Lumix G9’s viewfinder is the best the company has used to date and it provides a nice clear view. With magnification equivalent to 0.83x it seems very large so you almost have to look around it to see the edges of the scene. If that’s an issue for you, it’s possible to switch to 0.7x if you prefer.
Panasonic has also given the viewfinder a refresh rate of 120fps and consequently, I had no problem tracking moving subjects in it while shooting at 20fps.
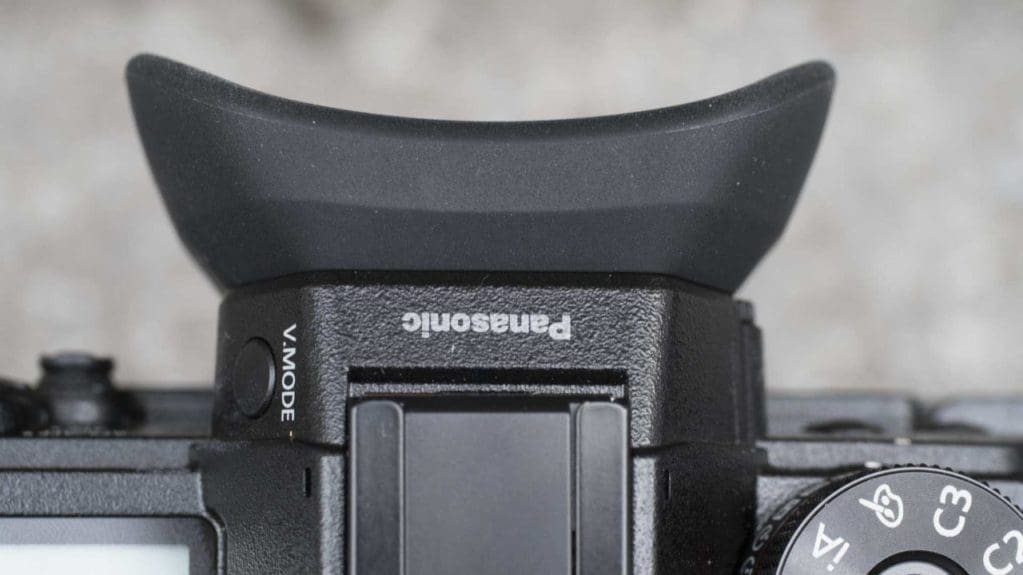
The standard eye-cup is quite comfortable and does a reasonably good job of keeping out sunlight, but as a left-eye user, the optional larger eye-cup is appealing for use in bright, sunny conditions.
As usual with Panasonic Lumix G-series cameras, the G9’s screen is very responsive to touch. It’s also helpful to be able to position it via the vari-angle hinge to compose landscape or portrait format images from high or low angles.
I’m not a huge fan of Panasonic’s Quick Menu as it spreads out the features and makes them harder to locate. However, I like the more common information display grid that can be accessed by pressing the display button. This screen is interactive and responds to touch control so it can be used to adjust settings. Ideally, I’d like the option to access this direclty vis the Q. Menu button.
Performance
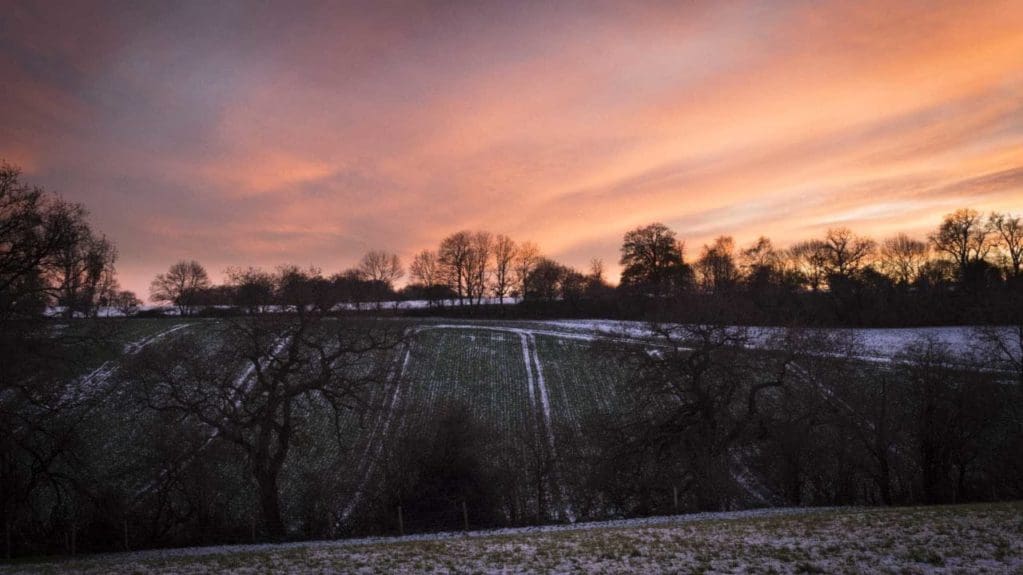
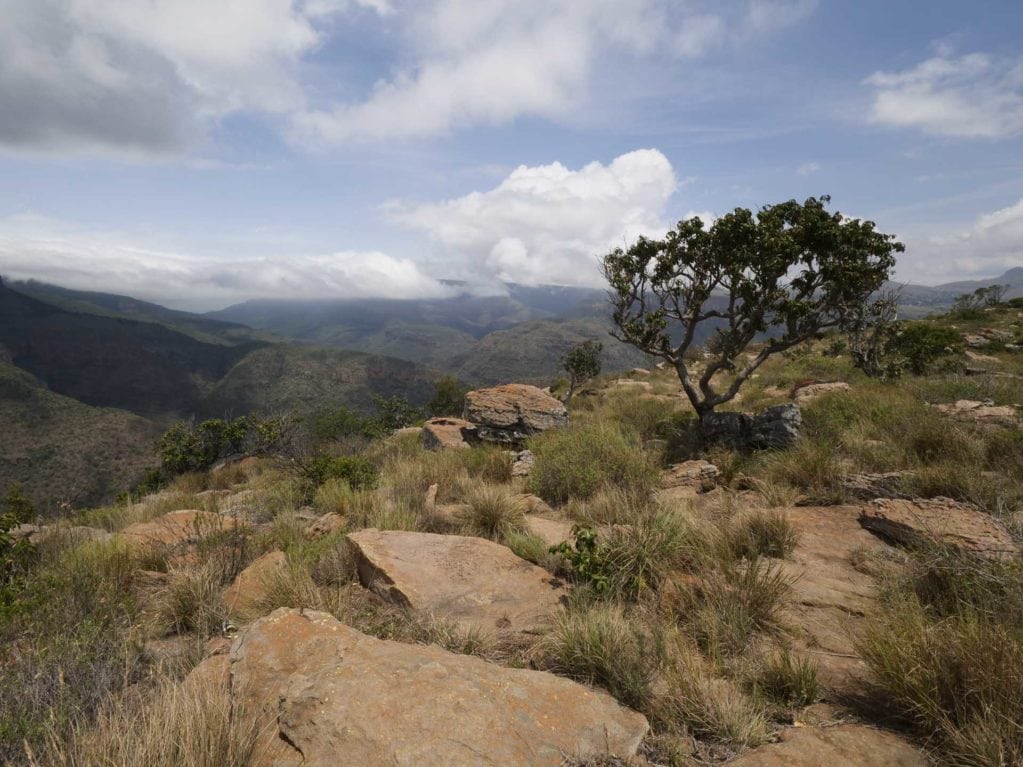
I shot with the G9 in a wide range of conditions, from bright South African sun to a heavily overcast rainy December day in the UK, with sunny, frosty mornings and winter sunsets fitting somewhere in between.
With the excellent electronic viewfinder (EVF) providing a clear view and accurate representation of the captured image, there isn’t an excuse for exposure errors. In most instances, I found that the G9’s general-purpose multi-zone metering system delivered accurate results, but there were a few occasions when I had to use the exposure compensation control for no obvious reason. In most instances, this was to reduce a little.
Panasonic’s automatic white balance system has impressed in the past and it again puts in a good performance in the G9, delivering results in a range of daylight conditions that are indistinguishable from those captured using the Fine Weather setting.
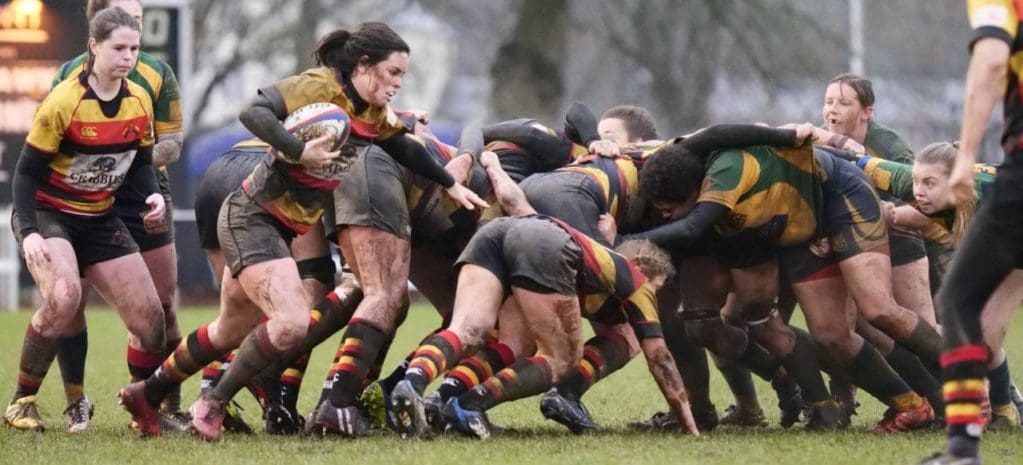
Panasonic has been working on its colour reproduction and the G9 has the most natural looking colours from any Lumix camera to date. In fact, when I was shooting in the low contrast, heavy rain conditions of a rugby match, I switched from the default Standard Photo Style to Vivid to give the images a bit of pep. The Standard setting was delivering accurate results but I wanted something a little bolder.
Autofocus Performance
One aspect that impressed me straight away with the G9 was its autofocus system. When I directed it towards a low-light area with low contrast, it latched on to the subject very quickly, with no noticeable hesitation or indecision. This proved very useful when photographing wildlife by torchlight or when it was heavily camouflaged by a dense thicket.
I took the G9 to a rugby match for part of my testing and it delivered some excellent images in very challenging conditions, with the low-light levels and heavy rain that are typical of mid-December in the UK. Follow this link to read more about shooting sport with the Panasonic Lumix G9.

Image Quality
Like the GH5, the G9’s sensor doesn’t have an optical low-pass filter. With the GH5 this enables the camera to capture a high level of detail for a 20Mp camera. However, Panasonic has tuned the G9 more towards stills and this seems to help the G9 produce even better images. The newer camera produces images with fine details that look just a little sharper and more natural.
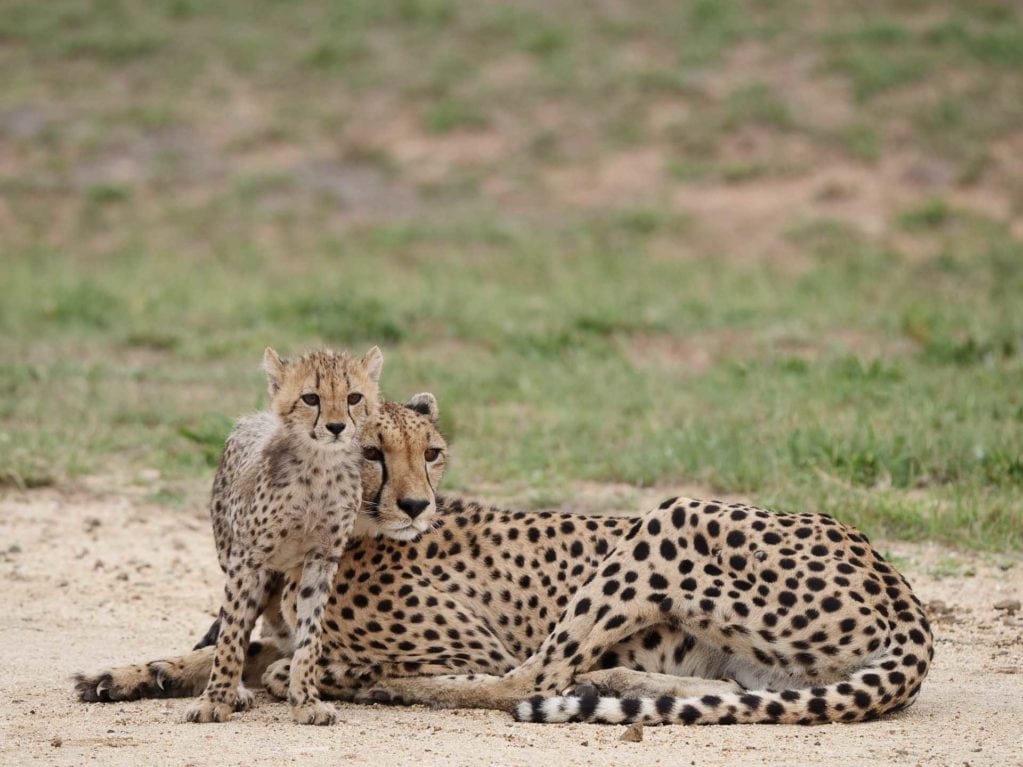
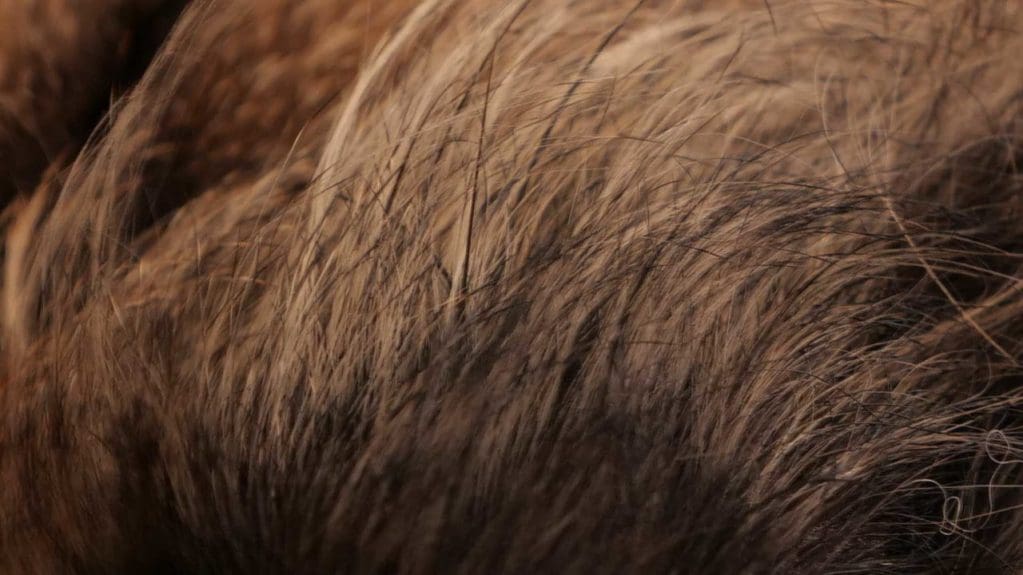
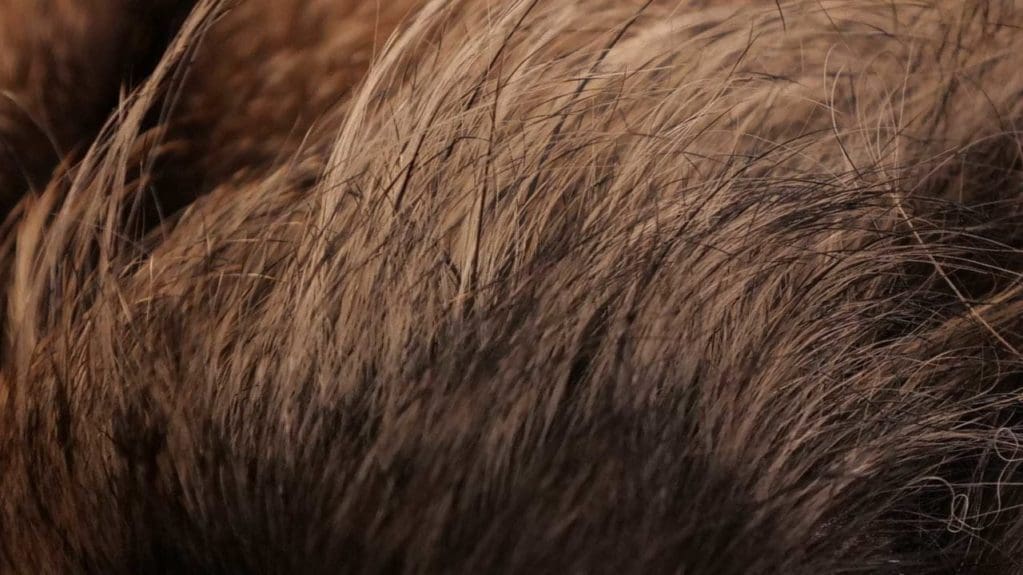
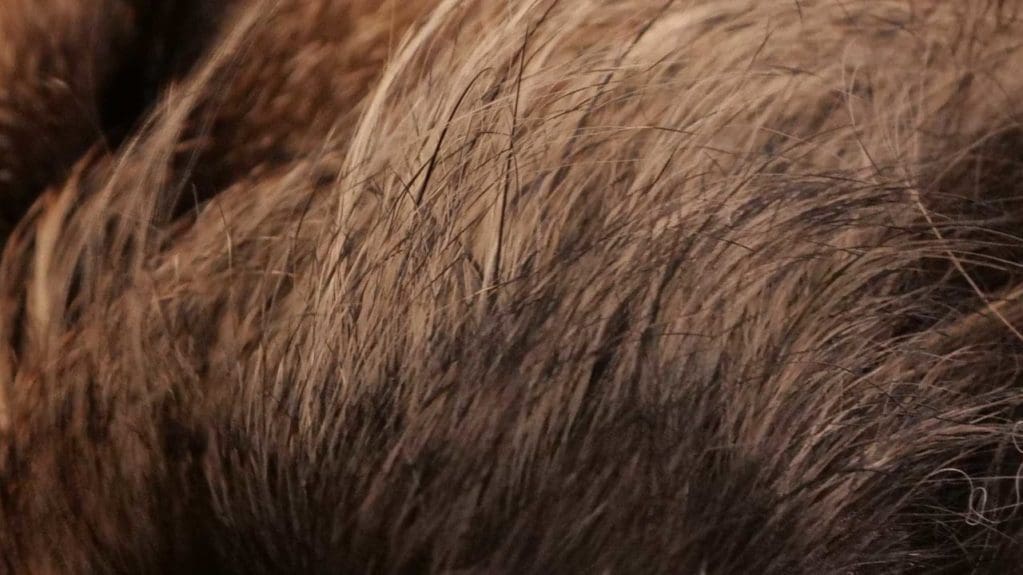
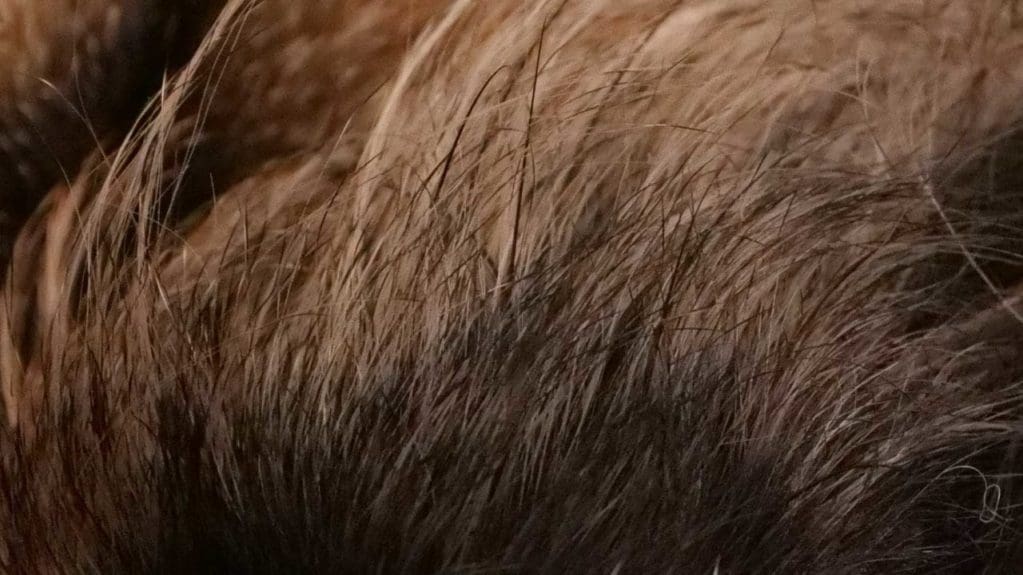
At low-to-mid-range sensitivity (ISO) settings, images look very good indeed and can easily pass for those captured by a camera with an APS-C format sensor. I am especially impressed by the rendition of fur in images captured using the new Leica DG Elmarit 200mm f/2.8 Power OIS lens.
Detail levels are maintained well up to about ISO 3200. In fact, in many instances, ISO 6400 images also look very good. Noise is controlled well up to this value but above it the impact or noise or the attempts to conceal it start to take their toll.
In dark conditions, raw files shot at the highest sensitivity setting, ISO 25,600, have a slight magenta cast and a coarse texture of noise. Simultaneously captured raw files look soft.
The G9’s dynamic range is also good so highlights aren’t lost too early and skies have nice gradations. In addition, it’s possible to brighten dark images, or dark sections by in excess of 2EV, 3EV in some cases.

High Resolution mode
Panasonic’s new High Resolution mode takes a succession of images and composites them together to make an 80Mp or 40Mp image depending upon the option selected. With a fast shutter speed set, it takes around a second for the series of images to be captured before they’re rendered together. This means that it’s essential that the G9 s kept stationary during the shooting.
If there are moving elements in the landscape, branches blowing in the wind, for example, they will appear in a different location in each shot and will look blurred in the final image. If the shutter speed is fast enough to freeze the movement there’s potential to create a stepped appearance in some areas, so you need to keep an eye on shutter speed and use longer exposures if necessary to give more uniform blur.
Images captured in 80Mp mode have a high level of natural looking detail.
Sample Images
We now have a sample of the camera so we’ve started shooting with it for our full Panasonic G9 review. We’ve uploaded a few images here and to our Flickr gallery and we’ll be adding more over the coming days, so do check back.
Following this link to browse and download full-resolution images


Verdict
Panasonic has produced a well-rounded camera in the G9. It has a relatively modest, but fairly popular standard resolution, along with the capability to produce much larger images in less time than is taken by the Olympus OM-D E-M1 Mark II.
Panasonic has also given the G9 a very high-quality electronic viewfinder, an articulating touch-screen and a blistering continuous shooting rate. Further good news is that the AF system can keep up with the frame rate so you can shoot sport and action.
While the location of the mini-joystick controller is a little annoying, the ability to change settings such as focus and drive mode quickly and the extensive customisation options make the G9 a pleasure to use.
With the right lens, the G9 is capable of capturing an impressive level of detail and images have the most natural yet attractive colours we’ve seen from a Lumix G-series camera to date.
To underline the target market of the G9, Panasonic has launched the Leica DG Elmarit 200mm f/2.8 POWER O.I.S. lens at the same time. This gives an effective focal length of 400mm by itself but when combined with the 1.4x Teleconverter (DMW-TC14) that comes with it, it becomes a 560mm optic. Alternatively, it can be used with the optional 2.0x Teleconverter (DMW-TC20) to turn it into an 800mm lens.
Should I Buy the Panasonic Lumix G9?
With a price starting at £1,499 / €1,729 /$1,698, the Panasonic G9 couldn’t be described as a cheap camera, but you get a lot for your money. It’s a versatile camera that’s compatible with a wide range of lenses. The 2x focal length conversion factor is attractive for sport and wildlife photography as it enables you to frame the subject more tightly than you might expect, while optics such as the Panasonic Lumix G Vario 7-14mm f/4 ASPH. and Leica DG Vario-Elmarit 8-18mm f/2.8-4 ASPH., which are equivalent to 14-28mm and 16-36mm lenses respectively on a 35mm camera, mean that you don’t have to miss the wide-angle shooting opportunities.