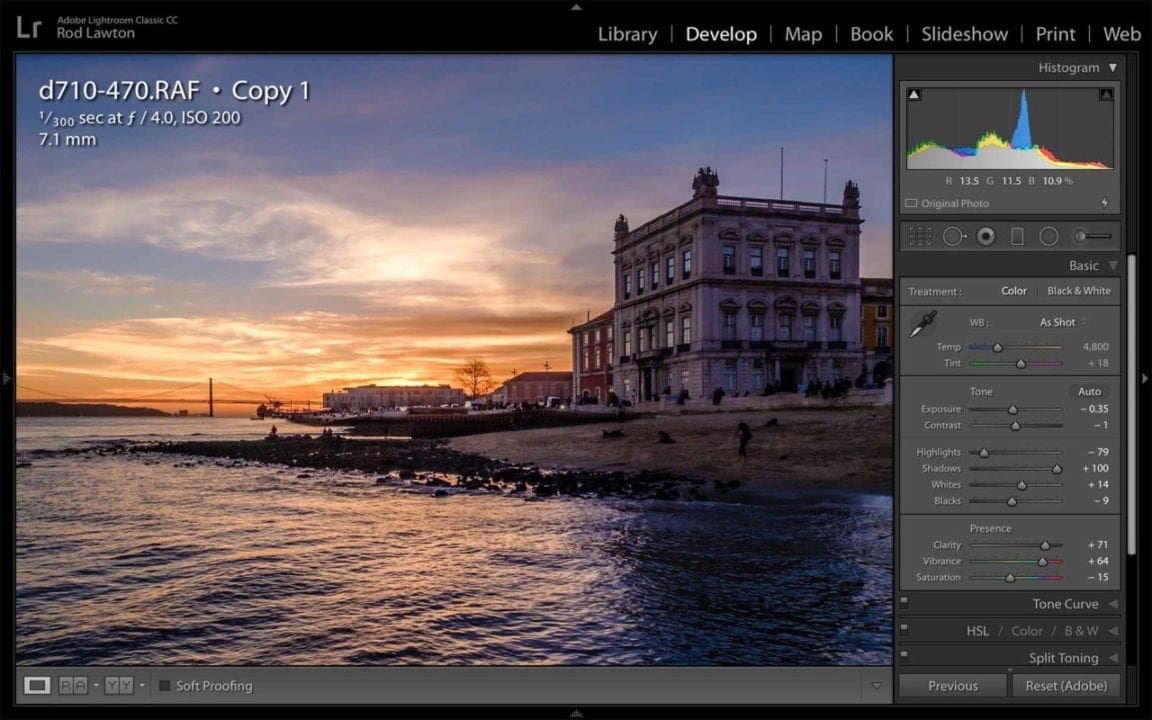
Lightroom Classic is the new name for Adobe’s desktop-based professional photo cataloguing program. Find out how it performs in our Adobe Lightroom Classic CC review.
What is Lightroom Classic?
Lightroom is like a companion program to Adobe Photoshop. Where Photoshop is designed for in-depth manipulation of single images, Lightroom can look after the large-scale organisation of your entire photo library, organising it in to a single, searchable catalog.
But Lightroom also has editing tools which can take care of most everyday photo enhancements, so increasingly it’s taking over Photoshop’s role.
But Adobe has just made some big changes to Lightroom. From the end of 2017, Lightroom 6 will no longer be supported. This was the non-subscription version of Lightroom, where you paid a single licence fee to use it forever.
This just leaves the subscription-based version, Lightroom CC. With Adobe’s subscription plans, you pay a monthly or annual fee to use the software.It’s an unpopular approach amongst some photographers, but it does offer access to previously expensive applications for a relatively modest monthly fee.
The other change is that the ‘old’ Lightroom CC now becomes Lightroom Classic, while a brand new product takes on the Lightroom CC name. Lightroom Classic is designed for a ‘desktop first’ approach where you store your photos on your own computer, while the new Lightroom CC takes a ‘cloud first’ approach – your photos are uploaded and stored on Adobe’s own servers.

Lightroom Classic is the ‘desktop first’ version of Adobe’s pro image cataloguing program. Your photos are stored in folders on your hard disk rather than remotely in the cloud.
We’ve reviewed Lightroom CC separately, but it’s a very new approach to photography that won’t suit everyone. For many photographers, Lightroom Classic is going to remain the best program for their needs, so let’s take a look at what it does and what’s new.
Importing and organising
You start off by importing your photos into a Lightroom catalog. This is essentially a database of your images – you don’t have to move them from your original folders since Lightroom can simply record their location.
Now you can start organising your images. A Folders panel shows their location on your computer, and any changes you make here will change the file and folder structure on your computer. But there’s also a Collections panel where you can create your own ‘virtual’ organisation system.
A single photo can be in many different Collections and is never actually moved on your computer. You can also create Smart Collections based on search criteria. For example, you could make a Smart Collection containing all the photos taken with a particular camera, or with a specific keyword.
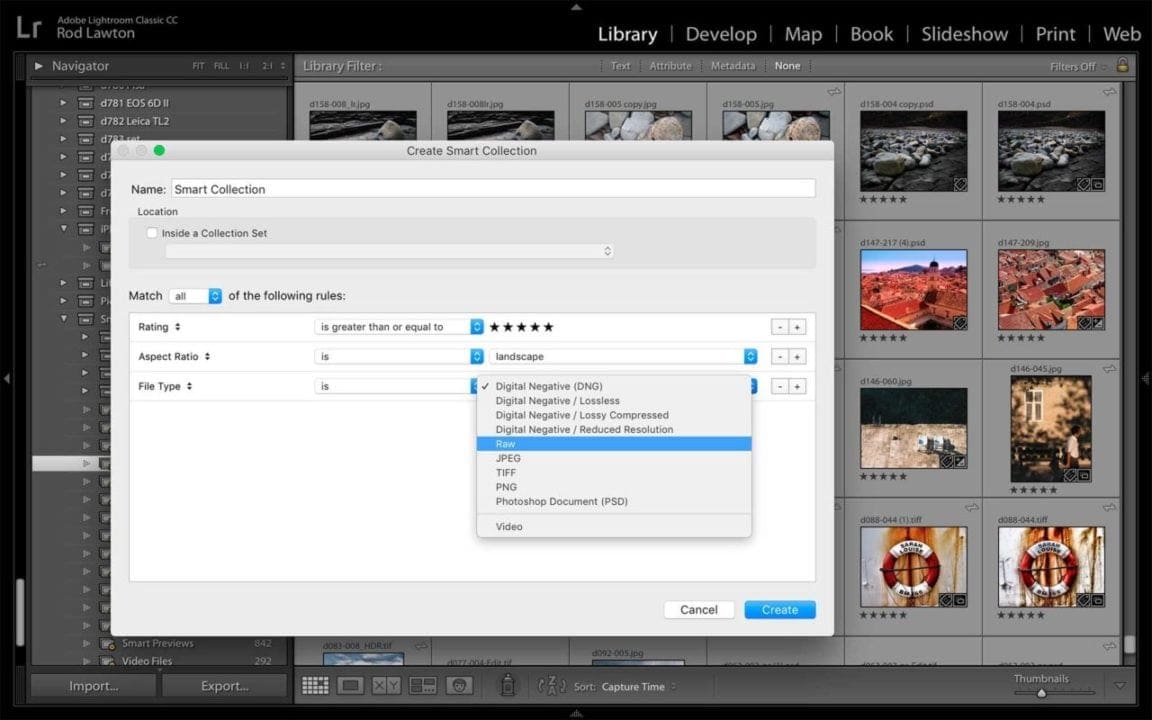
Smart Collections are populated automatically according to your search criteria. Here, we’ve chosen 5-star images in landscape format and in raw format.
Lightroom’s strength is its ability to search quickly across all your photos wherever they’re stored. In addition to its Smart Collections it offers a Filter bar with drop-down menus for finding specific images.
You can add ratings, color labels and flags to your photos, as well as keywords, copyright information and captions.
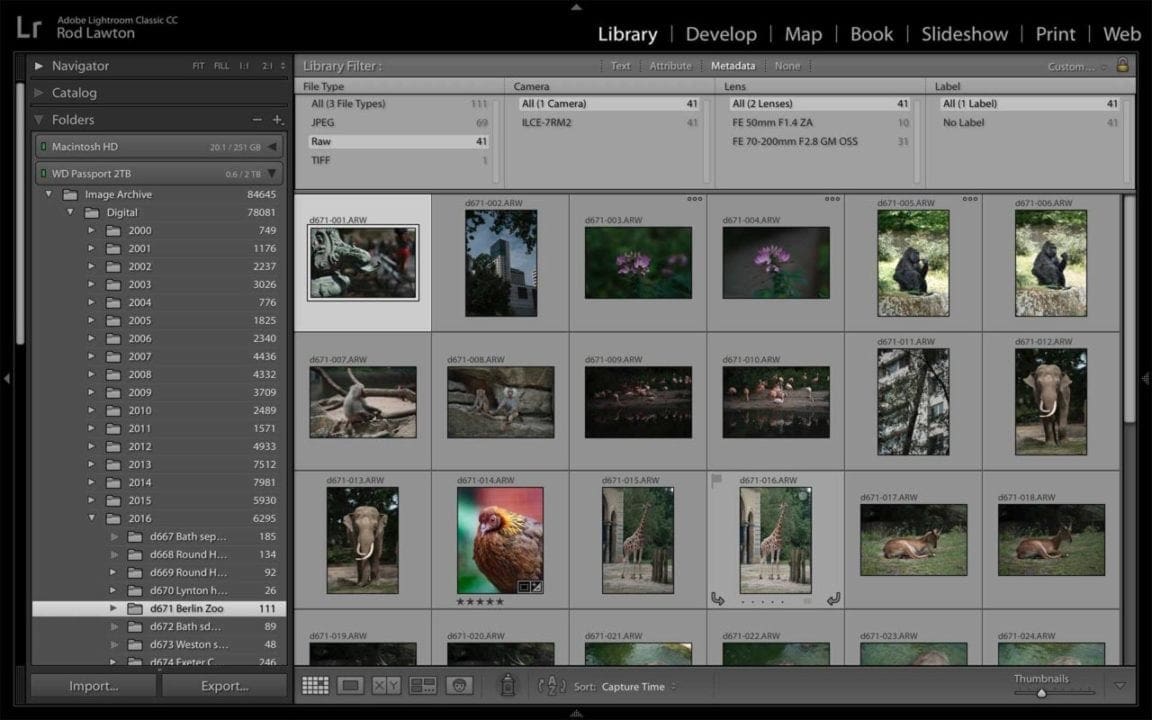
You can use Lightroom Classic’s filter bar to narrow down the images displayed according to file type, keyword, lens uses, ISO setting and much more.
The organisational tools haven’t changed greatly since Lightroom was first launched, and they probably don’t need to because they offer all the flexibility and power that photographers are likely to need. The biggest changes have been to the Develop mode and Lightroom’s image editing tools.
Editing photos in the Develop module
You can use Lightroom to adjust exposure, contrast and tonal rendition, white balance, saturation and vibrancy, the hue, saturation and lightness of individual colour ranges and more.
It offers lens correction profiles for fixing distortion and corner shading (vignetting) and it can fix chromatic aberration automatically too.
It even has automatic and manual perspective correction tools for converging verticals and other perspective issues, plus Clarity and Dehaze tools for fixing flat-looking photos.
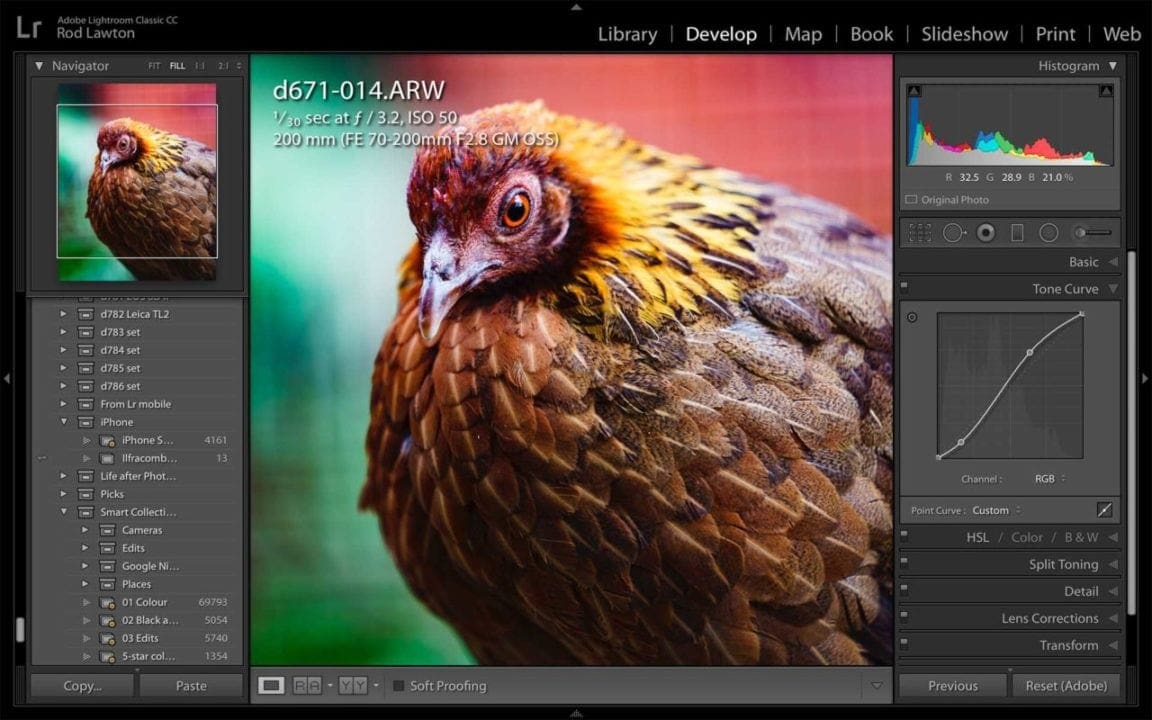
Lightroom Classic’s Develop module has editing tools so powerful that you may need a regular image editor like Photoshop less and less often.
This is where Lightroom Classic is still ahead of Adobe’s new cloud-based alternative, Lightroom CC. Lightroom CC does not offer Tone Curve adjustments, Camera Calibration (for replicating specific cameras’ picture styles) or a Split Toning panel.
Lightroom Classic also offers local adjustment tools for enhancing specific areas in your photos. These include a freehand Adjustment Brush, a Graduated Filter especially useful for controlling bright skies in outdoor shots and a Radial Filter for focusing the lighting on chosen parts of the picture.
In Lightroom Classic Adobe has added new Color Range and Luminance masking tools. Now, when you apply a local adjustment you can restrict its effect to specific brightness or colour ranges – Lightroom does not offer the kind of precise manual selection and masking tools you get in Photoshop, but this is perhaps the next best thing. Neither of these new features is yet available in Lightroom CC.

The new Color Range masking tool means you can apply a gradient filter to darken a sky but restrict it to the blue tones only so that the autumn leaves are left unaffected.
The Color Range masking tools is very effective because you’ll often get situations where the areas you want to modify are of a different colour to their surroundings, and you can use its eyedropper tool to precisely select these colours and add to your colour range selection to widen it if necessary.
The Luminance masking tool was less effective in our tests. Here, you use a simple slider and upper and lower limit control sliders to select the brightness range you want to mask – it’s easy to use but very often both the areas you want to mask and those you don’t will have overlapping tonal ranges and can’t be separated so easily.
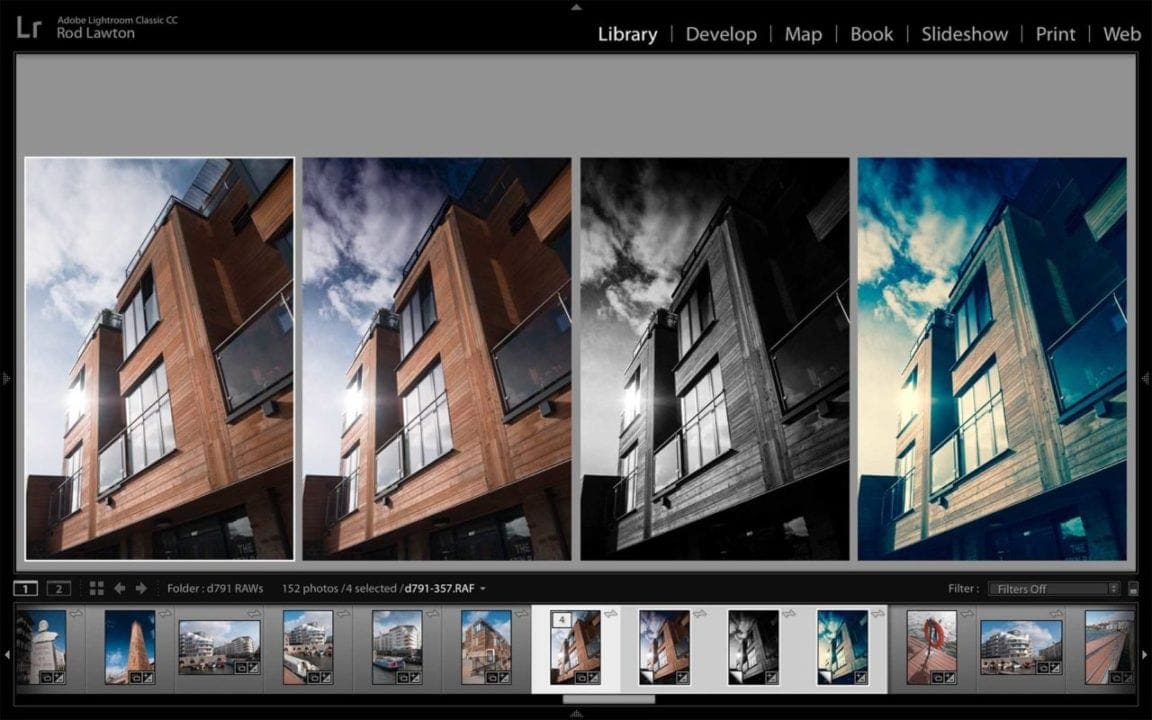
Lightroom Classic’s editing tools are non-destructive and reversible, and you can create ‘virtual copies’ with different processing effects but without having to create duplicate files.
Lightroom’s photo editing tools are powerful and effective, and there are a couple of key differences compared to regular photo editors like Photoshop.
First, all your adjustments are non-destructive – they’re saved as processing metadata (instructions) rather than being applied permanently to your original images.
If you want a permanent version you export it as a new, processed image file. You can also create Virtual Copies to try out new adjustments and effects on the same image without having to create a whole new file.
Second, Lightroom can work on your raw files ‘live’ with no need to go through a separate raw conversion process first – this is a major time-saver.
So far it sounds as if Lightroom is perfect at everything, but it isn’t quite. Its raw conversions are good rather than great, so while it’s in the first rank of raw editors, Capture One Pro and DxO PhotoLab (previously Optics Pro) are a little better at extracting fine detail and suppressing noise. For photographers who shoot raw, it’s far from being a one-horse race.
Synchronising your photos via the cloud
Both Lightroom CC and Lightroom Classic can synchronise your photos via Adobe Creative Cloud so that they are available in Lightroom mobile, Adobe’s companion tablet and smartphone app, and in Lightroom web, its web-based browsing and editing tool. However, they go about it in different ways.
Lightroom CC adopts an all-new ‘cloud-first’ approach where all your photos are uploaded to Adobe’s cloud-based storage where you also have access to the full range of organisational tools.
This means you get access to all your photos everywhere, at their full resolution, but it does mean you have to pay extra for online storage.
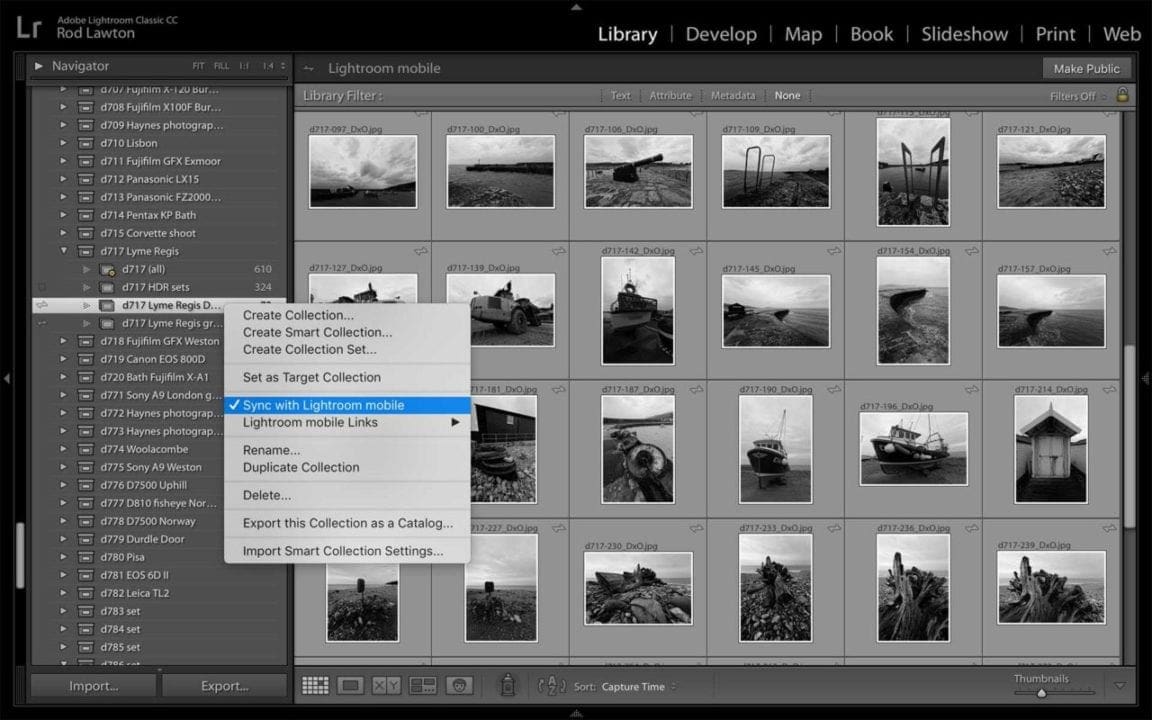
With Lightroom Classic your full-resolution originals are stored locally on your hard disk but you can synchronise specific collections via the cloud.

Synchronised Collections appear in the Lightroom mobile app. They’re Smart Previews at a lower resolution but you can still apply editing adjustments which are synchronised back to your desktop catalog.
Lightroom Classic retains Lightroom’s conventional ‘desktop first’ approach, where you store your photos on your own computer and disk drive(s) and only synchronise the ones you want to be available elsewhere.
This is cheaper and very effective but has a couple of downsides. First, Lightroom Classic will only synchronise lower-resolution DNG format Smart Previews of your photos.
These can be downloaded and used when the full image resolution is not needed, but you can’t download a full-res equivalent.
Smart Previews can also be edited on other devices, however, and your changes synchronised back to your main image library automatically.
The second downside is that you can only synchronise specific Collections, not Smart Collections, folders or your whole image catalog. You do need to be quite organised about the images you want to synchronise online.
Verdict
The new masking tools are not the only changes in Lightroom Classic. Adobe has improved it performance in a number of key areas.
It’s now faster to start up, it offers faster preview generation and more responsive local adjustments. And now, when you import images, you can filter images by type rather than importing a whole folder.
Adobe has also added the option to browse your photos using the preview images embedded by the camera in each file, rather than waiting for Lightroom to render its own.

Lightroom Classic doesn’t use Lightroom CC’s cloud-based storage, but its editing tools are for the time being more powerful.
Where Lightroom CC represents a bold step into the (possibly) cloud based future of image storage, Lightroom Classic uses regular local storage just like the previous versions and currently offers a number of tools, including Map, Book, Slideshow, Web and Print modules, that aren’t available in Lightroom CC.
The tipping point for most users is likely to be when the convenience of the cloud-based storage of Lightroom CC starts to outweigh the increased power and lower running costs of Lightroom Classic, but the current cost of cloud storage and the slow domestic data upload speeds available to most users mean that could be some way off.
If you want to stick with local storage, the regular Adobe Photography Plan is the best bet. This comes with Lightroom Classic, Lightroom CC (you can try it out) and Photoshop, plus sundry extras, for £9.98/$9.99 per month (paid for annually).
Alternatively, you can go for the Photography Plan with 1TB storage for £19.97/$19.99 per month. This gets you both versions of Lightroom, Photoshop and 1TB cloud storage, and is perfect for trying out a gradual migration to cloud storage.
Adobe’s Lightroom CC Plan is £9.98/£9.99 per month and comes only with Lightroom CC and 1TB storage. You should only choose this option if you’re ready to commit to cloud storage right now and you don’t need Photoshop.
