When Nikon released its v2.0 firmware update for the Nikon Z6 and Z7 mirrorless cameras, it added a powerful new capability for Eye-detection autofocus and AE (Auto Exposure) tracking in continuous high-speed (extended) mode, as well as extending the low-light detection range of the autofocus. It was the Eye-detection autofocus that got Nikon enthusiasts excited though.
Then with version 3.0 of the firmware, Nikon added Animal detection AF, which when activated, sets the camera to look for cat or dog eyes in the frame.
In this post, we explain how to set-up and shoot with eye-detect autofocus for humans or animals on the Nikon Z6, Nikon Z7, Nikon Z5 and Nikon 50 as well as on the new Nikon Z6 II and Nikon Z7 II which use a different approach.
Newer Nikon Z cameras like the Z50 and Nikon Z5 were launched with this feature. If you’re a Z6 or Z7 owner, read how to update the Nikon Z6 / Z7 firmware to get the new Eye-Detection AF. For more information, check out our guide to which Nikon cameras have Eye-Detection AF.
How to use Nikon Eye AF with the Nikon Z50, Z5, Z6 and Z7
Eye-detection autofocus works in the same way as Face-detection autofocus on the Nikon Z6 and Z7. After installing the firmware update you can use it as follows:
- Set the AF-area mode to Auto-area AF via the ‘i’ menu.
- Through the EVF (or on the LCD screen) in Auto-area AF you’ll see the red corner markings identifying it’s in auto-area AF.
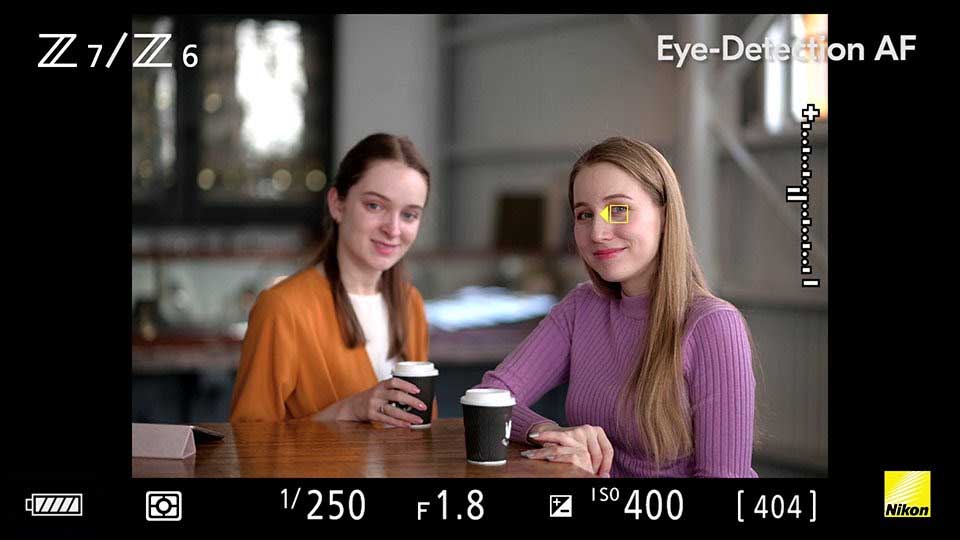
- As soon as the camera detects a face, this switches to a large yellow autofocus box that starts tracking the subject.
- Now with the firmware updated, when the camera detects an eye the autofocus box switches to a smaller yellow box and tracks the eye.
How to Set Nikon Eye detection to Human or Animal on the Nikon Z7, Z6, Z5 and Z50
When Nikon added Animal detection to the mix, it needed to add a way to tell the camera to swap between searching for human or animal or animals in the frame. On the Nikon Z7, Z6, Z5 and Z50, it’s done like this:
- Press the menu button
- Tap on the Custom Setting Menu (pencil icon)
- Tap on a Autofocus
- Scroll down or tap on a4 Auto-area AF face/eye detection
- Select ‘Face detection on’ or ‘Face and eye detection on’ to detect and focus on human subjects or ‘Animal detection on’ for animals. Alternatively, to ignore faces and eyes in the frame, select ‘Off’.
Continuous and Single AF Mode
Nikon’s eye AF works in both AF-C (continuous focus) and AF-S (single focus) mode, so you chose the mode most suitable for your subject.AF-C is for moving portraits, like kids playing, while AF-S is for posed portraits.
In AF-S mode, half-press the shutter button to focus the lens. Then, when the camera locks on, the autofocus box goes green and you can fire off a shot.
However, in AF-C mode the lens is constantly focusing, so there’s no focus confirmation and you can grab a shot at any time.
For more information on your camera’s AF system and how it works, read our in-depth guide on the Nikon Z6 and Z7 autofocus system.
You may also like our guides to setting up the Nikon D850 for the first time, setting up Nikon DSLRs for wireless flash and using your Nikon camera’s interval shooting mode to make a timelapse movie.
How to use Nikon Eye detection on the Nikon Z6 II and Z7 II

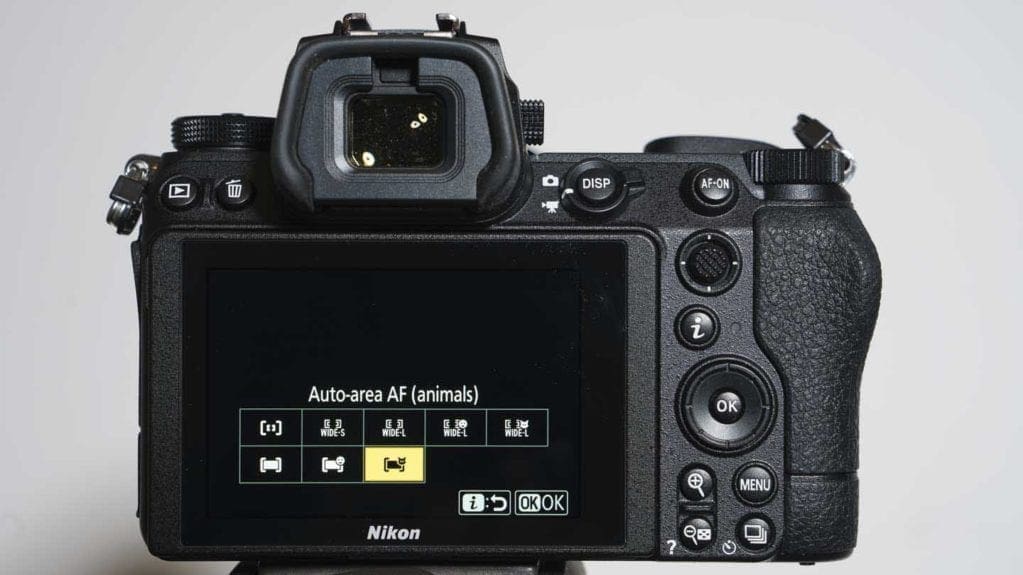
Thanks to their dual Expeed 6 processing engines, the Nikon Z6 II and Z7 II can use Eye detection in video as well as stills mode. Nikon has also changed how these modes are accessed, so instead of having to dip into the Autofocus A4 section of the Custom settings menu, the options are accessed via the ‘i’ on ‘Info’ menu or using shortcut controls. They’re selected in the same way as any other AF-area mode. They are also available whether the camera is set to Single AF (AF-S0, Continuous AF (AF-C) or Full-time AF (AF-F). Just do the following:
- Press the ‘i’ button.
- Tap on the AF-area mode icon (by default, it’s the top-right box).
- Tap to select Wide-area AF (human), Wide-area AF (animal), Auto-area AF (human) or Auto-area AF (animal). The Wide-area AF modes target the subject more precisely than the Auto-area AF modes, which can be helpful, but often with animals or children that are moving unpredictably, you’ll find the Auto-area AF options are a better choice.
Nikon AF shortcuts
Rather than using the menu to select the AF settings, there’s a quicker method that uses shortcut controls that is especially helpful when you’re looking in the viewfinder. Here’s how to use it:
- Press and hold the FN2 button on the front of the camera.
- Rotate the rear command dial to toggle through the Focus modes (manual, Single AF and Continuous AF) in stills mode and manual, Single AF, Continuous AF and Full-time AF in video mode).
- While still pressing the FN2 button, rotate the front command dial to toggle through the AF-area options (Pinpoint AF, Single-point AF, Wide-area AF (Small), Wide-area AF (Large), Auto-area AF Wide-area AF (human), Wide-area AF (animal), Auto-area AF (human) or Auto-area AF (animal) etc).
If your camera isn’t set to access the AF settings via the FN2 button, follow the link to read how to customise Nikon Z cameras.
- Check the price of the Nikon Z7 at Amazon UK, Amazon.com, Wex Photo Video, Park Cameras, Adorama, BH Photo Video
- Check the price of the Nikon Z6 at Amazon UK, Amazon.com, Wex Photo Video, Park Cameras, Adorama, BH Photo Video


