As smartphone camera technology improves, AI algorithms can now recognise your subjects before you do and dial in the settings to get you the best possible image. Sometimes, though, it’s worth reminding the AI who’s in charge here and use the camera’s manual controls.
On Android smartphones your manual controls will typically be found in a Manual or Pro mode. The Sony Xperia 5’s manual controls can be accessed in the native camera app by pressing the Mode icon and choosing Manual.
In this tutorial we’ll run you through how to use the Sony Xperia 5 camera’s Manual mode to start taking more control over the image-making process.
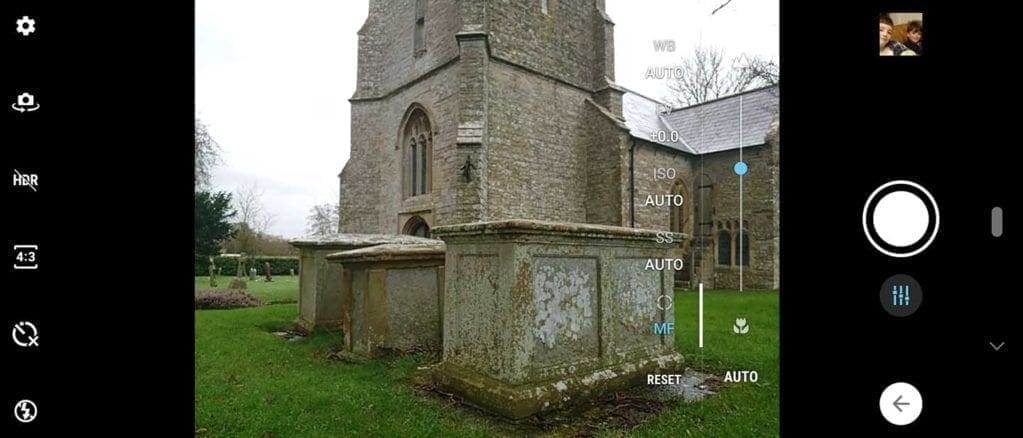
When shooting in the Xperia 5’s Manual mode you’ll notice a selection of settings along the bottom (in portrait orientation) or right (in landscape orientation) side of the screen. These are your manual controls. We’ll go through them one-by-one.
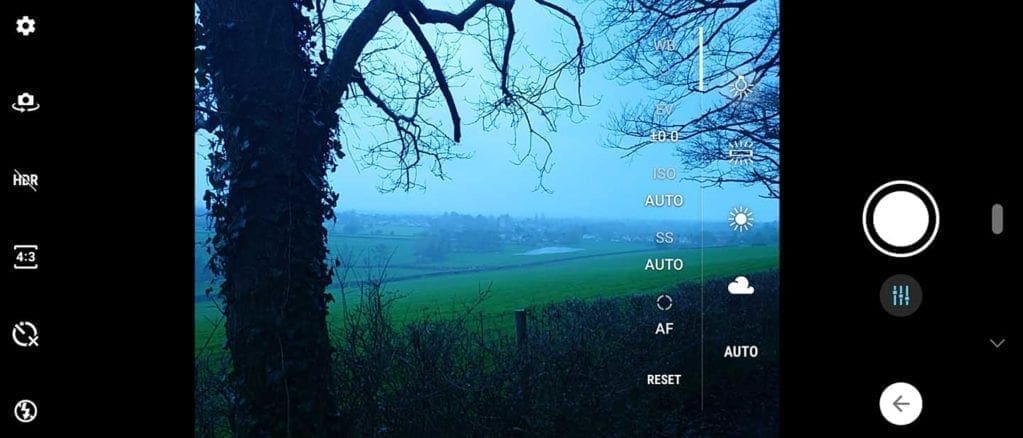
White Balance
White balance is an important setting that helps you achieve the most accurate tones possible in your images. What it does is ascertain how it believes white tones should look based on the lighting conditions.
By default your Xperia 5 camera will be set to Auto White Balance, and it’s generally very accurate. However, there are times when you may want to use some of the other presets. On a cloudy day, for instance, the Cloud setting will balance out your tones, ensuring the scene doesn’t look too cold.
On a sunny day, the Sun setting will ensure your colours are bright and vivid. Likewise, in artificial light using presets such as Tungsten (the light bulb icon on your Xperia 5) or Fluorescent (the bar icon) will ensure your images don’t have any unnatural tints.
What’s more, sometimes photographers will also use the ‘wrong’ white balance setting in certain conditions in order to create interesting colour casts and filter effects in their images.
Exposure Compensation (EV)
This is perhaps the most useful setting in your Xperia 5’s manual controls. If an exposure looks too dark or too bright in your live preview you can darken a scene by dragging the slider down to -EV (negative compensation) or brighten it by adding positive compensation (+EV).
In most situations +/-1EV will get you the exposure you want, but don’t be afraid to experiment!
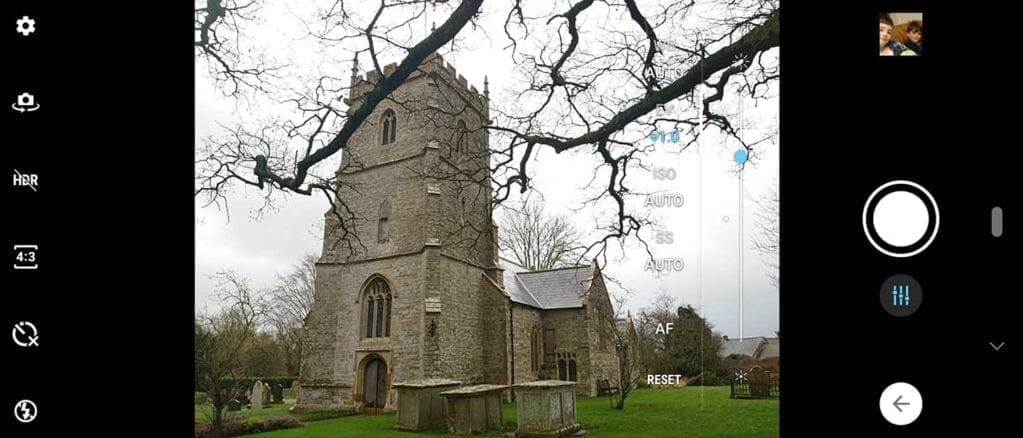
ISO
ISO stands for ‘International Organisation of Standardisation’, the body responsible for ensuring uniformity between cameras. If you ever used a film camera back in the analogue days, you might have come across ‘film speed’ or ‘ASA ratings’, which told you how sensitive the film was to light.
The principle is the same with digital cameras. The higher the ISO value, the more sensitive your sensor is to light. The lower the ISO, the less sensitive it is.
Shooting at a high ISO enables you to get images in low light; however, the trade-off is usually some softening of fine details or digital noise in your image. At lower ISO settings images are much cleaner, but in dark conditions you will struggle to get a shutter speed fast enough to enable you to take the shot handheld. Doing so will introduce camera shake and blurry images.
So low ISO settings are best used in good light conditions. Only push your ISO up when it’s dark and you need to get that faster shutter speed to get the shot.
On your Sony Xperia 5, tap the ISO option and drag the slider up or down to set the value you want.
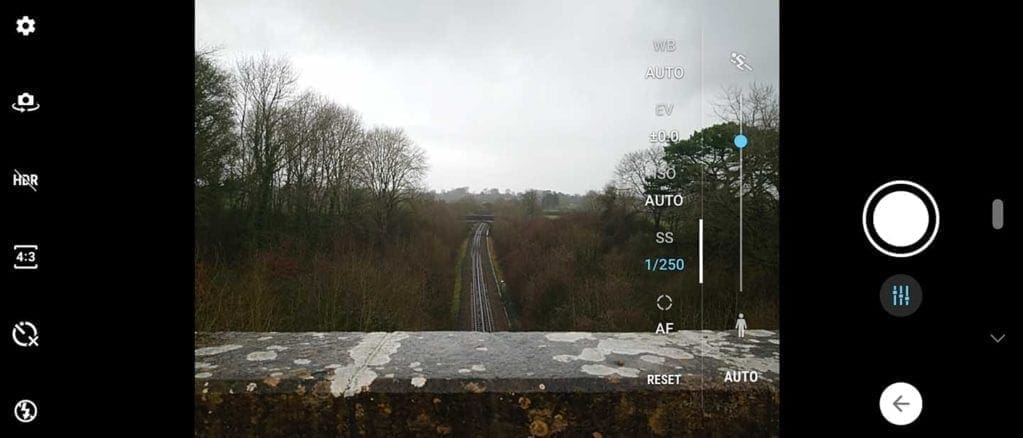
Shutter Speed
The Xperia 5 also lets you control the shutter speed. Shutter speed is simply how long the camera allows light to hit its sensor. The longer it stays open, the more light comes in.
In low light you’ll want a longer shutter speed to let more light in to avoid underexposure (images which are too dark). In bright conditions, you will want to use a faster shutter speed to avoid overexposure (images which are too bright).
You can also use different shutter speeds for a variety of creative effects. A fast shutter speed will freeze action, while slower shutter speeds can be used to blur motion.
Remember: in order to balance out the exposure you’ll need to use a very low ISO if you want to use a very long shutter speed. This harks to what they call the Exposure Triangle in traditional photography.
Shutter speed, aperture and ISO make up the Triangle. These are the three key variables in an exposure, and you must find balance between the three to get an image that looks well-exposed. As you change one of these settings, the others will need to change in accordance to keep that balance.
On the Xperia 5, again, tap the Shutter icon and drag the slider up or down for faster or slower shutter speeds. The sliding scale here is represented by a running man at one end and a stationary man at the other to indicate fast and slow. Your maximum shutter speed on the Xperia 5 is 1/4000sec, while the slowest speed available is 30secs.
AF/MF
The last setting at your disposal is the focusing. By default the Xperia 5 is in AF (autofocus) mode. If you tap that icon another slider appears, and this allows you to control focus manually.
As you drag the slider you’ll see parts of your scene move in and out of focus. Close focusing is represented at one end of the scale by a flower icon. Distant focusing is represented by a mountain.
If you’re new to focusing manually, these icons are quite helpful reminders that if you want all of your scene to be in focus, drag the slider towards the mountain icon. If you want a very close subject to be in focus with the background blurred (what we call shallow depth of field effects), drag it towards the flower.
Which camera settings should I use on the Sony Xperia 5?
This is a good question. Everyone is different, from what they like to shoot to how much control they want to take. But speaking for myself, in my everyday photography I will use the Xperia 5 in Manual mode but leave the ISO and Shutter Speed settings on Automatic.
I tend to leave it in AF mode about half the time when I’m just taking snapshots, but when I’m shooting a portrait or grabbing a nice shot of my lunch (I know), I might take it off AF and focus manually to create a shallow depth of field effect.
I always try to set my ISO as low as I can given the light. And living where I live in England, I tend to use the Cloud white balance setting. On nice days I’ll switch Sun. On days where the light is changing (eg clouds moving in and out) I’ll leave the Xperia 5 on Auto White Balance.
I use exposure compensation quite a bit. I prefer an image that’s too dark rather than too light, as it’s easier to brighten up a photo later on. I also sometimes dial in a small bit of negative compensation to help saturate colours. I don’t like an image that’s washed out.
However, if I’m shooting a portrait of my son, for instance, against a dark background, I might apply some positive compensation to help brighten up his face.
But this is just how I’ve been using the Sony Xperia 5’s manual mode. Manual controls mean you can put a unique stamp on a subject or scene with your own cocktail of settings to create the look you want!