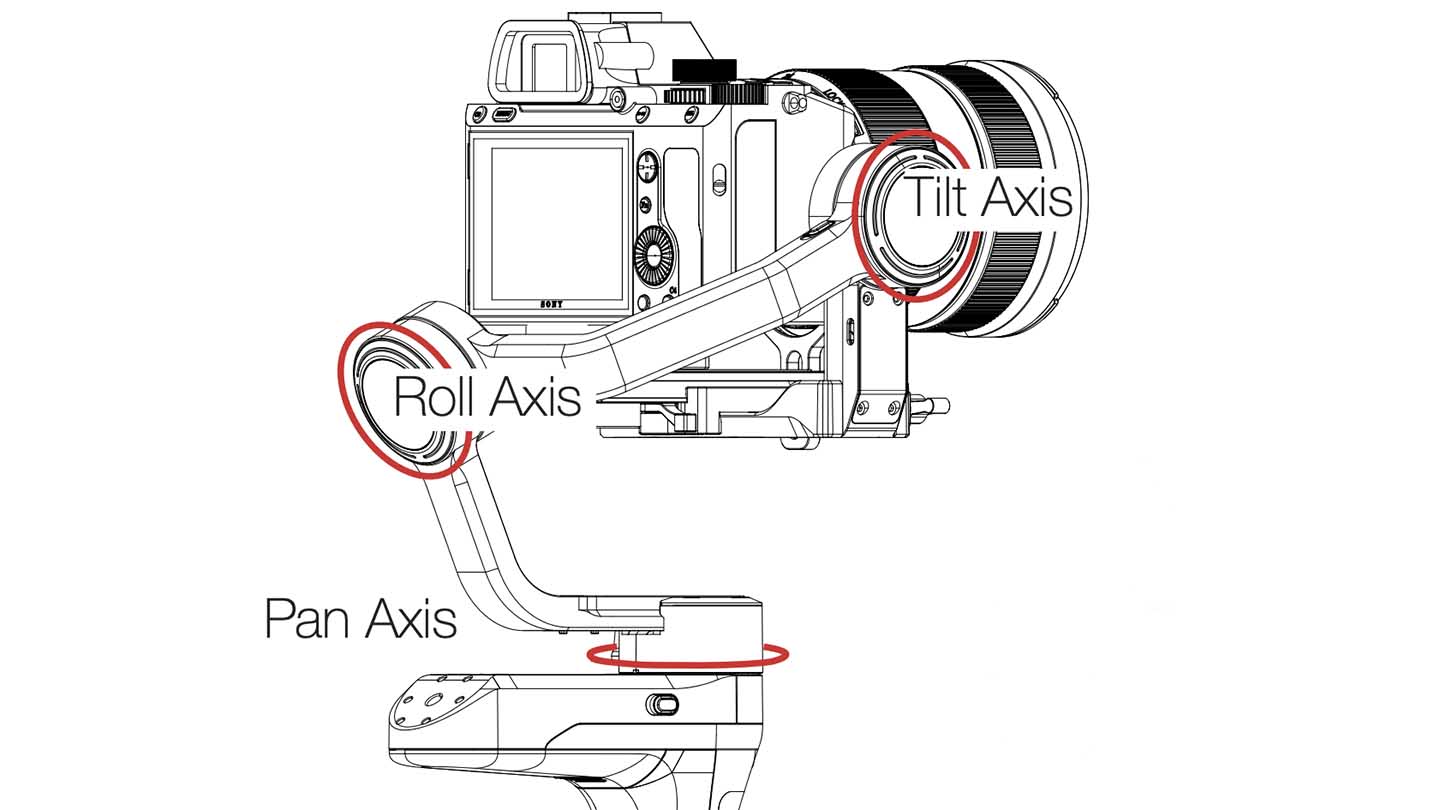
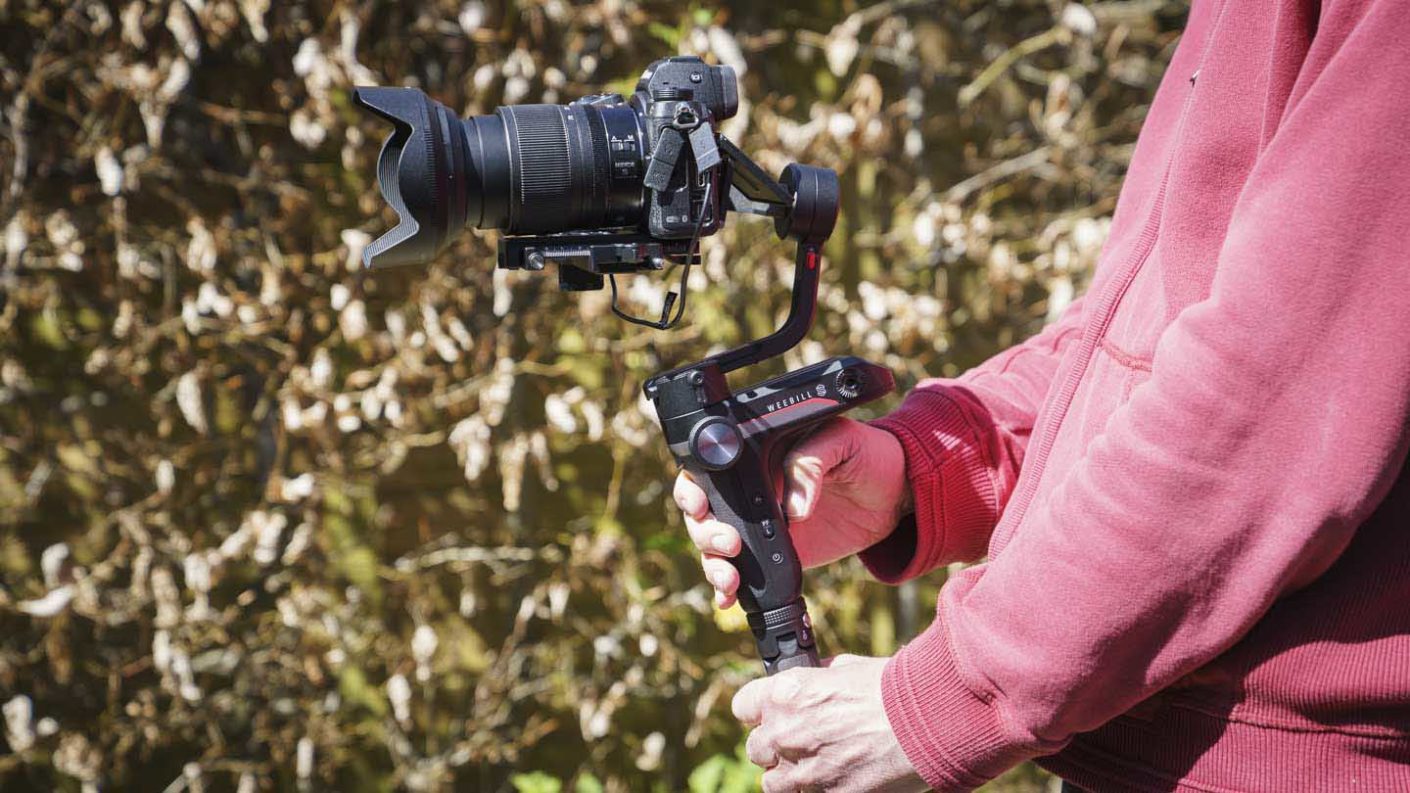
Like the Weebill-S, the Weebill 2 has an inverted L-shaped body with three motors and arms coming off it. The pan motor sits at the bottom of the three with the roll motor above it followed by the tilt motor at the top.

From the Zhiyun Weebill-S user manual
While the body of the Zhiyun Weebill 2 is still made from plastic, it has a higher-quality feel than the Weebill-S. Its handle is also a little better-shaped and has a rubber-like covering that gives it more grip.
In addition, most of the controls have been moved on to the left side of the horizontal section of the Weebill 2’s body. This is a good move for right-handed videographers as they can either be operated by your right thumb or using your left hand. It’s a bit more awkward for left-handed users though.
Relocating the controls from the vertical section (the main handle) of the gimbal, means that they are less likely to be pressed or nudged accidentally than on the Weebill-S.
Zhiyun has also swapped the pad-like joystick on the Weebill-S for a more conventional style stick on the Weebill 2. I find the new design easier to use.
As before, the Weebill 2’s arms and motor casings are made of metal and feel strong.
Once again, there are locks that can be flicked into position to prevent the arms from moving. These are useful when the gimbal is folded for transportation, or when it’s opened up for use and you need to balance each axis in turn.
Zhiyun has changed from the flat lozenge-shaped lock switches on the Weebill-S to conical switches on the Weebill 2. These sit higher from their surroundings and are easier to use. On several occasions, I’ve struggled to unlock one of the Weebill-S’s motors and I’ve had to jiggle the arm around until the lock suddenly decides to move. This has never happened with the Weebill 2.
Another small but pleasing point is that if you use all the locks to fix all the Weebill 2’s arms in position as you walk between shooting locations, the arms stay still and don’t jitter as you move. It gives you extra confidence in the overall build quality of the device.
While the Zhiyun Weebill 2 feels better made than the Weebill-S, it’s also significantly heavier. According to Zhiyun, the Weebill-S weighs 1,015g (although I’ve also seen it stated as 926g) without the batteries and tripod, whereas the Weebill 2 is 1,470g with the battery and without the tripod. I weighed the Weebill-S’s batteries and they’re 96g, making the overall weight without the tripod, 1,111g/1,025g. That means that the Weebill 2 is 359-445g heavier, and it’s noticeable in use.
If you don’t have good upper body strength then you may find it helpful to keep the tripod on the horizontal section of the gimbal so you have a second handle. This sling-style handle is also very useful for shooting from a lower level.
Setting up and balancing the Zhiyun Weebill 2
As usual with a gimbal, after the Weebill 2’s battery has been charged, the camera needs to be mounted and balanced before it can be used.
Zhiyun supplies a riser plate in case the lens that’s mounted on the camera rests on the gimbal’s mounting plate. This is necessary, for example, when the Sony FE 24-70mm F2.8 GM is used with the Sony A7 III or Sony A7R IV, but it’s not required if either of those cameras is used with the Vario-Tessar T* FE 24-70mm F4 ZA OSS.
With the Weebill 2’s arms all moved into their working positions and locked in place, the release plate can be slid into position on the gimbal and locked tight.
Balancing the Weebill 2 is much like balancing any other gimbal, you need to balance around each axis in turn starting at the top with the tilt axis, then moving down to the roll axis and finally the pan axis.
Each of the adjustment points has a nicely-sized lever lock which means they are easy to loosen and tighten by hand and there’s no need for a tool of any sort. Most of the adjustment action is also quite smooth and easy to make although one of the tilt adjustments can be a little tricky.
Using the Zhiyun Weebill 2
Some gimbals seem to have controls scattered all over them, but on the Weebill 2, there’s just the small selection on the left of the horizontal section, a trigger switch on the front and the flip-out screen. This means that it doesn’t take long to get to grips with the basics of using the Weebill 2.
There’s a switch that enables you to flick quickly between Pan Follow, Lock and Follow mode, and pressing and holding the trigger button activates POV (point of view mode). The other modes can be selected via the touchscreen.
There’s also a customisable control wheel that can be used adjust camera settings such as the aperture, ISO, shutter speed or the electronic focus, or it can the roll movement. Strangely, none of the other axis movements can be controlled via this wheel.
The level of control you get over the camera depends upon the degree of compatibility so it’s worth looking at Zhiyun’s camera compatibility chart before making a purchase.
The Weebill 2 is also compatible with Zhiyun Play, Zhiyun’s free smartphone app. This enables the gimbal to be paired with the phone and lets you control the gimbal’s movement remotely. It can also facilitate firmware upgrades, saving you the trouble of connecting the gimbal to a computer.
Once the phone and Weebill 2 have been paired for the first time, they quickly spot each other when they are in range and they connect without a hitch.


