Touch-first pro trigger balances ease of control with solid reliability, and usability with wide compatibility with Godox flashes.
The original X3 was one of the most useful flash accessories I’d ever used. When paired with a superb Godox V100 flash gun, other Godox flash heads or a combination, you could quickly build a powerful multi-flash system at a relatively low price. While the original X3 was superb, if you were using a larger number of flashes in different groups, you started to hit the limits of what that small trigger could do. Now, with the X3 Pro, it builds on the full potential of the original X3.
The new unit is once again a touchscreen-driven flash commander, fully compatible with almost all Godox 2.4G flash guns, including the V1 Pro, V100, AD100, and AD400, that I also used during this test. What’s more, it offers greater control over those flash guns with full Bluetooth control, so if you want to operate everything through the convenience of an app, that too is perfectly possible.
Aside from greater control, the unit is larger and gives you a much bigger 2.4-inch screen, making it easier to see what’s going on and make adjustments, especially in the basic confines of a studio.
Once again, I found the touchscreen and the new dial on the side exceptionally easy to use. When it came to the app, I felt it was extremely hit-and-miss, especially when connecting and controlling the flash guns. In the end, I just resorted to direct control on the unit itself, as it seemed more intuitive for the workload than having to delve around and search for my phone to adjust settings.
There are several things that made the X3 Pro stand out, and the first of those was just how easy it was to use. Unlike some flash triggers that can take a while to figure out and configure, this is all straightforward and simple. When teaching a class on how to use off-camera flash, the fact that I had a large screen which was easily visible just made it that much easier to teach. If I could link out to an external monitor so the display was larger still, that would be great, but that’s not essential for everyday use.
While I thought the X3 was one of the best units available for wirelessly triggering your flash guns, the X3 Pro takes that control up another notch. With additional features such as shutter control, app functionality, and the ability to control multiple groups, it’s an absolute essential if you’ve started to invest in Godox flashes, which range from the small iT30 Pro through to the AD600.
What is the Godox X3 Pro?
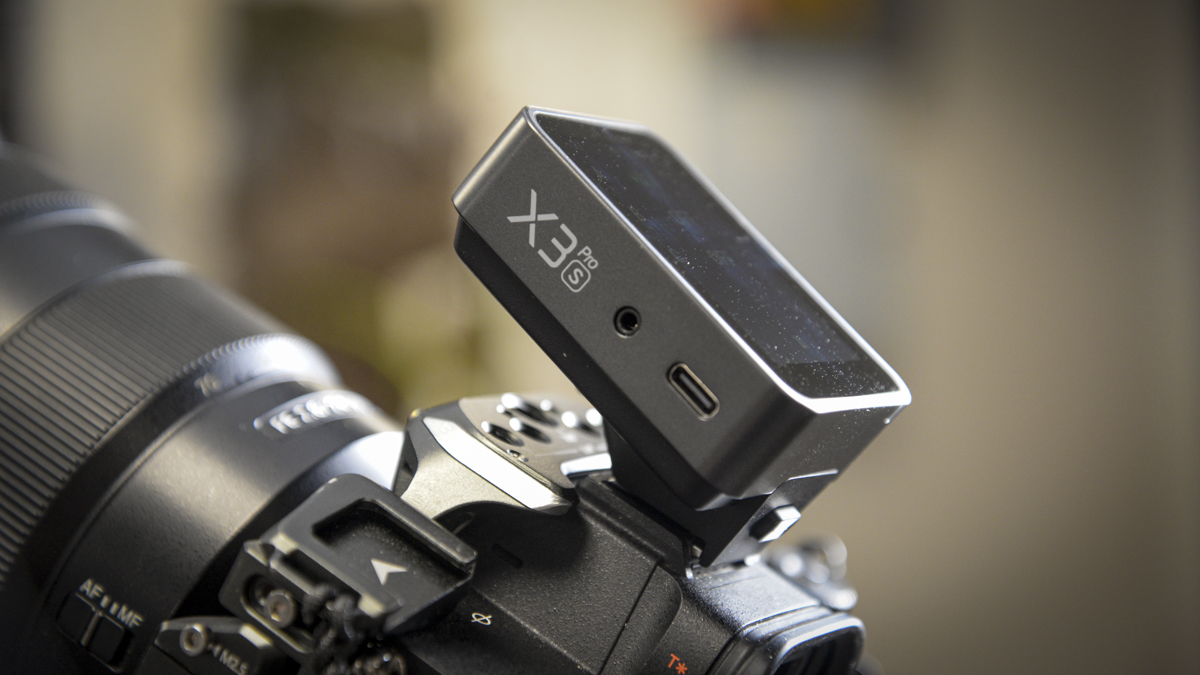
The Godox X3 Pro is a TTL/HSS 2.4GHz wireless flash trigger featuring a large 2.4-inch colour touchscreen and is part of the Godox X system of flashes. It’s also the larger sibling to the X3, which I looked at last year.
This new version is aimed at the pro market and enables you to control up to 16 groups of flashes over 32 channels. You can view four groups at a time, allowing for fast changes.
This flash trigger also pairs with a nifty Godox Flash App that gives you greater control and supposed ease of use. Rather than using the substantial touchscreen interface on the X3 Pro, you can instead utilise your mobile phone’s touchscreen.
In addition to standard off-camera flash capabilities, this trigger offers quite a bit more, including a built-in intervalometer. Although with the Sony A7 IV that I used in this test, an additional S2 cable was required to get this function to work. As the X3 Pro, like the X3, is dedicated to each system due to TTL features, you will need to purchase the X3 Pro for your specific camera brand.

While wireless flash triggers are nothing new, the sheer volume of features now accessible through the X3 Pro makes this a significant upgrade. Having used the X3 for over a year and now looking at the X3 Pro, it demonstrates just how far ahead Godox has become in the world of sophisticated flash systems.
Specification
- Touchscreen: 2.4″ colour display
- Groups: four visible simultaneously
- Channels / IDs: 32 channels, 01–99 IDs
- Wireless: Godox 2.4GHz X system + Bluetooth app link
- Control: Unified or per-unit parameter editing; TCM and modelling/zoom management
Godox X3 Pro Build and Handling
If you’ve used the X3, then you’ll know how well designed it is. It’s small, compact, and simply slots into the hot shoe of your camera. Power it on and, if you’re using a V1 or other Godox series flash, it just works out of the box.
The touchscreen interface lets you quickly navigate all the settings, from setting up groups and channels to adjusting each individual flash’s power. There are a few added extras that I really like, including the ability to use the intervalometer, which connects to the camera and the flash, enabling you to trigger the shutter and flash at the same time. This would be great for time-lapse, still life, and other more involved setups.
Another feature is that you can connect it to the mobile smartphone app using Bluetooth. The process is a little convoluted, you do need to delve into the manual to discover all the options and settings, and search online to find that the Bluetooth pairing code is ‘000000’, which oddly isn’t shown anywhere on the device.
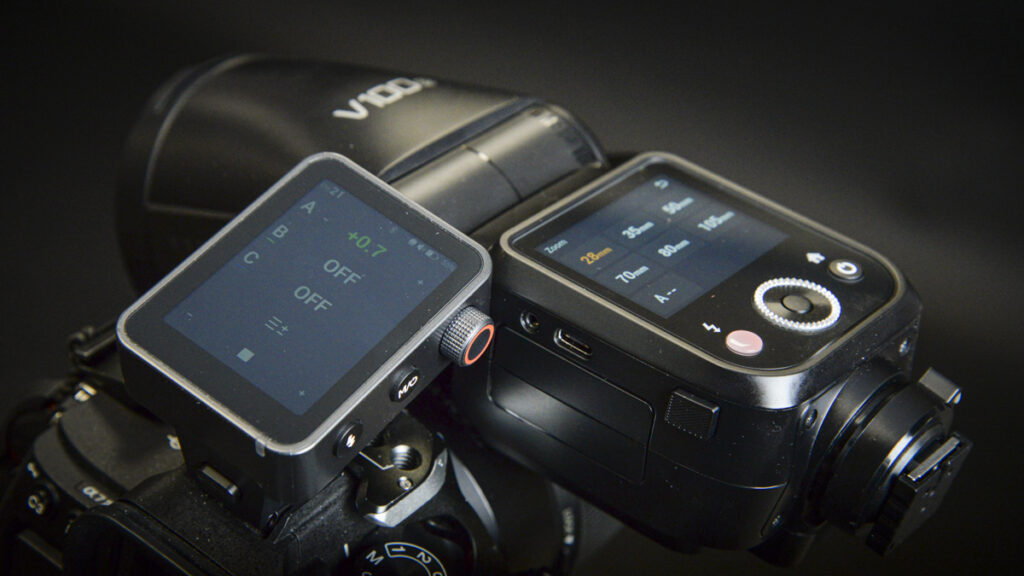
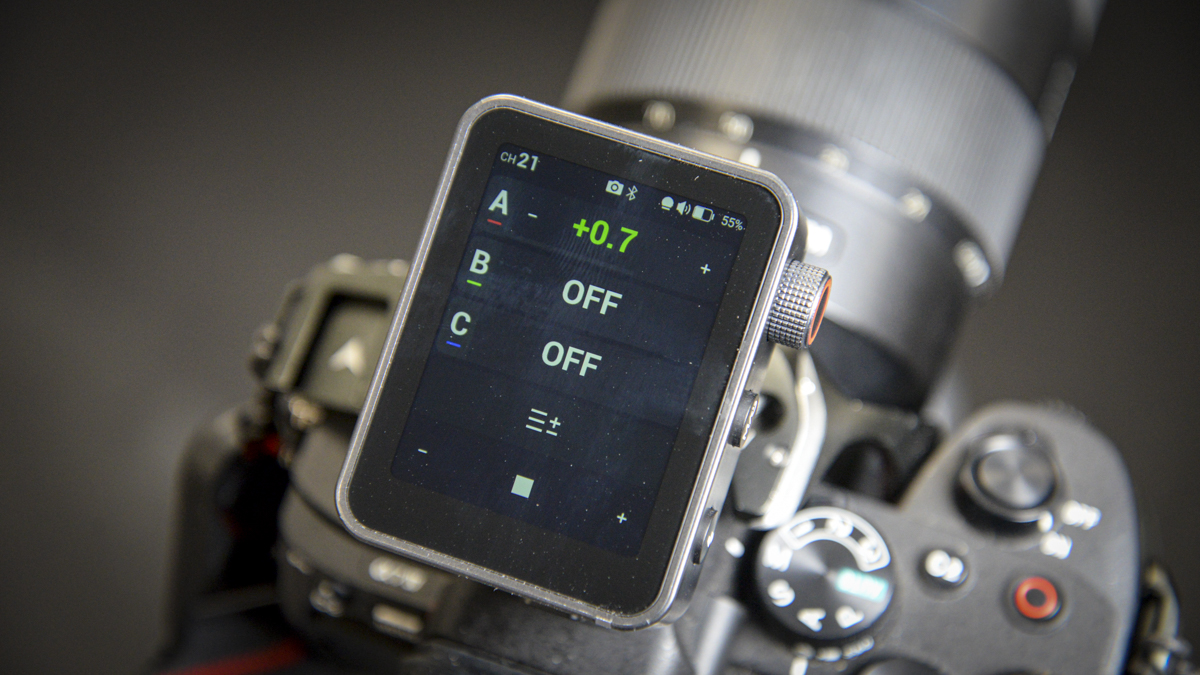
The look and design are once again minimalistic with a sleek, modern aesthetic, fronted by that large 2.4-inch LCD screen. It shows up to four groups of flashes on the home screen, and a quick swipe allows you to access all settings, plus Bluetooth if you want to use it with the Flash App.
The X3 Pro is dedicated to a single manufacturer, so in this test, I used it with the Sony A7 IV. However, versions are also available for Canon, Nikon, and Fuji. Just make sure you get the correct one for your particular camera.
In terms of size and weight, it measures 54 x 66 x 41mm and weighs 103g, slightly more than the X3, but still nicely compact.
While most controls are accessed via the touchscreen, if you prefer something more tactile, there’s a dial on the side which can be rotated or clicked to confirm. It’s exceptionally easy to use, and sometimes in the studio, having that tactile feel when making adjustments is quite handy.

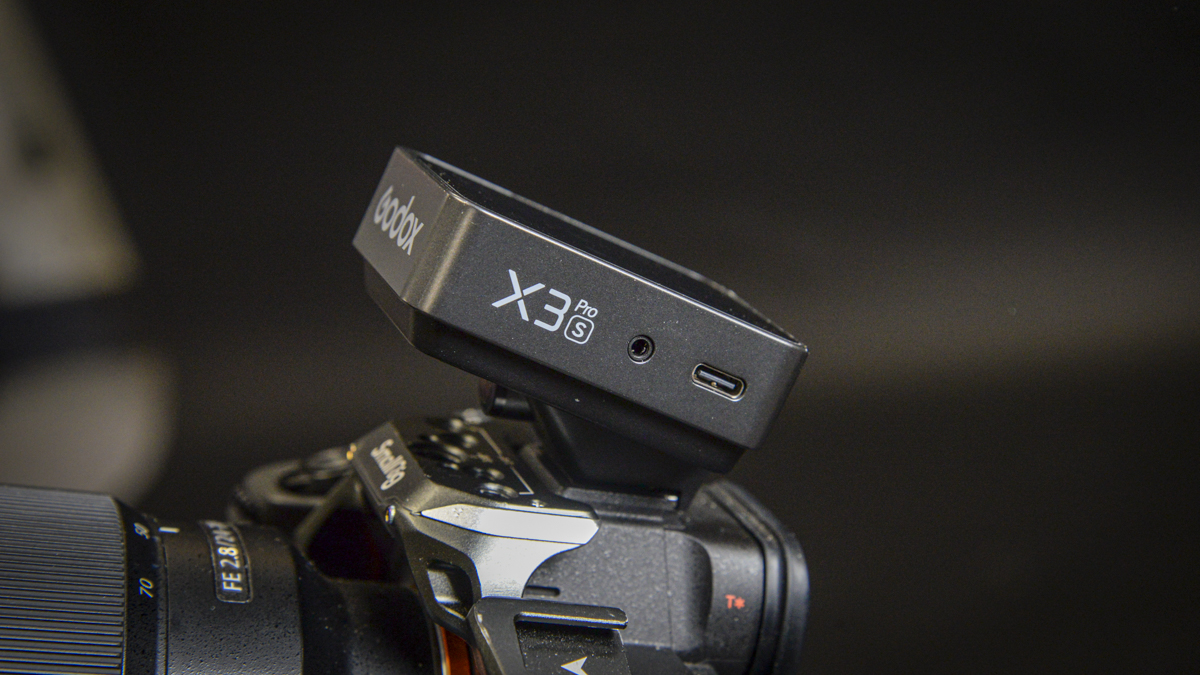
Next to that dial is the mode or power button, enabling you to quickly switch modes and bring up the full menu. There’s also a flash test button, and on the opposite side, a 2.5mm jack to connect to your camera for triggering and wireless shutter. There’s also a USB-C port for charging and firmware updates.
Godox X3 Pro Features
Godox sells the X3 Pro as the command centre at your fingertips, essentially enabling you to control all your flash guns via one small, easy-to-use interface. Everything to do with your flashes is right here, and if you’re using the range of Godox X series flashes, which includes the V1, AD100, AD200, and AD400, then adjustability through this simple interface is exceptionally easy and makes working in and out of the studio fast and smooth.
As you’d expect out of the box, you have TTL, Manual, Multi, HSS, and front and rear curtain flash, enabling you to adapt how you operate the flashes, from static portraits to action and events. There’s plenty of flexibility not only in the type of flash you use but also in where and how you use it. Essentially, think of the X3 Pro as the heart of your flash ecosystem.
One of the nicer features added to the X3 Pro is compatibility with the Flash App. This allows you to take full control of the X3 Pro remotely, adjusting flash power and all the other settings you can access directly from the unit. While it might seem like just adding another piece of kit into the mix, there are occasions where you don’t want to be behind the camera or want to make a quick adjustment while sorting out some gear. Having your mobile phone with you at the table can be really handy, especially for still life photography.
One feature that surprised me was the built-in intervalometer. So, if you want to use it without a flash but still have it controlling the shutter, you can. You’ll need a PC sync cable, in the case of the Sony A7 IV, you simply link the X3 Pro into the multi-port of the Sony, set up your timing info, and off it goes. The great thing here is that if you want the intervalometer to fire the flash, it’ll do that at the same time. If you’re doing a long time-lapse, say, of a flower opening, and want to illuminate that with a sophisticated flash setup, that’s perfectly possible.
A big feature over the standard X3 is that this is a pro-level flash trigger. While the X3 is great if you’re out and about and just need wireless flash functionality, the X3 Pro increases battery capacity, so while you’re out on a shoot, you can expect it to last all day. It’s also a solid piece of kit, suited to professional workflows, with a one-month standby time, and if it does run down during a shoot, it fully recharges in just under two hours.
One feature I really liked, although I haven’t been able to test it yet, is the option to use an XR receiver. So, if you’re not using Godox flash guns, say, you’re using a Profoto or Sony flash that’s not compatible with the X series, you can pop your flash onto the XR receiver. While you might not be able to control power settings, you will be able to fire that flash remotely. However, if you’re using Canon, Nikon, or Sony flashes that support TTL, the XR receiver will bridge the technology so that those flashes still utilise full TTL support, and that’s very clever.
Godox X3 Pro Performance
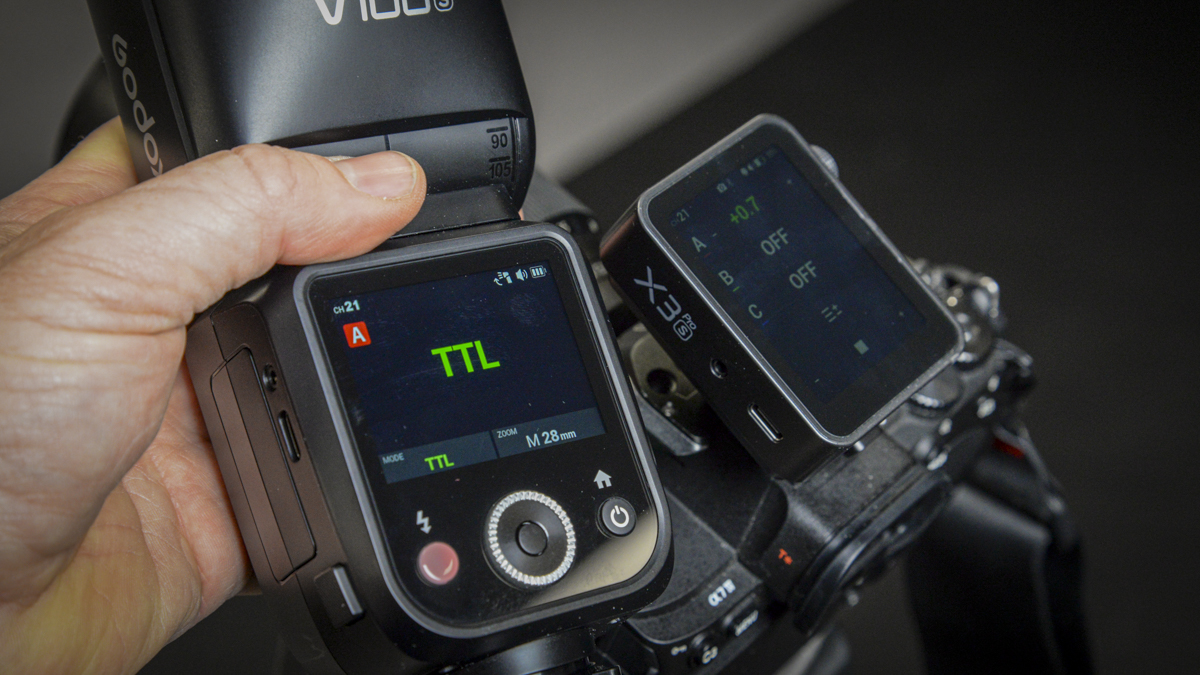
Getting started with the X3 Pro is just as easy as using the original X3. You start by popping it onto your camera’s hot shoe, powering up one of your flash guns, here, I used the V1 100S (Sony version), then swipe down to access settings. Tap Wireless to select the channel and ID, in this test, I set it to channel 21 with the ID turned off. Then I went over to the V1 100S, made sure it matched (channel 21, ID off), pushed the test button on the X3 Pro, and the V1 100S fired.
From there, I started by testing TTL, essentially, through-the-lens metering, so I didn’t have to worry about flash power. I used the flash for product photography. What I liked was being able to set up two V1 100 units, one for background lighting and one for the foreground with a diffuser, and adjust both via the touchscreen on the X3 Pro under Group A. This enabled me to fine-tune the power up or down, while the metering was still done via TTL and flash compensation.
The X3 Pro is genuinely easy to use. If I wanted to switch from TTL to Manual, I just tapped the flash option, then tapped TTL on the screen to swap modes. I could then adjust the power and zoom manually. It’s also possible to activate the modelling light, which, although not ideal, can be handy if you’re shooting a little bit of video.
As I started to add more flashes, I could assign them to the same group (so they all run under one setting), or activate further groups, B, C, etc., to control flash power individually. This is especially useful in more complex setups, when I have three or four flashes in use and need to adjust them individually from behind the camera. It’s also handy because you can switch each group on and off, ideal when building a lighting setup without needing to physically power on/off each flash.
As a straightforward flash trigger, it’s one of the best I’ve used. During the full test, including further product photography, its flexibility went well beyond anything else I’ve worked with. The battery lasted for the entire shoot, in fact, the entire week, which shows how solid a piece of kit it is.
That said, I initially liked the idea of the dial on the side, but in practice, I didn’t use it. Aside from testing it at first, I didn’t touch it again during the test, it just wasn’t necessary.
Another slight frustration was that some of the features I was excited to test weren’t usable without extra purchases. I wanted to try the intervalometer, but with no S2 cable in the box, it meant a separate £10 purchase. Easy enough to find, but I do feel it should have been included.
The app was helpful, it let me test fire the flashes, but it would’ve been nice if I could use my phone to take a picture with flash, just to test setups and lighting. Sometimes it’s easier to take a quick snap on your phone to show your designer or assistant, rather than using the camera’s rear screen. It just feels odd that, with such an advanced app, there’s no ability to actually take a photo with flash via the phone.
Overall, though, reliability stood out. Once you find your way around, and it does take a bit of time, it becomes very fluid. I was surprised by how little I used the dial, as the touchscreen was just easier and quicker. The fact that it’s illuminated and readable in a dark studio helps it stand out, and in the field, adjusting flash guns was just quicker via the touchscreen than the dial.
There’s a lot to the X3 Pro, and in practice, it just worked exceptionally well throughout the test. If you’re already invested in the Godox flash system and want a very capable wireless trigger, the X3 Pro is ideal. That said, I still think the smaller, lighter X3 is a better option for most people just wanting to experiment with off-camera flash. The X3 Pro really comes into its own if you want features like the intervalometer or app-based control.
Final Thoughts
When I first used the X3, I was surprised by how handy it was for wireless off-camera flash. The fact that you could sync it with multiple flash guns and control them all through one small remote made it exceptionally easy to use, both out in the field and in the studio. The X3 Pro builds on that functionality with a slightly larger unit and far greater battery capacity.
For most people, the X3 will be more than enough. However, if you’re working in a professional environment and need that extra level of control and flexibility, the X3 Pro becomes a strong contender.
If I had to pinpoint what separates the X3 and the X3 Pro, the first would be the enhanced battery life. As a professional, you’ve already got a lot to charge, so knowing this device stays topped up for a full week between charges is reassuring. During testing, I only drained it by about 50% over a day’s shoot.

The next key feature is app control. I didn’t use it much out in the field, as it felt like an extra piece of gear, but in the studio, I did find it useful. Being able to adjust settings via the app was helpful, but I did feel there was something missing.
Ideally, I’d love to use the app not just to control flash power, but to preview shots as well, especially in tethered scenarios. Being able to adjust the light position and power, then taking a shot and checking the preview right on your phone. It just makes sense, but it’s beyond what the X3 Pro can do. Right now, you can adjust settings and do a test fire, but you can’t trigger the shutter through the app.
The intervalometer is excellent, and the ability to control camera and flash settings, including time intervals, for time-lapse shots is very welcome. But again, it’s a shame the required S2 cable isn’t included. Also, it’s odd there’s no preview or capture ability via the phone app, just something to show the client or check composition before committing to a final frame.
Still, the negatives are more about things I’d like to see added, rather than issues with the X3 Pro itself. When it comes to form and function, it works brilliantly. The touchscreen interface gives quick access to settings, with excellent responsiveness. The ability to control a wide range of Godox flashes, including the V1 and AD series, is fantastic. And with the XR receiver, you can even connect third-party flashes to build a broader kit.
In short, it’s all executed really well, and if you’re already deep into the Godox system, this just enhances what you’re able to do. While I love the X3, I do feel the Pro version has just enough extra capability to make it a worthwhile upgrade.