


One of the great things about modern smartphones is that they allow everybody to experiment with different aspects of photography.
Although great as point and shoots, there might come a time when you want to understand a bit more about how to take greater control of how your images turn out.
Lots of Android smartphones offer manual or ‘pro’ control via dedicated modes found in the native camera app. One such phone is the Sony Xperia 1, launched in May 2019. As part of its native camera app, there is a Manual mode which allows you to control a wide array of different parameters. But, if you’ve never experimented with taking control before, it can be a little confusing knowing what is what. In this piece, I’ll explain what each control is for.
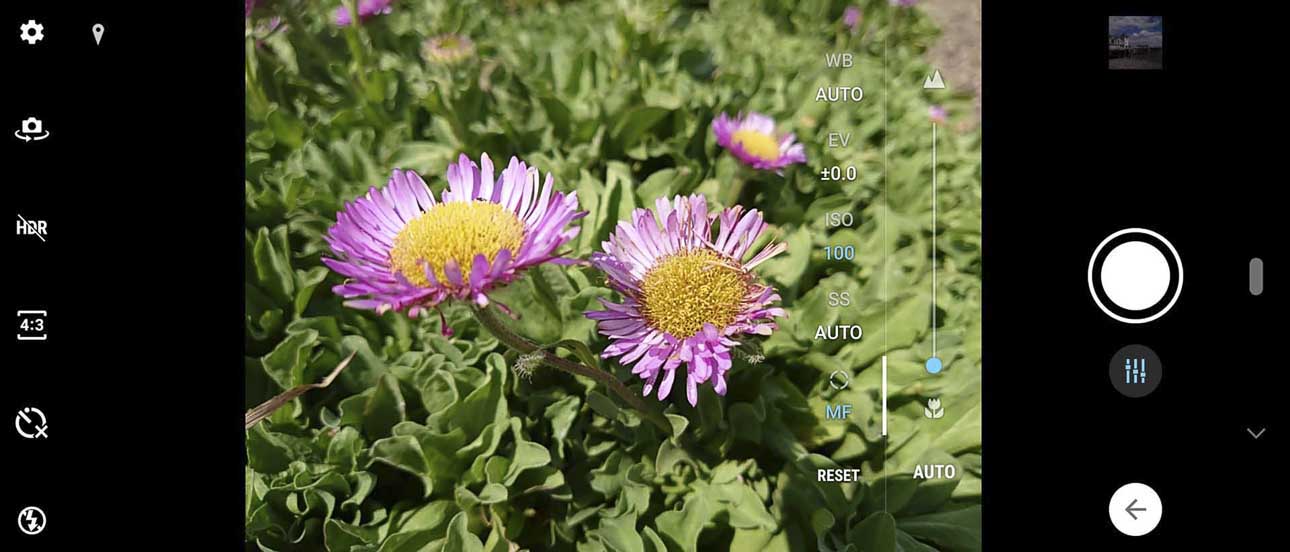
When you open the Manual mode, you’ll notice a series of different settings displayed along the right-hand side of the phone screen (or at the bottom if you’re holding it in portrait format). In turn, each of these is explained below.
WB (White Balance)
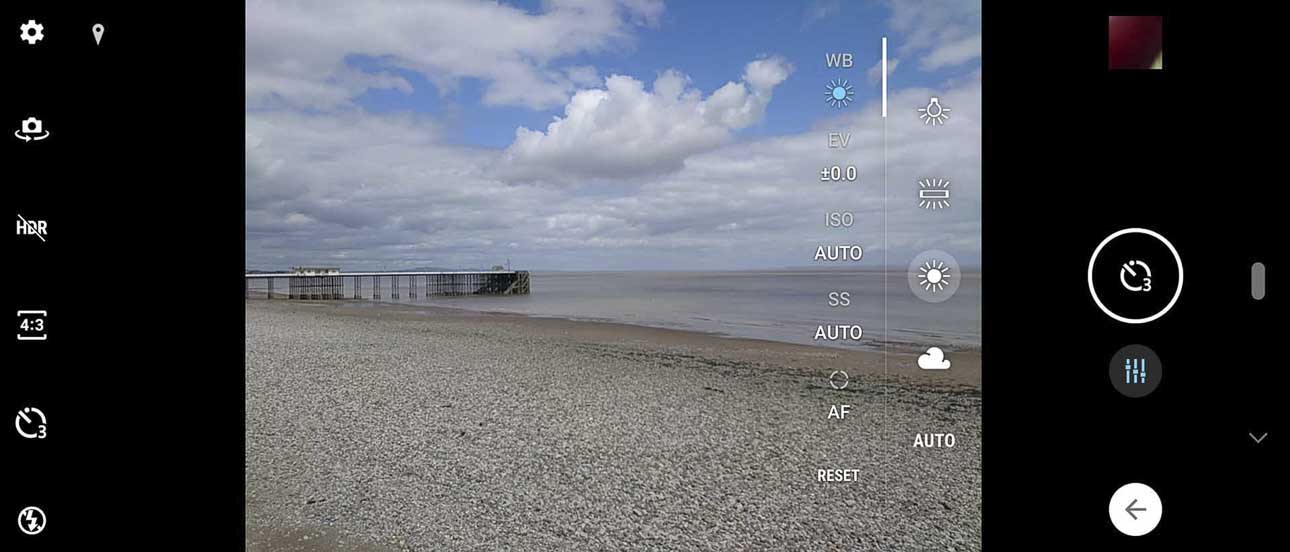
This setting allows you to choose a specific setting depending on the lighting conditions you’re working in for the most accurate colours. By default, the automatic setting is chosen whereby the phone works things out for itself – and you’ll probably find that in most situation it does that pretty well. However, things can get a little tricky for automatic white balance settings in some conditions, particularly when faced with artificial light where images can take on an unnatural yellow or orange tint.
If you tap the WB icon, you’ll be able to choose between different settings, including Tungsten (represented by a light bulb) and Fluorescent (represented by what looks like a wide bar with lines coming out of it). You can choose one of these for more accurate colours under artificial light.
You’ll see a setting for sunny conditions, and another for overcast or cloudy conditions (the icons for which should be pretty self-explanatory).
You could also use the ‘wrong’ white balance setting to purposefully create strange colour casts for artistic effects.
EV (Exposure Compensation)
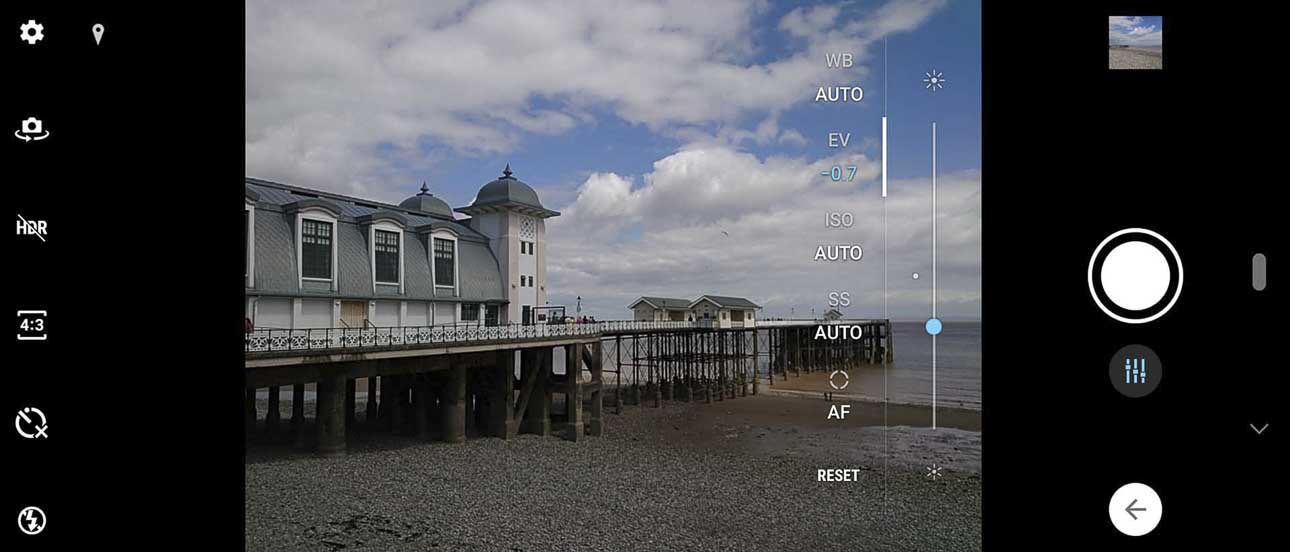
This one is a pretty simple setting, you can use it to increase or decrease the brightness in a scene. Again, there’s a default automatic setting, but you might find that the camera hasn’t got it quite right if you’re shooting something particularly dark or light, or the lighting is mixed.
Simply tap the EV button and move the marker up and down the slider to make the scene brighter or darker.
Sensitivity / ISO
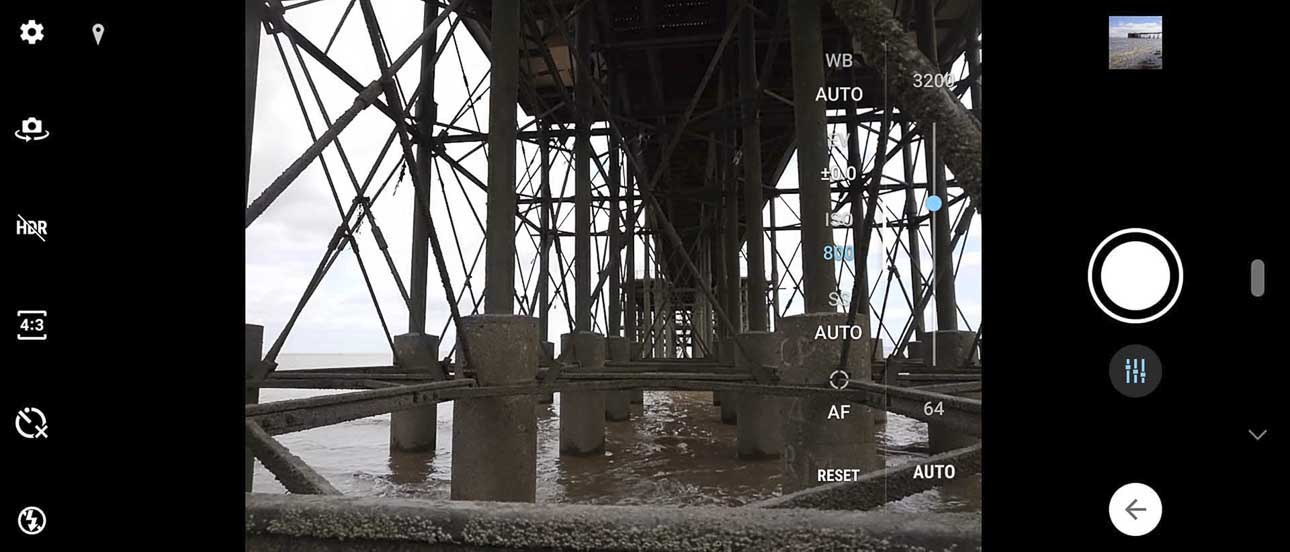
The term ISO stands for ‘International Organisation of Standardisation’, the body responsible for ensuring uniformity between cameras. If you ever used a film camera back in the analogue days, you might have come across ‘film speed’ or ‘ASA ratings’, which told you how sensitive the film was to light.
Using high ISO speeds allows you to capture shots in darker conditions, but the sacrifice is the introduction of noise or artefacts in the shot. Therefore, if possible it’s better to keep to as low an ISO as possible.
With the Xperia 1, there’s an Auto setting, whereby the camera will try to determine the best ISO setting to use. While it usually gets it just about right, if you’re trying to get a clean image and the camera is bumping up the ISO it can be frustrating.

Bear in mind that if you want to use a low ISO in low light conditions, you’ll need to use a longer shutter speed in order to get a balanced exposure. That will mean either having a very steady hand, or employing the use of a tripod or a stable surface to keep the phone as still as possible.
SS (Shuttter Speed)
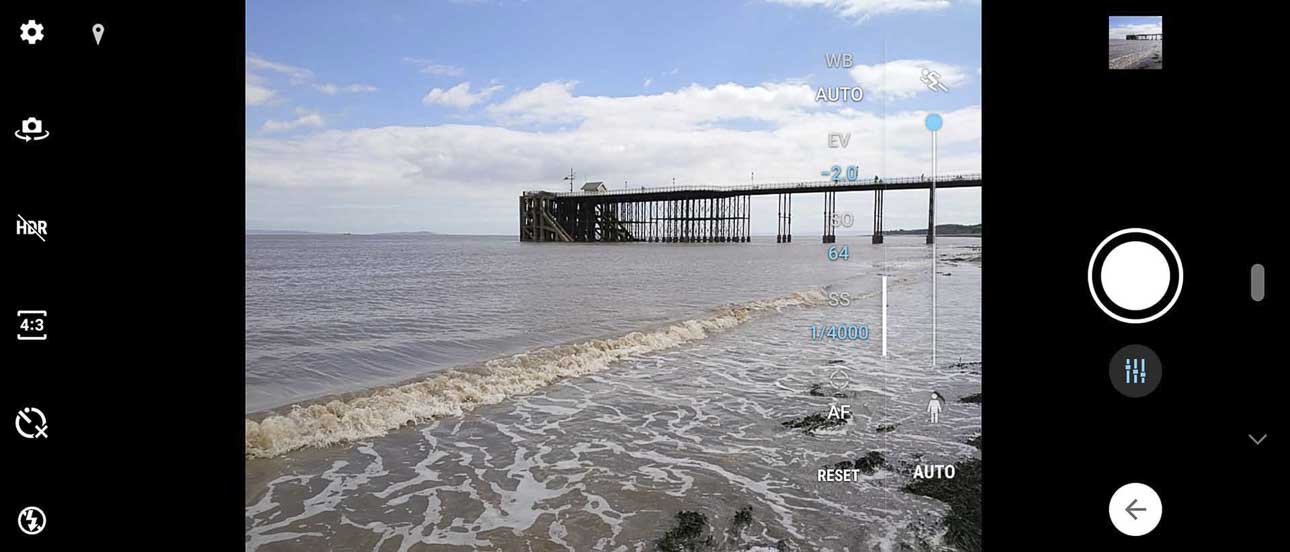
Shutter speed is simply how long the shutter stays open to allow light to hit the sensor. The longer it stays open, the more light hits the sensor. In bright conditions, you will want to use fast shutter speeds to avoid overexposure (images which are too bright), but in darker conditions, using longer shutter speeds helps you to avoid underexposure (images which are too dark).
You can also use different shutter speeds for different creative effects. A fast shutter speed will freeze action, while slower shutter speeds can be used to blur motion. Remember in order to balance out the exposure that you’ll need to use a very low ISO if you want to use a very long shutter speed.

To change shutter speed here, tab the SS icon, and then use the slider to move between the slowest shutter speed (30 seconds) and the fastest (1/4000). Leaving it on Auto means the phone will decide for itself the best speed to use.
AF/MF
Tapping the AF icon takes you into manual focusing. This can be useful if the phone is struggling to get focusing quite right – or perhaps if you want to adjust focus for a creative effect. Once you tap on it, you can use the slider to move from close focusing (represented by a flower) to distant focusing (represented by a mountain).

The best way to learn how to use all of these different settings is simply by experimentation. Remember, you don’t need to adjust all of them – you could adjust one of them, and leave the rest of the settings on Auto, or you could adjust the majority of settings, leaving just one or two on Auto – it’s really up to you.
Will you be experimenting with Manual mode?
Find out what we made of the onboard camera(s) in our full Sony Xperia 1 review.
Buy the Sony Xperia 1 from Amazon UK or Amazon.com