Knowing how to expose to the right is a technique many landscape photographers use to protect their images from over-exposure. In this guide we’ll explain the principles behind this technique. It may sound counter-intuitive to deliberately set up your camera to shoot a ‘bad’ exposure. But as you will see, it can ultimately produce an image with much more tonal information in the shadow areas.
What does expose to the right mean?
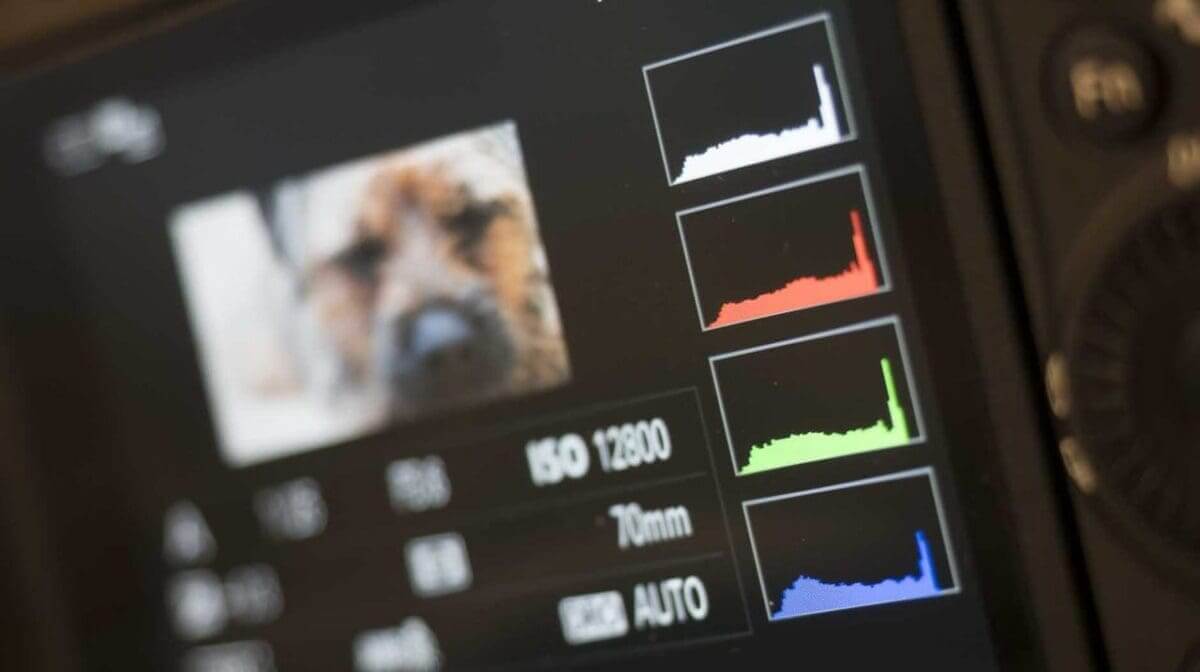
The phrase ‘expose to the right’ refers to your camera’s histogram and how it should look. In a typical exposure, your histogram should show an even spread of tones across the graph. When exposing to the right, photographers adjust their exposure so that the graph is stacked at the right side of the graph, producing an overexposure.
Why do this? Because raw files give you such flexibility in post-production, an image that has been ‘exposed to the right’ can then be brought back to the correct exposure with more detail in the shadow areas. This is a popular technique for landscape photographers, in particular.
The general principle behind exposing to the right is that the photographer uses the camera’s histogram view and/or highlight alert to guide the exposure and capture a bright raw file which has lots of data (more than a dark image for the same scene). However, it’s also important that there aren’t any burned-out details.
A bright image has lots of pixels of above-average brightness, so there’s a peak on the right side of the histogram – hence the term ‘expose to the right’.
The aim is to produce a bright raw file which can be darkened (selectively if necessary).
Why expose to the right?
If the highlights in a scene are overexposed to the point of being burned out there is no information to work with and they will have no tonal variation, so they can’t be brought back by any amount of Photoshop adjustment.
Consequently, many photographers underexpose their images to some degree to avoid having these featureless blobs of highlights and then brighten their shots post-capture.
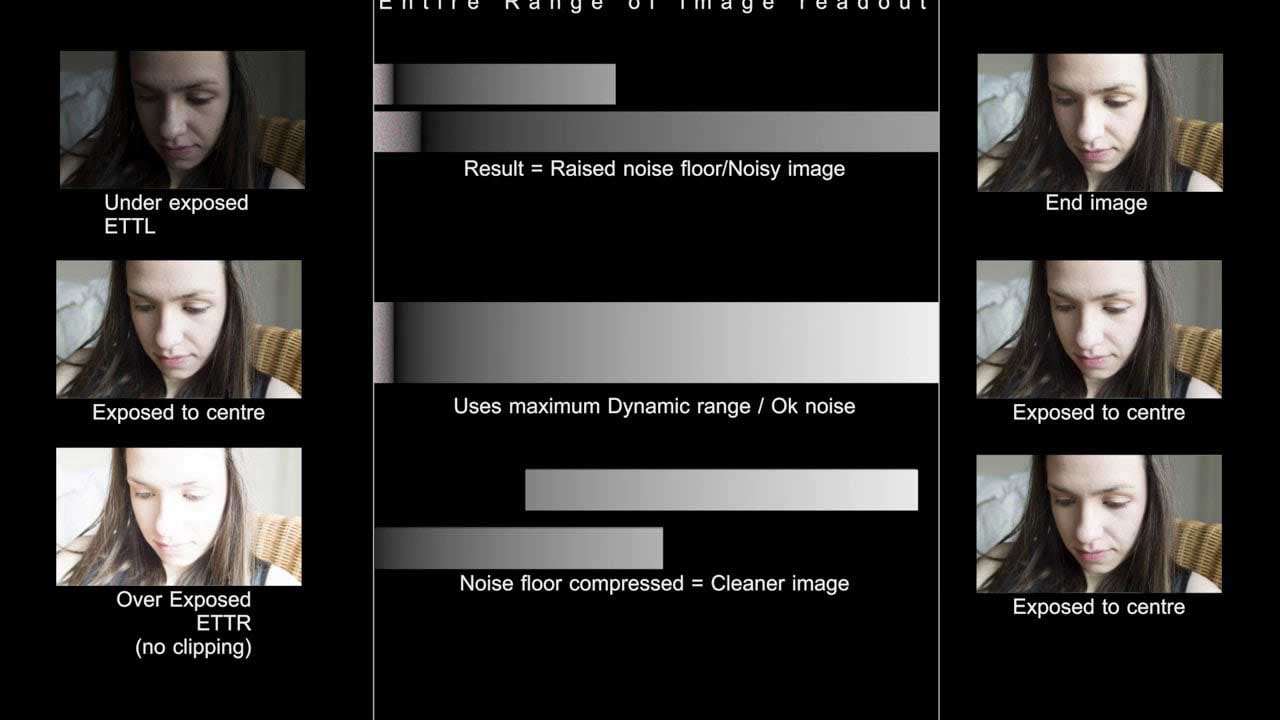
The problem with this technique is that there is less colour information and more noise in shadow areas than brighter areas, and brightening shadows brings out the noise. This means that if you capture a dark image that needs brightening, you will record lots of noise and then make simply more obvious in post-processing.
Lighter parts of an image have a stronger signal and less noise, so provided that you don’t burn out anything important, it’s better to record a bright image and make it darker.
When to expose to the right
This technique needs the subject to be a collection mid tones and shadows with no highlights that will be burned-out by over-exposure.
Unfortunately, this doesn’t occur very often and the average landscape, for example, usually has bright areas like clouds which are easily burned out.
This means that photographers are usually more concerned with avoiding huge peaks at the far right of the histogram.
A slightly more extreme version of the expose-to-the-right technique can be useful when gethering the bright shot for a composite landscape.
Use an exposure that produces a histogram in which the trace just reaches the far left of the graph, indicating that there are a few blacks and the shadows have good tonal range and lots of colour data.
How do you expose to the right
This technique aims to capture the maximum amount detail and minimise the level of noise while avoiding burning out any important highlights. This means that you need to set an exposure that has the peaks of the histogram towards the right, without having a large peak at its furthest point.
One way to do this by taking a shot and then inspecting the histogram, before adjusting the exposure and taking another shot until the histogram looks correct. You should try to produce a histogram trace that just reaches the right side of the scale and that doesn’t have a large peak of white pixels.
Check your camera’s histogram for the colour channels and check that none of them are burned out so that you have maximum colour information.
Another approach is to use the camera’s highlight alert to indicate when highlights are burned out. Many photographers find this easier because instead of looking at the histogram view, they can just look for the flashing that indicates that highlights are being lost.
Ideally you want to find the exposure level just before any highlights are lost. It’s often just a case of reducing the exposure by 1/3EV below the value at which the critical highlights are just starting to be lost.
Photographers who use their DSLRs in live view mode and compact system camera and high-end compact camera users can often use the ‘live’ histogram that displays the brightness of the scene at the selected exposure settings before shooting.
You should see the histogram peak move as you adjust exposure settings.
Expose to the right to avoid noise
As a general rule you should avoid burning out highlights, but if you shoot a scene with a light source such as a candle or a light bulb in it, that’s not going to be practical or desirable in most instances.
You would expect these areas to be burned out – that’s how ours eyes see them. Small highlights on a sparkling sea or a crystal glass can also reasonably be expected to be burned out.
What you don’t want, however, is for these areas to expand so that there are large areas that are burned out.
It’s very important to keep an eye on the size and location of the burned-out areas because if they become too large they will look like a featureless mass of white.
Clouds are often an issue in landscapes because they need to be bright, but have subtle tonal variations. Areas like these are the critical highlights, and the exposure needs to be set to protect them.
Using your histogram to expose to the right
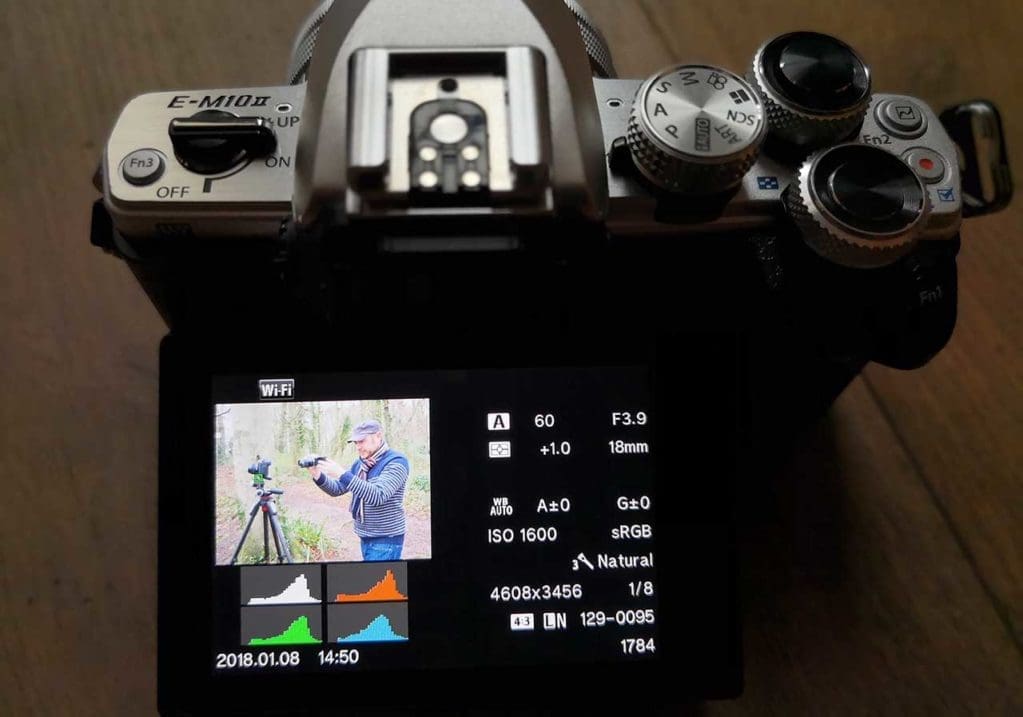
Most DSLRs, mirrorless cameras and premium compact cameras can display a histogram, which is a graphical representation of an image’s brightness. If you’ve ever used photo editing software like Photoshop or even Photoshop Elements, your camera’s histogram is very similar to the graph you see in the Levels tool.
The histogram has peaks that indicate the number of pixels (or size of the area) within the image that have a particular brightness. Dark pixels are shown on the left, while bright ones are on the right.
A ‘normal’ histogram for an ‘average’ scene will feature large peaks around the centre of the graph, which indicate that the majority of the pixels have a brightness that’s towards the middle of the range.
In an under-exposed image, the main body of the peak is towards the left of the graph and the trace doesn’t reach the far right of the scale. This means there are no pure whites in the image at this exposure.
Finally, in an over-exposed histogram, the peaks are over towards the right of the graph, which means that most pixels are brighter than a mid tone. A large peak at the farthest point on the right indicates that there are lots of completely white pixels, suggesting that some areas are burned out and have no detail or tonal gradation.
Raw exposed to the right
Shooting with the exposure to the right produces overexposed images that need to be adjusted to get them looking as they should.
This can be done using most image editing or raw file converter software, but the Levels control in Photoshop, Lightroom and Elements is ideal. As you darken the image you’ll see the histogram peaks move towards the left of the graph.
Most scenes have some black and white areas, so the histogram trace should reach both the far right and left points of the graph. However, it’s more important that the image looks correct, rather than the histogram does.

