Affinity Photo is an exciting new addition to the professional photo editing market, combining powerful layering, masking, adjustment and effects tools with an extremely competitive, subscription-free price. It’s now available in both Mac and Windows versions, too.
The latest update, version 1.5, introduced some exciting new tools – as you can see from this video.
The new features in version 1.5 include an HDR Merge tool for combining a series of different exposures of the same scene into a single, high dynamic range image, and Tone Mapping Persona (or ‘workspace’) which can bring out all this extended shadow and highlight detail to create a richly detailed, finished image.
There are a lot of misconceptions about HDR photography – that the results must always look ‘overcooked’, for example, or that HDR images are somehow inherently unnatural.
But done right, perhaps they represent the complex interaction between eye and brain that we rely on to ‘see’ the world more accurately than we think. Our eyes don’t just take in a scene with a single ‘exposure’ – instead, they scan back and forth, building a mental image of a scene, with all its extremes of brightness and shadow.
So our ‘after’ shot is arguably much closer to what we would see with the naked eye than any of the individual ‘before’ shots we used to make this single high-dynamic range image.
The other complaint, that HDR images look overdone, is more to do with the software than the process. There are, broadly, two types of HDR effect. There’s the wildly super-saturated, super-sharpened look that we’ve all seen lots of times, and there’s the subtly ‘tone-mapped’ look that is designed to look as natural as possible – ideally, so that people looking at the photo don’t realise that it’s been through an HDR process at all.
That’s the result you get from Serif Affinity Photo, and it’s achieved in two stages. First, there’s an HDR merge process that takes a series of individual ‘bracketed’ images shot at different exposures. Between them, these exposures capture the full brightness range in the scene, even if they can’t do that individually.
Second, there’s the tone mapping phase, carried out in Affinity Photo’s Tone Mapping Persona, which takes this enormous brightness range and maps it onto the available brightness range of a regular photo.
So that’s the theory – let’s see how it works in practice.
Start the HDR Merge process
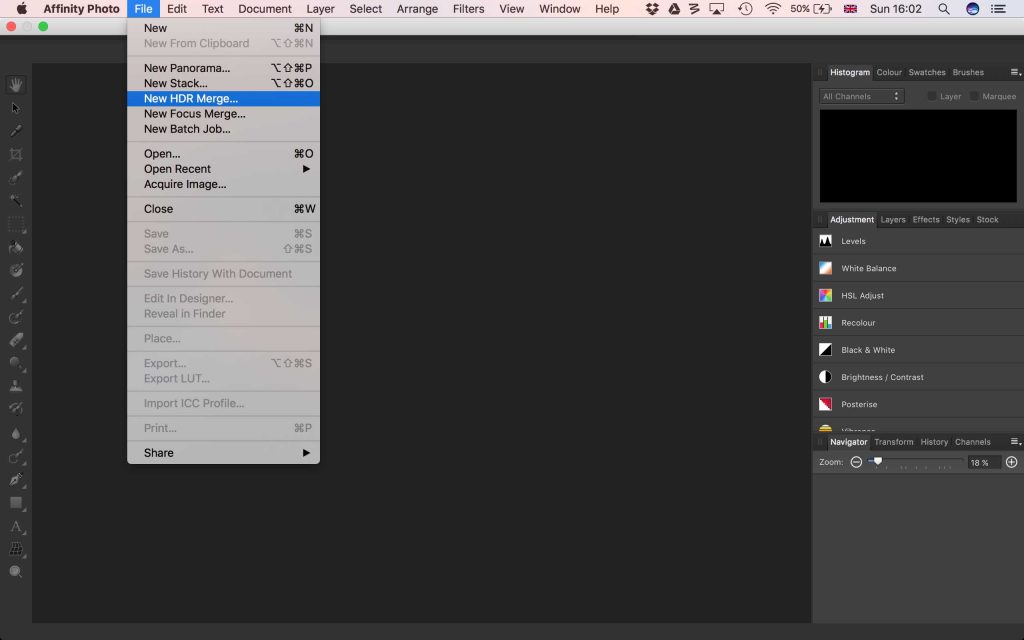
We’ll assume you’ve already got the bracketed exposures you want to merge. This is really easy to do on any camera with an exposure bracketing function, by the way. You simply specify the bracketing interval – we’d suggest 2EV steps, but 1EV is sometimes enough – and shoot your pictures. A tripod is good, but actually not essential. In Affinity Photo, select File > New HDR Merge…
Choose your photos and settings
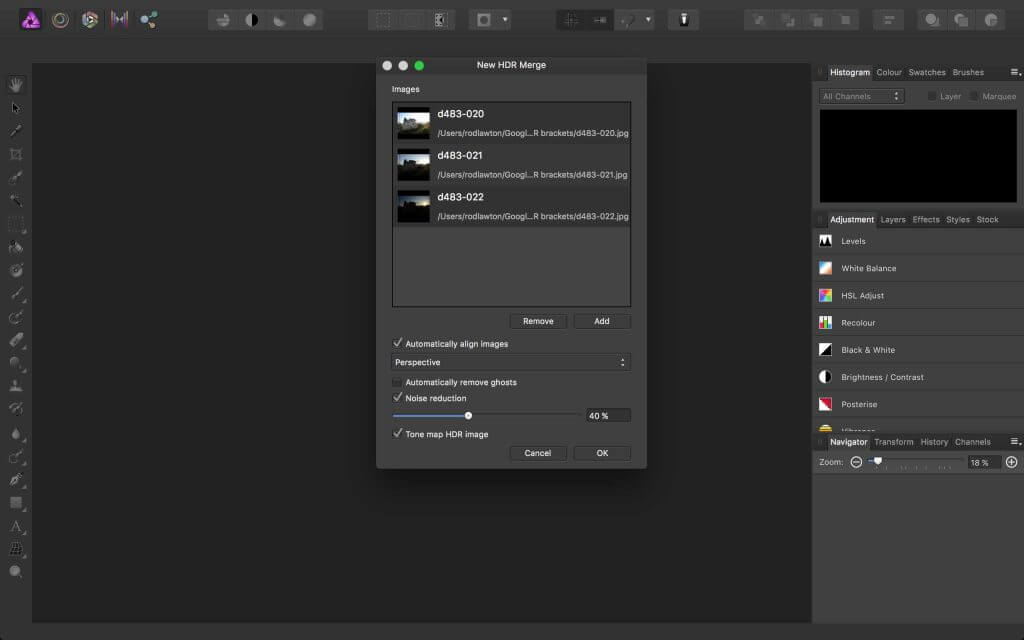
Now you’re prompted to choose the photos you want to merge on your computer, and when you’ve done that they’re displayed in the ‘New HDR Merge’ dialog. There are settings underneath which are ticked by default – ‘Automatically align images’, ‘Noise reduction’ and ‘Tone map HDR image’ – and you don’t usually need to change these. The noise reduction is designed for raw files, however, and if you’re using JPEGs or you find the effect too strong, you should disable it. Keep the ‘Automatically remove ghosts’ option for shots where objects have moved between frames.
Wait for the merge process to finish
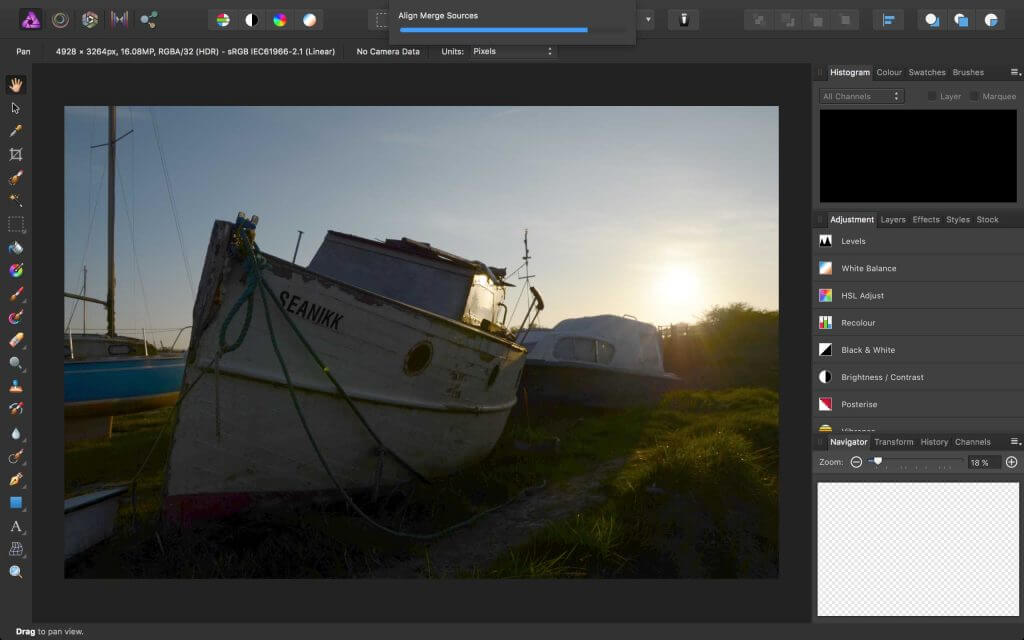
There are some complex processes at work here, so you need to wait a few moments while they finish. Affinity Photo will run through a sequence of steps here, including the alignment of the source images, the HDR merge process, a Denoise process (if you left this option selected in the previous step) and the final tone map phase. The image may change in appearance, but don’t worry about that – it’s the final tone mapped version that counts.
The Tone Mapping Persona
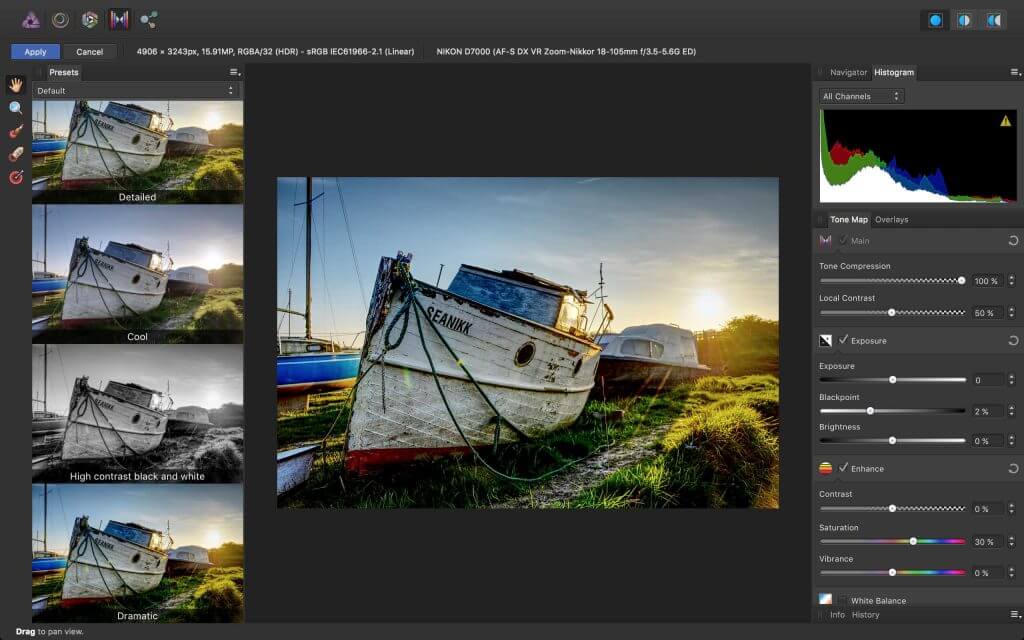
So this is what you see when these processes are finished. The merged image is displayed in Affinity Photo’s dedicated Tone Mapping Persona, with manual image adjustment controls on the right and a small selection of preset effects on the left. We’ve selected the ‘Dramatic’ preset at the bottom of the list, which is already pretty close to the effect we want. (If you don’t see the presets, check the View > Studio > Presets menu option.)
Overlay adjustments
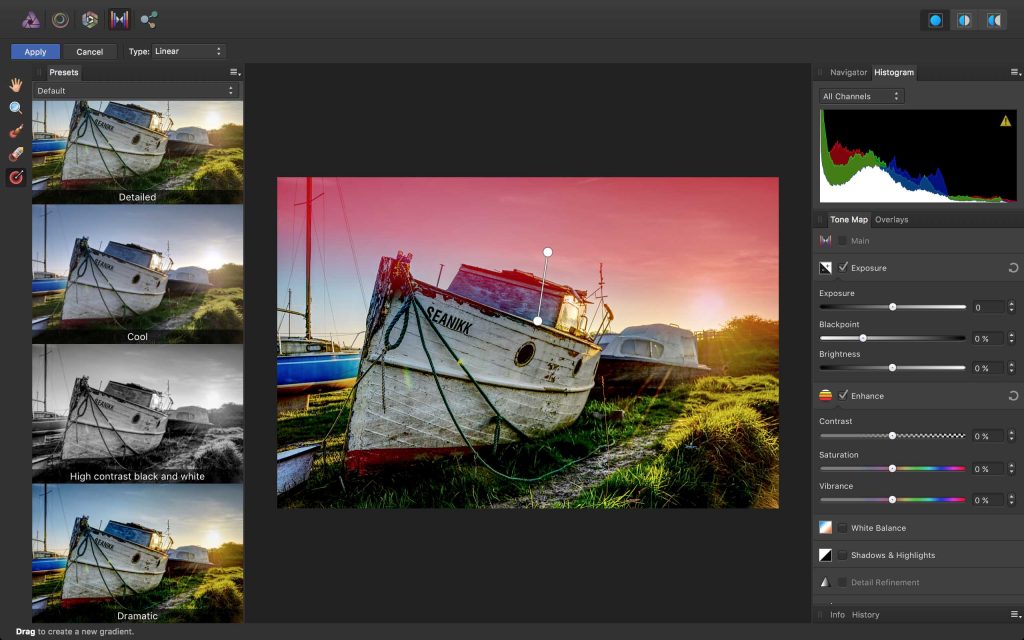
It doesn’t stop there. The overall effect is just how we wanted it, but the sky looks a little dull. We can fix this by adding a local ‘overlay’ adjustment. On the far left of the screen you’ll see a small selection of overlay tools – you can think of these as masking tools. We’ve selected the gradient overlay tool and dragged out a gradient at a slight angle to cover the sky and blend in with the foreground at the horizon.
Enhancing the sky
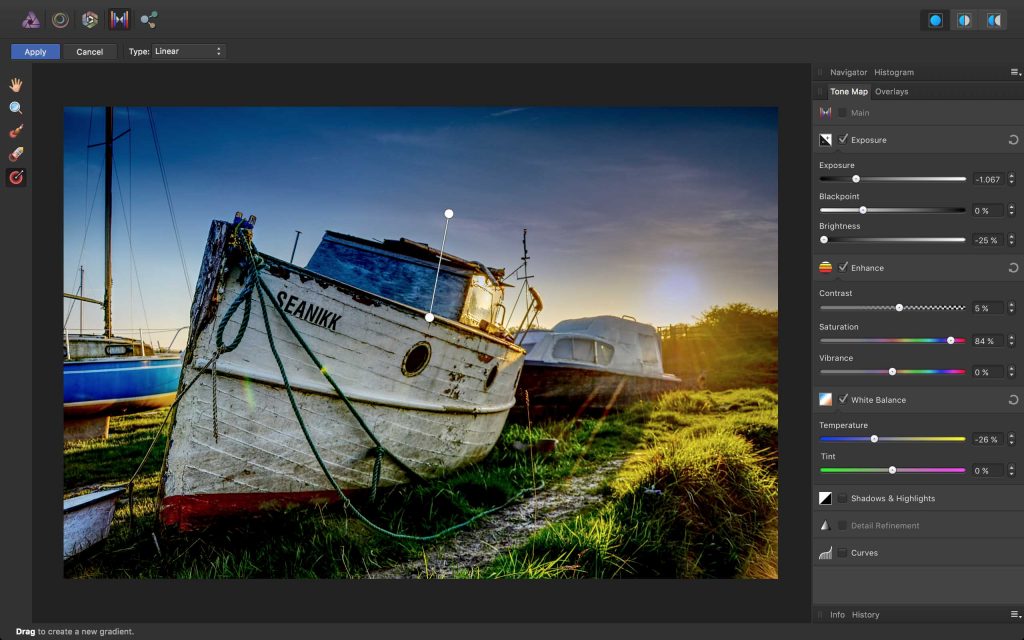
When an overlay is active like this, you can use the adjustment tools to enhance this specific area. As soon as you make any adjustments, the red overlay is hidden and you see the effect ‘live’ on the image (we’ve hidden the Presets panel to allow a bit more room to see this properly). We’ve made the sky a much more vivid blue by reducing the Exposure and Brightness, increasing the Saturation and cooling down the White Balance Temperature slider.
Finishing off
Once you’re happy with your tone mapped image, click the Apply button in the top left corner of the Tone Mapping Persona window. This generates a finished image which is then displayed in the regular Photo Persona. You can save this in the Affinity Photo image format and export it as a JPEG or TIFF image.


I had recently tried to switch over to Affinity, It’s a lovely program for the most part, but a very large issue with affinity is the lack of xmp (or similar) files. You can do all the “non-destructive” editing you like in the develop mode, but you have no option to save those changes and come back to it, with a full history of all your steps. In fact in the develop mode you have two options, you either exit the program and save nothing, or you “apply” those changes to the image and move into one of the other modes, but at this point you are no longer working in a raw image editor, you are working on an affinity own file, you’ve just lost any ability to editing those RAW changes you did, you can only apply new changes on top of what you committed.
Hence, On1 just took it’s place.
Thanks for taking the time to post this, we will pass it on to Serif for comment.
Serif has come back to us with the following response to your comment:
“This is certainly true. Because Affinity Photo is strictly an image editor, not a digital asset management app, it doesn’t present non-destructive raw editing. Instead, raw development is a means to get a raw file into Photo and edit it further. The kind of non-destructive raw editing Rob is referring to will be achievable through the eventual DAM app that we develop.”