The DJI Ronin-S has arrived! It’s been hard to miss, but if it has slipped your attention it’s a one-handed stabilizer grip that’s one of the most hotly anticipated video accessories this year.
Why? Well, it will boost the visual quality of your video by eliminating the handheld wobble. This enables you to pan, move and create stunning professional-quality footage on a budget. And what’s really incredible is the Ronin-S is selling for a meagre £669.
After a brief glimpse and tryout on the DJI stand at this year’s The Photography Show, this was my first ‘quality time’ with the Ronin-S away from the crowds.
As the courier left, I was keen to open the box and get going. Would the final production model be as good as the model I’d tried at the show, and would there be any significant changes?
Sliding the small briefcase-sized box from the cardboard outer, the anticipation grew.
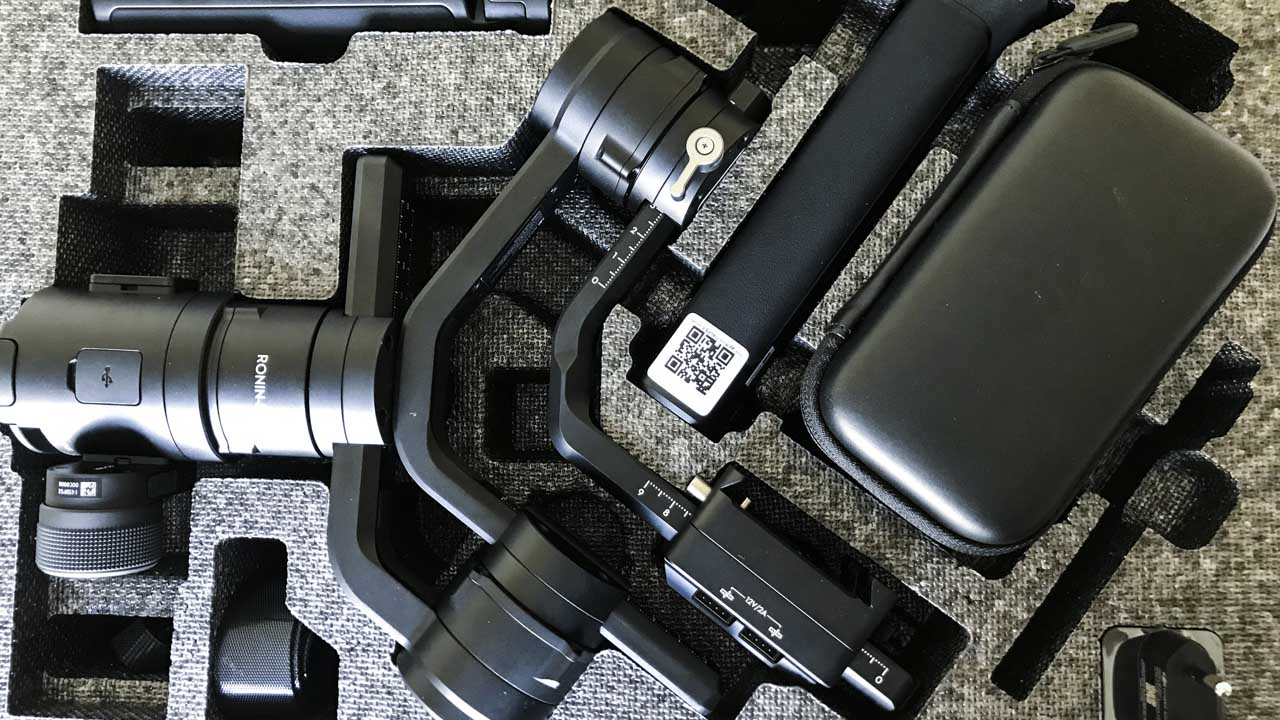
DJI’s use of Styrofoam boxes is a great idea and enables you to transport your gimbal safely until you purchase a more permanent solution.
Thankfully I didn’t dwell on the box quality too long and on opening the lid the content is revealed. Inside are all the component parts that make up the gimbal laid out in purpose-moulded sections. There’s also a manual and quick start guide in the box.
So far everything looks exactly as hoped.
Setting-up the Ronin-S
As ever with new kit there’s always a sense of urgency to set up and get out testing as quickly as possible. However, with a gimbal there’s usually some delicate setup process to follow before powering up. Failure to do so can result in damage to the sophisticated motors and electronic systems, so it’s best to at least have a fleeting look at the instructions.
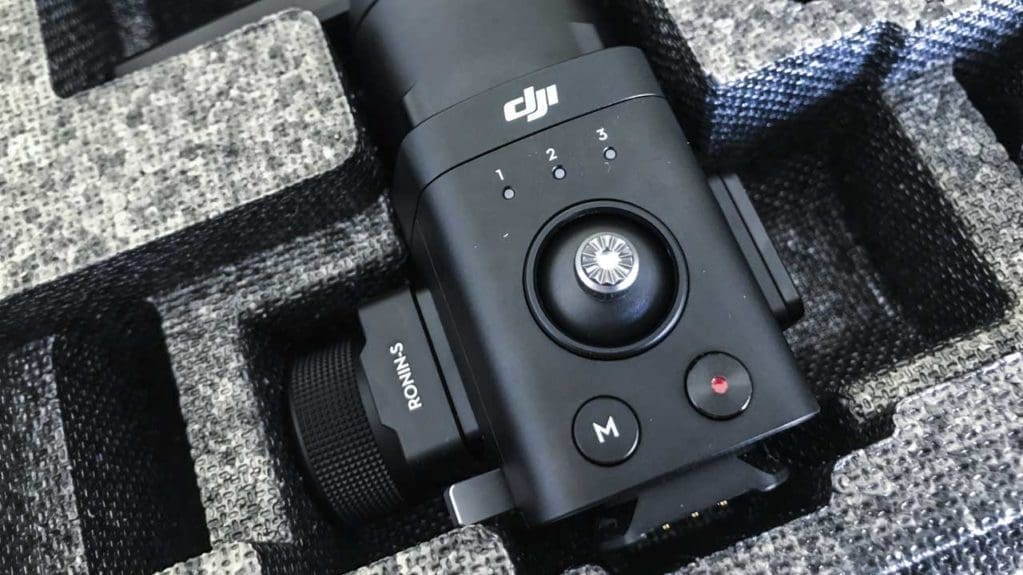
Reading instructions can often put an end to your fun well before it’s started. I found a note saying that before use, the Ronin-S will need a two and half hour charge. So no out-of-the-box instant fun!
In order to charge the battery the grip and gimbal must be slotted together and locked. Then a USB cable is attached to the Gimbal and in turn into the power.
A long two and a bit hours later…
Being forced to wait while the Ronin-S charges can only be a good thing. In the excitement about the product, you want to have time to immerse yourself in everything Ronin-S. So first stop, the manual, then the quick start guide.
Checking through the set-up process a couple of times, it all looks pretty simple. The small tripod starts to make sense, and I realise that in order to test the focus wheel I’m going to need a Panasonic GH5 or Canon DSLR, as my shiny new Sony Alpha 7 Mark III hasn’t yet reached the list of full compatibility.
With charging and, surprisingly, a few household chores completed, it’s time for the set-up. I’m actually dubious that it is as straightforward as the quick start guide makes out.
Essentially: screw in the tripod, slot together the gimbal and grip, put the base plate on and slide camera in, then stand on a flat surface.
The next step is balancing the camera. Again this looks straightforward and is well documented.
Flip the camera vertically, adjust the arm to find balance and lock. Then go back to the base plate and adjust the position to get a good balance. Next, it’s the roll balance adjustment at the back of the gimbal. You just need to slide left or right to find the balance. Finally, tilt the grip at 45º and adjust the arm attached to the pan rotation and lock.
If it sounds straightforward then that because it is. Once the physical balance is out of the way, it’s time to connect to the app and finish the calibration process.
The app for Android and iOS connects to the Ronin-S through BlueTooth. With the Ronin app downloaded it’s then just a simple case of powering on the Ronin-S; one tap of the battery grip power button followed by the tap of the gimbal power button.
A beep highlights all’s good and then it’s back to the app to connect. The app is typically DJI. Well laid out and it runs step-by-step through the connection process. This takes less than a minute with the Ronin-S quickly being recognised and connected.
You’ll need to activate an account to use the app. If you don’t already have a DJI account, you’ll be prompted to sign-up at this point, so an internet connection is essential.
Once in, just click on Motors > Auto-Tune then wait a little while before you’re ready to start.
From the outset, the Ronin-S feels like a high-quality piece of kit. Its construction is solid and the set-up and initial calibration really couldn’t be easier.
