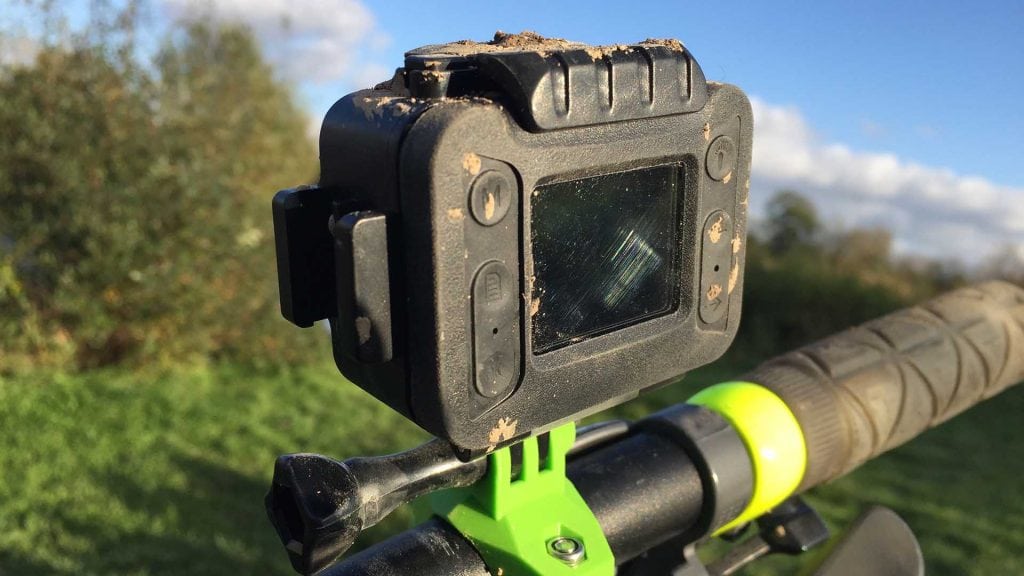
The Wasp 4K is one of those cameras that you instantly take a liking too, there’s something of the outsider about it with its bulky almost armoured design. This design was also something that I thought would divide opinion, as there is nothing streamline or delicate about it, and although it follows the usual GoPro style and shape it is very different and lacks the finesse of other cameras.
However everyone who has seen and used the Wasp 4K has liked the aesthetics, citing that the robust design looks ready for business. It also seemed those into off road motorsports felt that that the look better suited and matched what they were doing, despite assurances they really weren’t swayed by looks alone.
The first proper run went well, and any worries about the slight additional bulk didn’t seem to make any difference to the ability to mount the camera. The adaption of the GoPro style mount on the base meant that it fitted almost all of the mounts I tried, with the only exception being some of the metal machined mounts from K-Edge.
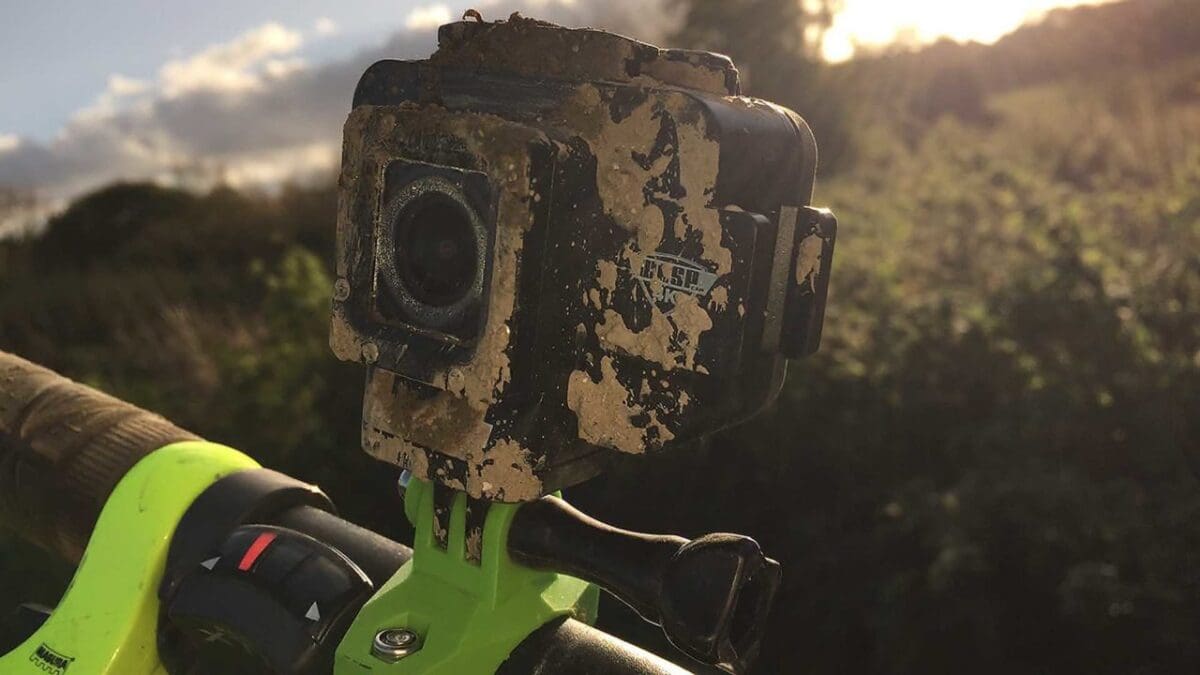
One aspect of the design that did become an issue throughout the test was the lens, and although this stood up to the battering that was thrown at it the screw on style is an issue when it comes to mud. The edges of the lens surround are slightly beveled so it is possible to wipe away mud, but not to the same degree as those cameras designed with a flat lens.
Like the lens the lever lock is also of the older style adapted by action cameras, with a safety lock ensuring that the rear door doesn’t flip open, this certainly does the job but was difficult to open with cold hands.
One issue that the WASP 4K addresses when compared with other action cameras is knowing where the power and shutter buttons are when the camera is mounted upside down.
As with other cameras the Wasp 4K has the usual icons for power and shutter on the top two buttons, which is great if you’re looking directly down on the camera. A solid red LED between these buttons shows that the camera is powered up. Flip the camera over and another small red LED is visible on the base of the camera and is placed on the same side as the power button. This makes knowing which button is which when the camera upside down far easier and is a small but very welcome addition.
Hit record and both LED’s start to flash. In the majority of conditions these LEDs were visible so made remembering which side was which when it came to starting and stopping recording very easy.
In bright sunlit conditions the LEDs did become a little bit more difficult to see, but shading the sun with your hand would quickly highlight the LEDs status.
The other option is to look at the small LCD screen. Despite it’s small it size showed a good representation of what’s being shot as well as enabling you to quickly flick through the options and settings.
Although this works well when viewed directly, it doesn’t have the greatest viewing angle, so looking at it from the side it can be tricky to pick out the settings and status.
 Around this screen are six rubberised buttons that enable you to switch through the modes, access settings, confirm, directly activate Wi-Fi and navigate up and down. These button are near flush to the body of the camera and are easy to operate and offer a satisfying click and beep.
The menu system is clear and well thought through so finding and activating settings really couldn’t be easier. If you’re out on the trial however and the camera isn’t easy to get to then you can always rely on the app.
The Wasp app is fluid and easy to install and setup, once Wifi on the camera is activated you can then switch to your mobile device, select the WASPcam from the list, enter the password, which is displayed on the back of the camera, then open the app and you’re ready to go.
During the test I found that the connection between the WASP and mobile device was incredibly robust, there was no dropping out, reconnecting or any of the other issues that can often affect these cameras.
The app itself mixes the Wasps strong branding with a slightly dated looking interface, but this all works well enough.
The interface displays a live view preview from the camera. When the mobile is in portrait orientation the liveview letter boxes with the date / time and camera resolution etc at the top.
Below the live view is the shutter button surrounded by a four other options. Video icon switches you to video, Folder enables you to flick through the video and stills that you’ve shot, the cog wheel takes you through to all the camera settings and finally the camera switches you to stills.
Flip to landscape and you have much the options but the live view increases to full screen.
Battery life is always a big issue with action camera, especially when you consider their small size. In each ride and test that we used the WASP 4K is was often the only camera to last the distance with a good two hours of charge.
In use the WASP 4K proved easy to use and able to withstand mud, water and a good few knocks. The design is robust and the navigation layout and design makes it easy to switch and change settings and options. The small screen is great as a visual guide but is limited due to it’s size and viewing angle especially compared with the latest competition.
The biggest issue when it came to usability was the screw on lens and that needed a little more attention than the usual quick wipe clean of the flat lens designs.
Check out my initial impressions in the first part of the WASP 4K review


