The DJI Ronin-S is an incredible piece of kit, but the hardware is just the start of the story.
To access this gimbal’s full feature set you have to delve into the app as it’s an integral part of the outfit. Whilst you can use the gimbal without, the app is required for many of the more advanced features and creative modes.
The app has several parts to play when it comes to using the Ronin-S, from setup and configuration through to use. Here I’ll just be looking at the creative options. They’re by far the most fun area of the app and offer features you’ll continually return to.
Once you’ve downloaded the app and the Ronin-S is setup you can then access the Create option from the apps home screen.
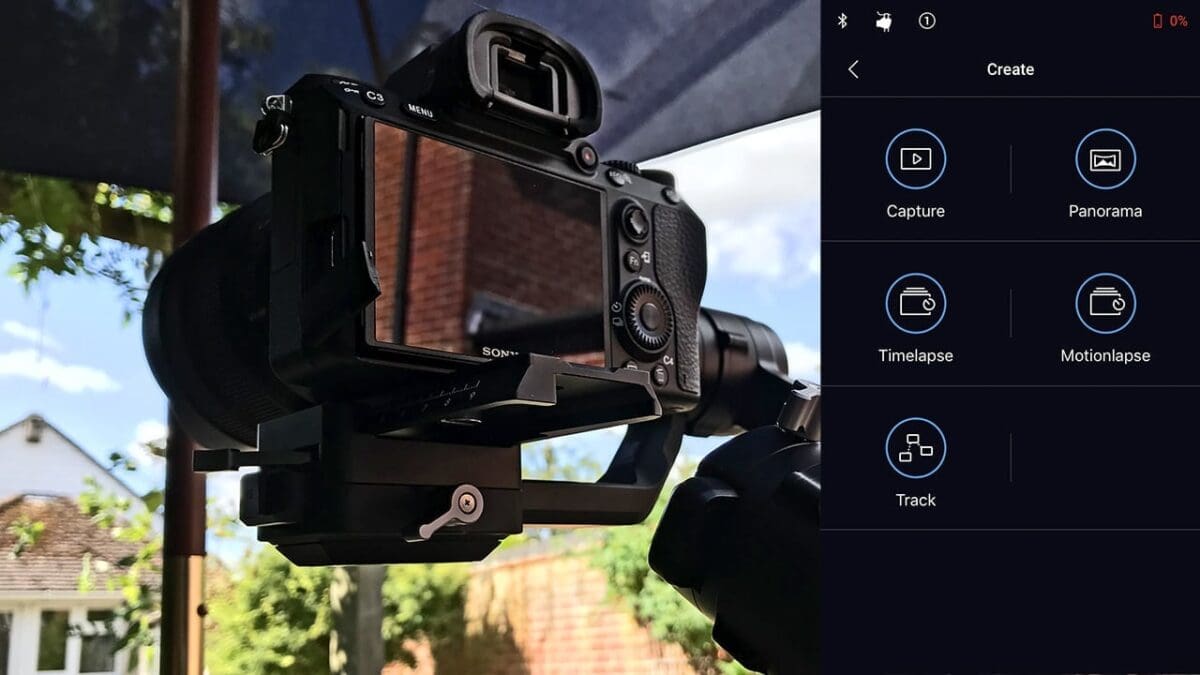
On the Ronin app home screen you have five options, as you get familiar with these you’ll see there’s plenty of scope for expansion in the future DJI develop the Ronin-S app.
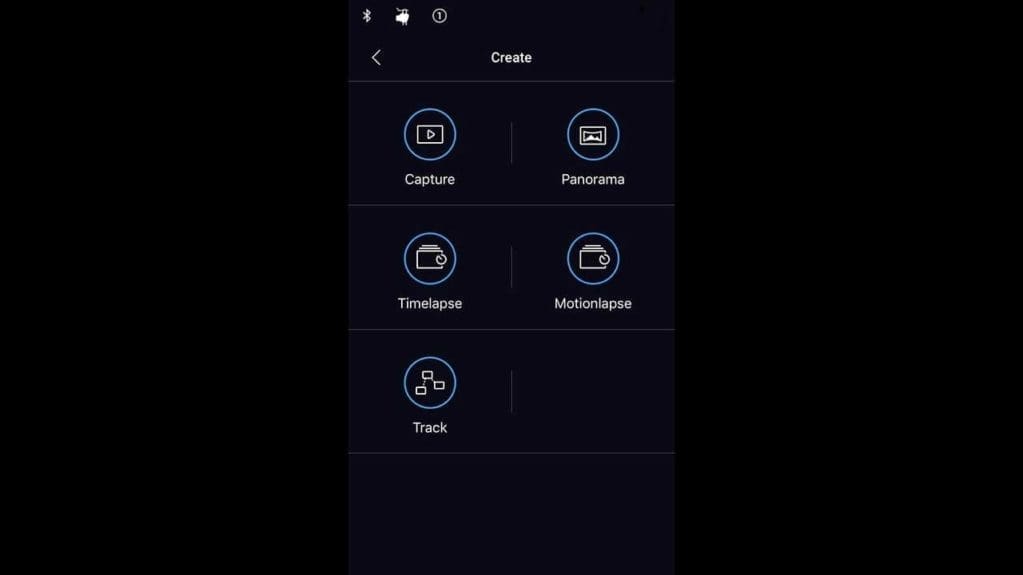
At present these sections are; Capture, Panorama, Timelapse, Motionlapse and Track, there’s a full description of these in the manual. Here I don’t intend to parrot what’s already been written but instead, give you a brief overview of my experience and use of each mode.
Before you start to use these remote modes you need to connect the Ronin-S to your camera. If you have the Panasonic GH5/S then just fit the cable, for all other cameras at present you’ll need to setup the IR cable. To see how that’s done check out our How to control the Sony A7 III with the DJI Ronin-S IR Cable features
If you want more details on the DJI Ronin-S or any other DJI products then check out Modus Brands – UK Distributors of Ronin-S
What is the Ronin-S Create Capture mode?
Mode available: Stills and video
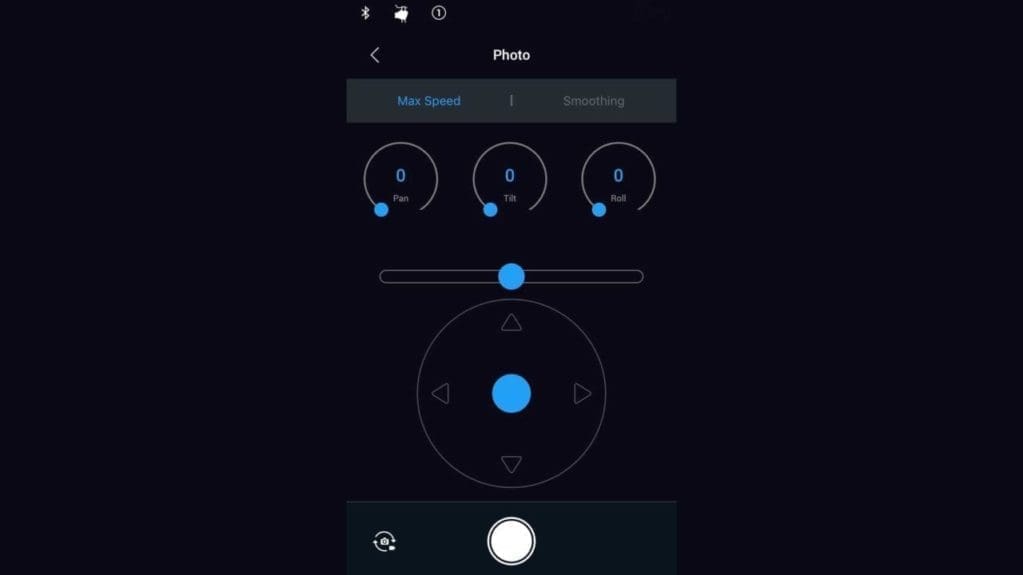
The first of the modes and essentially this is a manual mode that enables you to control the Ronin-S through the App. There are three main sections, the first enables you to adjust the speed of rotation through the three axes; Tilt, Roll and Pan. Beneath this are the direct controls over that motion. The long bar enables you to roll left and right and the joystick graphic enables you to pan and tilt the camera. At the bottom is the shutter button which will either start or stop recording or take a still.
The mode, still or video, can be switched by tapping the small icon at the bottom left of the screen.
When to use the Ronin-S Create Capture Mode
When you need full manual control over the movement of the camera, for video you could use this for a sweeping shot, or for stills it would be ideal for remote shooting when you need to shift the composition.
What is the Ronin-S Create Panorama mode?
Mode available: Stills and video
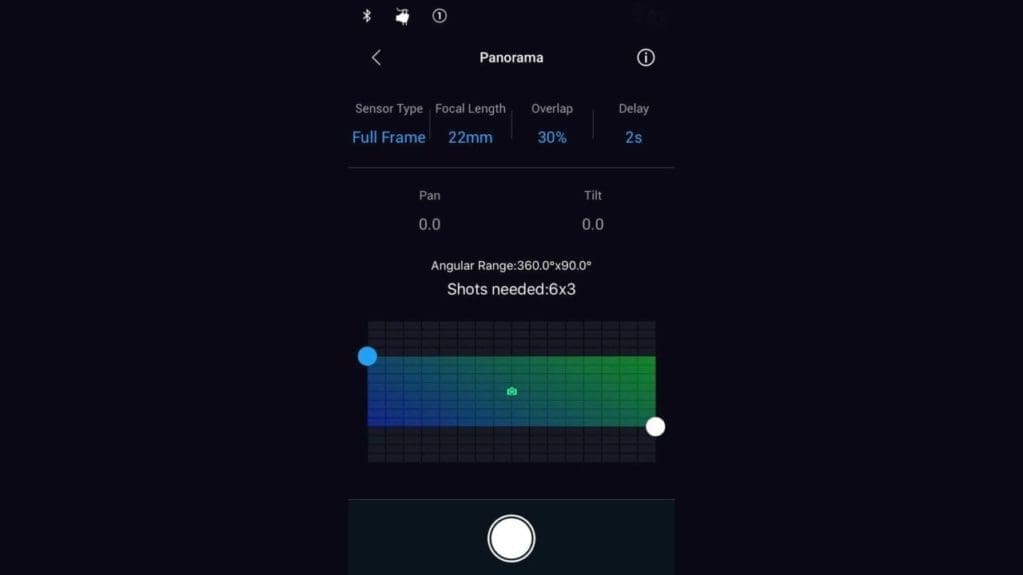
Ever wanted to take ultra-high-resolution panoramic images? Then this is the mode for you. Just attach the camera, enter in sensor type, focal length, overlap, say 30%, as default, and the delay between shots. Then by holding your finger over one of the two corner anchors on the display you can move it to set pan, up to 360º and the tilt up to 90º. The Ronin app will then calculate the number of shots needed to rotate and tilt in order to capture the panoramic.
When to use the Ronin-S Create Panorama Mode
Any time you want to capture large-scale panoramic images.
What is the Ronin-S Create Timelapse mode?
Mode available: Stills
Timelapse sequences are a stunning way to capture the passing of time and although many cameras have the feature built in there is an equal amount that don’t. For example, since Sony has ended PlayMemories compatibility with their latest cameras additional hardware is required in order to shoot this type of sequence.
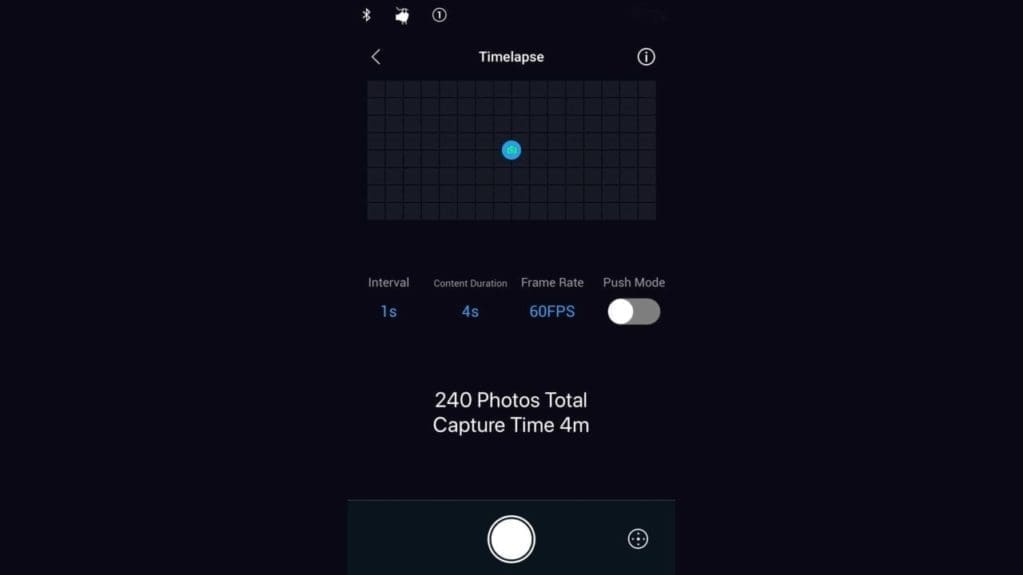
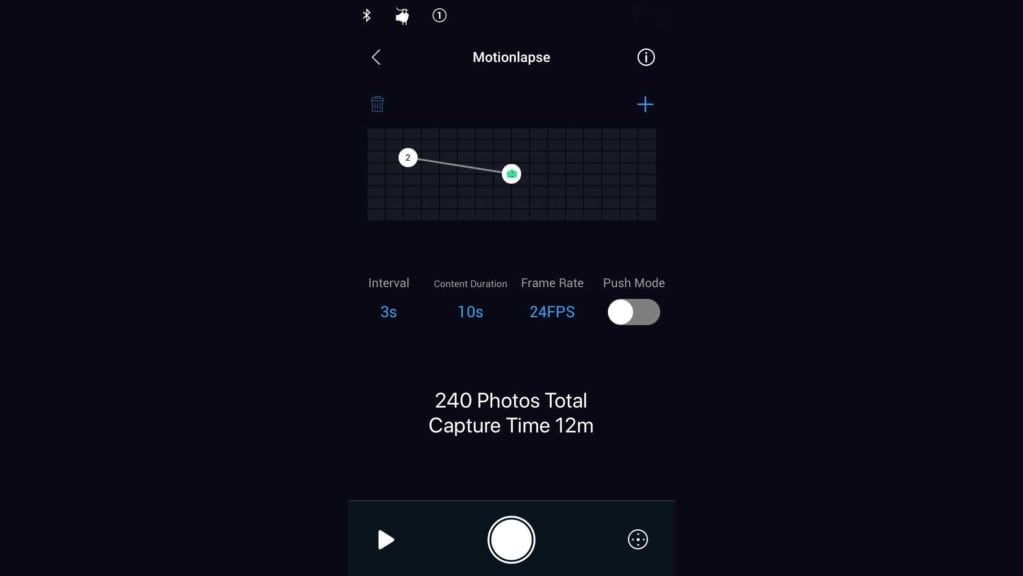
The Ronin-S offers a standard intervalometer that enables you to set the interval, content duration, and framerate. Once you dial in all your values the App with then tell you how many shots will be taken and more importantly the length of time it will take to complete.
What makes this different to any other intervalometer, wired or not, is that you have motion control. In this mode it isn’t about moving the camera during the timelapse, instead it gives you accurate control when composing the shot. This is in the same way that you would get with a geared head just without touching the head.
When to use the Ronin-S Create Timelapse Mode
Whenever you want to shoot a time-lapse sequence.
What is the Ronin-S Create Motionlapse mode?
Mode available: Stills
One of the most exciting modes available for stills photographers on the Ronin-S. Motionlapse enables the same basic feature set as the Timelapse mode with the addition of movement.
Again you can set the Interval, content duration and framerate but then you can add keyframes for the Ronin-S to Pan, Tilt and if you like to roll too. Then when you hit the shutter button the sequences that you have selected will be played through. But this mode isn’t just a change from point A to point B, you can add further points for the Ronin-S to move through. The result is that rather than a straight and static panoramic you get a motion time-lapse where the composition of the shot changes.
When to use the Ronin-S Create Motionlapse Mode
To create time-lapse movies with more. Not only will you capture the usual style of time-lapse but by adding a slight rotation or tilt you’ll add interest and instant impact.
What is the Ronin-S Create Track mode?
Mode available: Stills and video
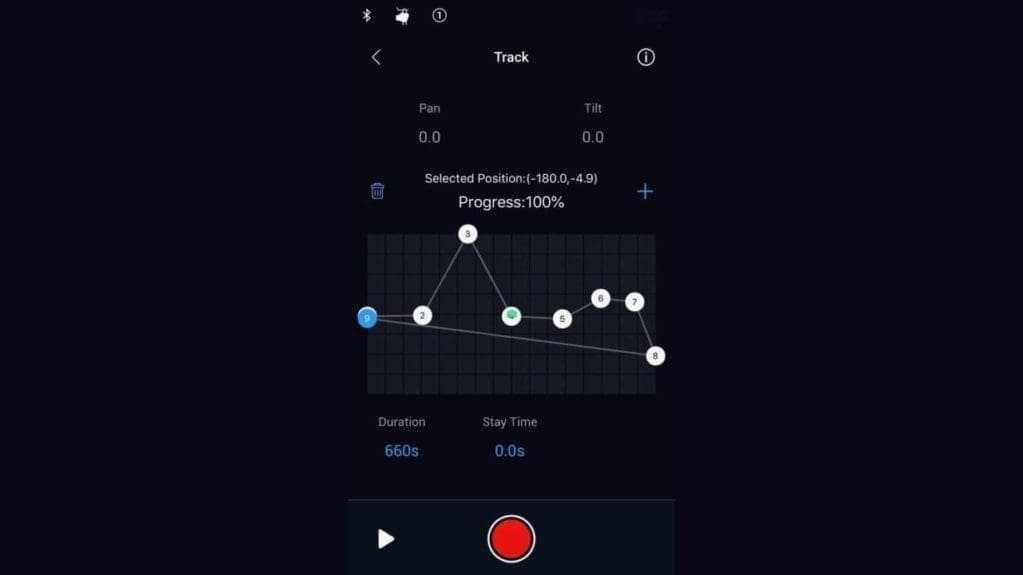
Of all the modes this is probably the most sophisticated and lengthy to set up. It’s designed so that you can pre-program the Ronin-S to pan, roll and tilt through a pre-defined motion. It works by enabling you to move the camera to get the composition you want, then tap the second keyframe in the app to set the second point. Then tap the + symbol to add another point, make sure it’s selected and move it to the position you want the camera to move to. Then once you’re finished adding points, just hit record to start the track.
When to use the Ronin-S Create Track Mode
Great for shots that you need to be filmed in a specific way and speed. For example following someone as they exit a door and walk down a corridor. Think of a thriller where you have a group by a pool, then the camera pans to a character who picks up a glass, then the camera swings to the next character giving a signal before the camera swings again to a gunman in a window. This shot would take a huge amount of planning, but here the motion at least can all be pre-programmed.
does this app offer the same functionalities on an ipad??