The aspect ratio is arguably the first thing we notice about an image yet, for many of us, this is a camera setting we’re least likely to use.
Many photographers decide upon an aspect ratio at the post-production stage, cropping an image to fit their desired shape. Sometimes this is fine, but as a general rule you’ll get better results if you think about your desired aspect ratio at the shooting stage and set this in-camera. Here’s why:
- Your composition will undoubtedly be better if you are thinking about aspect ratio at the shooting stage. Setting a square 1:1 frame, for instance, you can compose your image with this in mind and even take a few test shots.
- When you crop on the computer, you are losing resolution. Cropping makes your image smaller, which you are then stretching across the same digital canvas, thus losing detail.
Before we get into the different types of aspect ratios available within your Panasonic camera, let’s take a look at what aspect ratio means.

What is aspect ratio?
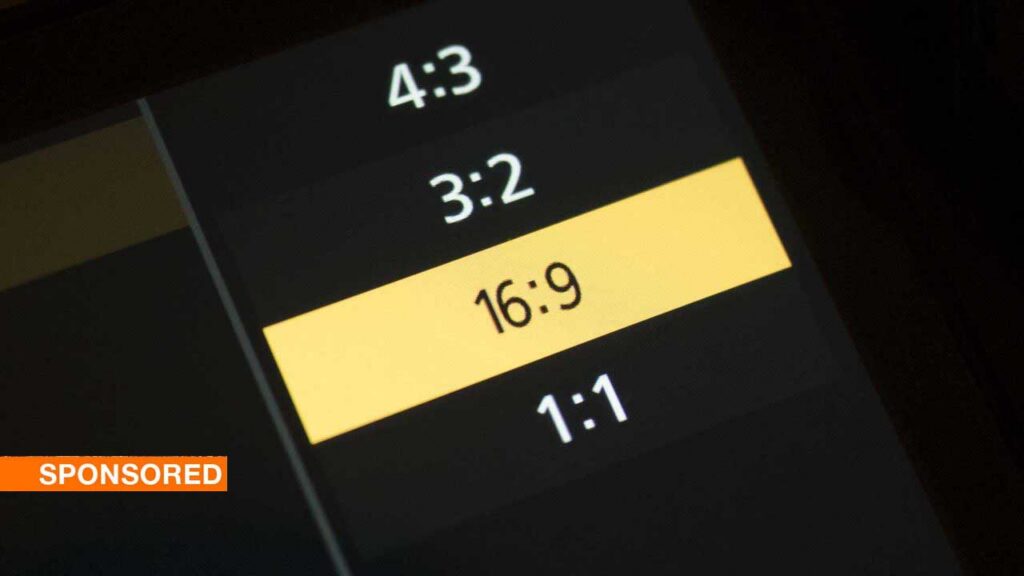
An aspect ratio in photography is literally the shape of your image frame. Most digital cameras that allow you to select an aspect ratio will have options such as 3:2, 4:3 (these two are the most common; most images are shot in these ratios) and 16:9. Some Panasonic cameras also offer a square format 1:1 aspect ratio and 5:4.
Panasonic’s full-frame S1 series cameras can also shoot in 65:24 and 2:1 formats. 65:24 is a long, thin panoramic style that gets quite addictive!
Your Panasonic camera’s aspect ratio setting is essentially a method for you to instruct the camera to fit your image into one of these shapes when you capture it.
Aside from the Panasonic Lumix LX100 II, which has a Multi-Aspect ratio sensor, switching aspect ratio in-camera effectively crops your image before you shoot, so there is a small loss of data when shooting JPEG files.
Raw files remain uncropped and retain all of the detail from the whole of the sensor, giving you much more flexibility to crop on your computer. This is why it’s often beneficial to shoot RAW + JPEG so that you have a back-up image if you get the aspect ratio wrong.
For example, if you were shooting landscapes in 16:9 and a deer strolled into the view, you might find that 16:9 wouldn’t be the ideal format. By capturing a raw file simultaneously you have that uncropped version as a back that allows you to fine-tune the aspect ratio yourself.
Who uses aspect ratios?
As we said, everyone uses an aspect ratio. Most people shoot 3:2 or 4:3 without realising it because this is their Panasonic camera’s default ratio. But there are times when you might want to mix it up.
If you are shooting landscapes or architecture, for instance, you might want to use a 16:9 aspect ratio. This is a long, thin, almost-panoramic format that can provide a striking effect. It is also commonly used in cinematography.
Portrait photographers might want to consider a 5:4 aspect ratio is common for portraiture. Square 1:1 aspect ratios are commonly used by macro and still life photographers. A 1:1 ratio works well when using a symmetrical composition with your subject framed in the centre.
If a 1:1 aspect ratio looks familiar, that’s because it’s the format Instagram has made famous. So if you are a keen Instagrammer, shooting in one of Panasonic’s square 1:1 aspect ratio means you can capture high-quality images in the best format for the image-sharing platform.
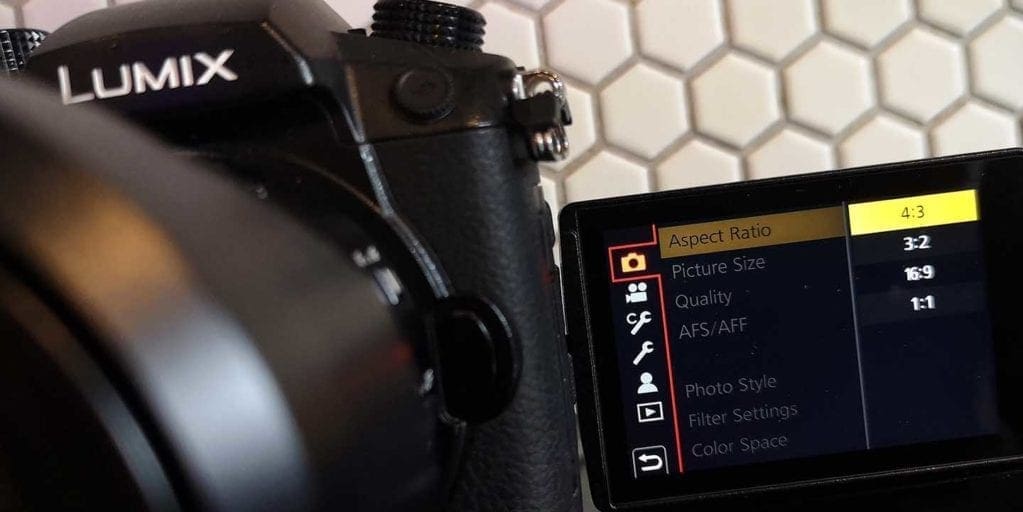
How to set the aspect ratio on a Panasonic camera
Setting the aspect ratio on your Panasonic camera takes a matter of seconds. There is no dedicated control for aspect ratio. If your camera allows you to customise certain buttons, then you can assign one of these controls to your aspect ratio function. Otherwise, you’ll need to go into the camera’s main shooting menu.
Aspect ratio will be among the first options in the shooting menu. Click to access this sub-menu and you will find the range of options.
Hover over the ratio you want and select OK.
Which option you choose really depends on your personal tastes and the subject you’re capturing. We listed some examples earlier. It’s a good idea to try shooting a subject or scene with different aspect ratios to give yourself options.
You might shoot an urban scene in portrait format, for instance, and find that a 16:9 aspect ratio really works when upright to emphasise the height of the skyscrapers.
The important point is to be creative and try new things. You never know what may work!