One of the most common questions that I get asked about the Atomos Ninja V is about the storage media; what should you use, and once you’ve decided, how do you get it ready for use.
The easiest answer is to buy one of the Anglebird SSDs; these are off the shelf solutions and only require a quick format to make them ready for use.
They’re also extremely robust due to their metal build, but to be honest, they’re extremely expensive, and if you’re using your Atomos Ninja V and you’re on a budget, there’s a far cheaper solution.
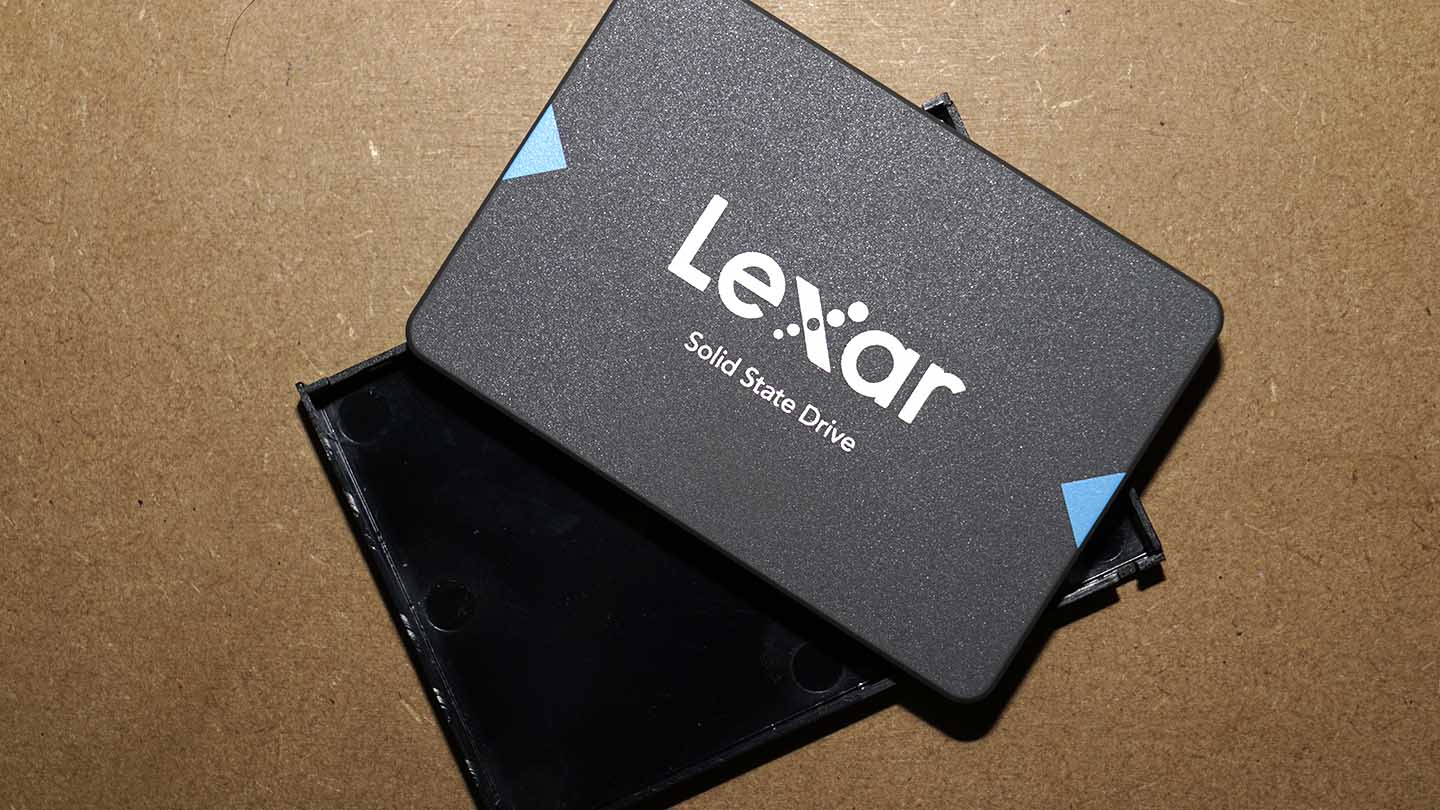
In the box with the Atomos Ninja V is a 2.5-inch SSD caddy. This is designed to hold a standard 2.5-inch SSD like the Lexar NQ100, and it takes just a few moments to fit.
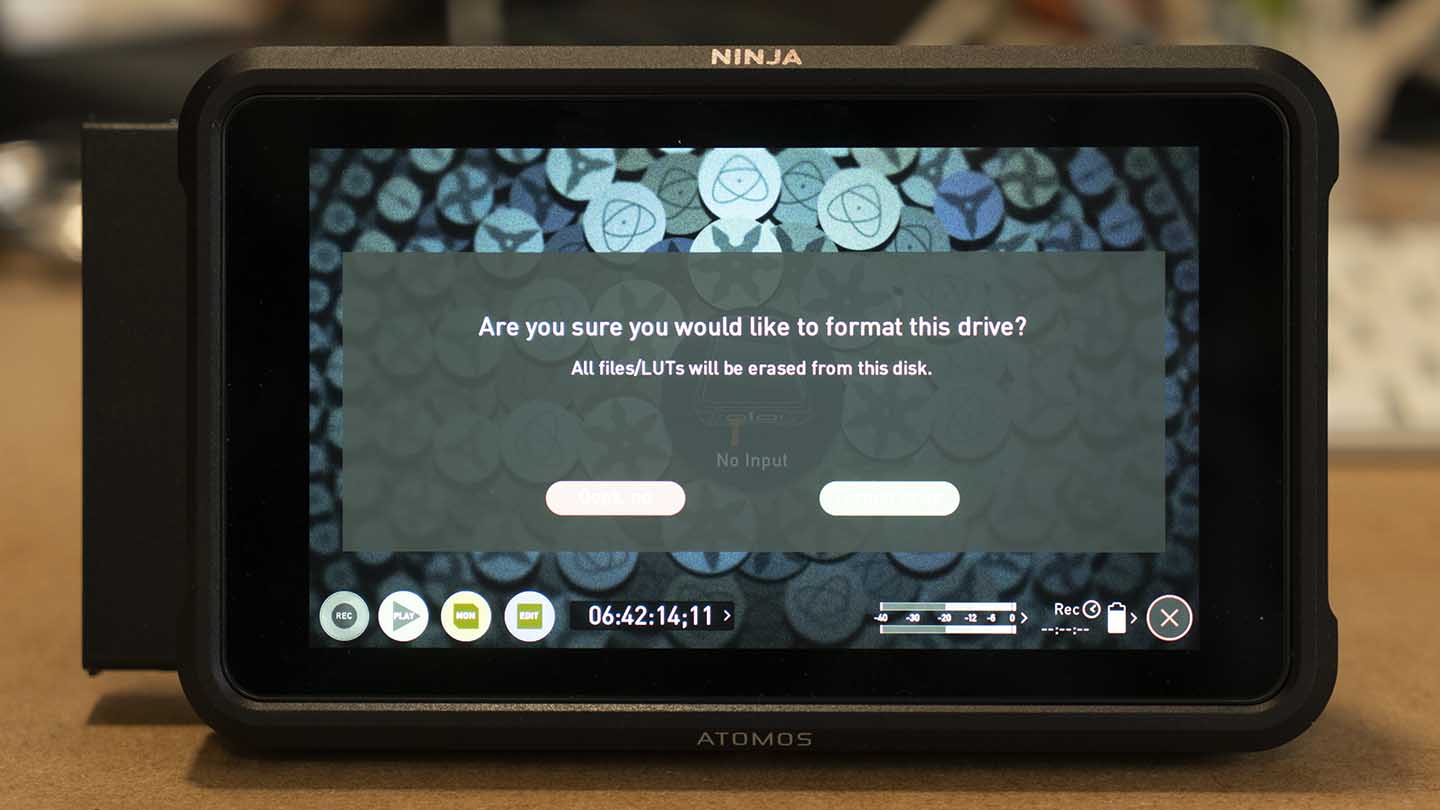
Once installed, you need to pop along to the Media options within the Atomos Ninja V menu and format it to the correct ExFat format.
It’s worth doing this in the Atomos Ninja V rather than on your desktop, as it seems to get a better result. The process is easy, but there are a couple of pointers that are well worth considering.
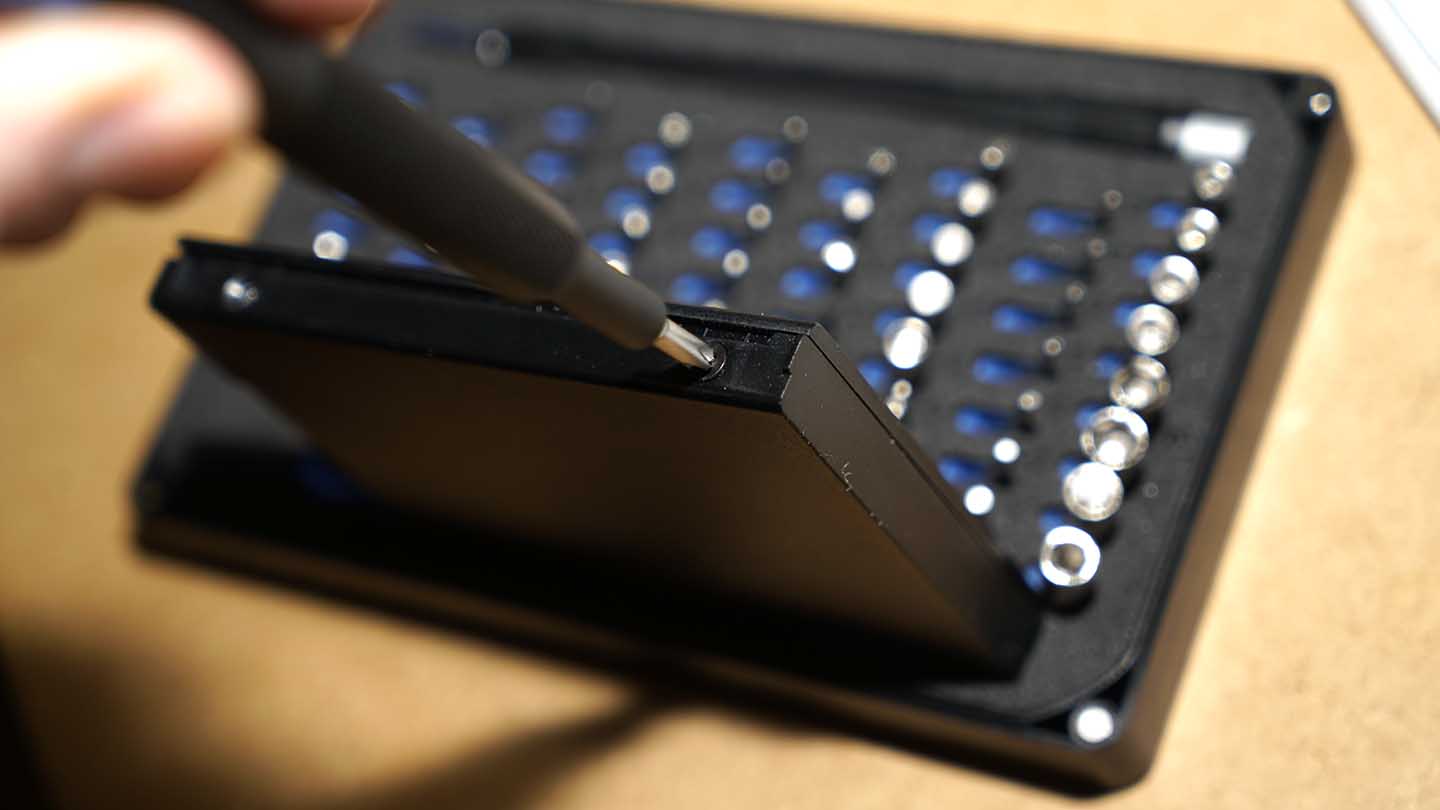
Firstly a small pot of Loctite 243, a small dab on the screw threads before inserting them will make all the difference to the drive’s use, mainly stopping the screws from coming loose. Don’t go for the high strength 638, as you’ll never be able to undo them.
The second tip is to get a decent set of mini screwdrivers. You can faff around with a cheap set but for this and many other projects, go for the iFix kit. The kit is great value and will make a real difference to your life.
Time needed: 10 minutes.
How to install and SSD into the Atomos Master Caddy II
- Install label up
Install the 2.5-inch SSD into the ATOMOS caddy, ensuring that the SATA connector is in the correct position. This should see the label of the drive facing up.
- Tighten the screws
Place the top of the caddy over the SSD and align the screw holes. Using a small Philips screwdriver, screw in the four small screws until hand tight.
- Format the SSD
Now insert the drive into the Atomos Ninja. Boot the Ninja and then tap the settings options. Tap Media and then Format and OK, and you’re now ready to use the drive as Atomos storage media.
The whole process should take you no more than ten minutes to complete if that. Any questions or comments, please leave them in the box below.