Knowing how to use a tripod is fundamental to photography. A tripod gives your camera stability to shoot over long exposures and is crucial to getting sharp images.
But using a tripod involves more than just mounting your camera and unlocking the legs. There’s some nuance to using a tripod, from setting it up on uneven ground to balancing the weight of your camera to keeping it clean and tidy.
We’ve used a lot of tripods over the years. Below you’ll find our best tutorials and advice on how to use a tripod, set it up for different types of shots, kept clean and more.
Selecting the right tripod for your camera
Before we get to those tutorials on how to use a tripod, the first thing you need to do is figure out which sort of tripod is best for your camera.
It’s rare that you’ll see a pro photographer without a tripod tucked under his or her arm, and for good reason: it’s arguably the most useful accessory you can buy for your camera after a lens.
A good tripod will live with you and bear the marks and scars of your adventures. These days most tripods are adaptable and designed for a multitude of photographic disciplines, from portraits to landscapes.
Features such as monopod legs, removable and reversible centre columns and ball heads increase the versatility and functionality of these time-tested supports, and there are few photographic genres that wouldn’t benefit from the help of a three-legged friend.
How to match the right tripod with your style of photography
Look at the high street, or more likely online, and you’ll see a wealth of tripod options. So how do you know which is best for you and how much you should spend?
Think about your style of photography. Do you need something big and solid or small and lightweight to get the type of shots you like to take? A good rule of thumb is to look for a tripod with a decent working height. You don’t want to be crouching down when the tripod is at its max height.
You’ll find that you don’t mind a little added weight if you’re going to be using filters for long exposures or spending a day in the studio, but if you’re out and about for a day’s hike you might want to use a tripod made of carbon fibre that won’t weigh on your shoulders. That said, you ultimately need to use a tripod that can support the weight of your camera.
Understanding tripod payload
Before you mount your camera to any tripod you need to know how much weight it can support. This is what is meant by ‘tripod payload’.
Lightweight tripods are great for their portability, but generally they don’t support a heavy payload. Tripods that do support large cameras and lenses, though, tend to be heavier and more cumbersome to travel with.
In this tutorial, we explain what tripod payload means and how to calculate what you need.
Setting up your tripod
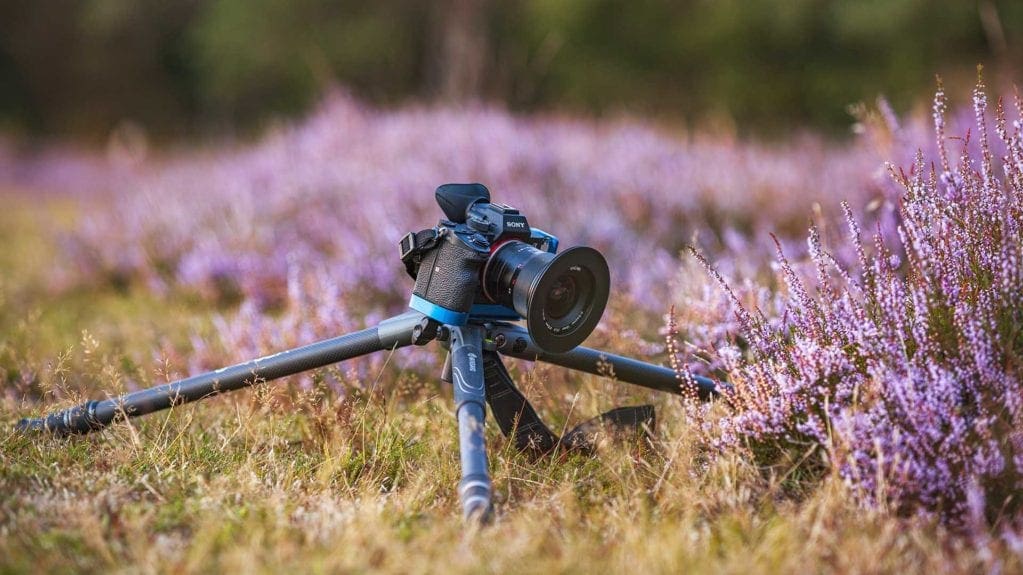
Once you add a tripod to your everyday kit, you’ll be surprised by just how much you use one. Not only that but you can start to experiment and experience other equipment and techniques that would otherwise be impossible such as using long exposures.
In this tutorial, we explain the basics of setting up a tripod and how to attach your camera. These techniques may be basic, but they’ll give you the foundations, and then you can apply them to any genre of photography.
How to use a tripod on uneven ground
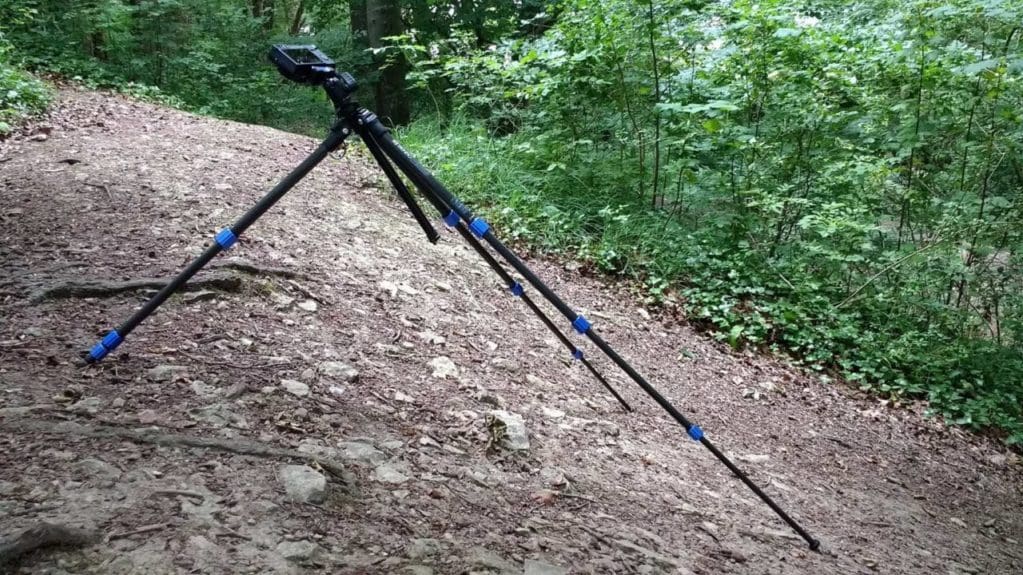
Setting up your tripod seems like it should be a simple job, but you’d be surprised how difficult in can sometimes be. There are a few basic rules for setting up your tripod, such as making sure the head is level and using a cable release, but these aren’t always enough to ensure stability.
In difficult terrain or challenging weather condition there are a few more advanced tripod techniques you can draw upon to give yourself that extra advantage.
In this tutorial, we show you how to set up your tripod and create a solid base wherever you may be. This is an essential tripod technique for shooting long exposures.
Stabilising your tripod
Shooting outdoors, even the sturdiest of tripods are susceptible to vibrations, especially in a strong wind. Add a long exposure to the equation, and it might feel like an impossible situation. But there’s always a solution!
In these conditions, you can better stabilise your tripod by adding some weight. One way to do this is to hang your camera bag from the central column. Many tripods have a hook at the base of the centre column while others may feature a D-ring where it’s possible to attach the ba. By hanging a bag from this hook or ring, the additional weight will give the tripod a lower centre of gravity, creating a much firmer base.
In this tutorial we show you other tips for keeping your tripod stable in most conditions.
Stabilising your tripod at maximum height
A tripod is designed to provide you with a solid shooting base for your camera. But, while most tripods are designed for stability, when you hit the rough ground or need to max out on height, that stability can suffer.
While you may think that a little wobble can be ignored, in reality, even the smallest movement will affect the quality and sharpness of your shots.
In this video tutorial we show you how to set up your tripod to its maximum height while also keeping it stable and secure.
Using tripod feet
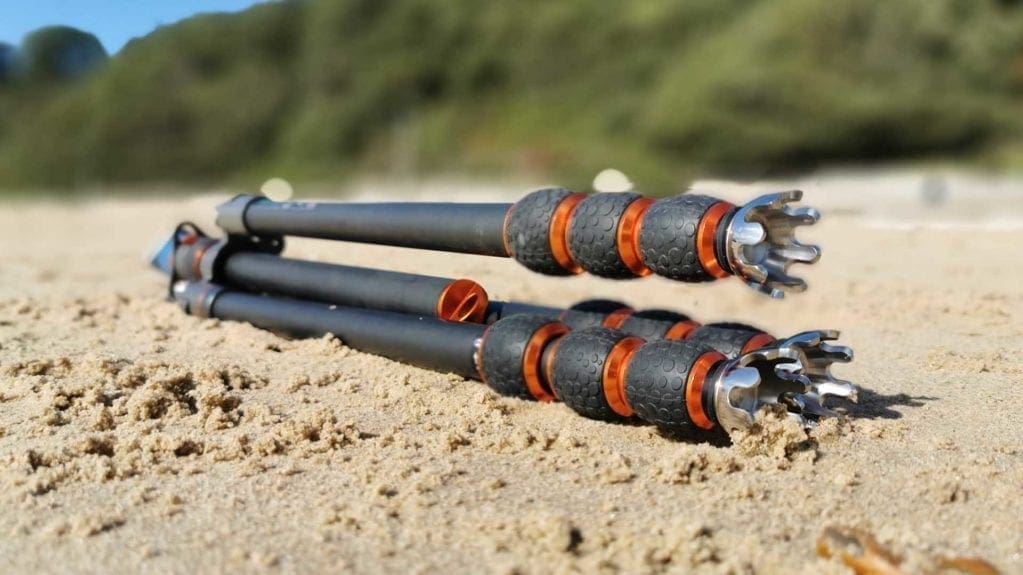
When you unwrap a new tripod it’s inevitably equipped with standard rubber feet. Rubber is an ideal multi-purpose solution and offers decent grip on all sorts of surfaces.
However, it isn’t always the best solution.On soft ground, such as sand, snow and even grass, you’ll find rubber feet can sink in and won’t create the stable base you’re after. Equally, wet rock and other hard surfaces can be a real issue with rubber feet sometimes not finding purchase.
Thankfully some manufacturers are well aware of the issue and give you the option to change the tripod’s feet to match the location.
In this tutorial we explain the different types of tripod feet and when you should use them.
Caring for your tripod
As a central part of your photography kit, your tripod should always be primed and ready for action. However, aside from extracting the camera’s memory card, charging the battery and giving the lens a quick wipe, we rarely check over the rest of our kit.
It’s good practice to check and maintain your kit before and after every shoot, and your tripod is no exception. Here’s just a few of the things you can check: do the legs unfold, do the leg locks work, are the feet all in place, is the quick release plate present>
These checks are all straightforward and will take you moments to do, but could save you a real headache on your next venture out.
In this tutorial we guide you step-by-step through how to care for your tripod.

Leave a Reply
You must be logged in to post a comment.