Lightning is one of the most dramatic natural phenomena you can photograph, but it also presents some difficult challenges. Not least of which is the physical danger that lightning poses. In this tutorial we’ll explain how to photograph lightning, but we want to make clear that you shouldn’t attempt to do so unless it is safe.
Don’t be, nor stand near, the tallest object in the landscape if you’re photographing a lightning storm. This is the number one rule.
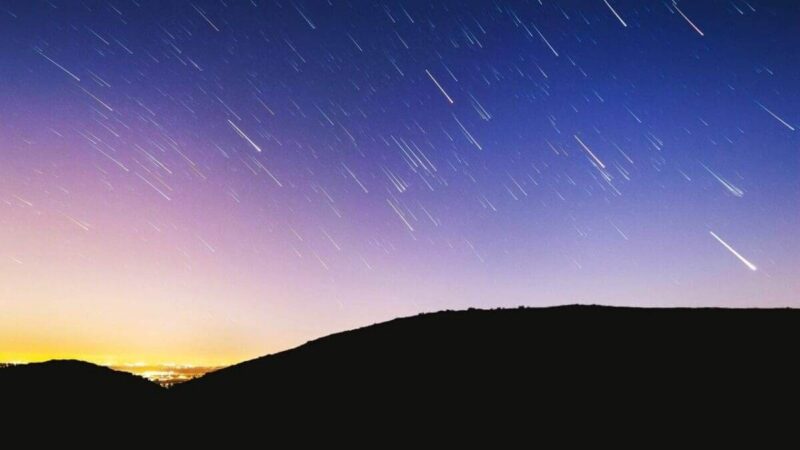
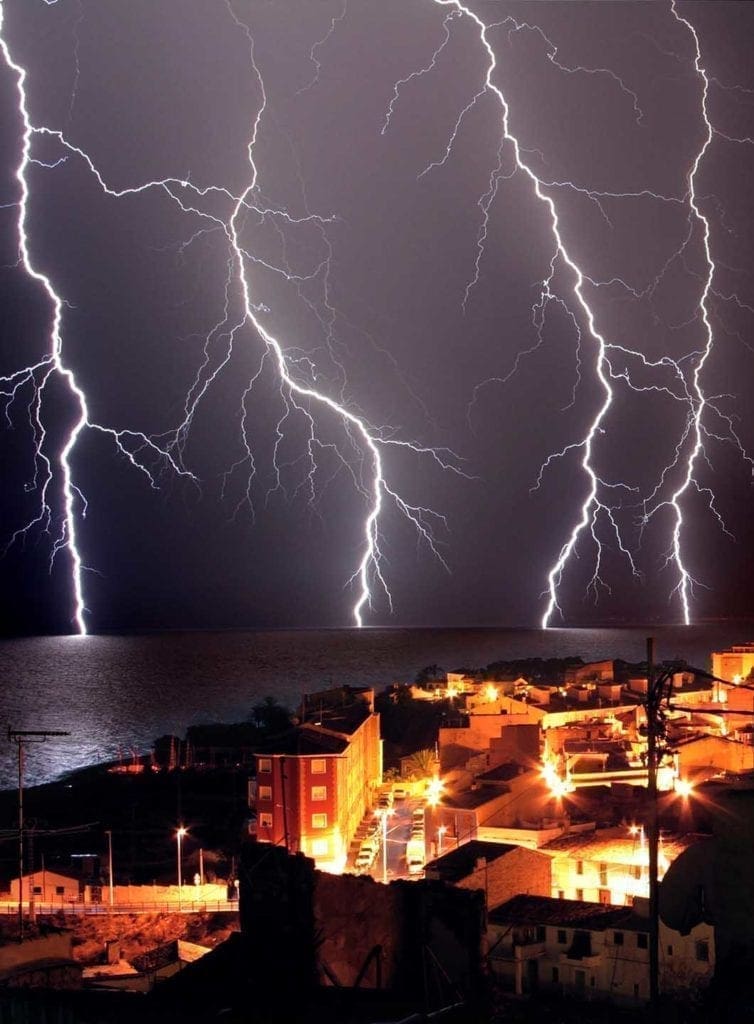
But if you can set up safely, lightning can produce some extraordinarily dramatic images.
The best – and safest – way to photograph lightning is to shoot from the edge of the storm. For starters you’ll be away from the epicentre of the lightning, but you’ll also be farthest away from the heaviest of the rainfall.
Below we’ll explain how to set up your camera to shoot lightning, but before we get into settings we want to emphasise composition. It’s easy to get focused solely on the lightning and forget about the surrounding environment. Lightning is a dramatic subject, but you still need to consider things like the Rule of Thirds and creating an interesting foreground.
Think about adding depth to your scene. And shoot raw. The surrounding landscape may be dark within your image, but you can pull back details in post-production.
A good rule of thumb is to watch the landscape for a few minutes. See where the lightning is striking and try to see if there is a pattern to its movement. Then compose a nice scene, pre-focus on a certain point and wait. Adjust as needed. The tips below should set you on the right path…
Tips for how to photograph lightning with any camera
01 Don’t be the tallest object in the landscape
This is one of those things that sounds obvious, but it’s astounding how quickly you can forget basic safety when the adrenaline of the opportunity for a great image sets in.
We would never advise you to go shoot in a storm, but if you are determined to photograph lightning make sure you set up in an area where there are taller objects around you.
The safest way to photograph lightning storms is to have a long lens and set your tripod up from a distance, with tall buildings in the immediate area around you.
Also, setting up low will – while safer – will also give you a more dynamic image. Mount your camera on a tripod and keep it as low to the ground as possible, and you’ll be able to photograph lighting bolts at their full height.
02 Focus manually
Even when they occur during the day, lighting storms come with low light levels, and their irregularity makes them hard to predict. Your camera’s AF system may struggle.
For best results, switch your camera to manual focus and pre-focus on an object in the distance. There is some trial and error involved, but this is really the best way.
Set an aperture of around f/8 that gives you some wider depth of field and wait for your moment.
03 Continuous shooting mode
For your best chance at success you’ll want to shoot in your camera’s continuous shooting mode. You’ll find this option in your drive modes, either in the camera’s menu or as a direct control on the camera body.
04 Have plenty of memory
Shooting raw files in quick succession will quickly fill up space on your memory card. Make sure you have at least 32GB of space when shooting lightning, and ideally have a back-up card to hand.
05 Setting exposure
Metering for lightning is a bit of trial and error at the start. When photographing storms you are usually going to be working in low light or at night.
If you’re shooting at night, try setting your camera for 20secs at f/8 and use this as a base to work from.
For distant lightning you might try an aperture of f/4, or f/11 if it’s relatively close.
Try to use ISO 100 if you can, but this means using a tripod.
Lastly, adjust your settings tounderexpose the scene just a little bit. You want the image to look gloomy, and the lightning will add extra illumination.
06 Use a wide-angle lens
Shooting at a wide focal length will not only allow you to include some environmental context within your frame (such as buildings or landmarks), but it also gives you your best chance of capturing a full bolt of lightning in your frame.
The faster your lens, the better for shooting in gloomy conditions.
Best camera settings for lightning
Below we’ve suggested some of the best camera settings for lightning; however, we should point out that these are simply a starting point. Dial these settings in and you’ll get a solid exposure, but undoubtedly you’ll want to let your creativity take over!
- Exposure mode: Shutter Priority
- Focus mode: Manual
- Shutter speed: 1/30sec or longer
- Aperture: f/5.6
- ISO: 100
- Lens: 18-24mm
- Drive mode: Continuous shooting
- White balance: Auto