Shooting silhouettes can make for a really striking image, but knowing what camera settings to use and when the effect works best is the key to successful photos. In this quick tutorial we explain how to photograph silhouettes that offer more than just a striking sky and are classic and timeless.
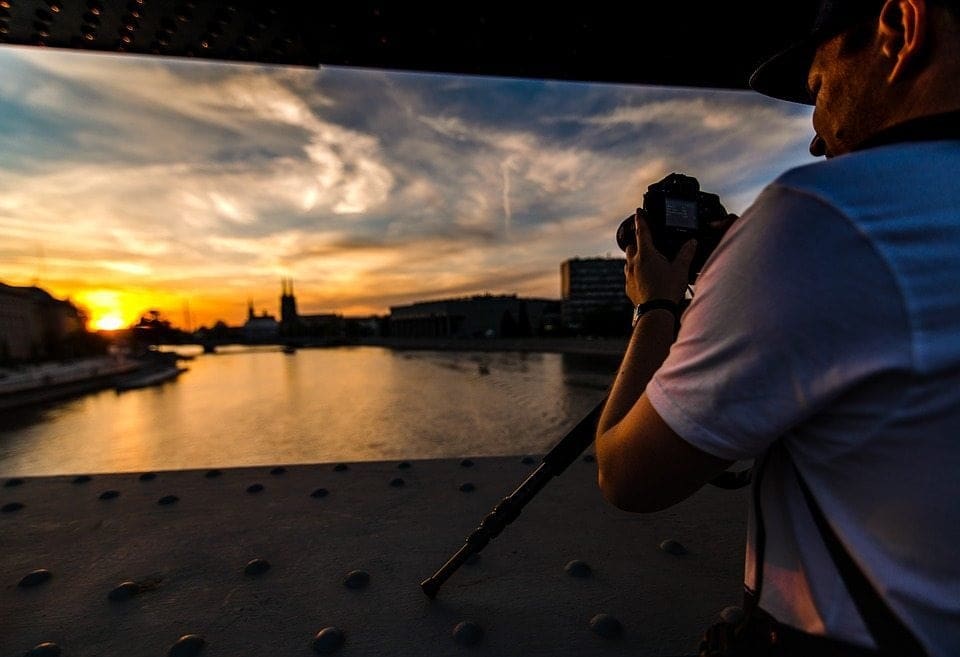
It’s a familiar scene for many photographers: you spot a striking sunset and quickly grab your camera and compose with a silhouette in the foreground to add some interest and scale.
And while this can produce a nice result, you’ve probably found that it blends in with all the other snapshots out there. In short, a little more thought is required to make a silhouette that is memorable.
What light conditions do you need to photograph a silhouette?
Creating a silhouette requires a high contrast scene, a dark foreground subject and a bright background.
So unless you’re in a studio, this means that silhouettes can really only be shot on bright sunny days, at sunrise or sunset or at night when there’s a large light source.
What subjects make good silhouettes?
The best silhouettes are those which have highly recognisable shapes. An elephant, for instance. Or a famous landmark. Because silhouettes are completely black and the detail is stripped away, the size, shape and position of your subject or foreground objects is incredibly important to the success of the image.
It can be as simple as shooting a landscape scene through trees, or an object against a spectacular sunset.
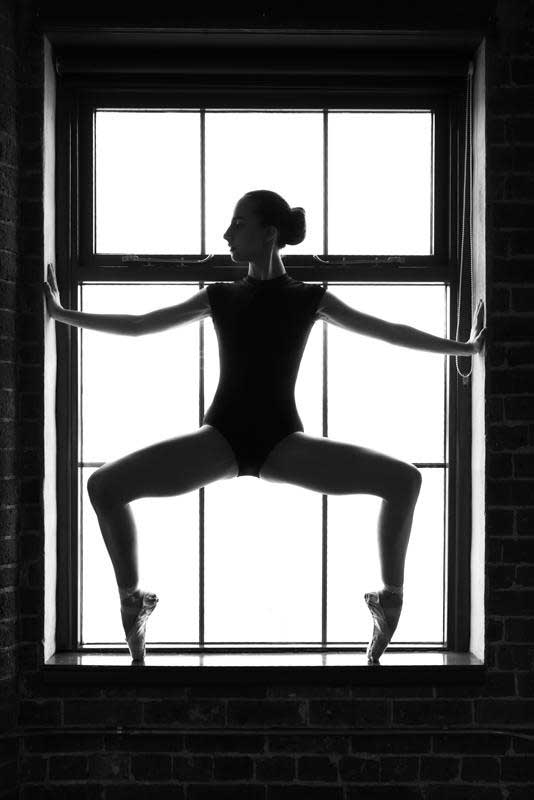
Trees are the classic subject, as are skyscrapers, but don’t limit yourself to these. You don’t have to rely on fixed subjects for silhouettes, you can create your own. People can make superb subjects and it’s worth spending a little time looking at a potential model considering the angle to shoot them from. Profile shots which reveal the contours of the face can work very well.
The sky at sunrise or sunset can make an excellent backdrop for a silhouette, and while these events tend to be more dramatic and at slightly more convenient times during spring and autumn, they don’t tend to last for very long. This means its a good idea to do a little research and find good locations during normal daylight hours.
As well as looking for subjects with bold and recognisable shapes, you also need one that offers a view of nothing but sky in the background from your intended shooting location.
This is very important. Other objects behind your intended subject will just be black clutter and spoil your image.
How do you expose for a silhouette?
You should set your camera’s exposure so that the darker foreground is black while the brighter background is correctly exposed, erring towards making it a mid-tone to bring out any colour. Dialling in some negative exposure compensation will help ensure your silhouetted subject is dark enough.
The good news is that because you’re underexposing the foreground so much, you can usually shoot handheld because the shutter speeds are fast enough to avoid camera shake.
If the bright part of your scene is very large, most cameras will be able to produce the effect you want by using the general-purpose Evaluative/Matrix/Multi-zone metering option.
However, many cameras will link the required exposure to your active AF point and adjust the settings accordingly. If your active AF point rests over a dark part of the scene that you want to be black, you are likely to get an overexposed image.
If this happens, you need to adjust your exposure using the exposure compensation control on your camera and dial in some negative compensation.
Alternatively, you could switch to your camera’s manual exposure mode to produce the result you are looking for.
Your camera’s centre-weighted or spot-metering modes can be useful for taking light measurements from the brighter part of a scene. Your spotmeter will suggest exposure settings that render it a mid-tone, which may be what you are looking for. If not, you’ll have to increase the exposure a little.
Step-by-step how to photograph a silhouette
Shooting a silhouette image may look simple, but there are a few key steps you need to follow and you need to ensure you are exposing from the right spot in the frame.
Follow these simple steps on how to photograph a silhouette, and you will get a strong, striking graphical image.
01 Choose a recognisable subject
Because your subject is going to be rendered completely in shadow, you’ll want your focal point to be something that is recognisable by its shape. An elephant, for instance. Or a human being. A palm tree.
If someone can’t recognise what your subject is from its shape, your silhouette will just be confusing and have less impact.
02 Clear the clutter
Because with a silhouette we’re dealing with shapes, you can keep them recognisable by making sure your subjects don’t overlap in your frame. If buildings blend together or a person is stood in front of a park bench, for instance, walk around and find an angle in which you can see separation between them.
It’s also a good idea to keep your compositions as simple as possible. With graphical images like this you don’t want to have too many elements in the frame.
03 Shoot into the light
In order to achieve a silhouette effect you must position your subject in front of your light source. For instance, a person with a sunset sky behind them. Or you might place a still life, such as bananas, on a table with a continuous light behind them.
04 Hide the light source
While we are shooting into the light to capture a silhouette, we don’t want the light source wholly in the frame. Too much strong light can blow out parts of your image. Lens flare is also a problem.
A quick and easy technique many photographers use is to simply frame their composition so that the sun is hidden behind a building or tree or something else within the frame.
05 Expose for the light
This is a crucial step. In order for your exposure to throw your subject into shadow you need to expose for the brightest part of the frame. If you’re shooting a friend against a sunset sky, expose for somewhere in the bright pinks and oranges.
On a traditional interchangeable lens camera you might want to do this by setting a manual exposure. On your phone, tap the brightest part of the background. Phones differ in their functionality, but generally you should be able to tap your focal point and then drag your exposure point away from the subject.
06 Metering
On the point of exposing for the light, you’ll likely want to take control over the metering. Left to its own devices, your sophisticated camera will calculate an exposure based on how it is reading the entire scene. It doesn’t realise you purposely want to underexpose your subject.
Set your camera to its spot metering mode, then take a reading from somewhere within your bright background and you’ll guarantee a dark silhouette.
07 Maximise the depth of field
You want a crisp silhouette in your image, so to this end it’s best to set a small aperture (large f number) to increase your depth of field.
Shooting at f/16, for instance, will mean you have a sharp foreground and background and all of your silhouettes will be crisp.