Set up shortcuts and optimise controls to speed up your shooting workflow
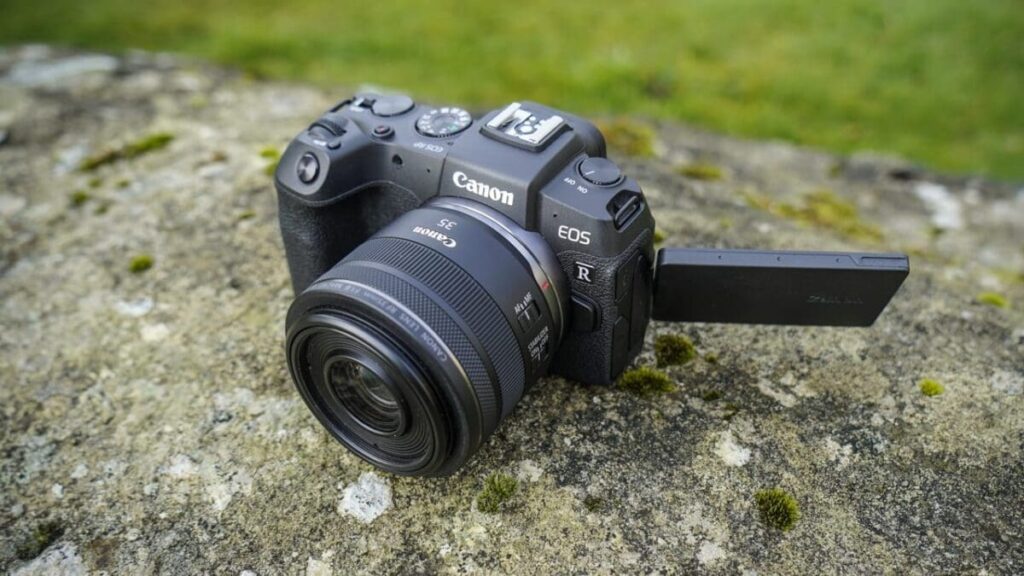
Canon’s full-frame mirrorless range comprises the Canon EOS R and EOS RP. But even Canon itself is saying we can expect the ranks of EOS R cameras to grow with professional and advanced-amateur models over the next year.
One of the best things you can do with your camera is customise its menus and controls so that it’s working better for your needs. This will also greatly speed up your workflow – particularly in those moments when you need to make adjustments on the fly.
In this quick tutorial we’ll show you how to customise the menus and controls on your Canon EOS R camera so that you can work quickly and efficiently.
Custom Functions
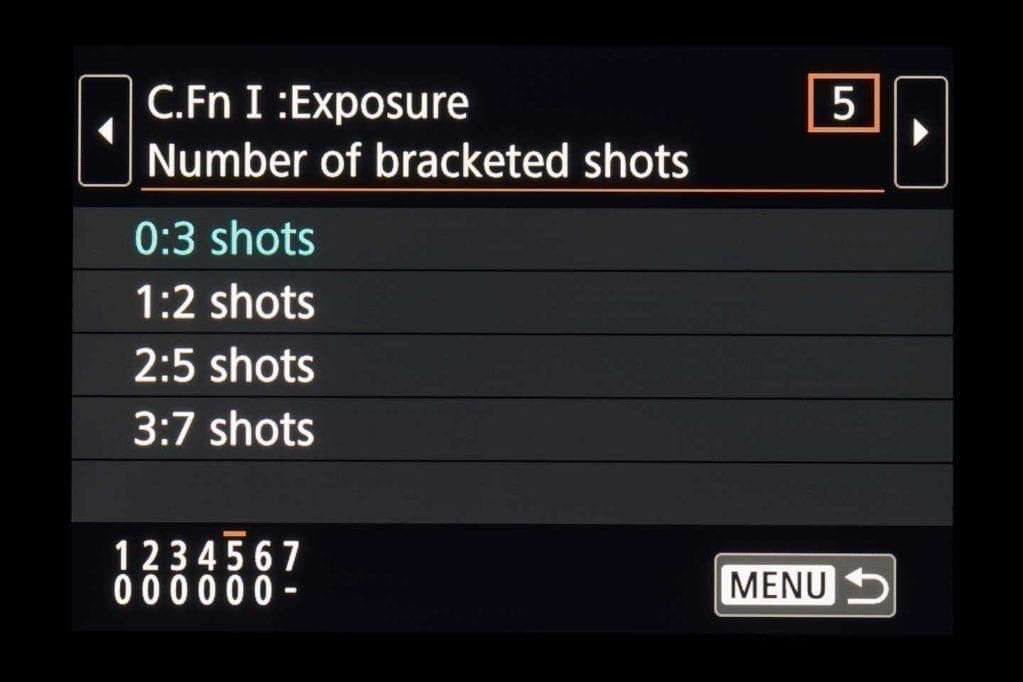
The orange tab in the EOS RP menu allows you to change a host of settings and functions. These are separated into sections: Exposure, Autofocus and Operation/Others.
The first ‘0’ option in a list of custom functions is the default setting, but you can choose one of the options listed by using the up/down d-pad keys and pressing the SET button, or tapping the touchscreen.

The selected option will be highlighted in blue and the change will also be indicated in the numbered section at the bottom-left of the screen. If there is a ‘-‘ instead of a number in this section, then there that custom function has multiple options to set up.
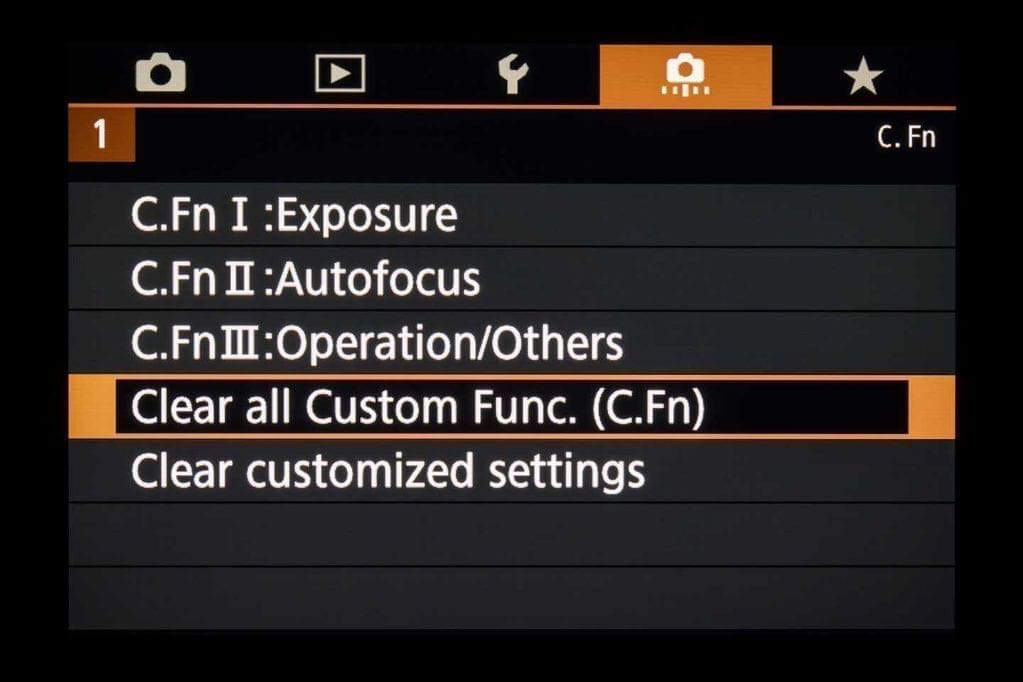
Resetting Custom Functions
There are two options for resetting the custom functions you’ve adjusted – you’ll find these at the bottom of the main Custom Functions menu tab:
• ‘Clear all Custom Func. (C.Fn)’ clears everything except any customised settings for buttons and dials
• ‘Clear customized settings’ resets any customised buttons and dial settings
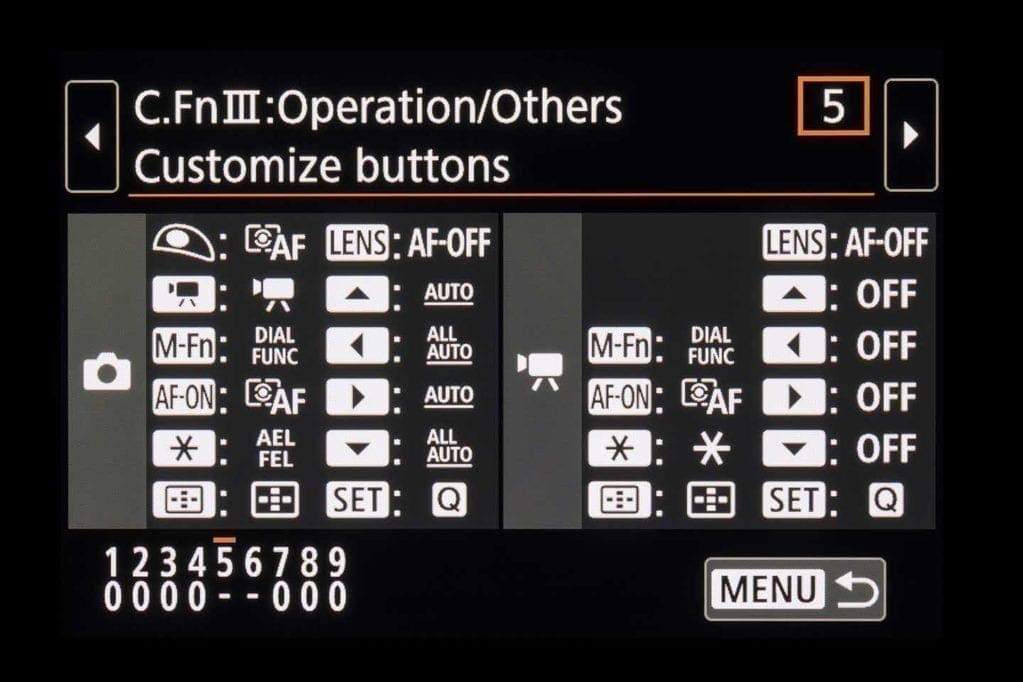
Customised controls
Top of the list for customising the RF is tailoring the way that the buttons and dials work to the way you like to shoot. You’ll find these collected together in the ‘C.Fn III Operation/Others’ section of the Custom Functions menu. You can also access these settings directly, via the Quick Control screen (on the right, just below Flash Exposure Compensation).

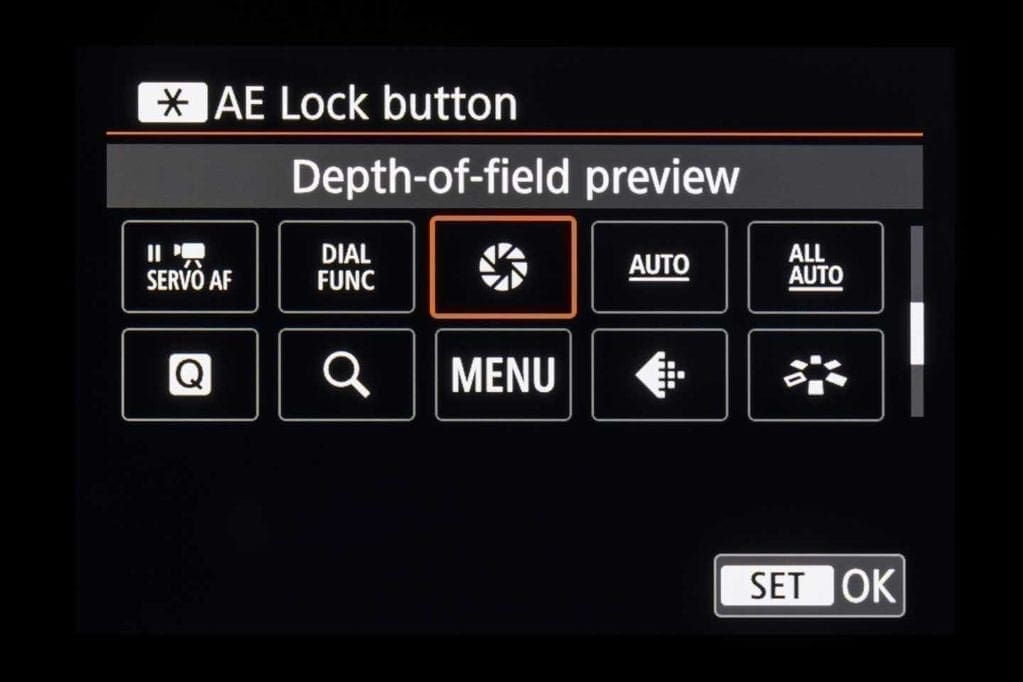
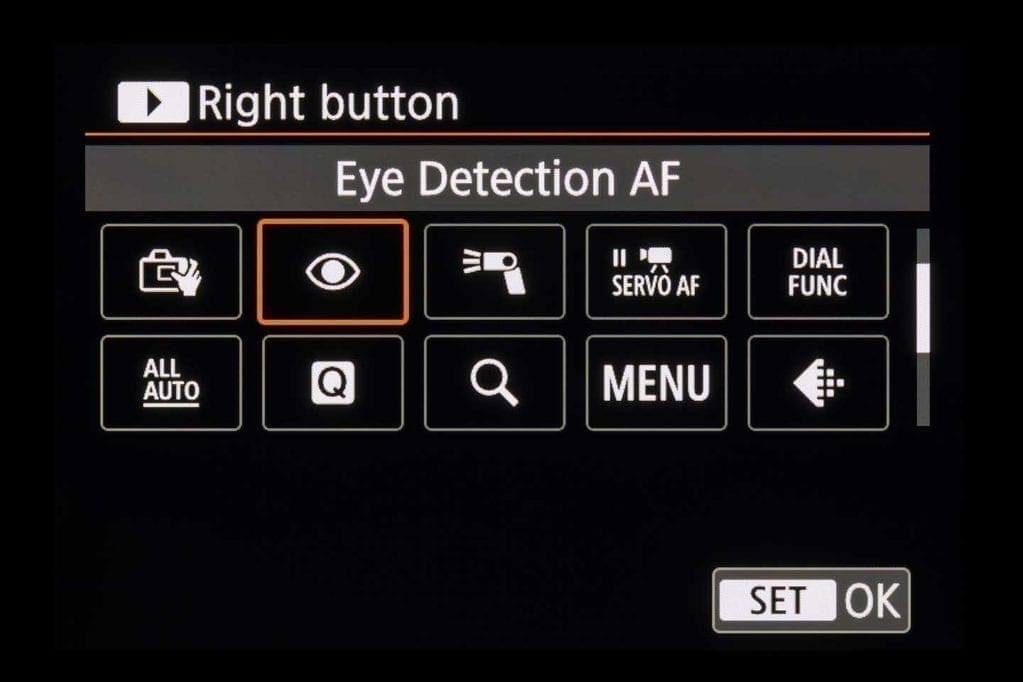
As well as letting your shift the controls around, you can assign some new functions to the buttons. For example, you can assign depth of field preview or Eye Detection AF to buttons you don’t use often.
My Menu options
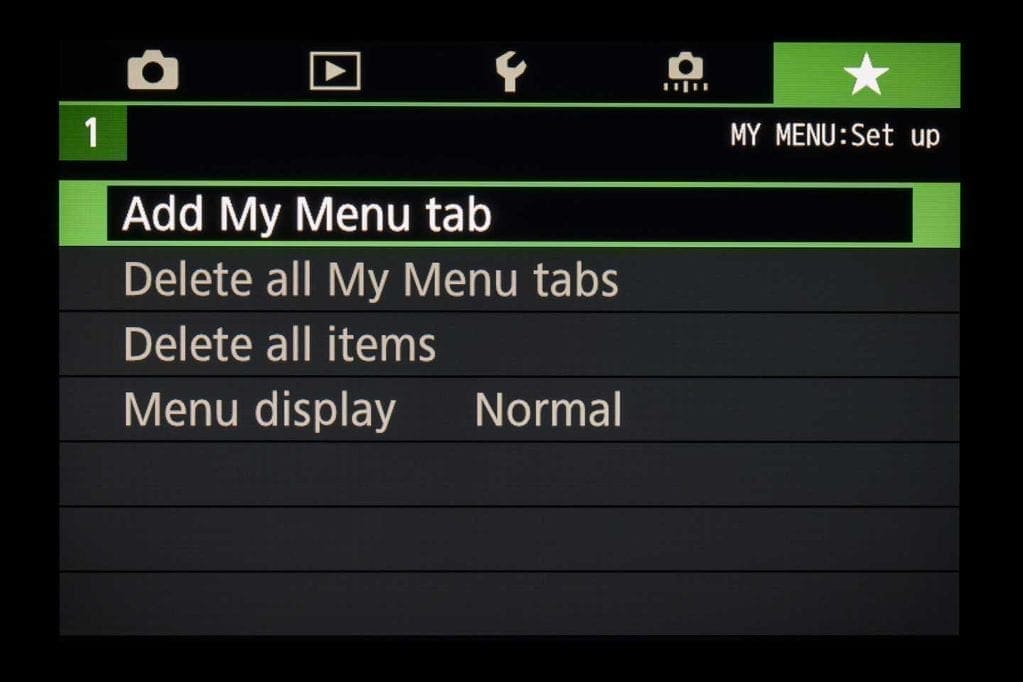
The green My Menu tab allows you to gather your most-used menu options and Custom Functions in one place rather than having to trawl backwards and forwards through the pages of the main menu.
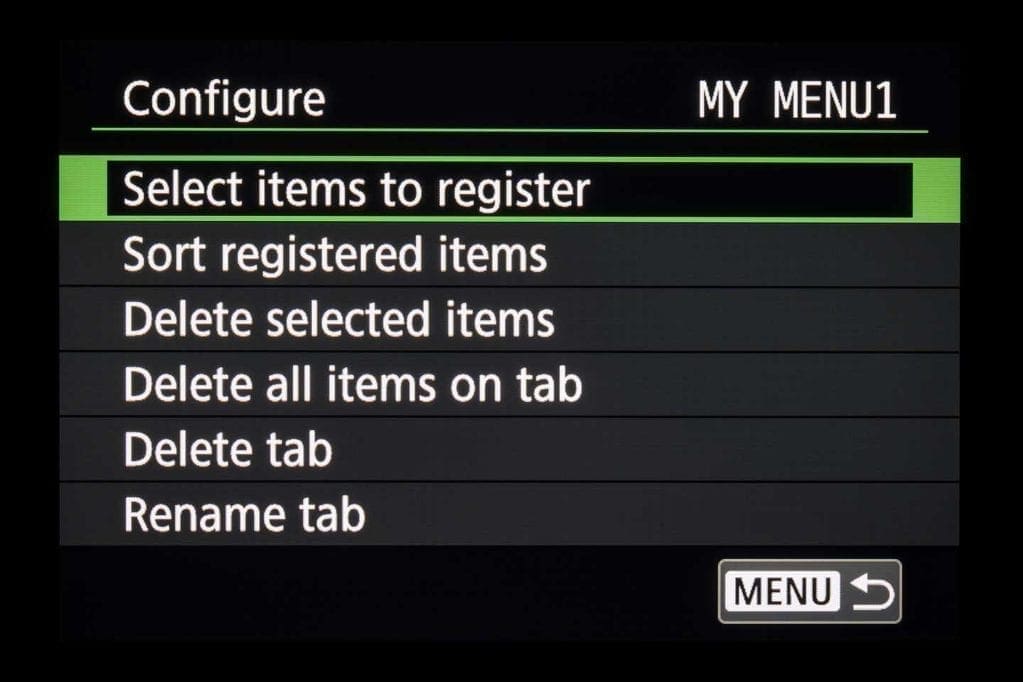
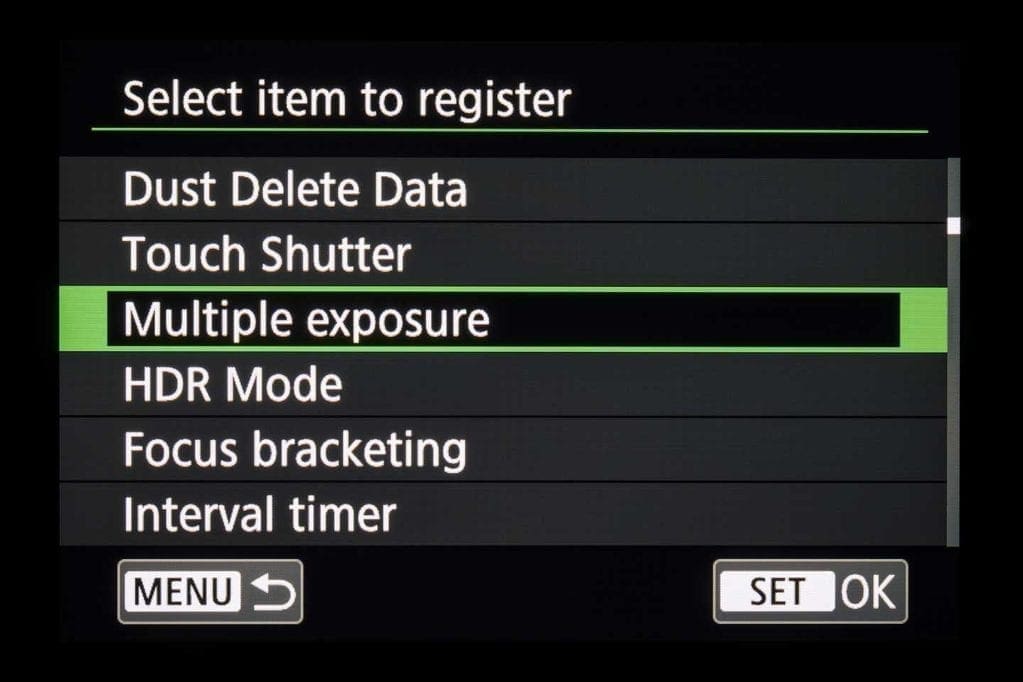
You can actually store up to five My Menu tabs in this green section. This is useful if you’d like to separate the functions into areas such as AF or exposure, and you can rename the tabs accordingly.
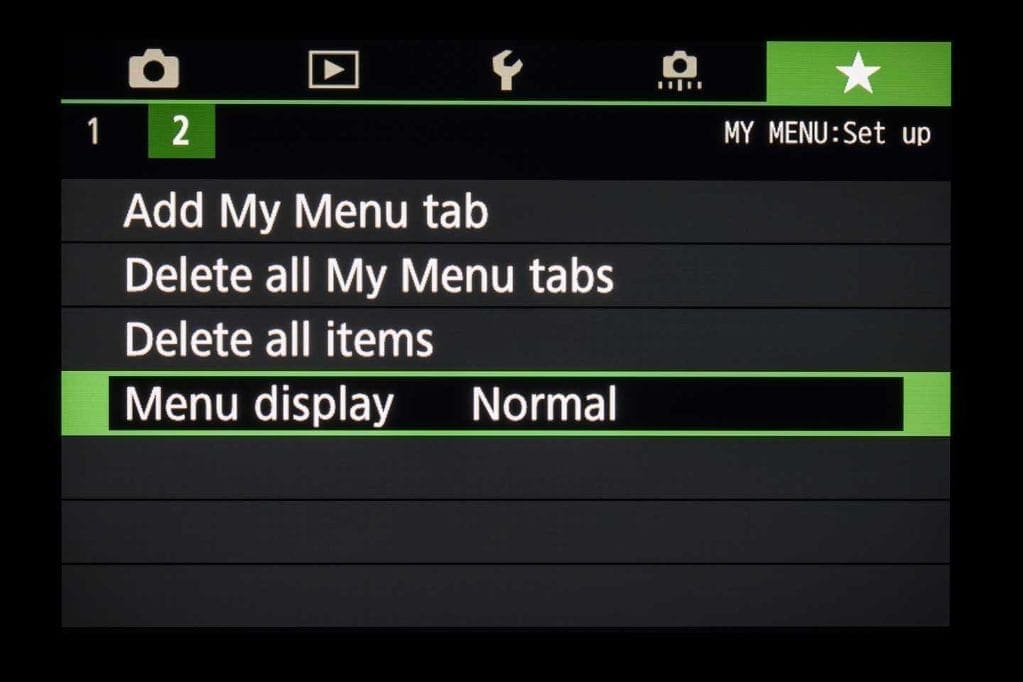
My Menu shortcut
You can even customise the way the My Menu section is displayed, via ‘Menu display’ at the bottom of the list. ‘Display from My Menu tab’ makes My Menu always appear first when you hit the MENU button. To make it the only camera menu to be displayed, select ‘Display only My Menu tab’.
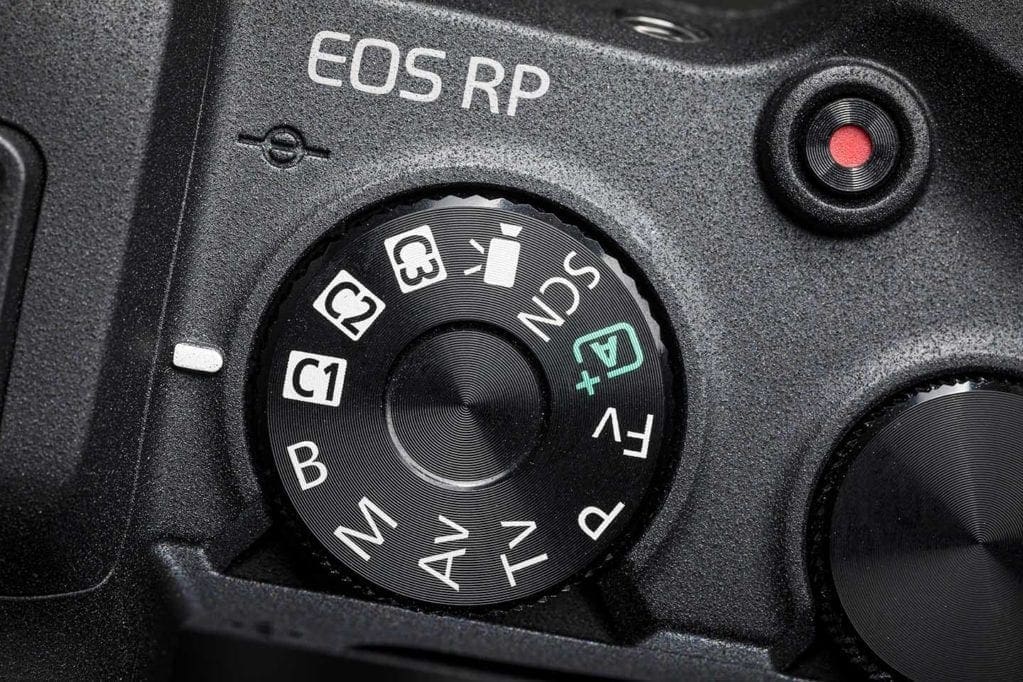
Custom shooting modes
The RP has three Custom modes, which allow you to save a snapshot of the current camera settings – from the AF set-up right down to simple things such as screen brightness – under C1, C2 or C3 on the mode dial.
This means you can create your own trio of advanced ‘scene’ modes – such as one optimised for portraits, another for action, and another for landscapes – that you can shift between with a turn of the dial.
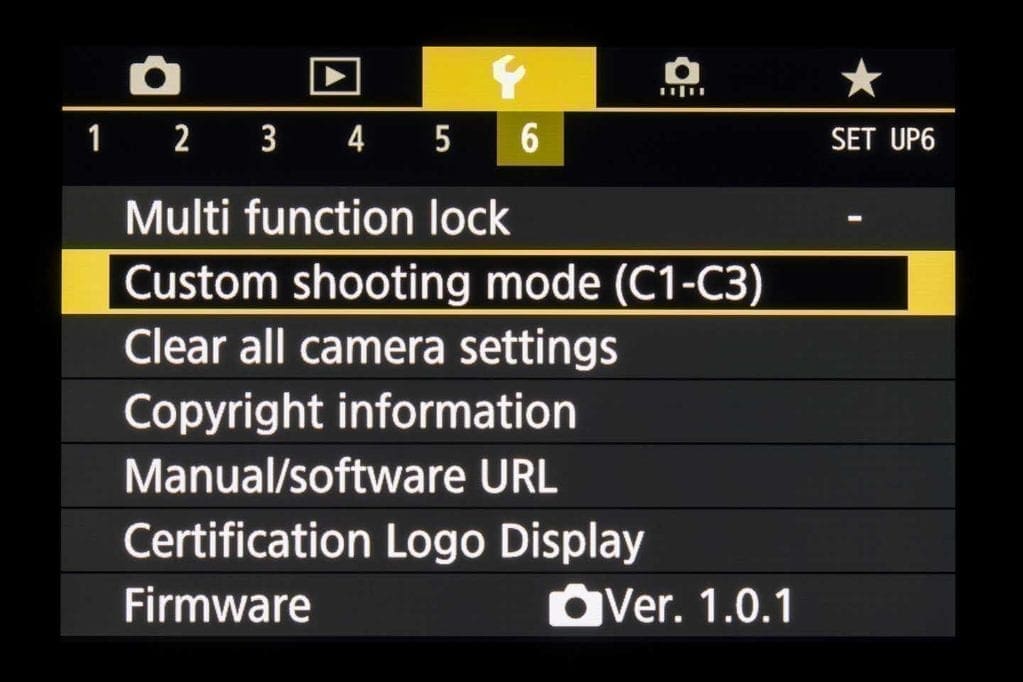
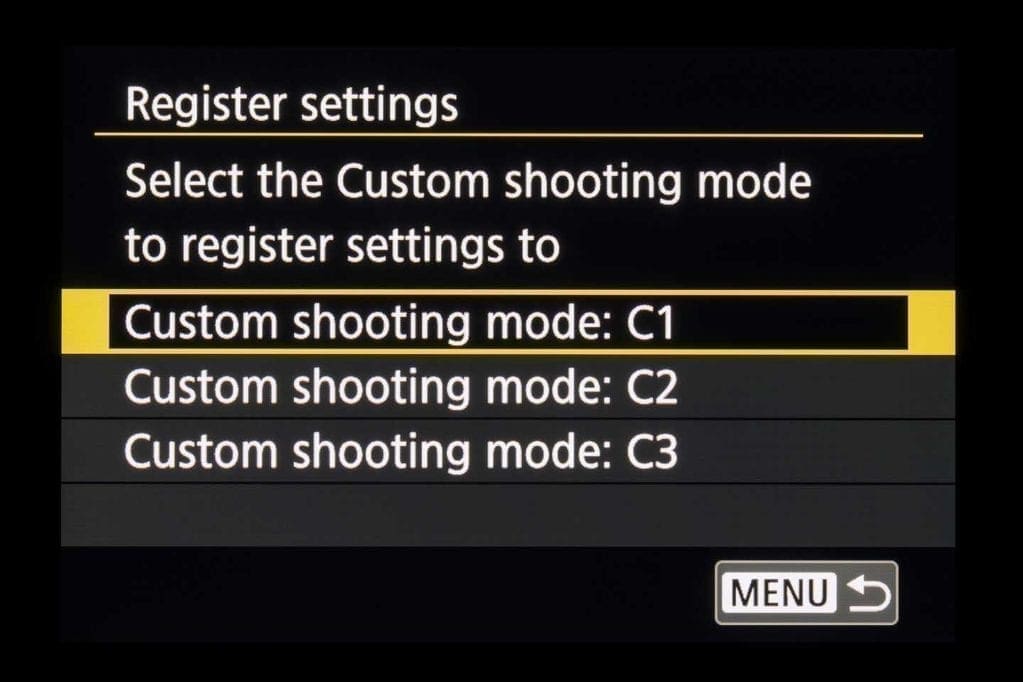
Registering Custom shooting settings
The first step is to configure the camera how you want it, then go to page 6 of the yellow Set-up menu. Select ‘Register settings’ here, followed by the C mode you want to use.
Any changes you make to the camera when it’s in a C mode won’t be permanently applied to your registered settings. Switch to a different mode and back, and the C mode will have reset to how you originally set it up.
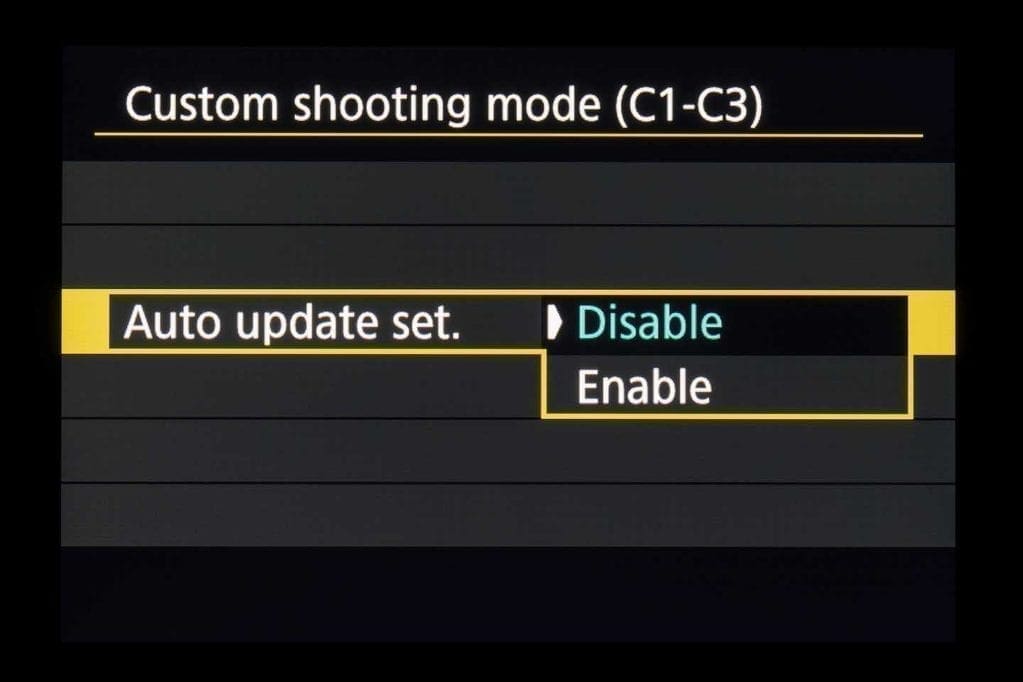
If you’re getting used to the camera and would prefer any tweaks you make to be recorded, enable ‘Auto update set.’.
Did you find this information useful? Would you be interested in a Camera Jabber app with in-depth tutorials on how to use Canon EOS R cameras, as well as models from other manufacturers? If so, register your interest in the field below or comment on this post!