Our Verdict
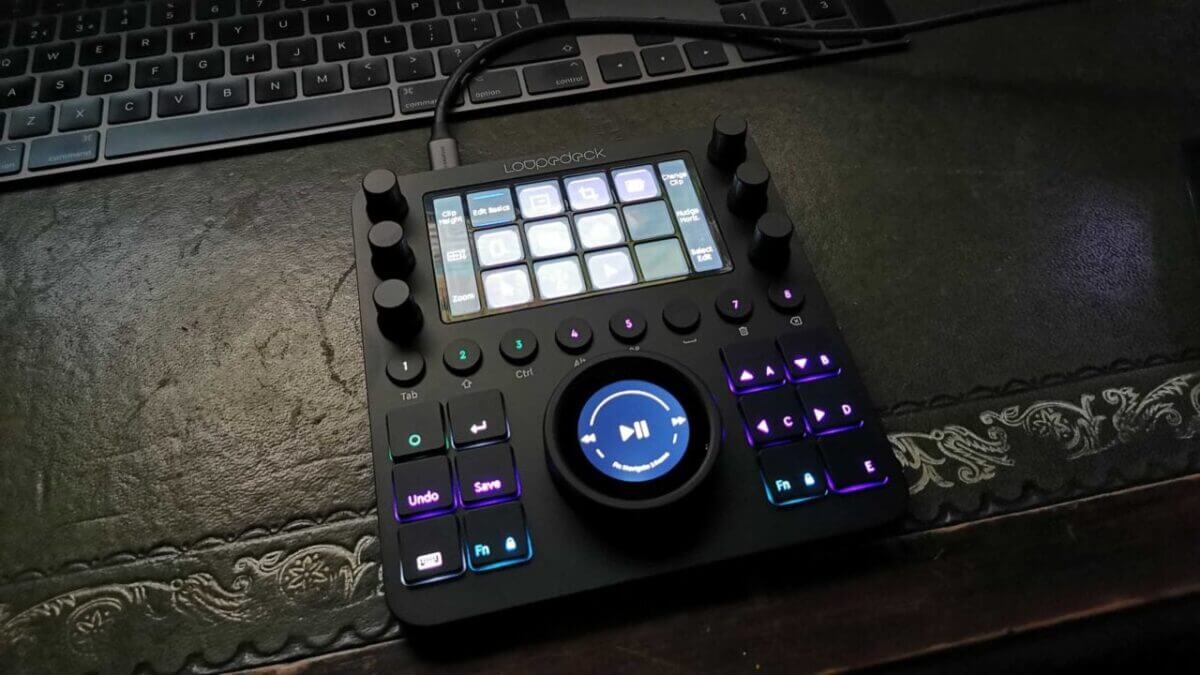
LOUPEDECK CT is a complete control panel for creative applications such as FinalCut Pro, Premiere, Photoshop or Lightroom.
It replaces your keyboard with dials and buttons that off a far more intuitive control over adjustments within the application.
All buttons, dials and touchpad icons are fully configurable through the powerful and extensive software.
Edits become faster and workflows smooth, this is a device that has been designed to fine-tune a creatives interaction with their machine.
The price may seem high compared with a standard keyboard and mouse, but the LOUPEDECK CT is especially suited to creative applications making the keyboard and mouse seem clunky.
If you edit video or images then the LOUPEDECK CT will help speed up the editing and production process.
For
- Fast editing
- Fully configurable
- Compatible with a large range of applications
What is the LOUPEDECK CT?
Let’s face it, keyboards and mice are designed for typing word not editing video or images. Yet that’s exactly what most of us photographers do with them.
While we make do with the tools we’re given, there are far better options. So what alternatives are there?
Before digital, there was film and when it came to editing there were Steenbeck flatbed editors and alike. These were a common sight in production houses and indeed my old college. These tables enabled you to scrub through the film, preview footage and with the aid of a scalpel and some tape, cut and edit.
When the world switched to tape then digital, those flatbed editors became far more sophisticated, if not that much smaller.

Today video control panels, which are the evolution of the old desks, are common and come in all sizes and price ranges. But, even the cheapest is well beyond the means of most of us.
But the real issue is that we all now work on the move and any control panel we use needs to be small and lightweight.
This is where the LOUPEDECK CT comes in. This complete control panel comes in at a reasonable price, but best of all will fit easily into a backpack with the rest of your kit.
The LOUPEDECK CT follows directly on from the LOUPEDECK+, and while it’s suited to applications such as FinalCut Pro and Premiere Pro that I used while reviewing, it’s equally at home with Photoshop or Lightroom.
Loupdeck+ and Loupedeck CT
LOUPDECK’s aim is to reinvent the way we interact with our computer’s when using creative applications such as FCPX, Premiere, Photoshop or Lightroom.
When it comes to those still editing packages LOUPEDECK+ certainly enhanced the process enabling analogue style control over adjustment.
An update earlier this year enhanced the compatibility with Premiere and FinalCut Pro. But, while the integration worked, there was still plenty of room for improvement, and thus the CT was developed.
The new LOUPEDECK CT is a very different device to the LOUPEDECK CT, build quality is reassuring solid, and the new button layout, both physical and dynamic, give a completely new experience in application control compared with a keyboard and mouse or indeed the old model.
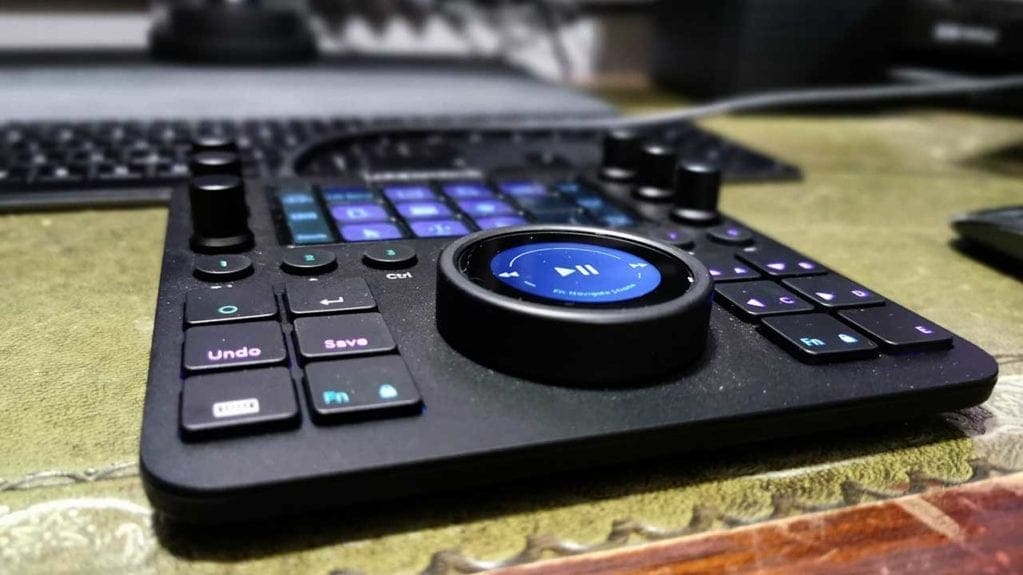
This is the device many videographers on the move have been waiting for, it’s smaller, lighter and more versatile than anything else on the market, but does it really make video editing easier?
Features
If you’re familiar with the original LOUPEDECK+, you’ll know about all the buttons and dials. With the CT the small adjustment wheels have gone but now taking the centre stage is the large jog wheel and touchpad.
As with the original, the LOUPEDECK CT is fully configurable, and the buttons and dials will change function depending on the application you’re using.
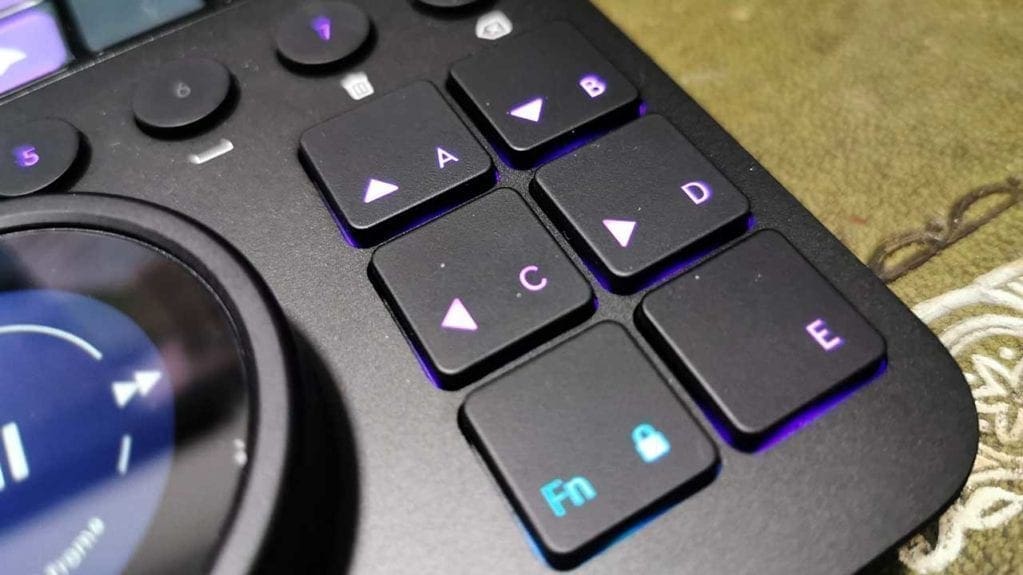
There are three push-button dials and six push-buttons mirrored on each side, eight push-buttons through the middle, twelve dynamic buttons on the touchpad and the dial at the front, again with a dynamic button in the centre.
Connectivity comes through a USB Type-C cable, a cabled connection is still by far the most reliable and required for the speed needed by editing applications.
Along with the LOUPEDECK CT is the LOUPEDECK software. This enables you to configure the CT in the way that you want for the applications you’re using.
Once plugged in and set up the LOUPEDECK CT takes over from the keyboard in your chosen application, the mouse is still required to move the cursor and click things when needed.
I’ve used FinalCut Pro X as the application of choice for the review, although CT works with Premiere, Final Cut Pro, Photoshop, Lightroom, Ableton and more to follow soon.
Once booted the LOUPEDECK CT recognises the open application and shows the set of pre-configured options.
The dial can be used to scroll through footage while buttons select the blade, copy, paste and carry out all of the commands that you would usually do through your keyboard short cuts.
LOUPEDECK CT disposes of the need for your keyboard for the majority of functions. However, your old mouse is still required as an essential part of the editing setup. It enables you to move the cursor and drag and drop clips into the timeline when needed.
Build and Handling
I liked the LOUPEDECK+ as it enabled a level of analogue style interaction with image enhancement through Photoshop and Lightroom.
However, the device itself was quite large, it didn’t easily fit in my bag, and with notes, coffee, keyboard and mouse on my desk already my working environment was becoming over-cluttered.
I do use LOUPEDECK+ when I have quite a few creative images to enhance, usually personal work, that I want to take time over and enjoy.
The LOUPEDECK CT for me is a far better size, and its square format means that it sits neatly on the desk, leaving enough room for the keyboard to remain neatly tucked in front of the monitor.
LOUPEDECK make quite a point on their site about the build quality and sure enough as soon as it’s removed from the box that quality is apparent.
It has a reassuring weight, and this does one of two things; gives the perception of quality and keeps the LOUPEDECK CT stationary on the desk when in use.
The buttons, have a nice feel about them and are all backlit, the dials feature both a reassuring click when pushed and a progressive click as they’re rotated.
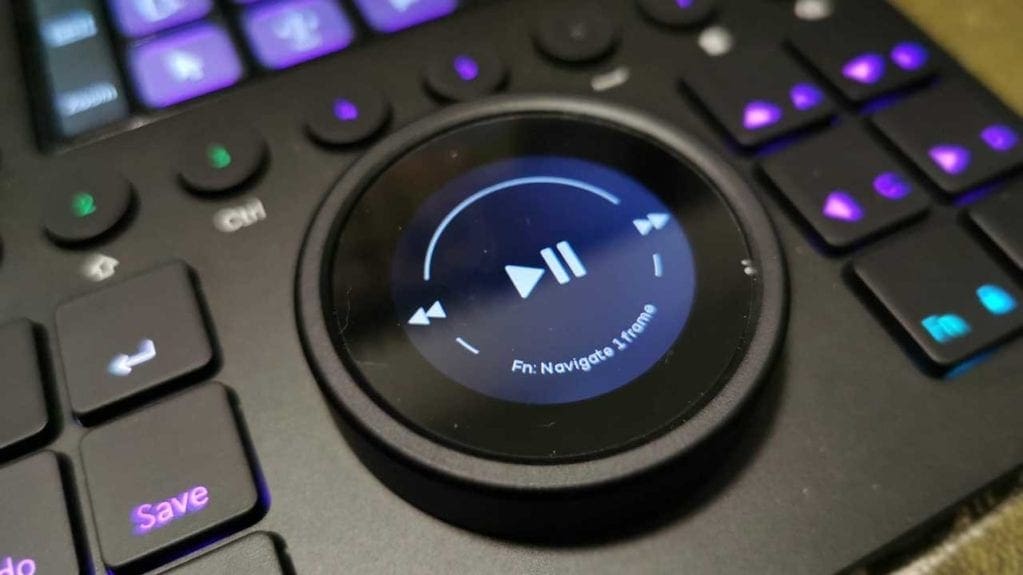
The main dial rotates smoothly, and the screen in the middle is responsive with different functions again dependent on the application and what tool is selected.
While the overall build and design are excellent, I can’t help feeling that there are some areas I would like to see enhanced.
Firstly a slider or two on the right, I love a good slider when editing audio, brightness or opacity and it’s a shame there’s nothing here.
On the small dials, a knurled edge would give a little more purchase when editing. I tend to rotate the dials by pushing on the side of the dial rather than a two-fingered twiddle!
Then the main dial, which I like a lot, I want it to spring back to the centre rather than just being free moving.
I want the dial to be progressive, spring-loaded, so a slight move to the right progresses the timeline one frame at a time, twist it further, and it scrubs through the footage faster, then crank it to the max, and it scrubs at speed.
At any point release the scroll wheel and the playhead stops. At the moment you directly interact with the playhead, the more you rotate the dial, the further the play head moves.
Read our Eizo ColorEdge CG319X Monitor review
Loupedeck Software
Every aspect of the LOUPEDECK CT can be configured through the software, and this is one in-depth application.
On the surface, it looks relatively simple, but this is the heart of the device, enabling you to configure the way the CT works with your desired application.
For the most part, the CT has been intuitively setup and finding the options, shortcuts and operations are all easy enough to locate.
Like any new device in your workflow, it does take time to find where everything is. Then a week or so for the dials and button positions to fix themselves solidly into your memory.
After a couple of days, you start to find your way around, and once you do, you can dip into the software and adjust the position of dials and controls as needed.
I changed the nearest left dial, for instance, from timeline zoom to master brightness.
Performance
Think back to when you first started using a keyboard and mouse; it probably wasn’t the most natural partnership.
Likewise starting to use the LOUPEDECK CT takes time, your fingers need to find their place and learn the exact positioning of the buttons and dials.
In a testament to LOUPEDECKS design, the layout is intuitive, and aside from a few carefully placed taps initially, it doesn’t take too long to get the hang of the controls.
This learning curve takes a couple of days to get the hang of, and a week of substantial editing to master, at which point you’re ready to delve into the settings and customise the layout to suit your needs.
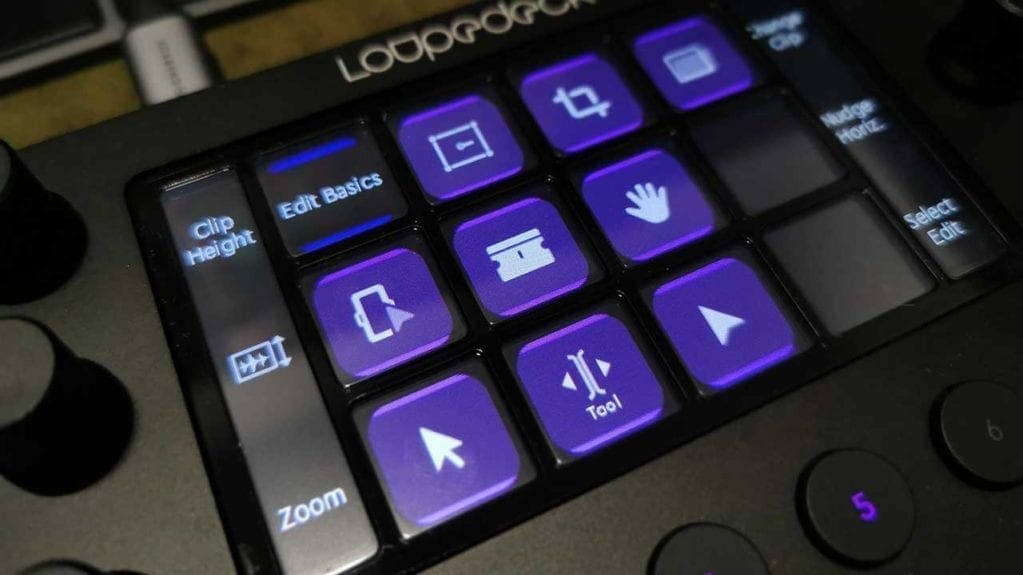
I primarily edit in FinalCut Pro X and have been editing in the environment with the various shortcuts for many years.
Making the switch to anything is going to require a slight relearning, but with the LOUPEDECK that learning curve was relatively quick.
When it came to reconfiguring the default settings, it was more a case of disabling options rather than changing them to something else. For whatever reason I kept tapping one of the buttons changing the Workspace layout, this was the first option to be changed.
Throughout use, the tweaks and changes to the buttons are quick to make, open the software, click the button on the graphical on-screen representation of the LOUPEDECK CT, and then select the action from the options on the left.
Once the changes are made, the CT quickly becomes second nature, and it’s at this point where the real advantages in speed come into play.
Using the direct physical button enable you to navigate the editing with speed, scrubbing through the footage and making the edits where needed.
Another useful feature of the central control wheel’s touch-sensitive LCD is that you can use it to manipulate the colour wheels. Using it to make colour changes is intuitive and enables far greater accuracy and speed than when using the mouse.
Operations that require a cursor move still require the mouse, but for almost everything else the LOUPEDECK CT is there.
Taking over the top portion of the LOUPEDECK CT is the touchpad, this features shortcuts to many of the more base application functions, such as creating a new library or folder. Tap the option, and you’re into the tools set where you can select or use the blade tool.
With all tools within a short distance of your fingers, edits become quick and intuitive helping to enhance the workflow.
Verdict
As with any new control device, it takes a while to learn the layout and imprint the workflow into your memory. This learning curve is surprisingly short, especially once you fine-tuned the layout to your needs.
During the review I focused on using the LOUPEDECK CT with the FinalCut Pro video editor, however, it is equally suited to Photoshop and Lightroom, both of which I used with the CT.
On using the CT with stills, having the buttons and dials close together made the editing experience far more intuitive than with the original LOUPEDECK+.
The compact size and layout meant that everything is close at hand, this may seem like a small point, but it really does make a big difference when ploughing through countless images.
Back to using with video and I found there was an even balance of buttons and controls and that dial is essential for video.
A feature of this that I liked was the touch LCD in the centre which was especially useful when grading; tap and you can adjust the colour directly in the colour wheel. This direct interface considerably sped-up grading footage making it feel very intuitive.
The control wheel is the prominent feature of the CT, it works amazingly well, but it does feel, for me at least, like there is room for improvement.
For much of the time when video editing, I was spinning the dial to scrub through the footage, then once I arrived at the spot, I could hold down Fn and scrub frame by frame.
Read our guide to the best camera accessories
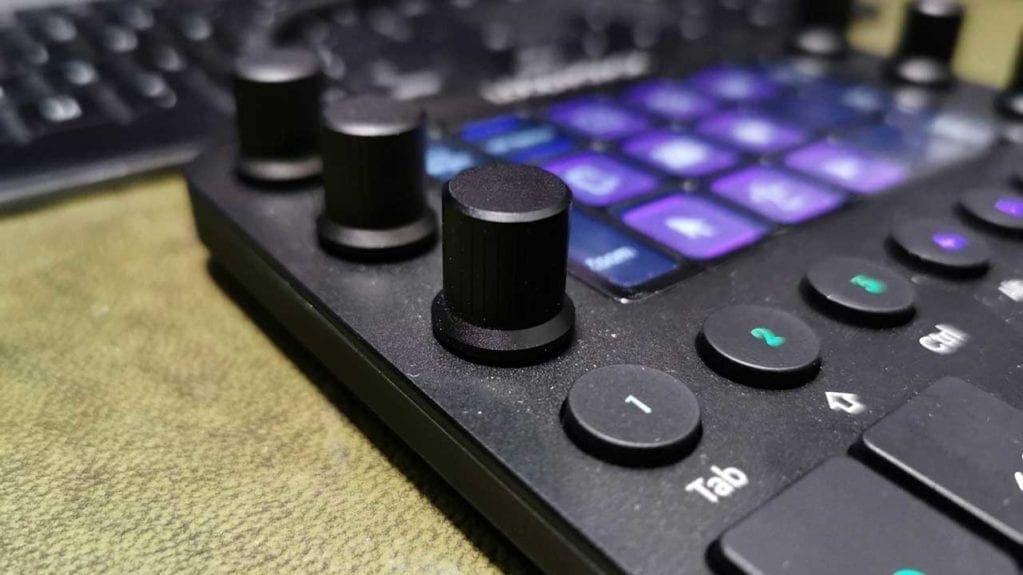
This worked well, but I felt I wanted a progressive sprung wheel, twist it right so that it would scrub through the footage at an accelerated speed, the more it’s turned, the faster it goes.
Release the wheel and it springs back to the start position and the scrubbing stops, tap left or right gently on the wheel to skip frame by frame and tap the LCD to cut.
It’s a feature I would like to see, but not possible with this version. The other aspect of the design I would have liked to have seen is a slight knurled edge to the control wheel and dials, to give some purchase.
These, however, are minor points, the fact is that the LOUPEDECK CT is a phenomenal piece of kit. It takes a little getting used to, but once you’ve familiarised yourself with the layout, there’s no doubt that it does vastly increase editing speeds.
The fact that the LOUPEDECK CT works so well in so many creative applications is impressive, and while I liked the original LOUPEDECK+, the CT is a far superior product.
The CT is the evolution of an idea that has formed with the help of a great deal of feedback from customers, as well as knowledge about the applications that it has been designed to control.
Along with the GNARBOX 2.0 and Linedock, the LOUPEDECK CT is for me one of this year’s stand out products.

