Reviews DJI Neo 2 review, this palm‑sized tracking drone is and ideal option for content creators

DJI Neo 2 review, this palm‑sized tracking drone is and ideal option for content creators

The Neo 2 offers a fun easy access drone for everyone with enough to appeal to experienced pilots as well

DJI Neo 2 review - palm take off
Review

Our Verdict

The Neo 2 is quite a step up in design and features over the original Neo. While it still aims at the beginner market, there are a few features here that are really going to appeal to many content creators or families just looking to capture the action whilst they’re out on holiday or adventuring in the wild.

The drone itself remains really small—just 151g—and features a similar follow-me camera that enables you to essentially be tracked by the drone without the need to use a controller.
Getting set up and started is as easy as ever, although you do need to activate the drone, which is standard DJI practice—making sure that you have a DJI account and that you can connect it with the DJI Flight app.

Flying the drone as a standard drone, its small size enables you to fly it equally easily inside and out, and through the test I was impressed with just how responsive it was to fly. The Neo was exceptionally easy; the Neo 2 just seemed to be a little more responsive, especially when turning corners. The new 360° object detection works phenomenally well, although it can be a little bit annoying when you’re trying to fly the drone up some stairs.

Of course, using the controller is where the real fun comes into play, and this small drone is essentially meant to self-fly. So placing the drone on your palm, you can activate the palm take-off with voice control and, after that, get it to track you or run through a number of other flights. But “Track Me” is probably the easiest and most entertaining. It’s like you’ve got a little friend following you around.

One of the downsides about having such a small drone is that the battery, whilst significantly better than the previous iteration, is still relatively short—with a quoted time being around 19 minutes per battery. But taking into account that you need a 25% buffer for safety, and when you’re using the camera at full blast, it does reduce it down to between 12 and 15 minutes depending on the location and how you’re flying.

One of the most impressive things about this new iteration of the Neo is the camera. Whilst, once again, it’s a small compact device, it’s able to shoot 4K video at 100 frames per second. That enables you to capture some really good slow motion and dramatic cinematic footage. The camera itself is mounted on a two-axis mechanical gimbal, but being from DJI, there’s also the electronic stabilisation that enables it to smooth out any vibrations. All footage just looks beautifully smooth when played back.

Essentially, the Neo 2 is an entry-level drone and with its fully encased propellers, easy flight characteristics, and surprisingly robust build—even with the two antennae at the back—it’s a great option for almost any level of drone pilot. Don’t expect it to have the video quality to seamlessly match in with your professional productions, but for most people, especially content creators, the quality of the video and the ease of use should definitely appeal. And for me, it was one of the most fun drones that I’ve had to test in a long while.

What is the DJI Neo 2?

The DJI Neo 2 is a palm-sized follow-me camera drone with enhanced tracking and advanced object avoidance that has been designed for beginners. My thoughts having been using the Neo 2 for the last couple of weeks is that it will also appeal to content creators, who could use the Neo 2 as a secondary camera. The small drone’s camera is one that’s ever ready to capture shots, rather than having to ready a standard production camera such as the Canon EOS R50V that would also need setting up on a tripod, my favourite support for speed is still the 3LT Billy 2.0! Even though the camera is incredibly small with that half-inch 12-megapixel sensor, the quality of the footage is surprisingly good.

Through the test, I have to say that just having such a small drone in the bag alongside my camera kit was great fun. It enabled me to shoot behind-the-scenes shots quickly and without fuss. You don’t really have to think about it, simply pull it out of the bag, talk to it (Voice recognition, you understand), and off it goes, circling or following you to capture some behind-the-scenes footage that you can then cut into your main production.

DJI Neo 2 review - front facing
For families as well, if you’re out walking the dog, as some of the press shots showed, then you can simply launch it. If the dog isn’t distracted by it following them, then it’s a great way to capture a family day out. And with that fully protected propeller design, it means there’s very little chance of anyone getting fingers caught or any accidents happening.

One of the big new features here is the omnidirectional obstacle sensing with ActiveTrack, which basically enables fully autonomous flight. I’ll come on to exactly how well that object detection worked in the performance section, but now with sensors on the top and bottom of the drone as well as at the front, it’s got almost 360° optic coverage around the body. It’s far safer to fly, and even the original Neo, while it had fully protected blades, didn’t have any type of object detection.

Specification

  • Weight: 151 g
  • Sensor: 1/2-inch 12 MP CMOS, f/2.2 lens
  • Video: Up to 4K/100fps (or 2.7K vertical)
  • Gimbal: 2-axis mechanical + EIS stabilisation
  • Max Speed: 12 m/s
  • Wind Resistance: Level 5
  • Storage: 49 GB internal
  • Flight Time: Up to 19 min
  • Transmission: Up to 10 km with DJI RC-N3
  • Connectivity: Wi-Fi 80 MB/s transfer
  • Intelligent Modes: ActiveTrack, SelfieShot, Dolly Zoom, QuickShots, MasterShots
  • Obstacle Sensing: Omnidirectional (LiDAR + monocular + infrared)
  • Take-off: Palm take-off / Return-to-Palm landing

DJI Neo 2 Build and Handling

As it seems with every iteration of DJI drones, the Neo 2 has gone through a complete redesign and, whilst it enhances the fully protective blades of the original Neo, pretty much everything else about it has changed.

Whilst I did like the Neo and used it extensively, there were a few features, such as the lack of obstacle detection, that occasionally meant it would bash into objects, and not always with the best results. This fully enclosed design just seems a little bit more robust, even if it is far lighter. With the rounded chassis and matte polymer shell, it just feels incredibly sturdy.

For beginners, one of the biggest fears is the blades of any drone, especially when they’re spinning at such a rate, so it’s great to see here that the blades are incredibly small and fully protected by propeller guards around the edges, top, and bottom. So, whilst small fingers are able to poke their way through the guard, for the most part, if it does bump into someone, there’s very little chance the blades are going to cause any injury.

The propellers also have automatic cut-off, so if something does get jammed in them, they’ll automatically stop. There’s no protection for the object that’s been stuck in, but it also avoids the motors burning out, something that used to happen with many drones.

One of the new features on the front is the small display, which shows status and other information. Because it’s so small and simple, when you’re first taking off and are quite close to the drone, it’s surprisingly easy to see what’s on the screen, even in bright sun conditions. However, from more than a couple of metres away, trying to make out anything on the small screen is obviously almost impossible.

DJI Neo 2 review - side
The design of the drone really has been carefully thought out so that launching it directly from your palm is incredibly easy. Whilst it doesn’t have a palm-shaped base to sit perfectly in your hand, it does feel nicely balanced. And, once again, because of the prop guards around the blades, it feels nice and safe.

Overall, it’s a nice-looking drone and very sleek compared with the original Neo. The colour scheme and overall design are just one up on the previous iteration. However, as with most small drones, it always looks a little bit bug-like. DJI takes things a step further with two small antennae at the back used for video transmission. These are fixed and can’t be removed. Initially, I was a little bit worried they’d break off if I crashed the drone at all. However, in use, it’s extremely difficult to bash into anything or crash, so any worries that these would be fragile or could be a weak point in the design were quickly dispelled.

DJI Neo 2 Features

A quick look at the features really highlights how fast the DJI Neo 2 has evolved from the original model. Firstly, and most obviously, there’s the omnidirectional subject sensing with the LiDAR, infrared, and monocular vision combined to give full 360° awareness of its surroundings.

In use, you can see this going into overdrive. If you activate it in your house and get the drone to try and follow you in a larger space, it’s absolutely fine. But as soon as you get to a doorway, it does start to jitter, almost nervous about crashing. However, in most situations with larger doorways, it works absolutely fine, and the object avoidance is obviously very welcome.

Through this test, I decided that whilst a controller was supplied with the drone, it’s actually better to really focus on palm take-off and control of the drone using gesture control. After a short time, you realise just how well this all works and how responsive this new drone is. It really does feel like the face and hand recognition have gone a level up from any DJI drone that has come before.

DJI Neo 2 review - 2 axis gimbal
Now with palm take-off and return-to-palm, alongside all those ways to fly, everyone from beginners to intermediate and advanced users has plenty of choice over how the drone is used.

In all modes, you always access the app or use the onboard buttons prior to take-off to adjust the mode you’re going to fly in. So, if you just want manual, then you can use the remote control. However, for other modes, you can choose what type of selfie shot or mode you want and adjust those using the two selection buttons on the drone itself. A quick hold of one of these buttons enables you to switch between photo and video, and the button closest to the front of the drone essentially sets it off on take-off.

The big feature here is the new ActiveTrack, and if you’re just using the drone on its own, it works surprisingly well. Once you start to learn the hand gestures, you can control its framing. However, if you pop into the DJI Fly app, this gives you plenty of additional features and options. Very quickly, you can fine-tune how it’s tracking and framing the subject, which again is very intuitive and aimed at the beginner market.

One of the things that I liked, if you are a content creator, is the fact that so many cinematic modes are available. You have Dolly Zoom, QuickShots, and MasterShots, which we’ve seen in the more expensive drones before. Here, with that small camera, however small, the quality for creating these quick and dramatic shots is incredibly good.

DJI Neo 2 review
Inside the drone, there’s an amount of storage, 49 GB, and as I found, the Wi-Fi transfer between the drone and, say, my iPhone 15 Pro through the Fly app was exceptionally quick. Unlike some of the other drones, there isn’t an option for a microSD card, but at the back of the drone by the video transmission module, there is a USB-C port. So if you want an ultra-fast connection between the drone and your computer, you can always plug in directly.

DJI Neo 2 Performance

Getting started with the Neo 2 is relatively straightforward, and there are really three ways you can fly the drone. The first is the most traditional: with the controller. The second is with hand gestures, and the third is by voice control, which needs to be activated from within the app.

In this test, I started off using the controller. The first step, which is now required by all DJI drones, is activation. This essentially means you have to register as a DJI owner and use your phone number or email address to set up an account. Once you’ve done that and downloaded the latest version of the Flight app to your Android or iOS device, you can then pair it with the Neo 2 and activate your new drone.

In the past, this has sometimes taken quite a while just to pair the drone with your phone, but this time it was almost instantaneous, and the whole registration process took less than a couple of minutes.

Once registration was done, the drone was set and ready to fly. I started off by using the controller just to fly the drone around the house and then through the garden. The characteristics of the drone are sharp, and as long as there are no obstructions in the way, so the object detection sensors don’t kick in, the flight is incredibly smooth.

On the first few flights, the weather was quite blustery. I didn’t like that the Neo could be quite easily buffeted by the wind, but then again, it’s so light that it’s not really a surprise and considering the size it’s actually incredibly stable and robust in the air. However, later on in the test I had a bright, sunny morning, and flying around the garden was great fun. It was fast and responsive and just felt like one of the larger drones, only in a really small and compact body.

Take-off and landing were easy, and the footage from around parts of the garden looked spectacular, really in line with drones many times the price from just a few years ago. It’s essentially action camera footage, and if you’re using it for content creation, then the quality is more than good enough. You might be pushing it a bit if you’re going for broadcast, but for casual use it’s absolutely superb. The colours are bright and vibrant, and the detail is clear and crisp.

When you’re using the controller and the drone in isolation, you don’t really have any control over the video quality, but what it produces is going to satisfy the vast majority of users just starting out. If you do want a little bit more control, then you have to go through the Fly app, where you can adjust all the quality settings in the usual way. The app uses Wi-Fi rather than Bluetooth to ensure a strong, robust signal.

When you’re into the Fly app, it is actually a little bit different from what we’ve seen before. It’s more simplistic, with a large take-off button, meaning you can activate all the flight modes and camera settings from within the app. It’s just a really quick and easy way to access the drone.

When it comes to video, the default is set at 4K 30 frames per second (normal), and you have the option to go from landscape mode to portrait mode and also change the aspect ratio. For resolution, you have either 1080p or 4K. The 4K resolution goes from 30 frames per second up to 60 fps, and the frame rate at 1080p goes from 30 to 60 fps as well. When you flip over to portrait orientation, the resolution adapts to 2.7K and again offers frame rates from 30 fps up to 60 fps.

As I’m using a pre-release model of the Neo 2, some of the more advanced features that appear to be options, including the colour profile and encoding format, these are fixed. At the moment, I’ve only got ‘Normal’ and H.265, but I’m sure these will be added in the near future.

Interestingly, looking through the app, I realised I couldn’t quite access the full 4K 100 frames per second option. I then realised that when you’re using the drone without the remote, it is limited to 60 fps. However, once you connect with the remote rather than using the drone in isolation, you can then access those higher frame rates. To do this, though, you need to connect your mobile phone directly to the controller. Then the app interface looks far more familiar and akin to the DJI Fly app we use with other drones. The only thing is that, at present, those higher frame rates still didn’t seem to be available.

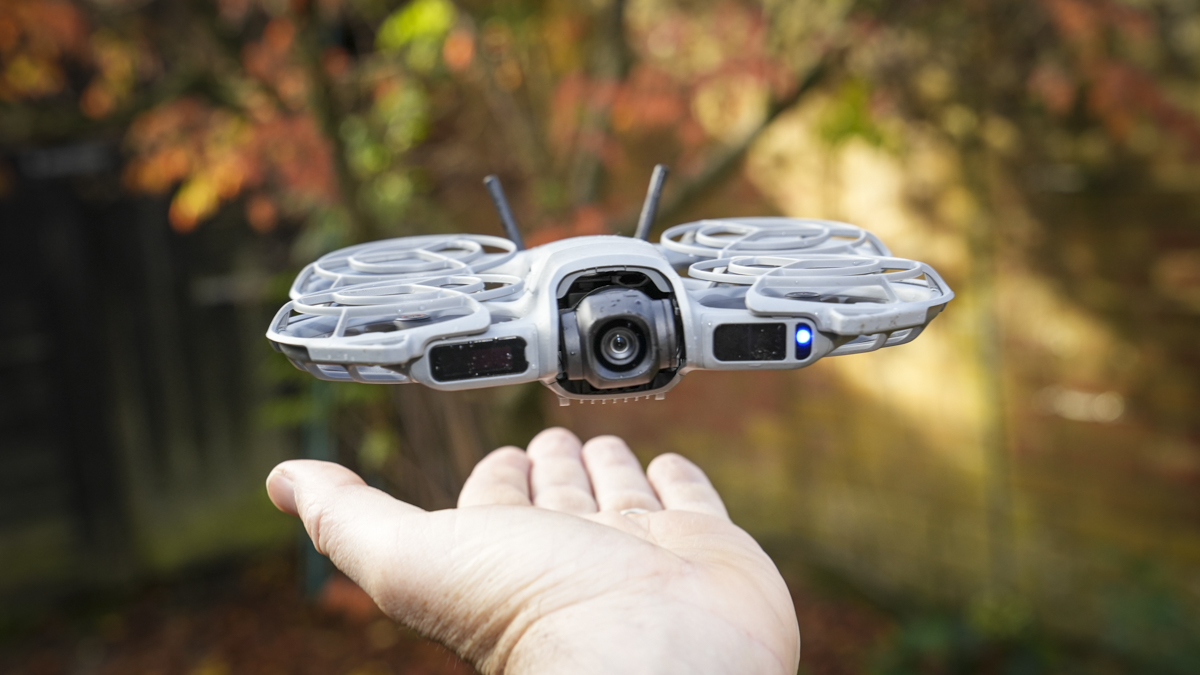
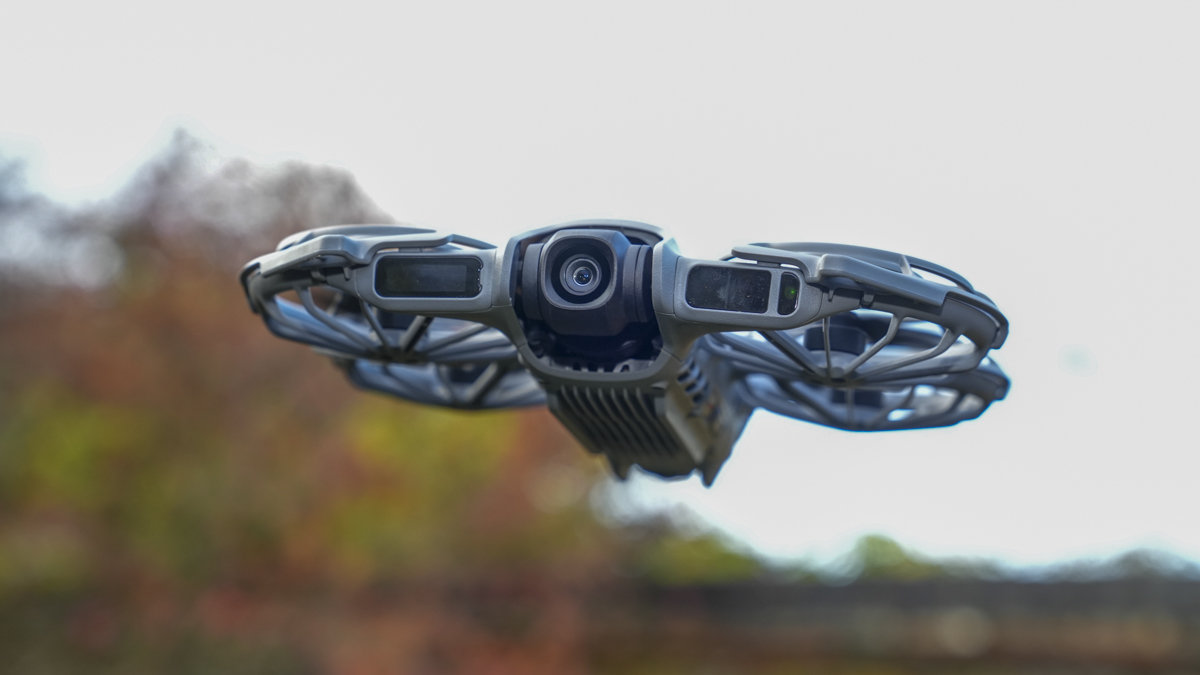
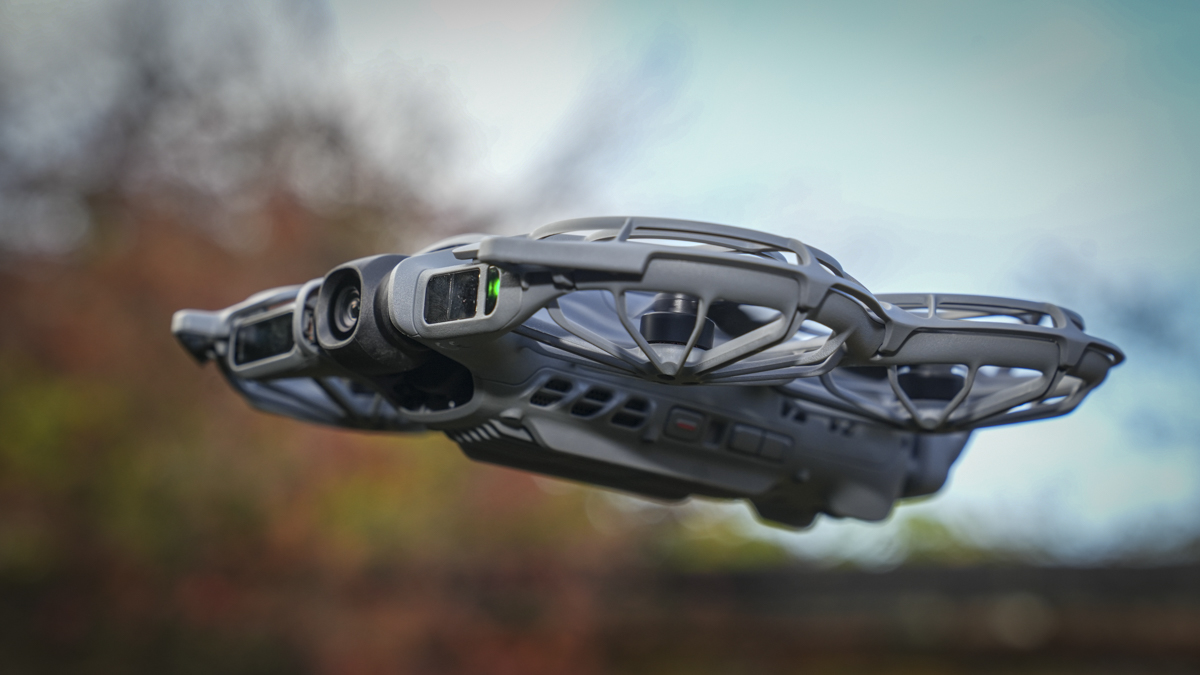
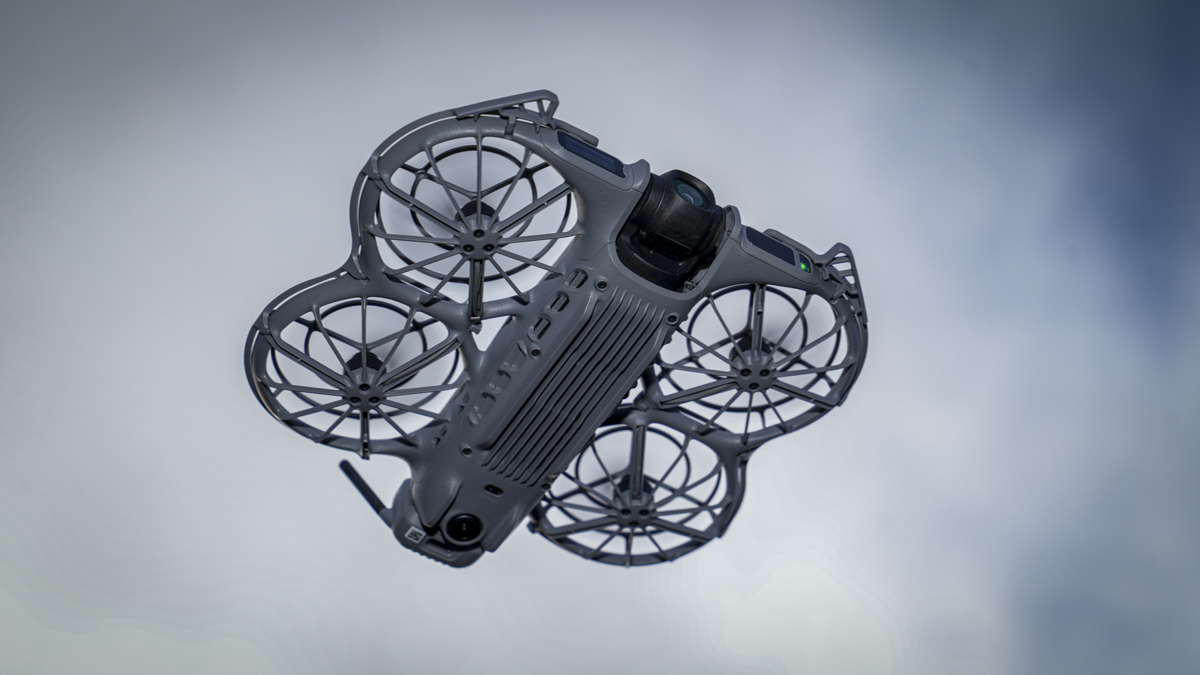
Taking a look around the body of the Neo 2, you can see the new sensors, with one on top, another on the bottom, and sensors on the front next to the camera assembly. These new sensors worked incredibly well. When used for the follow-me tracking, they were able to navigate through footpaths, woodland, and open spaces without issue. Taken into the confines of a building, they paused flight, and you could see the small craft trying to work out the best approach to continue its journey. Of all drones of this type so far, this is by far the most accurate.

Flight times as a whole were pretty good. The quoted 19-minute flight time in purely calm conditions without using the camera is probably about right. For the most part, through the test period, the small battery lasted between 12 and 15 minutes when recording video and tracking my movements. Obviously, this uses a bit more processing power and drains the battery, but still—15 minutes of flight time is exceptionally good. Since the drone is never that far away from you, there’s never a real worry about flyaways. If the battery gets low, it sounds loud enough to give you that 20% warning so you know it’s starting to fade.

My review sample was the combo kit and arrived with three batteries, essentially giving you an hour of flight time. That’s really more than enough for most people. The fact that it can be quickly charged using the DJI Power 2000, which I reviewed recently, also adds to its appeal. So when you’re out on site filming, you can have this topping up its charge with the included charger while you’re getting on with other work. If you’re looking for a drone that can capture behind-the-scenes detail, then this is absolutely one of the best options I’ve yet come across. It’s just so easy to use.

One thing I will say is that the drone arrived during a particularly drizzly and rainy stretch of English weather. Every time I went out, there was always a little bit of drizzle around and a light to moderate breeze. This had a noticeably adverse effect on the flight, as it is only small, but I was still impressed with how robust it was and how well it held its own. However, with brighter conditions present, the speed for walking, running, and even being on a bike was impressive. As I flexed through all the different flight modes, it was interesting to see that this small drone, whilst compact, has been designed to keep up with the action. My tests were especially impressive when it came to tracking while I was on my bike.

Which brings me onto the flight mode and how the drone actually works when using it for palm flight. Essentially, once you power it on with the usual double-press technique on the battery, you can then hold it in your left or right hand (I found the left hand easiest). On the right-hand side of the drone (as you look at it), there are three buttons, one with an orange line through it and two simple push buttons, much like the volume buttons on a phone.

The first thing to do is select the mode you want, and this can be done using one of those two buttons. You can scroll through from tracking to ski tracking, cycle tracking, as well as helix and all the other modes that DJI drones have included over the years. Very new here is the small LCD screen on the front, which shows you exactly what mode you’re in, while the internal voice highlights the selected mode as well. Once you have the mode you want, you can just click and hold the other button, and it will count down to take-off and launch directly from your palm. At that point, you’ll see the lights on the right-hand side where the sensors are flash to show that it’s locked onto a target, such as you, and it will now track you.

The way this works is exceptionally easy, and from beginner to intermediate and expert, I think there’s something here that everyone will really enjoy.

Then there is, of course, the gesture control. Using a variety of different gestures, you can get the drone to do several things. First, you need to activate gesture control, and you do this by holding a flat palm up to the camera. Once that’s done, you can then move your palm left or right and the drone will move left or right. Likewise, move it up or down to adjust the framing of the shot.

The really clever part is that if you hold both hands up with your palms facing the camera and move your hands towards or away from each other, then the drone will move forwards or backwards. It’s just really good.
Finally, if you want to stop it from following your gestures, you hold your palm up to the camera, then clap it into a fist. When the blue light indicator on the drone switches off, you know you’re out of gesture control.

DJI Neo 2 Final Thoughts

After spending a good amount of time playing around with the Neo and now the Neo 2, it’s one of my favourite drones just for taking out and having fun with. But the Neo 2 is far more than the Neo. The Neo was really a toy, it was great for learning how to fly, however the Neo 2 feels like more of a practical tool. It’s small, lightweight, and with the fact that you can also bind it in with the video transmission system, taking it to another level, it’s actually a very proficient compact drone for content creation.

Ok, it might not have the quality of the larger drones with that small camera, but to be honest, the quality of the transmission and the footage captured on that half-inch sensor is impressive. If you’re just dropping in a few aerial shots into your videos, then really it’s going to seamlessly match in. At present, it only shoots in standard colour profiles, and whether DJI will expand the colour modes from just normal to include something like a log mode is quite unlikely, but it would be a nice feature to see. As it is, whether you’re shooting video or stills, the quality for the size of the drone is exceptionally good.

But where it really stands out is with the level of the tracking, it’s exceptionally good. If you’re just using it to track along with you on a walk, it’s like having a small friend following you. It’s a little bit disconcerting at first, but it just works seamlessly. I did try during the test to see if it was possible to pair one of the mic systems in with it, which would make it a perfect creator drone. Unfortunately, that doesn’t seem to be possible, but this is asking a little too much of what is essentially a beginner drone designed for tracking, for which it works exceptionally well.

While I couldn’t try the video transmission properly, I will have a go at this in the near future and will update the review accordingly.

For now, if you’re a beginner wanting safe and easy access to your first drone, then this is a perfect option. Likewise, if you’re a content creator and want to add some aerial drone footage, especially behind the scenes, then it’s exceptionally good. You basically just let it get on with its job, and it will produce stunning footage for you. The quality of the footage from that small camera is surprisingly good.

For me, though, the two areas which really stand out are: being able to capture behind-the-scenes footage so easily with that incredible tracking, and also the pure quality of the video that the small camera is able to capture. Those two things instantly make it a must for content creation.

However, what I really like about it is that it’s just so fun. It’s quick, and when you use it with the remote, it makes a great way of practising flying a larger drone, based in your home and garden, making it suitable not just for beginners, but for all levels of drone pilot.