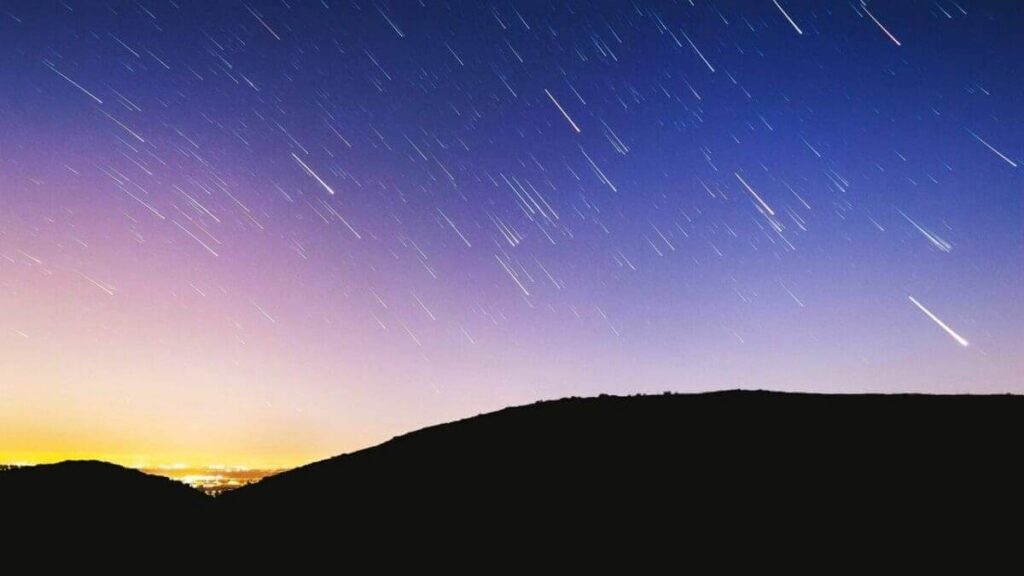
The Perseid meteor shower graces our skies every August, and this year promises to be especially stunning! In this brief tutorial, we’ll guide you on how to set up your camera to capture the Perseid meteor shower. Follow these straightforward steps, and you’ll be sure to capture images you can be proud of.
To photograph a meteor shower like the Perseids, you’ll need a clear night and a very dark location. Since you’ll be working in complete darkness, it’s best to set up your camera in advance. This way, you’ll be prepared and won’t have to fumble with your settings in the dark.
How to set up your camera to shoot the Perseid meteor shower
Since you’ll be in total darkness, you’ll need to use your camera’s manual mode. Don’t worry—this mode gives you full control. Here’s how to get started:
First, consider your exposure time. Unlike other night photography, you don’t want to use super long exposures. Long exposures will record the motion of the stars as star trails, and the Perseid meteors will appear as faint streaks across your frame.
To avoid this, set your camera’s ISO to a higher sensitivity, starting at around ISO 3200. This will help determine an appropriate shutter speed.
Aim for a shutter speed of about 5 seconds and set your lens’s aperture to its widest option, ideally f/2.8 or f/4.
You’ll also need to focus your camera manually since the autofocus system will struggle to find something to lock onto in the night sky.
Manual focusing in the dark can be challenging, so we suggest pre-setting the focus to infinity.
If you’re using a zoom lens, set the zoom to a suitable setting, usually a wide-angle such as 18mm. Point your camera at a distant subject and carefully focus. Alternatively, use the lens’s focus scale to set the focus to infinity.
To ensure the zoom doesn’t move, use a small piece of tape on the lens.
Lastly, select the raw format or Raw + JPEG in your camera’s menu system. While you’re there, turn on your camera’s long exposure noise reduction mode. This will double the time it takes to capture each image, but the results are usually better.
Adjusting your camera settings
There are many challenges when shooting meteors and starscapes, but focusing in total darkness is probably the biggest one.
Earlier, we explained how to pre-set your focus, and ideally, you shouldn’t need to change it. However, if you decide to adjust the zoom setting or if the piece of tape falls off, you’ll need to refocus your lens on a distant object.
The best way to do this is by using your camera’s Live View feature. When the night sky appears on your LCD screen, find the brightest object you can see.
Next, zoom in on that object using the magnify button on your camera and adjust the focus manually. This can be tricky and requires patience, but you can do it!
Once you’ve fine-tuned your focus, take a test shot with the settings you configured before you started. Check if the exposure is acceptable and if the image is too noisy.
Remember, the settings we’ve suggested are just a starting point. You may want to tweak them to suit your preferences or creative vision.
Generally, aim for an image that is fairly dark with minimal foreground detail, but with bright and clear stars.
If your image is too bright, try a shorter shutter speed, such as 2 seconds. Conversely, if your photo is too dark, increase the ISO. Avoid using a longer shutter speed to prevent unwanted star movement.
Best camera settings for meteors and starry skies
File format: Raw
Exposure mode: Manual
Aperture: f/2.8
ISO: 3200
Shutter speed: 5 secs
Focus mode: Manual
Drive mode: Single shot
White balance: Auto
Final tip for photographing a meteor shower
Taking pictures of meteors will be easier if you give your eyes plenty of time to adjust to the darkness.
When you arrive at your location, avoid looking at any bright lights, such as flashlights or even the rear screen on your DSLR or mirrorless, for about 20 minutes. This will help your eyes become accustomed to the dark, improving your ability to see the night sky and compose your shots effectively.
For more tips read how to shoot astrophotography.
Recommended Camera and Lens Combinations for Capturing the Perseid Meteor Shower
Capturing the beauty of the Perseid meteor shower requires the right equipment to ensure you get the best possible images. Whether you’re a beginner on a budget, an enthusiast looking for the next step up, or a professional aiming for the highest quality, we have recommendations for you. Here are camera and lens combinations from popular manufacturers, suitable for different levels of photographers. Prices are provided in both the UK and US currencies for your convenience.
Canon
Budget:
- Camera: Canon EOS Rebel T7 (US) / EOS 2000D (UK)
- Lens: Canon EF-S 18-55mm f/3.5-5.6 IS II
- Price: $450 / £400
Enthusiast:
- Camera: Canon EOS 90D
- Lens: Canon EF-S 10-18mm f/4.5-5.6 IS STM
- Price: $1,350 / £1,250
Professional:
- Camera: Canon EOS R5
- Lens: Canon RF 15-35mm f/2.8L IS USM
- Price: $5,800 / £5,400
Nikon
Budget:
- Camera: Nikon D3500
- Lens: Nikon AF-P DX NIKKOR 18-55mm f/3.5-5.6G VR
- Price: $650 / £600
Enthusiast:
- Camera: Nikon D7500
- Lens: Nikon AF-S DX NIKKOR 10-24mm f/3.5-4.5G ED
- Price: $1,700 / £1,550
Professional:
- Camera: Nikon Z7 II
- Lens: NIKKOR Z 14-24mm f/2.8 S
- Price: $4,900 / £4,500
Sony
Budget:
- Camera: Sony Alpha a6000
- Lens: Sony E 16-50mm f/3.5-5.6 OSS
- Price: $700 / £650
Enthusiast:
- Camera: Sony Alpha a7 III
- Lens: Sony FE 16-35mm f/4 ZA OSS
- Price: $2,600 / £2,400
Professional:
- Camera: Sony Alpha a7R IV
- Lens: Sony FE 12-24mm f/2.8 GM
- Price: $5,300 / £4,900
Olympus
Budget:
- Camera: Olympus OM-D E-M10 Mark IV
- Lens: Olympus M.Zuiko Digital ED 14-42mm f/3.5-5.6 EZ
- Price: $800 / £750
Enthusiast:
- Camera: Olympus OM-D E-M5 Mark III
- Lens: Olympus M.Zuiko Digital ED 9-18mm f/4-5.6
- Price: $1,600 / £1,450
Professional:
- Camera: Olympus OM-D E-M1 Mark III
- Lens: Olympus M.Zuiko Digital ED 7-14mm f/2.8 PRO
- Price: $2,600 / £2,400
Fujifilm
Budget:
- Camera: Fujifilm X-T200
- Lens: Fujinon XC 15-45mm f/3.5-5.6 OIS PZ
- Price: $900 / £850
Enthusiast:
- Camera: Fujifilm X-T30 II
- Lens: Fujinon XF 10-24mm f/4 R OIS
- Price: $1,800 / £1,650
Professional:
- Camera: Fujifilm X-T4
- Lens: Fujinon XF 16-55mm f/2.8 R LM WR
- Price: $3,100 / £2,850
Pentax
Budget:
- Camera: Pentax K-70
- Lens: Pentax DA 18-55mm f/3.5-5.6 AL WR
- Price: $850 / £800
Enthusiast:
- Camera: Pentax K-3 III
- Lens: Pentax DA 12-24mm f/4 ED AL (IF)
- Price: $2,300 / £2,100
Professional:
- Camera: Pentax K-1 Mark II
- Lens: Pentax D FA 15-30mm f/2.8 ED SDM WR
- Price: $3,400 / £3,100
LEICA
Budget:
- Camera: Leica D-Lux 7
- Lens: Integrated Leica DC Vario-Summilux 10.9-34mm f/1.7-2.8 ASPH
- Price: $1,400 / £1,300
Enthusiast:
- Camera: Leica Q2
- Lens: Integrated Leica Summilux 28mm f/1.7 ASPH
- Price: $5,500 / £5,000
Professional:
- Camera: Leica SL2
- Lens: Leica Vario-Elmarit-SL 16-35mm f/3.5-4.5 ASPH
- Price: $9,500 / £8,700
Panasonic
Budget:
- Camera: Panasonic Lumix GX85
- Lens: Panasonic Lumix G Vario 12-32mm f/3.5-5.6 ASPH
- Price: $800 / £750
Enthusiast:
- Camera: Panasonic Lumix G9
- Lens: Panasonic Lumix G Vario 7-14mm f/4 ASPH
- Price: $2,200 / £2,000
Professional:
- Camera: Panasonic Lumix S1R
- Lens: Panasonic Lumix S Pro 16-35mm f/4
- Price: $4,500 / £4,100
For more information on the Perseid Metor Shower check out the Royal Museums Greenwich dedicated pages to the event.