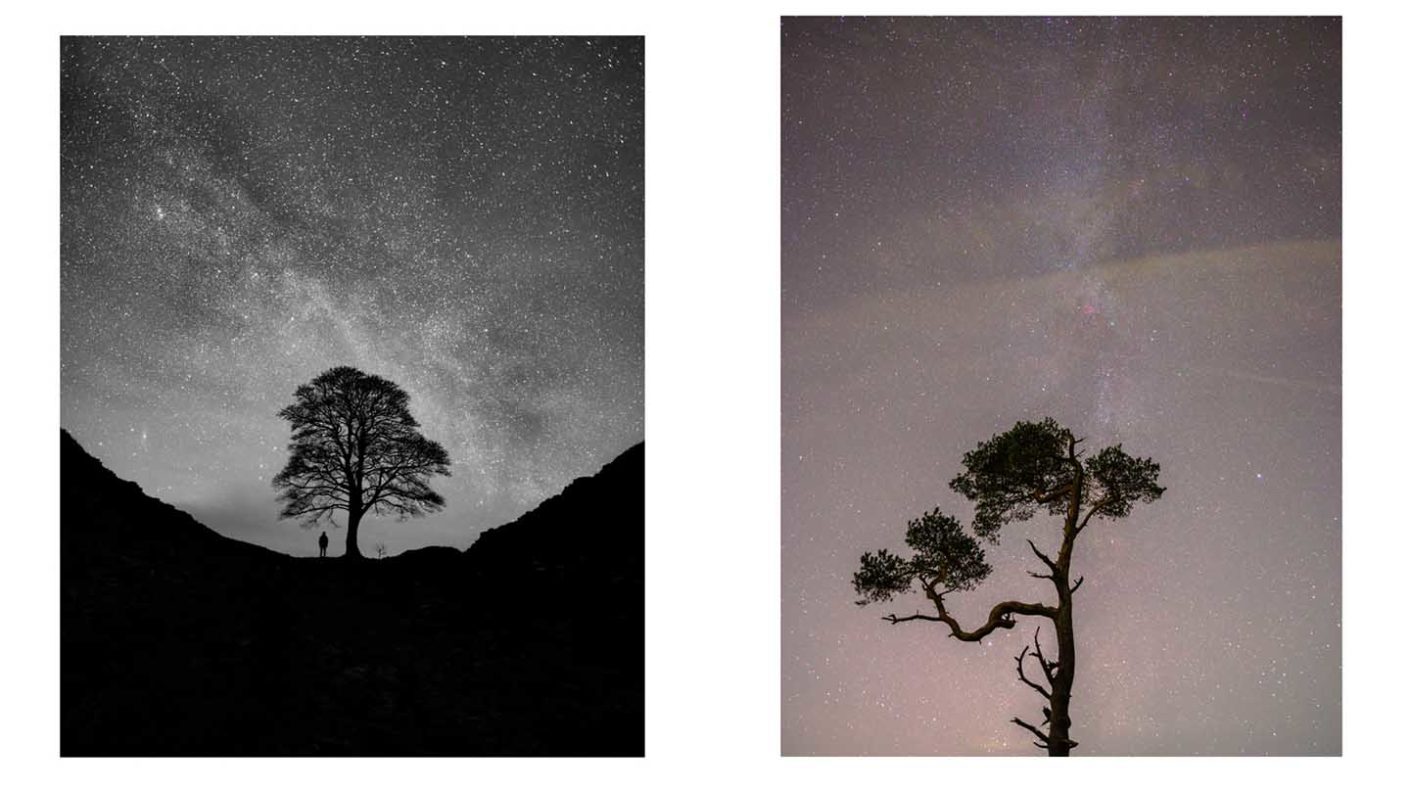

Mark McNeill is a professional landscape and astrophotographer, during the lockdown he’s been able to continue to shoot images of star trails, galaxies and the moon from his back garden.
In the video below, which was record via Zoom video conferencing, Mark explains how to get started with astrophotography and shares some of his amazing images. Scroll down for a summary of the main points and the best camera settings for astrophotography.
Visit Mark McNeill’s website
Follow Mark on Facebook
Follow Mark on Twitter
Follow Mark on Instagram
How to shoot astrophotography
The night sky, the stars and the moon are fascinating but they can be quite daunting subjects for inexperienced photographers. However, as Mark has explained, it’s not as hard as you might think to shoot astrophotography. Here are the key steps and the best camera settings for astrophotography:
01 Find your location
Ideally, you want to shoot somewhere dark and away from any street lights, but it’s possible to shoot astrophotography from your own garden.
Turn off all the lights you have control over and allow your eyes to acclimatise for a few minutes, it’s amazing how much difference that makes to what you can see.
If you need some light to see your camera, use a red light as this won’t set your eyes back as much as a standard white light.
02 Select your lens
Your lens choice, or more specifically its focal length, is a critical decision for astrophotography. If want to include some scale or context, pick a wide-angle lens. A focal length of 24mm or 35mm is popular,
However, if you want to capture the details of the moon, you’ll need a longer lens. An effective focal length of 400-500mm or more is ideal.
03 Set-up your camera
Mount your camera on a sturdy tripod and frame the shot. Make sure that the leg locks, centre column lock and tripod head locks are all nice and tight so the camera can’t move during a long exposure.
04 Set the shutter speed
Set your camera to manual exposure mode and set the shutter speed. If you want the stars to look like sharp dots rather than streaks, you should use the ‘500 rule’. To apply this, simply divide 500 by the effective focal length of your lens to derive the shutter speed. For example, a 24mm lens on a full-frame camera needs a shutter speed of 21sec.
500/24=20.8
On an APS-C format camera, a 24mm (36mm effective focal length) lens requires a shutter speed of 14 sec.
500/36=13.8
And on a Micro Four Thirds camera, a 24mm lens is effectively a 48mm lens so you need a shutter speed of 10sec.
500/48=10.4
If you want to shoot star trails you need to use long exposures. Rather than shooting these in one go, it’s often easier to shoot a sequence of shorter exposures that you composite – but make sure the long exposure noise reduction is turned off.
05 Set the ISO and aperture
With the shutter speed determined by your choice of lens and the type of image that you want to shoot, now set the sensitivity (ISO) and aperture to accommodate that exposure time. Ideally, keep the sensitivity to ISO 3200 or lower. This usually means using a wide aperture, which is why fast lenses (those with a wide maximum aperture) are favoured.
After taking your first shot, check the exposure of your image and adjust as necessary.
06 Focus the lens
Switch to manual focus mode and focus the lens on infinity – but don’t rely on the infinity marking. Instead, try focusing on a distant light or bright point about 300m or so away.
Alternatively, in daylight, focus your lens on an object around 300m away and put a mark on the lens so you can find the right point again in the dark.
When you’re focusing at night, it’s helpful to use focus peaking as this reveals the sharpest areas of the scene.
07 Turn off the noise reduction
Most cameras have two forms of noise reduction, high ISO and long exposure. The high ISO noise reduction shouldn’t affect raw files, you can set it during the processing, but it can remove details from your Jpegs images.
Long exposure noise reduction effectively doubles the time it takes to capture each image. As well as resulting in some stars being mistakenly removed, using it for star-trail images composited from multiple shots will result in gaps in the trails.
08 Use the self-timer or a remote release
Use a remote release or your camera’s self-timer to trip the shutter without introducing any vibration that could cause blur or loss of detail in your image.