You’ve just invested in a new camera, Sony A7R IV, Canon R5, Nikon Z7 II and have been blown away by the performance and stunning, high-quality images.
The stills and video resolution increase is welcome, but there’s an issue, not with the camera, but with the old trusty computer that you use to process and edit the files.
45MP and upward images and 4k plus video takes some serious processing power, and that’s power your computer is desperately lacking. While you can get away with using older machines, once Photoshop layers or advanced video timelines start to increase, the resulting computer slow down can be infuriating.
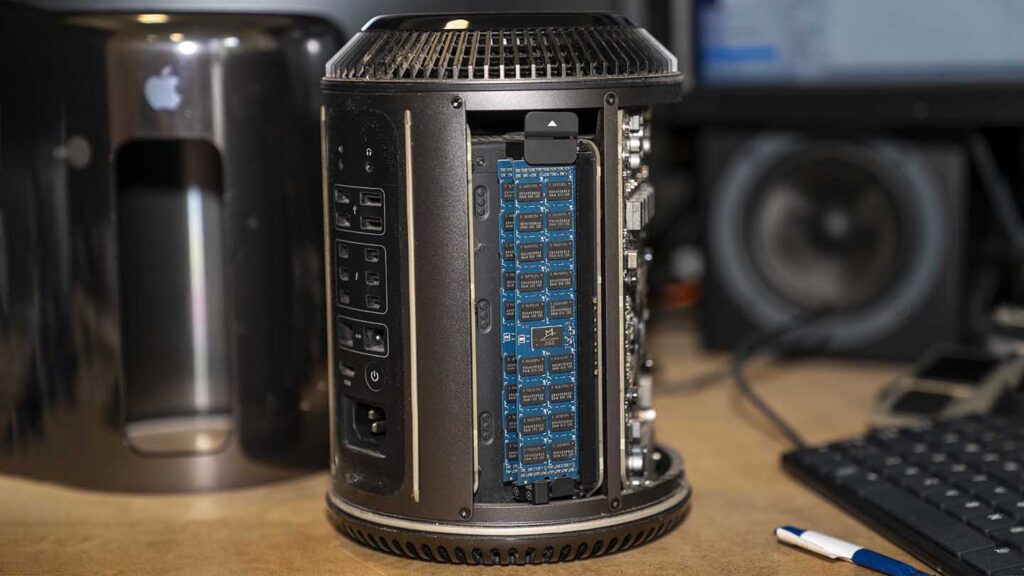
While your first thought might be to retire your old machine, the likely hood is that there’s still plenty of life left in it, especially if it’s a Mac Pro (Late 2013).
Whatever your machine, one of the first upgrade options is to boost the RAM. RAM is generally quick and easy to fit, and in this tutorial, I’ll be looking at the upgrade kit for the Mac Pro (Late 2013).
When the computer was released in 2013, it came as standard with 12GB of RAM but could be maxed out with 64GB. Inside the machine are four RAM slots designed to take 1866 MHz DDR3 ECC SDRAM.
Since the Mac Pro (Late 2013)’s release, it has been confirmed that the machine can actually take up to 128GB of RAM. One of the most popular choices is OWC with their 128GB upgrade kit that I’ll be using in this tutorial. RAM: https://eshop.macsales.com/item/OWC/1333D3Z3M128/
In this feature, I aim to answer a few questions about the RAM upgrade, how it boosts performance, what overall improvement you can expect, and ultimately will it breathe more life into your computer?
Before we get started, it’s important to benchmark the machine as it is.
Mac Pro (Late 2013) with 3.5 GHz 6-Core Intel Xeon E5, 16GB 1866 MHz DDR3 RAM, AMD FirePro D500 3 GB running macOS Big Sur Version 11.4.
I ran Blackmagic Disk Speed Test, GeekBench and CineBench to check the computers initial performance. I’ve also listed the test results after the new RAM was installed for easy comparison.
Results
Blackmagic Disk Speed Test (Before)
Write: 731.3 MB/s
Read: 910.9 MB/s
Blackmagic Disk Speed Test (After)
Write: 754.1 MB/s
Read: 941.6 MB/s
GeekBench (Before)
Single-Core Score: 802
Multi-Core Score: 4681
Compute Metal Score: 23926
Compute OpenCL Score: 22001
GeekBench (After)
Single-Core Score: 824
Multi-Core Score: 4677
Compute Metal Score: 24047
Compute OpenCL Score: 21603
CineBench (Before)
CPU (Multi-Core) 4870
CPU (Singel Core) 691
CineBench (After)
CPU (Multi-Core) 5362
CPU (Singel Core) 724
With the initial speed bench done, it made for some interesting reading. The results, in most cases, are better, but no the leap I was expecting. However, as I started on the real-world tests of the machine, the performance upgrade with the new RAM became very apparent.
Starting with using the machine with 16GB installed and HD footage and 24mp stills are handled well. This is expected as these would have been the standard camera resolutions when the computer was released.
However, as I started to edit files from a Sony A7R II and video from a Sony FS-7, the Mac Pro quickly started to slow.
Creating multiple adjustment layers in Photoshop, the machine started to lag with the beach ball of death spinning merrily on screen.
Likewise, waiting for 4K video to render in the timeline is painfully slow.
With the initial benchmarks done, the new RAM was installed before all tests were carried out again.
While in the benchmark test, there was little uplift in the speed of the machine, when it came to the real-world test, the performance improvements were much more apparent.
A good example is Final Cut Pro. After an edit with 16GB of RAM, the speed of the machine visibly slows; likewise, as the layers build in Photoshop, there’s a definite lag with the higher resolution images.
However, with the additional RAM, this slow down is delayed and editing 4K video and handling the larger image files are all handled similarly to a MacBook Pro 16-inch (2019) with 32GB of RAM.
Essentially, the RAM upgrade enables you to do more. You won’t see a huge speed boost in the machine, but you will notice that you can do more for longer, ultimately boosting your workflow.
For example, 16GB will enable you to use apps or an app, but there will be a slow down if you decide to open up FCPX and start rendering a file, then open Photoshop to do some image enhancement.
128GB gives your machine more flexibility to handle the apps and the content you’re creating.
As upgrades go, the RAM might not have given me the type of speed boost that I expected but has enabled the machine to do far more.
01 Open the Mac Pro
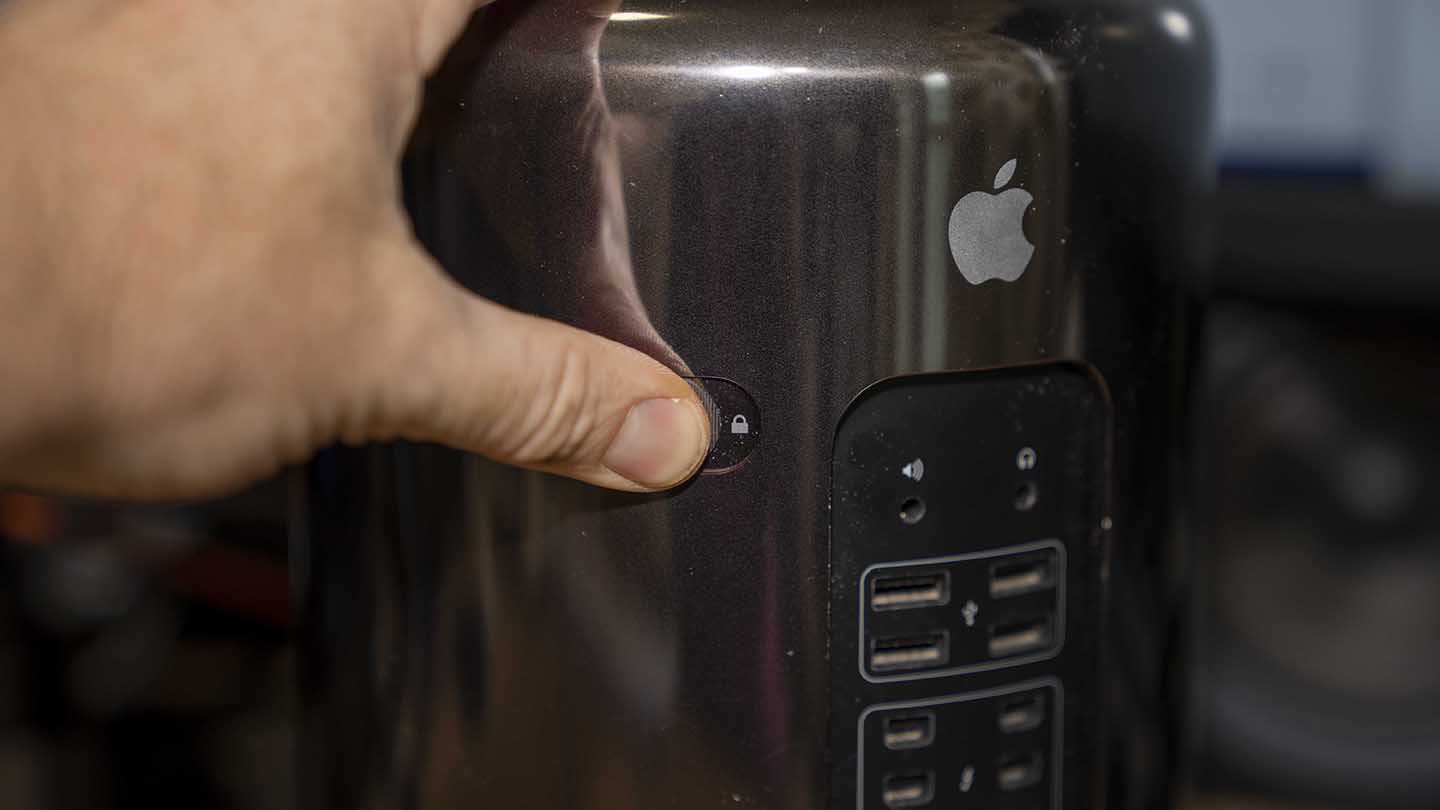 Unplug all cables and then slide the locking button to release the case and pull vertically away from the base.
02 Remove the old RAM
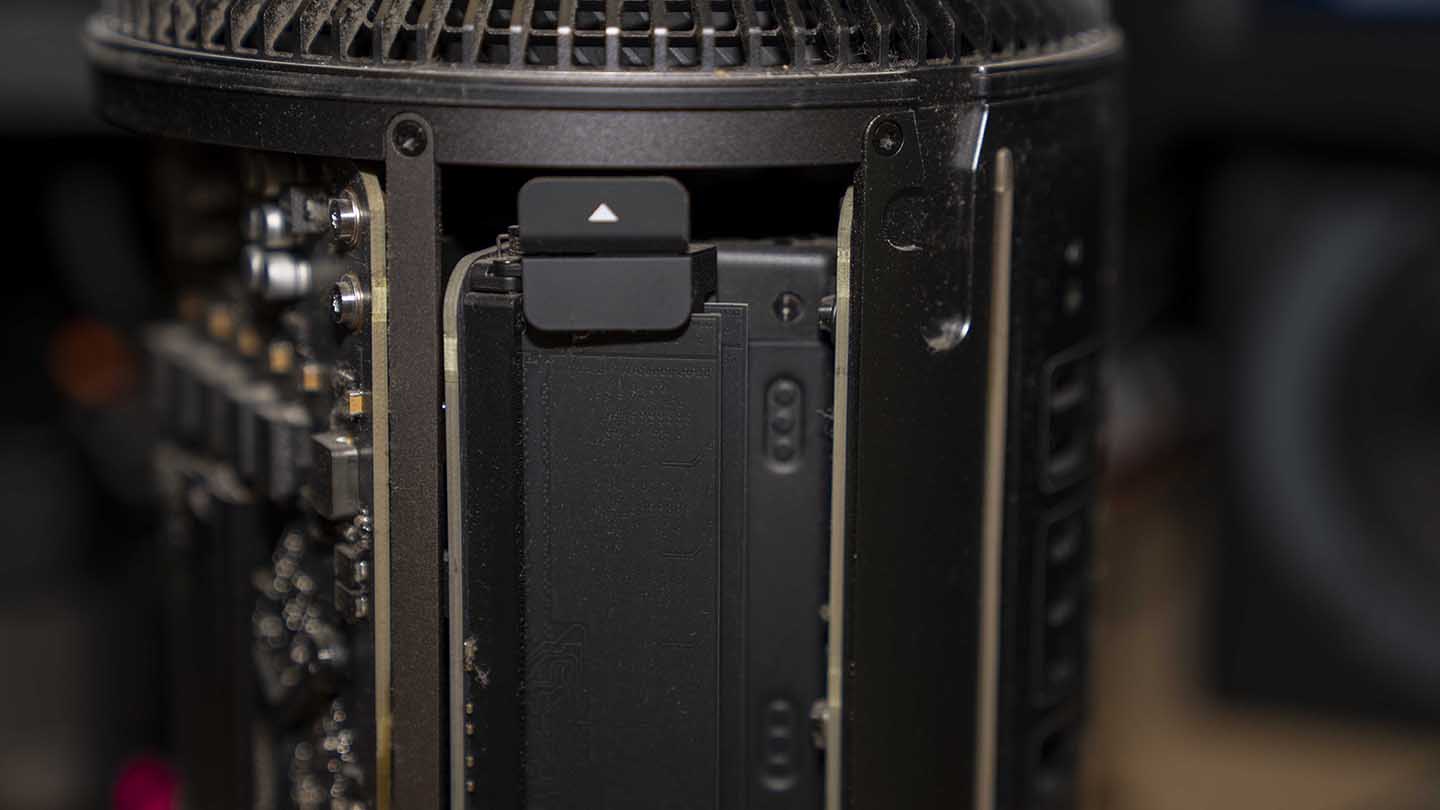 OWC supplies a small plastic lever that can be used to release the RAM, place it under the release tab, and twist; the RAM will pop out and be easily removed.
03 Install the new RAM
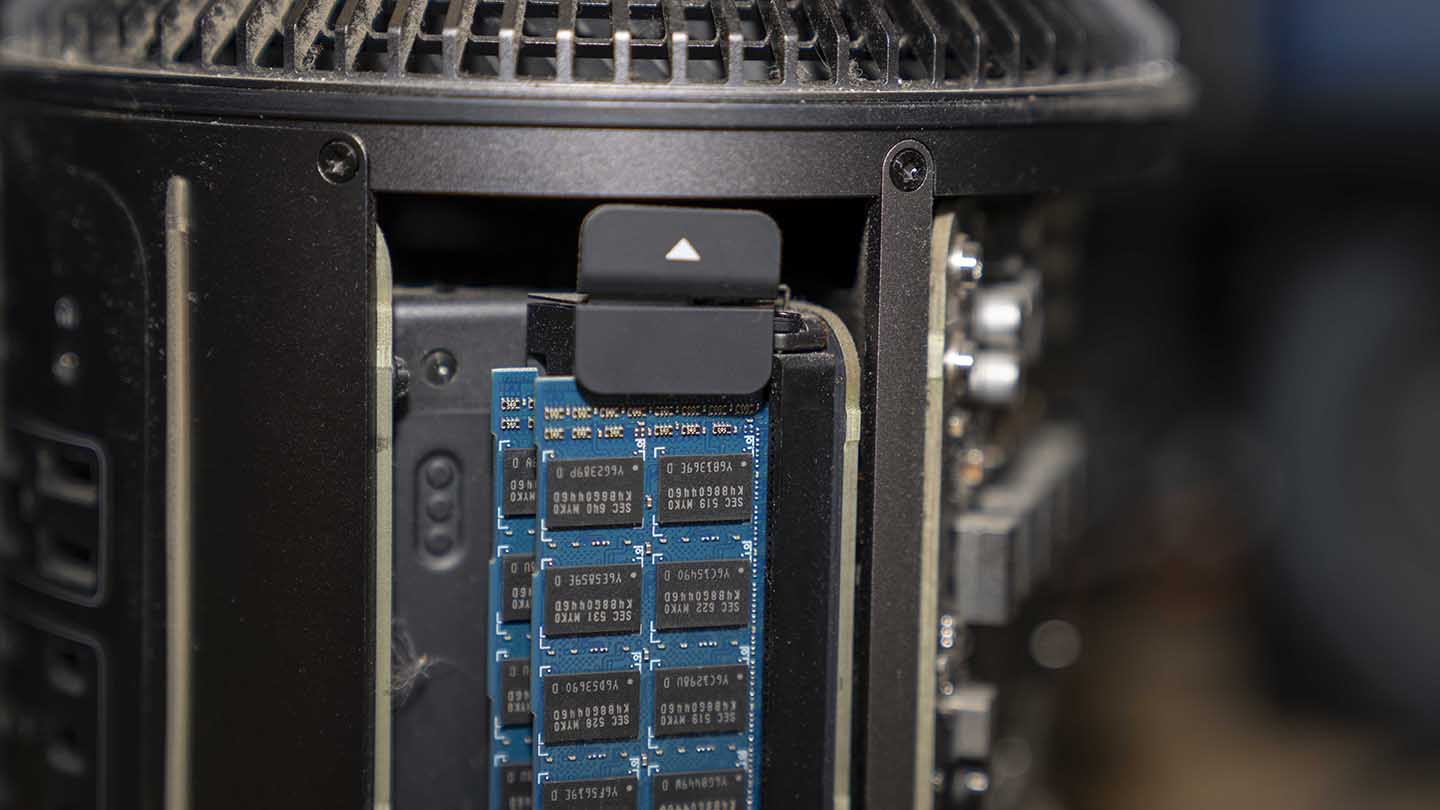 The new RAM can be quickly inserted and clicked into place. The installation is extremely easy and shouldn’t present any issues.
04 replace the case
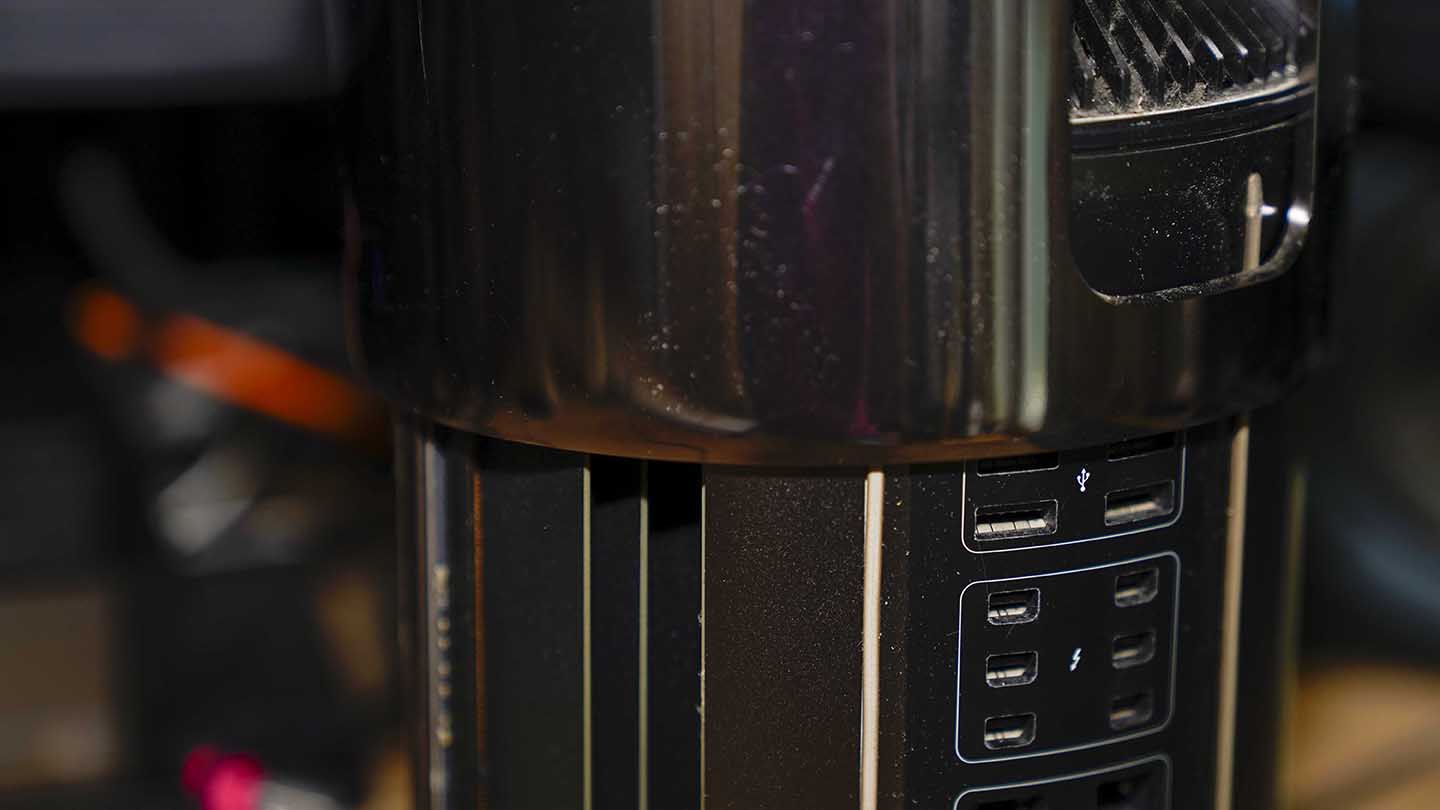 Once the RAM is installed, pop the case back over the top, plug in the cables and reboot the Mac. The new RAM should be recognised.
05 Check the RAM
Go to the apple icon > About this Mac. Click on Memory, and you’ll see the new RAM installed on your system.
Be it a Mac or PC, the process for installing RAM into your computer should be much the same. The good thing about this hardware upgrade is that there’s no software to install or settings to change. It should just work.