If you’re a new photographer you may feel daunted by the sheer volume of different photography techniques there are to learn, from setting up your camera to essential photo editing skills. Sometimes the best way to move forward is to just pick a few of the fundamentals and master those.
Then, once you’ve mastered those techniques, pick a few more. We had a think about about some of the photography techniques that can both kickstart your learning and help you get creative with your compositions. Have you tried any of these?
Beginner photography techniques: 01 Panning
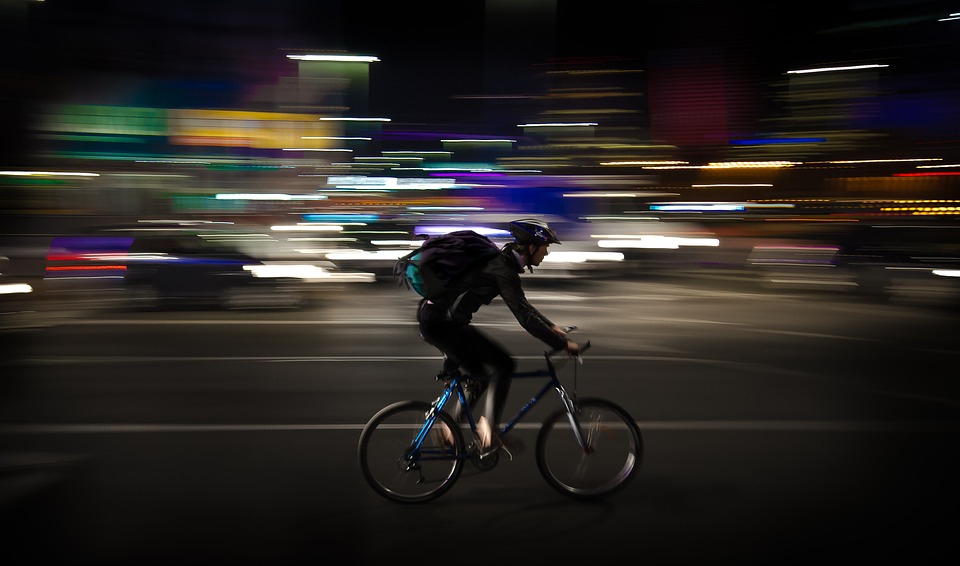
Panning a subject is a technique where you physically follow your subject your camera as it moves across a scene. The idea behind this technique is that you capture your subject in precise focus, but the background is blurred by your motion, providing a contrast with the sharp subject.
Panning is a useful photography technique to learn if you practice any kind of sports or wildlife photography, but it can be used to great effect in street photography as well – or any type of subject where there is a clear action occurring.
How to do it
Panning successfully involves getting a number of things right. The first thing you need to do is follow your subject evenly through the duration of the pan so that it stays sharp. Knowing where to start and stop the pan is key. If you start it too soon you will find it hard to keep up with your subject. Yet, if you start it too late you probably won’t achieve the effect you were hoping for.
The other key is learning the right shutter speed to use. If you use a shutter speed that is too long you will find it hard keeping up with your subject throughout the pan. On the other hand, if you’re using a shutter speed that’s too short it won’t give you enough time to blur the background sufficiently.
For most pans you will want to use a shutter speed of at least 1/40sec, but possibly even as long as a second or more. We’d like to say there are hard and fast rules when choosing a shutter speed, but you will only know through trial and error.
The right shutter speed depends on how fast the subject is moving and how far away it is from you. A long pan can look great when the background is completely blurred, for instance, but it’s more difficult to achieve. In these instances it’s better to start with a shorter exposure and work from there.
If you have image stabilization on your camera or lens, take a look at your mode options. The secondary option is usually designed for panning. What this does is disable stabilization across one axis so that your camera or lens only tries to compensate for motion along the axis you require.
It’s also worth mentioning your posture. The way you stand affects your movement, and this will affect the quality of your panning. Best practice is to stand with your legs spaced wide apart and try to move just your knees and upper body (rather than solely your arms) to keep the pan as smooth as possible.
Also, make sure you begin your pan before you press the shutter button so that you start off smoothly, and carry on for a brief moment afterwards to make sure that it ends on a similar motion. Monopods can be quite useful camera accessories for panning as they allow you to keep the camera steady.
Final Tip: If your subject gradually occupies more or less of the frame as you pan, such as if it is approaching you from a sharp angle, you may struggle to get a sharp result. You’ll have a much better chance of success if the distance between you and the subject is kept as constant as possible, so that you’re capturing it as perpendicularly as possible to its direction of travel.
Beginner photography techniques: 02 Focus peaking
If you’ve bought a digital camera in the past few years, there’s a pretty good chance it has focus-peaking technology, and this can make a huge difference to your photography.
Focus peaking is available on most mirrorless cameras and enthusiast compact cameras (even some DSLRs) and allows you to fine tune your manual focusing to ensure precise sharpness.
How to do it
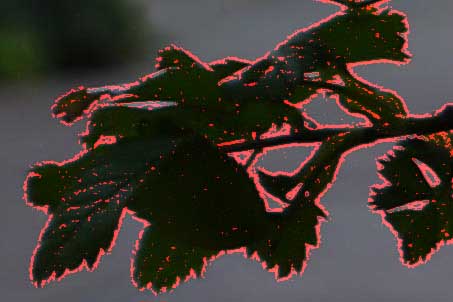
Once you have set your camera or lens to its manual focus mode you can enable focus peaking through your menu system. Next, simply point your camera at the subject and adjust the focusing ring until you see your subject start to come into focus.
What’s different, you may ask? As your subject comes into focus you’ll notice a white or coloured highlight appear over parts of your image. These indicate the areas that are sharp. Keep turning the focusing ring until the highlight covers as much of your subject as possible, then take the picture.
You can use this with the LCD on the back of your camera or via an electronic viewfinder – although we suggest using the former, as this tends to allow you to focus more precisely. For static subjects like still-lifes, you may also want to use a tripod if possible for maximum sharpness.
Beginner photography techniques: 03 Bracketing
What is bracketing, you may be asking. Bracketing is an old technique of taking several different exposures of the same subject – one over, one under and one at an even exposure – giving you the option to choose which is best.
Most cameras now offer this functionality, and it is quite a useful tool when lighting conditions are difficult and confusing your metering system. You might want to bracket, for instance, when shooting reflective subjects or in changing light.
How to do it
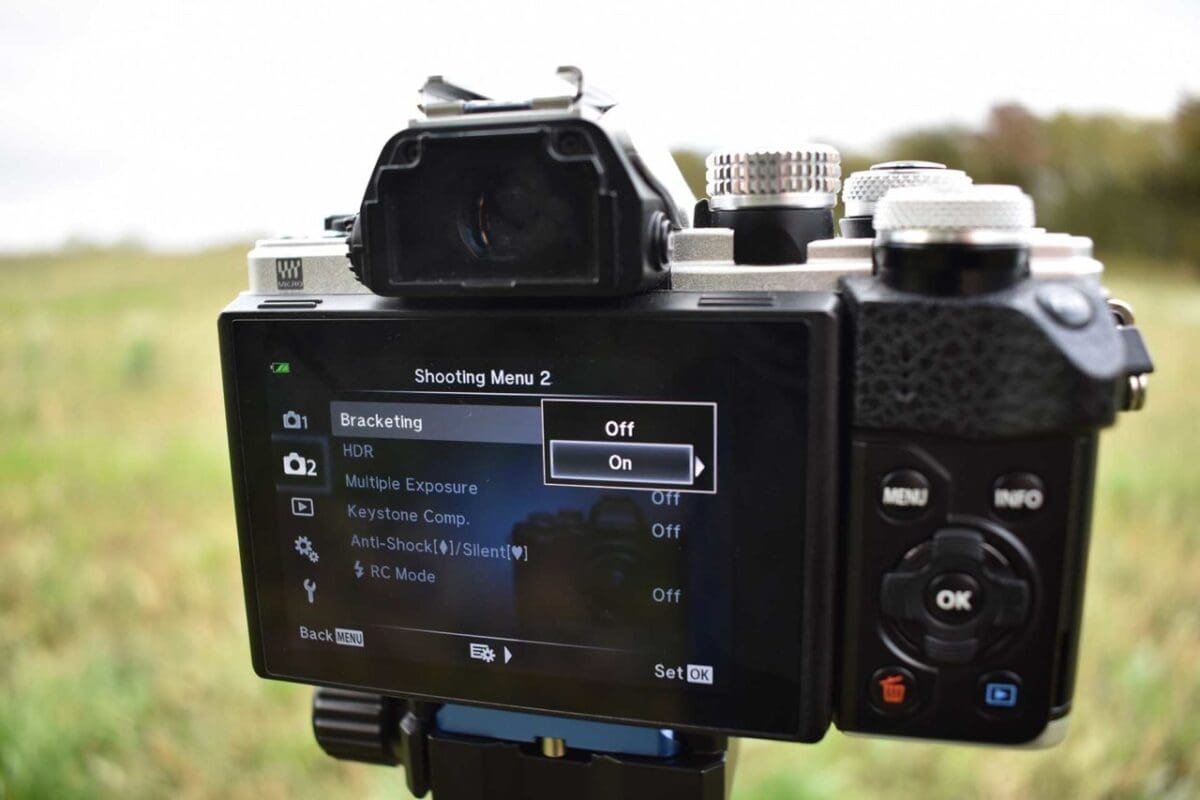
Locate the ‘AE BKT’ or ‘BKT’ option on your camera, or alternatively the icon with three differently shaded rectangles (if you can’t find this on your camera’s body it’ll be in your menu system). Once you have enabled your bracketing feature you then have the option of setting the different exposures for each of the frames you want to capture.
Typically you’ll find that you either want each frame to be slightly different or drastically different to gauge different effects.
We recommend you vary your exposures by +/- 1EV to begin and work from there. For a more subtle effect you might try a smaller shift each frame – for instance, 1/3EV instead of 1EV.
Depending on your camera you may need to press the shutter button three times, or the camera may do this automatically with just one press. At the end, you should have three images captured at each of the different exposures you set.
Get the Canon 1300D for as low as £279
Beginner photography techniques: 04 Zoom bursts
Everyone has seen a zoom burst image and stopped to marvel at the effect as you try and make out what the scene actually is. Admit it: you have. However, zoom bursts have become somewhat less fashionable in recent years, as software and tools like Photoshop’s Motion Blur filter have made it easier to replicate, thus making the effect more commonplace.
That said, a zoom burst effect done properly can still provide wow factor with the right subject and can be a satisfying photography technique to learn.
How to do it
The key to this technique is that you use a camera with a zoom lens that you can manually zoom. For the best results, mount your camera on a tripod and compose your subject using a wide focal length.
Keep note of this focal length and set your exposure in either your camera’s manual exposure mode or shutter priority mode so that your shutter speed is about 1/2sec. You may need to adjust your ISO or aperture to achieve this shutter speed, but don’t worry if it is not exact, as some trial and error is required.
Next, zoom into the scene and with one hand on the shutter release button and the other on your lens’s zoom ring. Press the shutter release button and move the zoom ring back to the first focal length you noted while doing so.
Don’t worry if your first results aren’t up to scratch. It will take a few attempts to understand the appropriate length for your exposure and know how fast to zoom.
The main thing is to not lose faith. Keep trying until you achieve the effect you want. Keep adjusting your shutter speed and even try changing the direction in which you zoom. Eventually you’ll find a combination that works best.
The key to any successful zoom burst image, though, is to make sure your camera is completely stable on the tripod. Make sure you only move the zoom ring during the exposure and try to avoid camera shake. Cable releases are handy camera accessories for zoom burst effects, as they enable you to keep the camera more stable during the exposure.
Beginner photography techniques: 05 Embedding copyright information
Embedding copyright information surely isn’t an essential technique, you may be wondering?! We admit, it’s not the sexiest photography technique in this list but it’s a habit you should pick up early on in your photographic journey.
Attaching your name to an image you take is something many photographers do for the sake of security. Once you’ve automated this information in-camera you don’t need to worry about it – it will automatically be embedded in every shot you take. Here’s how…
How to do it
In your camera’s menu system there should be an option to input copyright information – sometimes this is labeled as an image comment. On most cameras you will find this in the Setup menu, however you may need to set your camera to its manual exposure mode for it to appear.
Once you have this setting open, simply enter your name (and maybe the year; except you must remember to change this each year!), and either the copyright symbol or the word ‘copyright’. If you’re particularly savvy – and we know you are! – you may want to even add your website.
Get the Nikon D3300 for as low as $316 on Amazon US
Beginner photography techniques: 06 Setting up a tripod properly
A tripod is one of the most fundamental camera accessories there is, but you’d be surprised how many people miss shots due to camera shake because it was set up improperly. Using a tripod would seem straightforward, but there are a few best-practice guidelines that many photographers often forget.
How to do it
Before you mount your camera on the tripod, spread each leg until they extend outward to the same angle. Next you will want to release the top section of each leg that is closest to the head. You want to extend them fully and then lock them in place. You will want to repeat the process moving down each leg until the tripod is at your desired height.
One mistake many photographers make is that they extend the lower sections of a tripod’s legs first because they’re closer to your hand. However, these are the least stable section of a tripod so only extend the centre column (if your tripod allows you to do this) once every leg section has been extended.
Now, you can finally mount your camera on the tripod’s quick-release plate. An arrow underneath the plate will tell you which direction it goes. Place it on the head so that at least one bubble level faces you. Finally, make sure all spirit levels on the head and legs (if your tripod has these) are level.
If you need to adjust the tripod while you shoot, move the legs first and keep your eye on the bubble level. Only extend the centre column as a last resort.
We recommend that you use a remote release – or at the very least, your camera’s self timer mode – to help minimize camera shake. And if you’re shooting on soft ground use the feet spikes (again, if your tripod has them) to lock the tripod in position.
