Getting the correct exposure is a fundamental goal for any photographer. However, achieving that perfect balance can be a challenge. Anyone who has spent time behind the lens knows that various obstacles can prevent you from capturing the shot you envision. Among these, one of the most common and frustrating problems is overblown highlights.
Overblown highlights occur when certain areas of your image are too bright, losing all detail and texture. This not only affects the overall quality of your photos but can also make them appear unprofessional. The good news is that this issue is entirely preventable with the right techniques and tools.
To help you avoid this pitfall, we’ve identified four of the most common reasons behind blown-out highlights and practical tips to tackle them. Whether it’s shooting in harsh midday sunlight, misusing exposure settings, skipping a Neutral Density (ND) filter, or neglecting your camera’s histogram, these challenges can be overcome. With some adjustments to your approach, you can ensure your images maintain their balance, detail, and vibrancy, even in tricky lighting conditions. Master these techniques and take a confident step toward capturing perfectly exposed shots every time.
01 Shooting in strong daylight
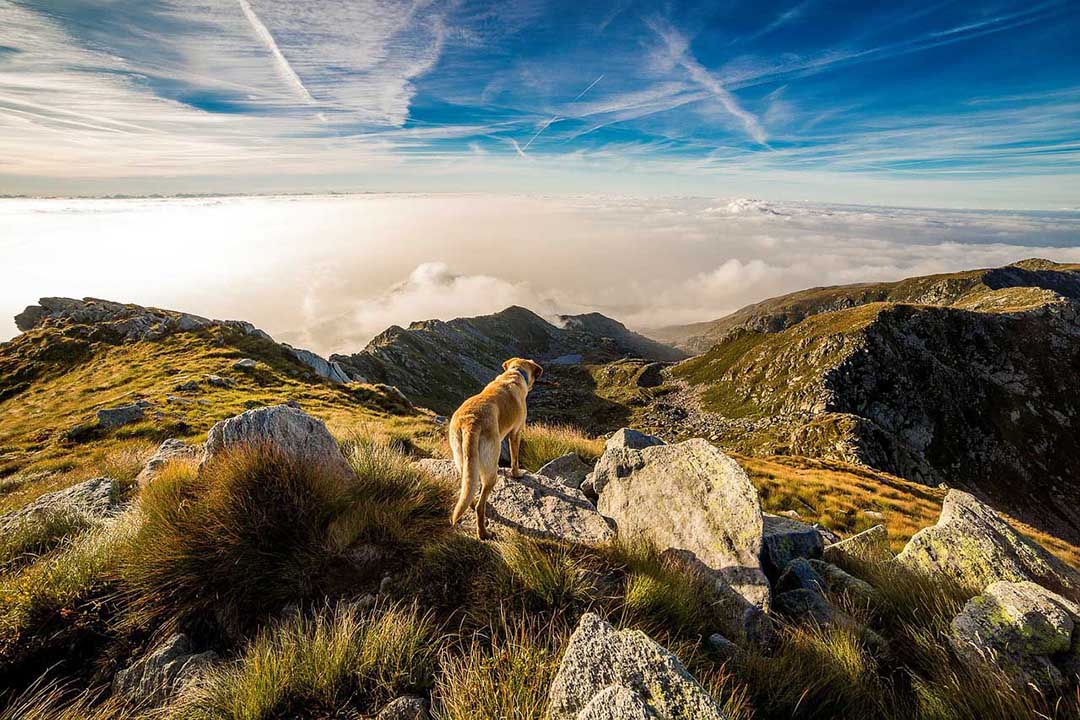
When shooting landscapes at midday or early afternoon, the sun is directly overhead, casting harsh, unforgiving light that creates strong glare and shadows. This intense lighting can make it challenging to capture the vibrant colours and balanced exposures you’re aiming for.
One effective way to mitigate these challenges is to position yourself with your back to the sun. By doing this, you can reduce glare and ensure your scene is more evenly lit, resulting in richer colors and more natural-looking exposures.
However, shooting with the sun at your back isn’t always possible—your subject or composition might require a different angle, or environmental constraints might limit your options. In these situations, you can use other techniques, such as adjusting your exposure settings or employing a polarising filter. A polariser can help reduce glare and reflections while enhancing the colours in your scene, especially in skies and water.
Additionally, consider bracketing your shots by taking multiple exposures at different settings. This approach allows you to merge them later for a well-balanced final image. Learning how to work with challenging lighting conditions will help you produce stunning landscapes, even under the midday sun.
02 Use exposure compensation
Your camera is a very intelligent piece of technology, but like a puppy it needs your guidance. Often your camera will get confused in certain lighting conditions, or will simply struggle to achieve a balanced exposure in mixed lighting, and it will produce images that are lighter or darker than you’d like them to be.
In these instances we suggest you switch your camera to its Aperture Priority mode and use your exposure compensation (the +/- button usually on the back of your camera) to make adjustments to the brightness of your images.
You can adjustment the exposure compensation in subtle increments. Take a shot at each ’stop’ and see how it looks in playback mode. In most cases, a little exposure compensation, whether over or under, will help you get the look you’re after.
SEE MORE: Common camera filter errors (and how to avoid them)
03 You didn’t use an ND Grad filter
Ask any landscape photographer of any level of experience, and she’ll tell you that the biggest challenge is that a standard exposure will either yield a a striking sky with rich blues and dramatic clouds, yet an overly dark foreground, or a foreground full of detail and a bright, overblown sky with no colour or detail whatsoever.
Admit it, we’ve all taken an image or five like that. By using a Neutral Density Gradient (ND grad) filter when you shoot a landscape, you can achieve an even exposure much more easily.
An ND grad filter mounts to the end of your lens and is dark along the upper half in order to restrict light coming in to your camera. When mounted on to your lens you can then expose for the foreground, which allows you to capture all of that beautiful colour and detail while still retaining colour and texture in the sky.
04 You didn’t use your histogram
Your camera’s histogram feature is an exposure graph that shows you in a visual form whether you have an even exposure or whether you’re blowing out your highlights or underexposing with too much shadow area.
We have a popular post on histograms here, which explains how they work.
But as a general rule, when you are reviewing your images on your camera’s LCD screen it’s good to get in the habit of checking your histogram as well to see if your images are too bright or dark.
An image that is underexposed will show your exposure graph bunched up on the left of the histogram.
An image that is overexposed will show your exposure graph stacked on the right of the histogram.
And a correctly exposed image will show an even spread of shadows, midtones
and highlights across the histogram.
READ MORE
6 beginner photography techniques you can use forever
10 digital camera tips, tricks and truths you may not have known
Best Variable ND Filters: This article provides a comprehensive overview of top variable neutral density filters, essential tools for controlling exposure in bright conditions.
URTH Variable ND2-400 Review: An in-depth review of the URTH Variable ND2-400 filter, offering insights into its performance and suitability for landscape photography.
Benro Filter System Review: This review examines the Benro Filter System, including ND grad filters, which are crucial for balancing exposures between the sky and foreground.
PolarPro Summit Landscape Filter Kit Review: A detailed look at the PolarPro Summit Landscape Filter Kit, highlighting its features and effectiveness in achieving even exposures.
Haida NanoPro Variable ND Filter Review: This review discusses the Haida NanoPro Variable ND Filter, focusing on its build quality and impact on image sharpness and colour reproduction.


