LookUp Tables (aka LUTs) are additional tools that expand your capabilities when creating and saving colour grading of your footage. To delve deeper, let’s take a closer look at LUTs to examine exactly what they are, why you should consider using them and how to apply LookUp Tables to your video edits.
What you’ll learn
- What a LookUp Table is
- The different types of LUTs
- Why you should use LUTs
- Where you should use LUTs
- How to apply LUTs to your footage
- How to get free LUTs
What you’ll need
- Access to online LUT downloads
- A 4K resolution camera kit
- A high-quality hard drive to back up your work
- A computer with enough memory to handle 4K video edits
The abbreviation LUT is an acronym that stands for ‘LookUp Table’, but what, exactly is a LUT? Put simply, a LUT holds a set of defined data in numbers (a mathematical formula), which are ‘looked up’ by the software you’re using to change the input values of colours, saturation, brightness and contrast in the footage from your camera.
In other words, a LUT is a conduit/code to transform colour (RGB) input values from your camera to different colour (RGB) output values to give your final footage a different look or feel. You can think of LUTs as preset colour looks for your video footage that can help to speed up your editing process.
In previous posts I discussed colour correction and colour grading and LUTs, if used, are a different option in the grading process. Arguably LUTs are the quickest way to grade your footage once it has been colour corrected. However, it’s vital to remember that if your footage doesn’t match from shot to shot, isn’t correctly exposed or isn’t colour corrected properly then a LUT won’t work in the way you might want it to.
So, LUTs are not simply a ‘quick fix’ method to achieve great looking colour grades – you must be aware of doing your colour correction parameters properly before applying any LUT. You should also be aware of the colour space and input level intended for any LUT and the type of shot it was intended for.
What are the different types of LUTs in video editing?
Colour LUTs just take in colour values and output the corresponding colours. Some LUTs change saturation, some increase contrast and some can change the input colours completely. They can be applied directly to your footage, can help to speed up the grading process and can transform your footage to look like your favourite films or TV shows.
The different types of LUTs in video editing include calibration LUTs, transformation LUTs, viewing LUTs, 1D LUTs and 3D LUTs. They are described separately below:
- A calibration LUT – this is a LUT that will help you to correct and calibrate any inaccuracies in your displays and ensure that a reference monitor, or projector, adheres to a standard colour space (such as Rec.709). A calibration LUT may also be described as a display or monitor LUT. In essence, it’s a correction/display matching LUT rather than a creative LUT.
- A transformation LUT – this type of LUT converts an image from one colour space to another. For example, the transformation could be from Rec.709 to DCI-P3 (a cinema colour space).
- A viewing LUT – this type of LUT is designed to make a camera’s output look good during shooting. Viewing LUTs can range from converting a flat S-Log or Log C into a normal looking Rec.709 images to more aesthetic choices. For films a viewing LUT is often created for the Director of Photography to look at and then these are regularly shared with post-production editors as a starting point for final grading.
- A 1D LUT – a 1D LUT modifies an image, but it has fairly limited adjustment possibilities as it is composed of just three different data mappings – one for red, one for green and one for blue. Each colour is treated separately so, for example, a change in blue wouldn’t affect a red value.
- A 3D LUT – as the name suggests 3D LUTs are more complex than 1D LUTs. They are based on a three dimensional cube which maps all of the colours together and gives you greater adjustment potential. A 3D LUT is created with a number of input and output points (usually 17, but sometimes more) and any value outside of those points is interpolated. 3D LUTs are often found with .cube file extensions.
Hopefully, you’ll now have a better idea of the key different types of LUTs available, but what are they used for?
Why should you use LUTs in video editing?
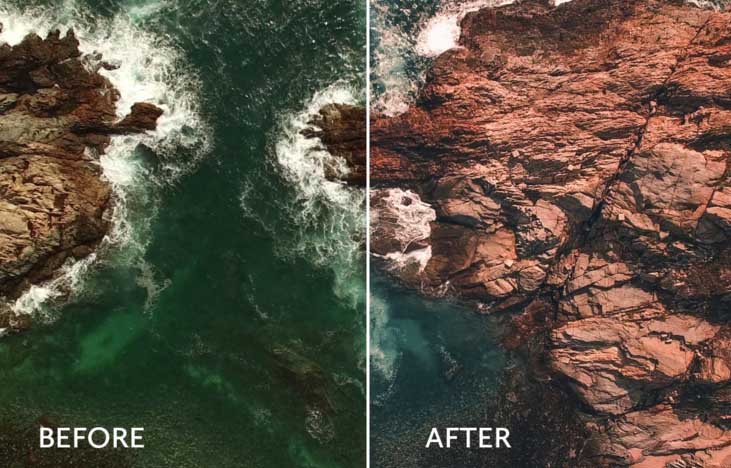
LUTs are most commonly used for creating and saving colour grades, which can be used or applied to other film projects. They can also make log or flat footage come to life by adding contrast and style or by converting it back into a Rec.709 colour space. As mentioned above, you can even load a LUT into a monitor or display to calibrate it to get an idea of what the finished look of your film might be.
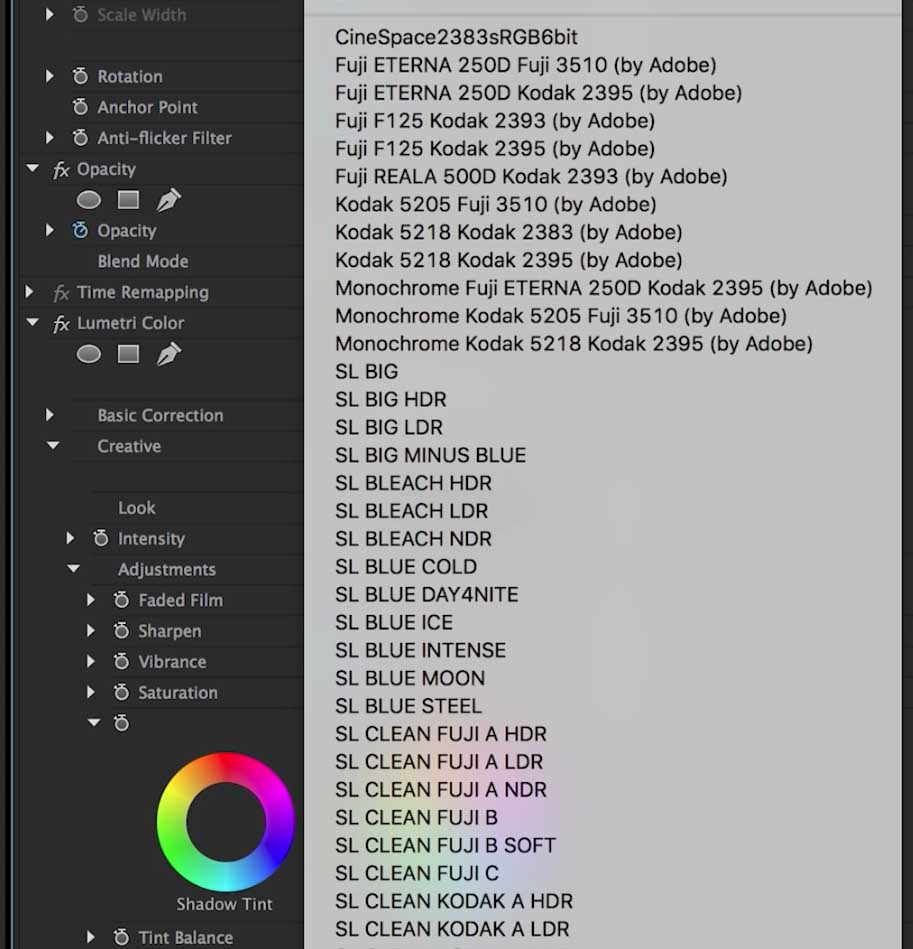
The reasons behind using LUTs include the fact that they are readily available online and are often free. They vary from specific LUTs created by filmmakers to LUTs created by camera manufacturers to work with specific cameras or series of cameras. LUTS can also be created to mirror the look of a particular film stock – for example, Kodak or Fujifilm – as you may want a film to look less like video and more like a traditional film stock.
Experienced colour graders are likely to be able to easily achieve the same, or better, results than those available by using LUTs but, particularly for less experienced editors, they can be an invaluable tool within the grading and editing workflow.
Where should you use LUTs?
So, where can you use LUTs? Basically, LUTs can be used in any editing software programme that has the ability to grade your footage. The most popular such software includes the likes of Adobe Premiere Pro, Blackmagic DaVinci Resolve and Final Cut. You can even load a LUT into Photoshop to apply it to the colours in a still image.
As LUTs are so universal they are often a better option when moving between software, instead of saving presets within a specific editing software programme. By using LUTs you can do quick overall corrections, make certain colours ‘pop’ in your footage or add cinematic style, all depending on the values contained within that LUT.
The mistake a lot of people make is just adding a LUT into their footage and, as mentioned earlier, the results can look very strange. Here are some top tips for how best to apply LUTs in your chosen software…
How to apply LUTs
Depending on which editing software you are using there will be different ways to apply LUTs to your clips. The best advice is to, first of all, ensure that you have colour corrected and matched all of the clips that you want to apply the LUT to. As a rule of thumb, LUTs will tend to work best with well-exposed and white balanced footage, as they will assume that’s what they are working with. Here’s an example of how to apply LUTs…
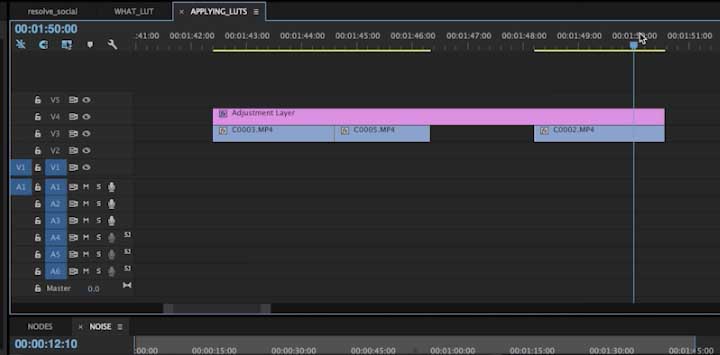
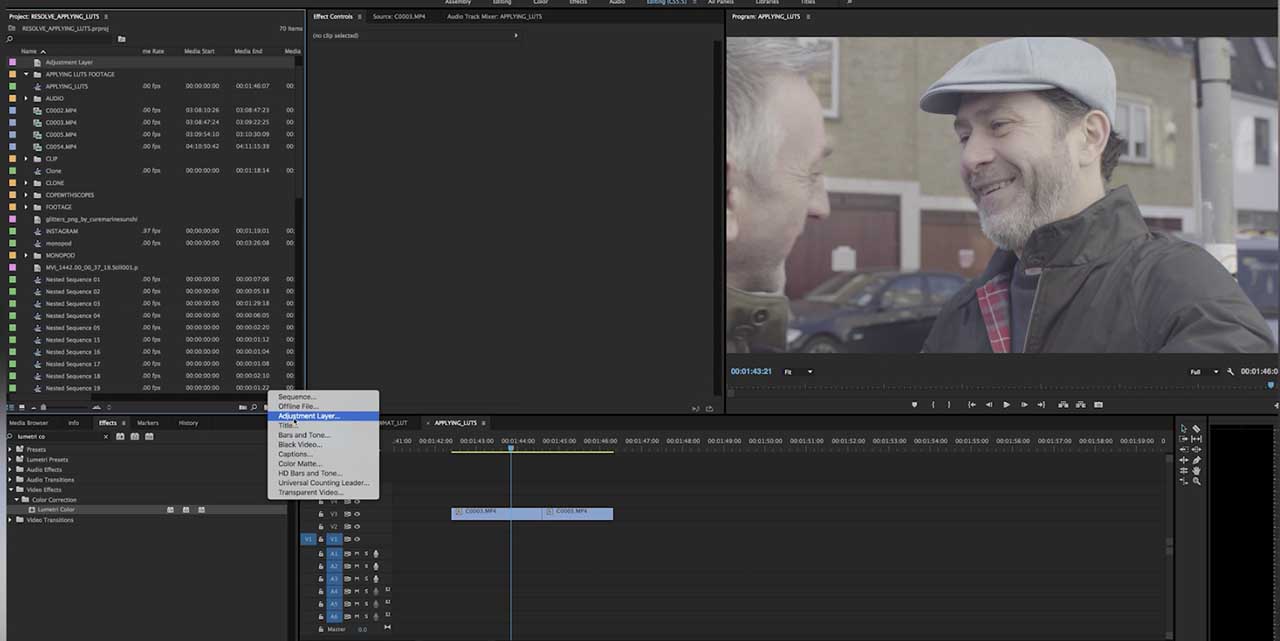
To apply LUTs in Premiere Pro CC you will select LUTs in the Lumetri Effects panel that becomes available once you’ve switched to Adobe Premiere Pro’s colour workspace. You can then select ‘Add Adjustment Layer’ to apply a new Adjustment Layer and drag it into your timeline above your chosen clips.
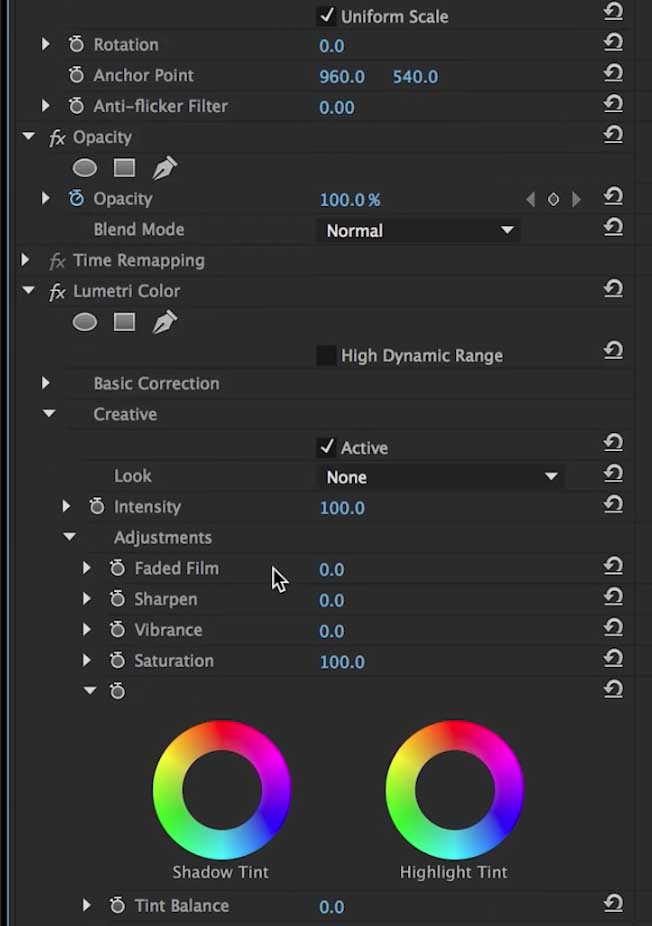
Click on the Adjustment Layer to highlight it and then, in the Effects panel, select ‘Lumetri Color’ and drag that on top of the Adjustment Layer. This will apply that into the ‘Effects Controls’ panel of that Adjustment Layer. Then within the ‘Lumteri Color’ you can select ‘Basic Correction’, which will give you access to an ‘Input LUT’ drop down menu from which you can select a LUT to apply/use by clicking the ‘Open’ option – this might be a ‘Log to Rec.709’ LUT to bring back the contrast contained within your Log footage to how it was originally shot.
If you want to get more creative within the Effects panel you can additionally choose ‘Creative’, which will give you access to a ‘Look’ drop down menu so can select and apply a ‘look’ LUT to footage. If you’re not 100% happy with the applied creative LUT, you can go back to the ‘Adjustments’ menu of the Effects panel to adjust some of the available variables, such as Saturation, Shadows, Exposure, Highlights or Contrast.
In effect you are now using your own judgment to make creative decisions within a ‘creative’ LUT. If you want to apply the two LUTs mentioned above to more clips you can simply drag the clips into your editing sequence and drag the Adjustment Layer further across your timeline to apply the LUTs to more, or all, of your added clips.
It’s worth remembering that it’s very rare that you will simply apply LUTs to your colour corrected footage and then sit back and admire how great your edited footage looks. So, be prepared to play around within your chosen editing software and use LUTs to alter the look of the clips within it… and don’t be afraid to make your own creative decisions along the way.
Getting some LUTs
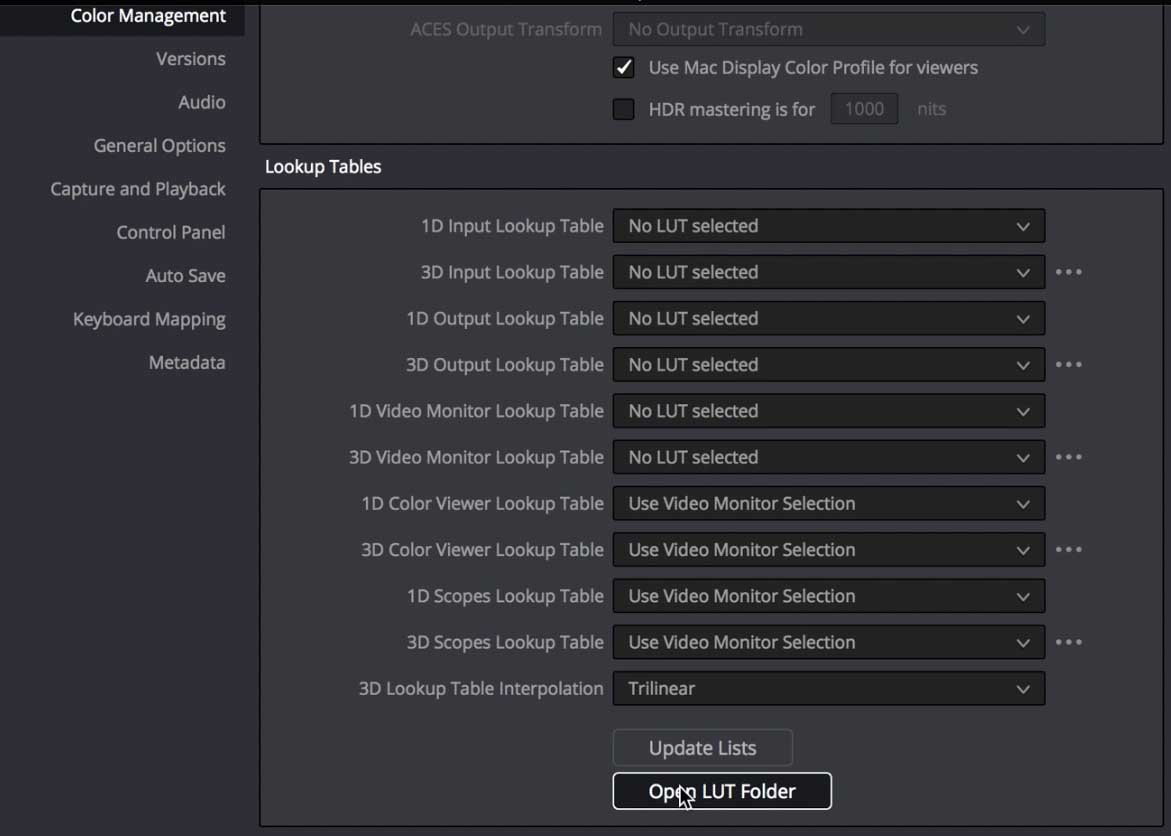
If you’re in any doubt as to how to gain access to LUTs there are often camera LUTs or LUT libraries included within the websites of major camera manufacturers. For example, Canon has had different iterations of its CLog systems that will have LUTs that are designed to work with them.
Also, many filmmakers and colour graders have developed their own LUTs and are usually more than willing to share them with fellow filmmakers for download. Just do a quick search online and you will find literally hundreds (if not thousands) of free LUTs to choose from and download.
The benefits of using LUTs include the fact that they are universal, so they are often a better option if you are moving between different software programmes instead of trying to save presets within each programme you are using. Think of LUTs as another tool in the armoury for your video edits and don’t be daunted by using them. They are simply another way to help you to get the colours that you want in your final edits.



Very helpful and insightful.
Thanks for your easy to understand rundown on LUTs!
Thanks. Very helpful 🙂
Fantastic article, thanks a lot!
Thanks for clearing lut’s up for me!!