Innovative carry-on luggage designed for modern travellers and photographers
I’ve been lucky enough to check out a pre-production release of the Peak Design Roller Pro, and I have to say that I’m impressed. Essentially, it’s designed along the same lines as their high-quality backpacks and features the same level of quality. In the mix are stunning looks, water-resistant materials, high-specification zips, super smooth rolling and the design flair that is consistent with Peak Design.
While the model I’m looking at is as close to a production version as possible, there were a few slight differences. If there is anything different between the bag I’m reviewing and the final production model, I’ll update this review and highlight those changes if and when I know what those are.
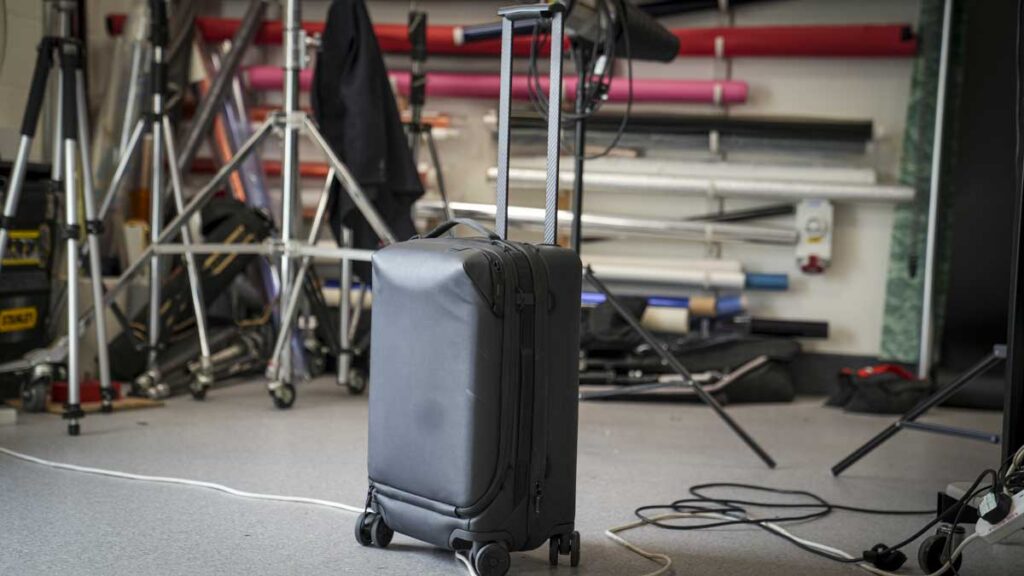
Essentially, the Roller Pro is a high-quality roller bag of the type you would use when travelling abroad. It provides ample space to pack all your clothes and travel essentials. Inside is a large cavity that can expand from a relatively spacious 34L to 39L by simply unzipping one of the exterior UltraZips.
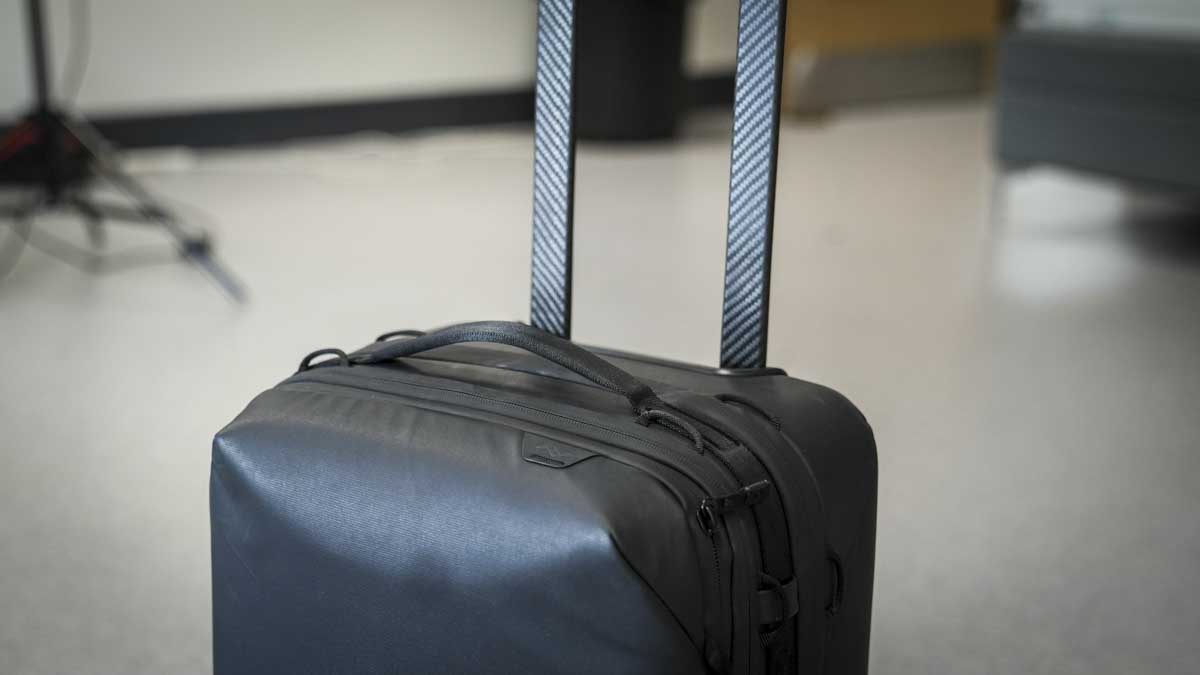
What Peak Design has done with this Roller is go back to the drawing board, and in doing so, they’ve managed to create a larger capacity bag than you would normally expect for a carry-on of this type. Part of the way they’ve achieved this is through custom design and SlimDrive handle that features 7mm thick carbon fibre trolley tubes. This helps to maximise internal space while still maintaining a rigid and strong structure for manoeuvring around an airport or, of course, other locations.
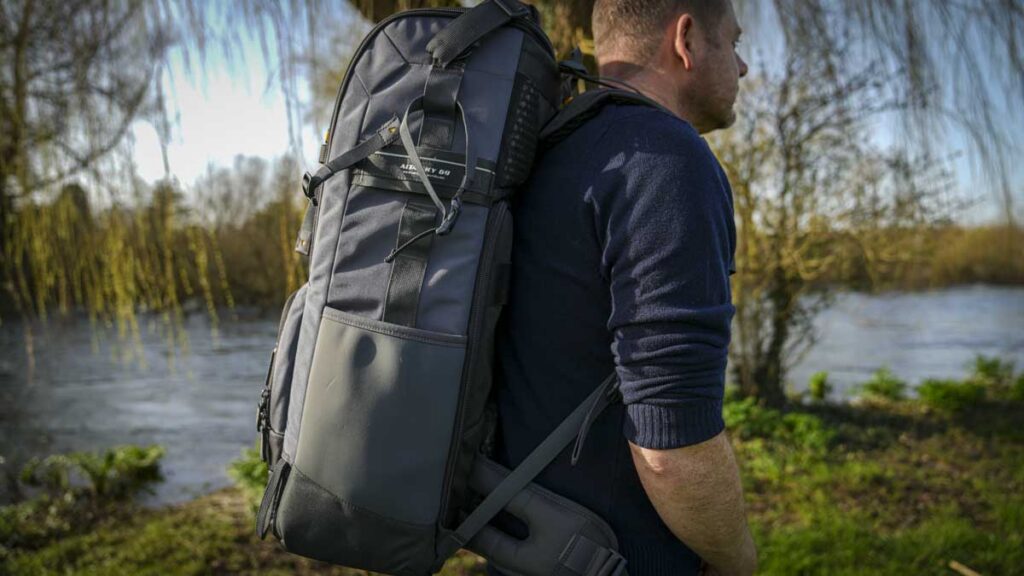
I’m all about using this roller bag for photography, so with the all-new XL Camera Cube inserted, pre-production or not, it was time to put this bag through its paces.
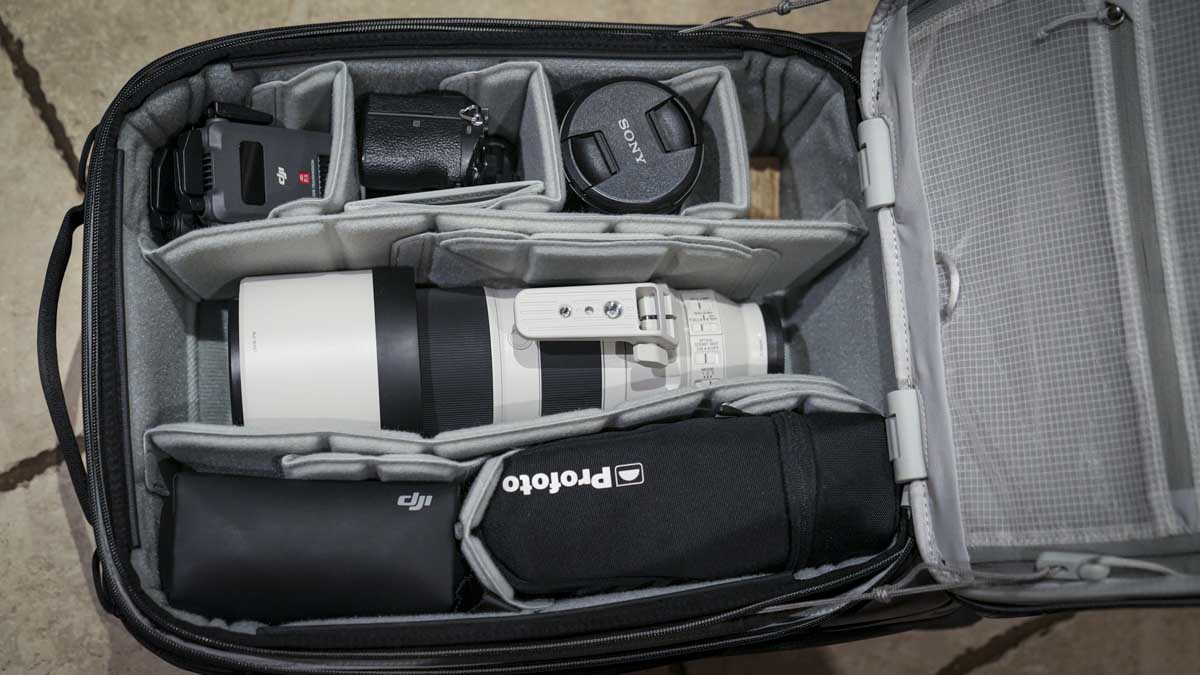
First and foremost, the quality of the design is really high. Once you’ve slotted in the Camera Cube, folded over the lid, and inserted all your gear, there proves to be plenty of room for a large 200–400mm lens, at least two bodies, and a further three to five lenses, plus a flash. What I really like is that on the front of the bag, there’s an additional compartment where you can slot up to a 16-inch laptop. If you’re working on-site and have all your camera gear stashed inside the Roller Pro, having that dedicated laptop compartment is a real benefit.
On-site, I often use roller bags for several reasons. Firstly, they’re easier to roll around, so you don’t have to carry all that weight on your back. Secondly, when fully closed, they often make a great makeshift table for your laptop while you’re sitting and reviewing the day’s images.
Through the test, the bag performed well, and some early reservations that I had about the use of four wheels—rather than the larger two-wheel versions I’m more used to—were quickly dispelled. It ran across some gravel and uneven ground in much the same way as my other rollers. However, while the physical size of the bag is much the same as my other rollers, the fact that Peak Design has made a SlimDrive handle so slimline to the back of the bag means internal space really is increased.
So, suppose you’re looking for a day-to-day roller bag to use in the field, with plenty of capacity and the flexibility to accommodate different styles of Camera Cubes and a few clothes. In that case, the new Peak Design Roller Pro is a perfect option.
What is the Peak Design Roller Pro Carry-On?
The Peak Design Roller Pro has been designed as a carry-on bag that you can take on flights. It will also pack neatly into the back of your car boot with relative ease. It follows the same design principles as many pro-level bags, featuring four wheels, although here they are slightly larger at 60mm. These ABS smooth-glide casters on the base aid easy manoeuvrability, with a decent pull-along handle that tucks neatly away at the back of the bag to provide control.
As I’ve seen with other Peak Design bags, the quality of materials is really high, and similar materials are used here, with a range of colour choices, including Black, Sage, or Eclipse. The outer shell offers decent protection with a Durable VersaShell 550D fabric exterior made from 100% recycled materials. It features a protective EVA foam layer, a rigid polycarbonate shell, and an interior felt finish; it all looks great. When a Camera Cube is inserted, this provides plenty of protection for your kit and in this review I’ve made use of the new XL Camera Cube.
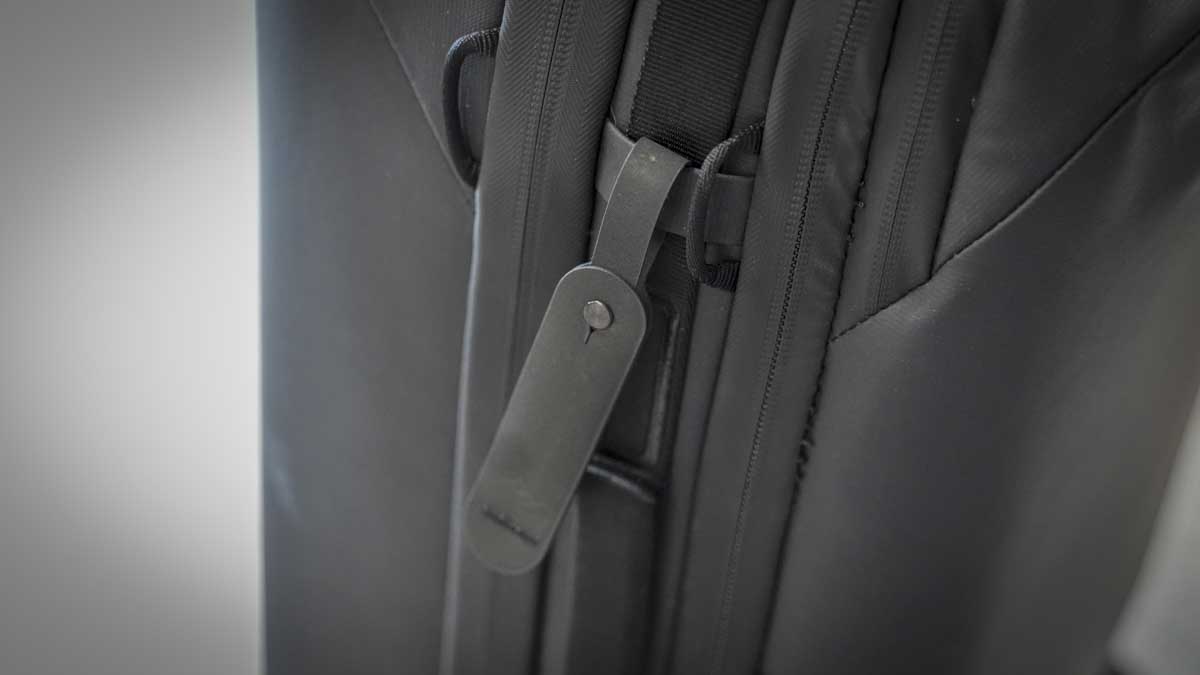
One of the biggest design features of the bag is the SlimDrive trolley system, featuring 3K weave carbon fibre trolley tubes. Rather than the usual round shape used in most roller bags, these tubes are flattened and tapered from top to bottom, ensuring a tight and rigid fit and construction that offers plenty of agility when towing the bag around. In fact, the level of detail that has gone into this mechanism is impressive, and they’ve clearly considered the ergonomics of the anodized aluminium lock button and chassis, making the handle really comfortable—something I found out after towing it around for days on end.

Having a comfortable and high-quality roller bag really does make a difference, especially when you’re carrying a lot of kit. A roller bag is a very viable alternative to a backpack, particularly when you consider the weight of professional gear.
Specification
- Dimensions:: 36 x 23 x 56cm (21.8 x 14 x 9 inches)
- Weight:: 4kg (8.8 lbs)
- Capacity:: Expandable from 34L to 39L
- Material:: Hybrid polycarbonate shell with VersaShell fabric
- Handle:: SlimDrive Carbon-fibre
- Wheels:: Custom 60mm
- Laptop Compartment:: Fits up to 16-inch devices
Build and Handling
Peak Design is know for their high-quality materials and manufacturing, and again the materials used here really stand out. First and foremost the outer shell, which utilises high-tech fabrics durable Versa Shell 550D Fabric to ensure both weather protection and resistance to the knocks and scrapes that are common when travelling.
The Roller Pro itself is of hybrid construction, which essentially means it combines soft and hard shell materials to ensure the kit inside the bag remains safe. In this review, I’m looking at the Roller Pro with the XL Camera Cube inserted, as this makes an ideal companion for any photographer. However, the Camera Cube is an additional cost, and if you just want this as an open-cavity roller bag, you can buy the unit on its own. Likewise, if you have other Camera Cubes, you can configure those inside the bag while leaving a little space for your own personal kit, which is really handy.
The Roller Pro is designed to be carry-on size. One of the biggest features that has really impressed me from the outset is the fact that there’s a fabric handle on the top and one on each side, making it easy to grab from a conveyor belt or out of the back of a van without too much issue. When it comes to the actual size, it measures 36 × 23 × 56 cm, and with the handle fully extended, it reaches 90 cm. There is also a further deployed height that extends the handle to 100 cm, so there’s plenty of flexibility to customise the handle height to suit your personal preference, making it easy to manoeuvre.

The handle is really comfortable, and as Peak Design has highlighted in all their materials, they’ve gone to great lengths to ensure that this is one of the most comfortable handles on any roller bag. This might seem a little excessive, but it is a nice touch, and sure enough, it is comfortable to use as you tow it around. Another notable feature is that the lock button is anodised aluminium, giving it a tactile feel. As you pull the bag out of the car, a single push unlocks the handle, allowing you to extend it to its fullest height.
One of the design highlights are the SlimDrive trolley tubes, which feature 7mm carbon fibre rails for the handle. These are relatively flat, meaning that unlike many roller bags that sacrifice a significant amount of internal space for bulky handle rails, here they sit almost flush against the back of the bag, maximising internal capacity. Another key point is that, unlike some bags that use a telescopic design to extend the handle, Peak Design has opted for single-piece carbon fibre trolley tubes, reducing the number of mechanical parts that could potentially fail.
On the base, there are four custom-designed 60mm ABS smooth-glide casters, and while I’m not usually a massive fan of this type of wheel design—similar to those used on Pelican hard cases, which we often use on-site—like those Pelican wheels, they seem to do the job.

When it comes to weight, the Roller Pro weighs 3.9 kg when empty, which is considerably lighter than many of my other roller bags, which typically come in at around 5–6 kg.
Over the years, many bag manufacturers have talked about the durability of their zips, and Peak Design is once again keen to highlight this. They use UltraZips, which feature abrasion-resistant UHMWPE thread. To be honest, this translates to a very smooth-acting zip that keeps the water out, which is exactly what you need.
Features
Essentially, this is a roller bag that has been redesigned from the ground up, setting it apart from the standard carry-on roller bag you would usually take on holiday. Instead, it operates on another level, making it suitable for transporting all your photography gear. The Roller Pro itself is sold as just the roller bag with an empty cavity inside—it’s up to you to fill it however you want. Of course, this being Peak Design, they’ve also designed the XL Camera Cube, which is divided into a variety of different sections with Velcro dividers that you can move around to suit whichever kit you’re using. In this test, I used a variety of different cameras and lenses to check out the configurations.
Looking at the bag itself, a few of the main features stand out aside from those covered in the previous sections. One is the Drawbridge-Style opening, which enables easy access. This is particularly useful if you need to check gear in the back of your van or on location without having to fully flip open the bag. The drawstrings allow you to keep the lid upright, providing both access and privacy while you’re sorting through expensive equipment.
One of the features I really like is that you can expand the capacity from 34L to 39L using an UltraZip that runs around the exterior of the bag. This allows a small section of the bag to expand, giving it slightly greater depth. Another feature that stood out to me is the quick-access front pocket, which offers protective storage for a laptop. This meant I could fit my 16-inch MacBook Pro easily, and when sitting in the waiting lounge, I could quickly retrieve it for some work before slotting it back inside. In all my other roller bags, I have to open the main compartment or store the laptop in my backpack, so I really appreciated this dedicated pocket.
Of course, one of the biggest selling points for any photographer is its compatibility with Peak Design’s Camera Cubes. The new XL size takes up the entire internal section of the bag, allowing you to store all of your camera gear. If you use one of the smaller Camera Cubes, it takes up less space, leaving room for personal items alongside your camera kit—an option that will likely suit most people better.
One of the other really nice features I’ve already mentioned is the Cord Hook Internal Retention System. If you have a smaller Camera Cube and some clothes or other items inside, you can use this system to keep everything secure and in place.
Most of the Roller Pro’s other major features relate to its build quality, such as the SlimDrive trolley system with 3K weave carbon fibre trolley tubes, the 60mm ABS smooth-glide casters, and the Durable VersaShell 550D fabric exterior—all of which help differentiate this bag from the average roller bag.
Performance
As I’m looking to use this bag for photography gear, I started out by inserting the XL Camera Cube, and setting it into the bag was straightforward. All you need to do is open the lid, flip it underneath, and then insert the Camera Cube with all of the compartments facing upwards. For travel, you might want to keep the lid closed to add a little extra protection to the top of your kit, but to be honest, this bag is already well-padded.
The XL Camera Cube is, a larger version of Peak Design’s excellent Camera Cubes. It features the same semi-rigid dividers, which can be adjusted to suit the camera kit you’re using. In the pictures, you’ll see that I packed a 200–400mm lens, two Sony A7 bodies although you’ll only see on as the pictures were shot with the other, and a few fixed and telephoto lenses, along with accessories. The Roller Pro has plenty of internal capacity.
I really like how these internal dividers work. While they are semi-rigid and a little more difficult to adjust than the softer padded dividers found in many other bags, they hold your kit securely. Having used these for over a year in other bags, I know they retain their rigidity well.

With the bag open, a few things instantly stand out, especially for on-site use. One key feature is the retaining cords, which allow the lid to open in a Drawbridge-Style manner. This means the lid remains partially upright instead of flipping fully open. Even with my 16-inch MacBook Pro inside, which does put some strain on the drawbridge cords, the lid remains stable. This design is particularly useful when reaching into the bag to grab a camera or change a lens, as you often want to close the lid quickly.
Having it partially upright not only makes it easier to flip shut but also provides an added level of privacy when accessing your gear, which I really appreciate.
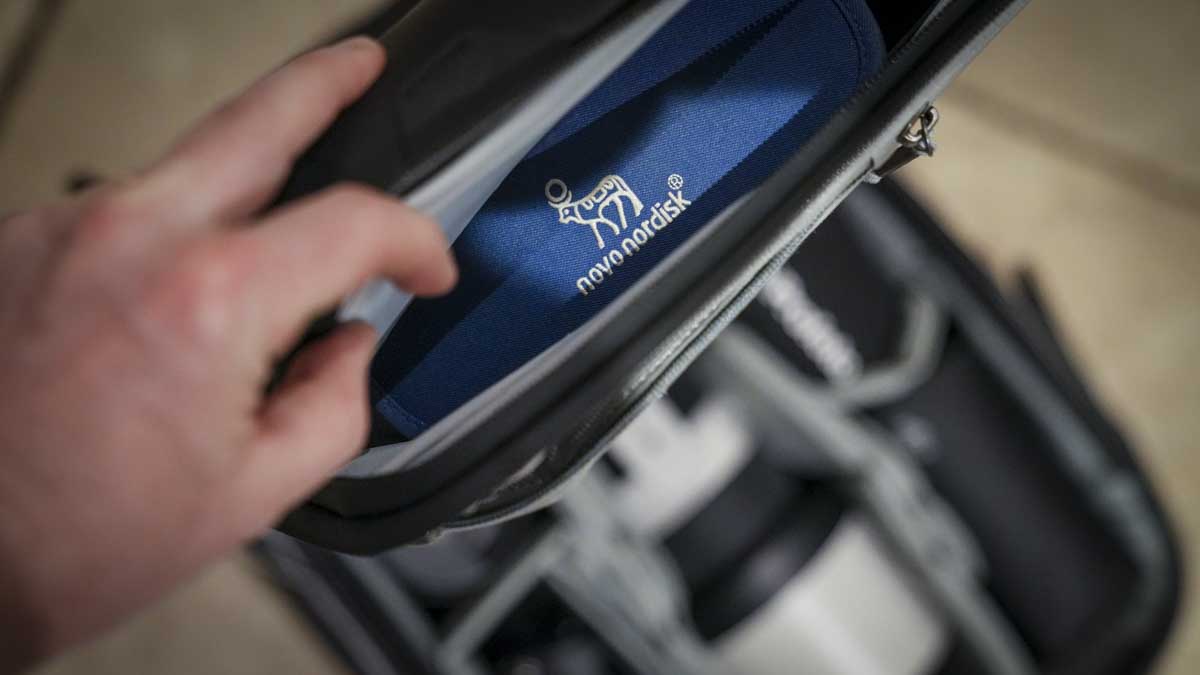
Another great feature is the three large zipped pockets on the inside of the lid, which offer quick access to cables, SD cards, batteries, and other accessories. These pockets are a decent size. Behind them, accessed via an additional lid zip, is a larger storage section. While it’s not huge, it’s big enough to fit a couple of T-shirts, a change of underwear, and a few other essentials—handy if your main compartment is full of camera gear.

It’s also worth noting that the lid hinge is well-designed. Unlike many roller bags where the hinge is simply fabric, here it’s reinforced, making it far more durable.
One other design detail I want to highlight is the wheel layout. When the bag is lying flat on the ground and open, the wheels remain slightly raised. This means that instead of having to tip the bag to an angle to move it, you can simply lift the top handle and roll it keeping the bag level. I really like this feature, as I often keep my bags open while working and need to move them without the hassle of closing them first.
The front laptop pocket is another well-thought-out feature for closing the bag and getting ready to set off. It’s designed for larger laptops and has a dual-section layout. The front section allows you to drop in your laptop, while a smaller pouch behind it provides additional space for quick-access essentials. Inside, this pouch is divided into three separate sections which are all part of the Snap Tent feature, making it particularly useful for travel.

Once the bag is fully packed, the four grab handles make it incredibly easy to lift. One of the things I really like is that instead of just having a top or side handle, there are handles on all four edges of the bag. This means that no matter how it’s positioned in your vehicle or on a plane, there’s always a handle that you can securely grab. These are made from seatbelt-style material, which is ultra-tough.
Moving onto the roller system, the four 60mm ABS smooth-glide casters feature a hard rubber edge, which adds a bit of grip. On hard surfaces, they roll smoothly and quietly—far quieter than most roller bags I’ve used.
Of course, a major part of any roller bag is the handle, and here, the SlimDrive trolley system works incredibly well. The anodised aluminium lock button provides a clean and precise locking and unlocking mechanism, allowing you to extend and retract the handle smoothly and to a decent height.
What I really like about this handle is how rigid and sturdy it is. Unlike cheaper telescopic handles that flex as you move, the SlimDrive handle remains solid, giving you confidence as you manoeuvre. The four-wheel system makes the bag feel agile and responsive, even when weaving through a crowded airport.
One of my biggest issues with most four-wheel roller bags—even expensive ones—is that gravel and mud tend to clog the wheel mechanism. However, Peak Design’s approach seems to work just as well, if not better, than many dual-wheel designs. While dragging the bag across gravel or uneven terrain is still a bit of a chore, the wheel mechanism is impressively robust.
Ultimately, this roller bag handles exceptionally well in most environments—whether airports, educational institutions, or on-site locations. However, it’s important to remember that these are 60mm wheels designed for everyday use rather than off-road terrain. That said, the Roller Pro still copes surprisingly well on uneven surfaces. And if conditions are too rough, the four grab handles make it easy to carry.

There’s plenty of space for camera gear in terms of capacity. While I tested it with the XL Camera Cube, using smaller Camera Cubes alongside personal items makes a lot of sense. Pairing it with one of Peak Design’s other camera bags creates a perfect travel setup.
There are plenty of choices when it comes to photo roller bags. The one thing they all have in common is that they tend to be relatively expensive and this Peak Design is no exception, especially with the camera cube insert.
Final Thoughts
I’ve been using photo roller bags for years but whilst I love them and have quite a collection I’ve always been aware of that slight waist of space due to the handle mechanism. That handle usually takes up internal capacity, however here, Peak Design has redesigned the Roller Pro, ensuring that the SlimDrive trolley system is as slimline yet strong as possible. This maximises internal space, allowing the XL Camera Cube to slot in perfectly, with plenty of room for kit as well as some personal effects.
There are a few standout features in this bag that I found particularly useful. One was the Drawbridge-Style opening, which allows the lid to remain upright while you access the bag’s contents. I’m used to this feature on Pelican cases, mainly due to the stiff hinges that hold the lid in pace, but having it on a roller bag is a really nice touch.
Another great detail is that when the bag is lying flat with the lid open, the rear wheels just touch the ground. This means that if you need to quickly move it—whether to clear space as cables are being laid or people are passing by—you can roll it out of the way without having to zip it up first or tilt the angle much.
I was also really impressed with the 60mm ABS smooth-glide casters—something I didn’t expect. I’ve had issues with smaller four-wheel rollers in the past, to the point where for the last few years, the three roller bags I’ve used (from Vanguard, Manfrotto, and Think Tank) have all featured dual-wheel options. The only exceptions have been larger Pelican cases, which serve a different purpose.
Another major plus is the front protective section for a laptop. This is a high-quality addition to any roller bag, offering quick access to your laptop without needing to open the main compartment. Combined with the high-tech materials used throughout, there’s also a good level of water resistance, meaning that if you get caught in a typical British downpour, your gear should remain safe.
Overall, when it comes to photo roller bags, this is one of the best I’ve used, but it does all come at a hefty price.