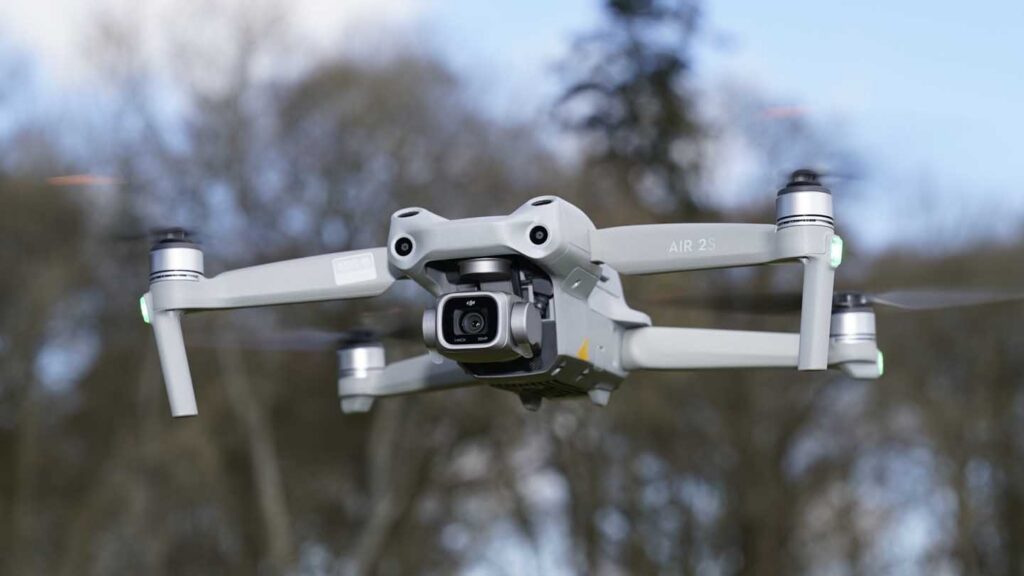
What is the DJI Air 2S?
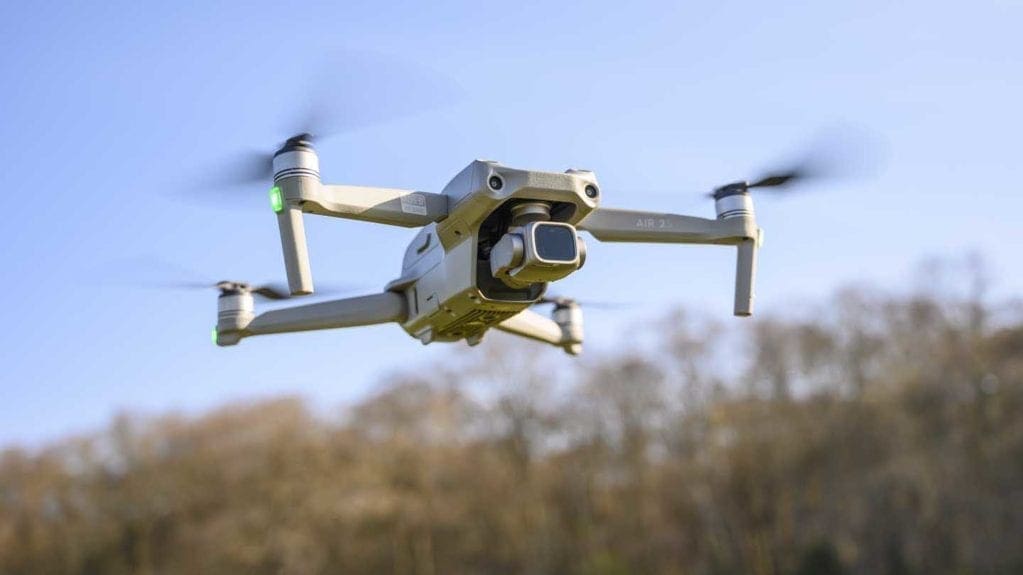
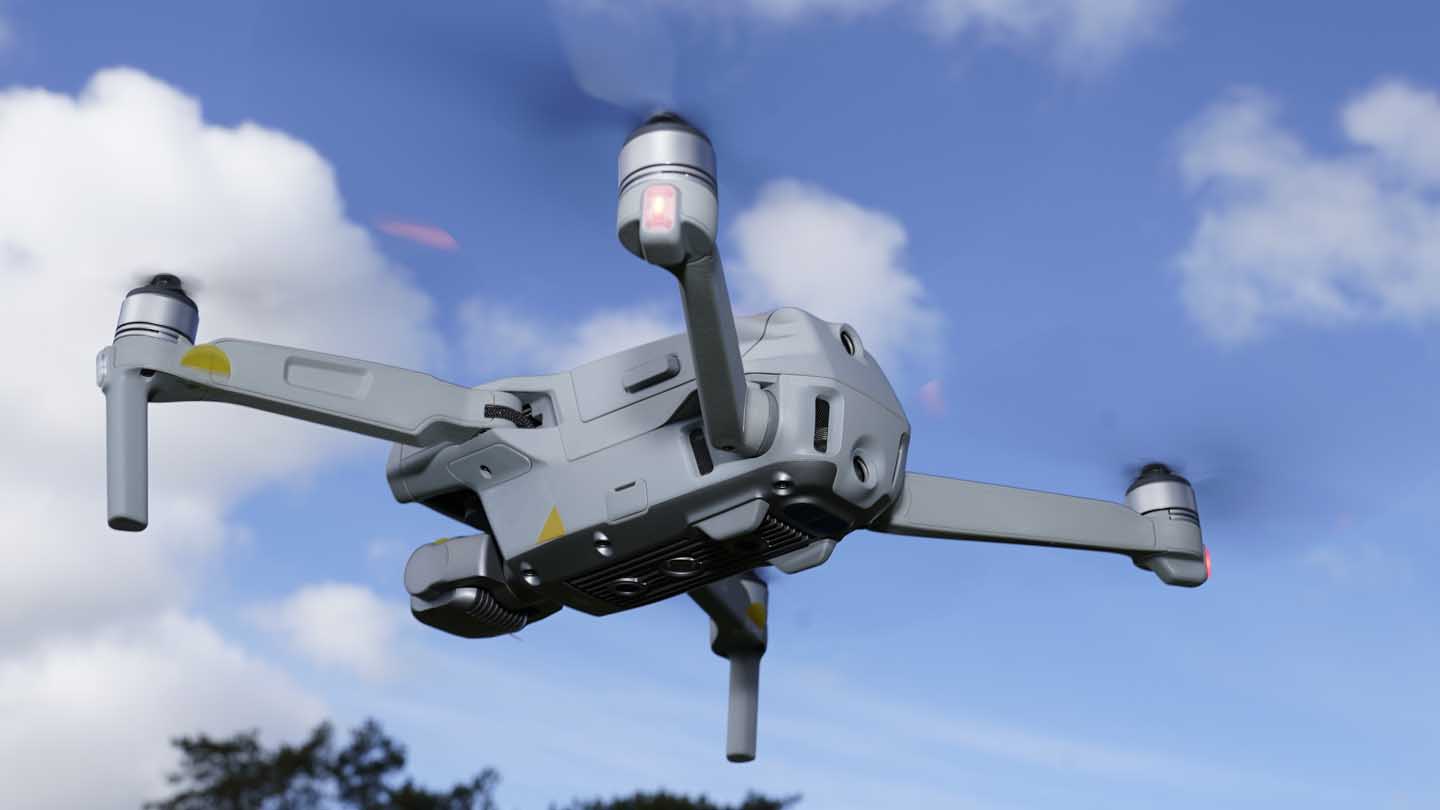
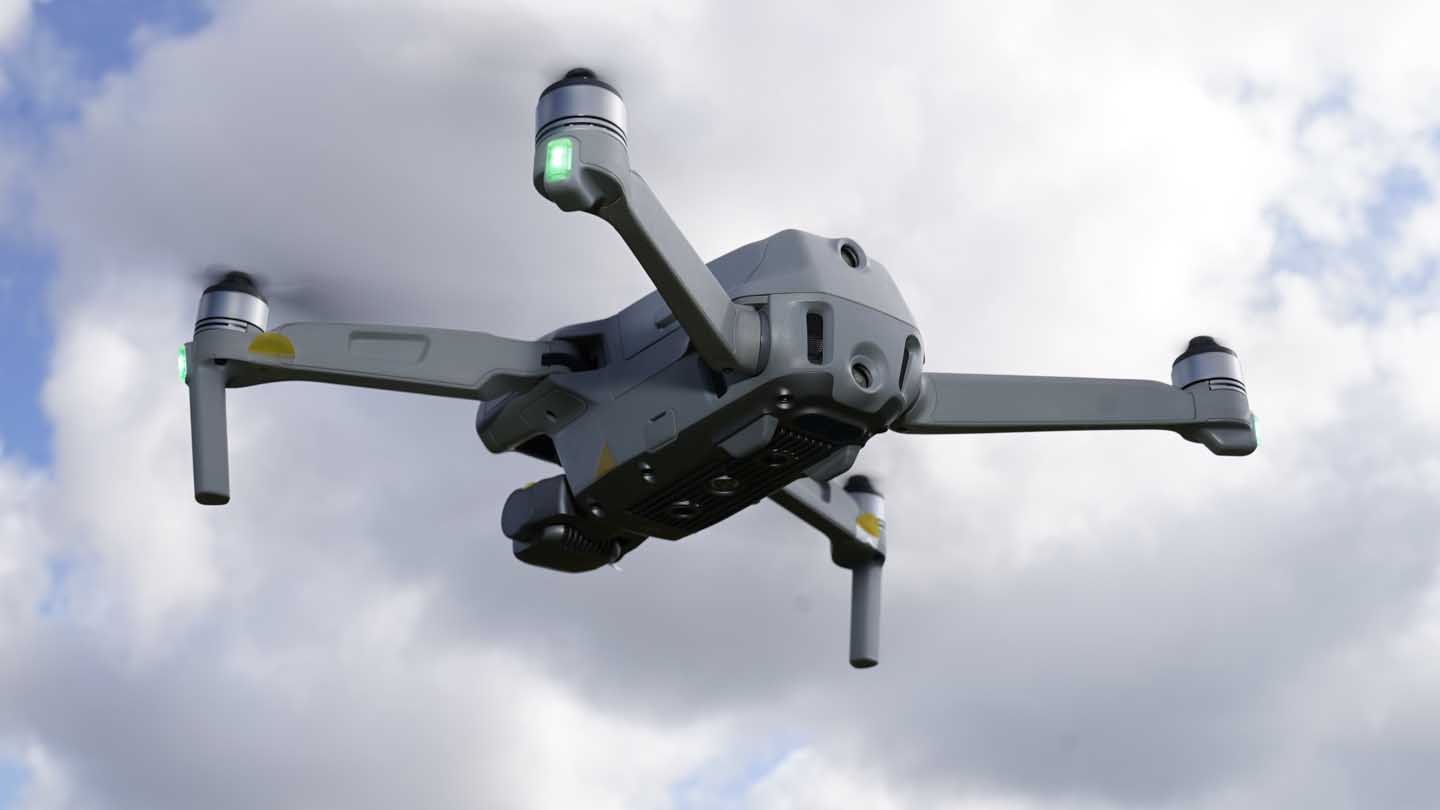
The DJI Air 2S is a foldable, portable drone that offers a considerable hike in specifications in comparison with the Mavic Air 2, yet it’s much lighter than the DJI Mavic 2 Pro.
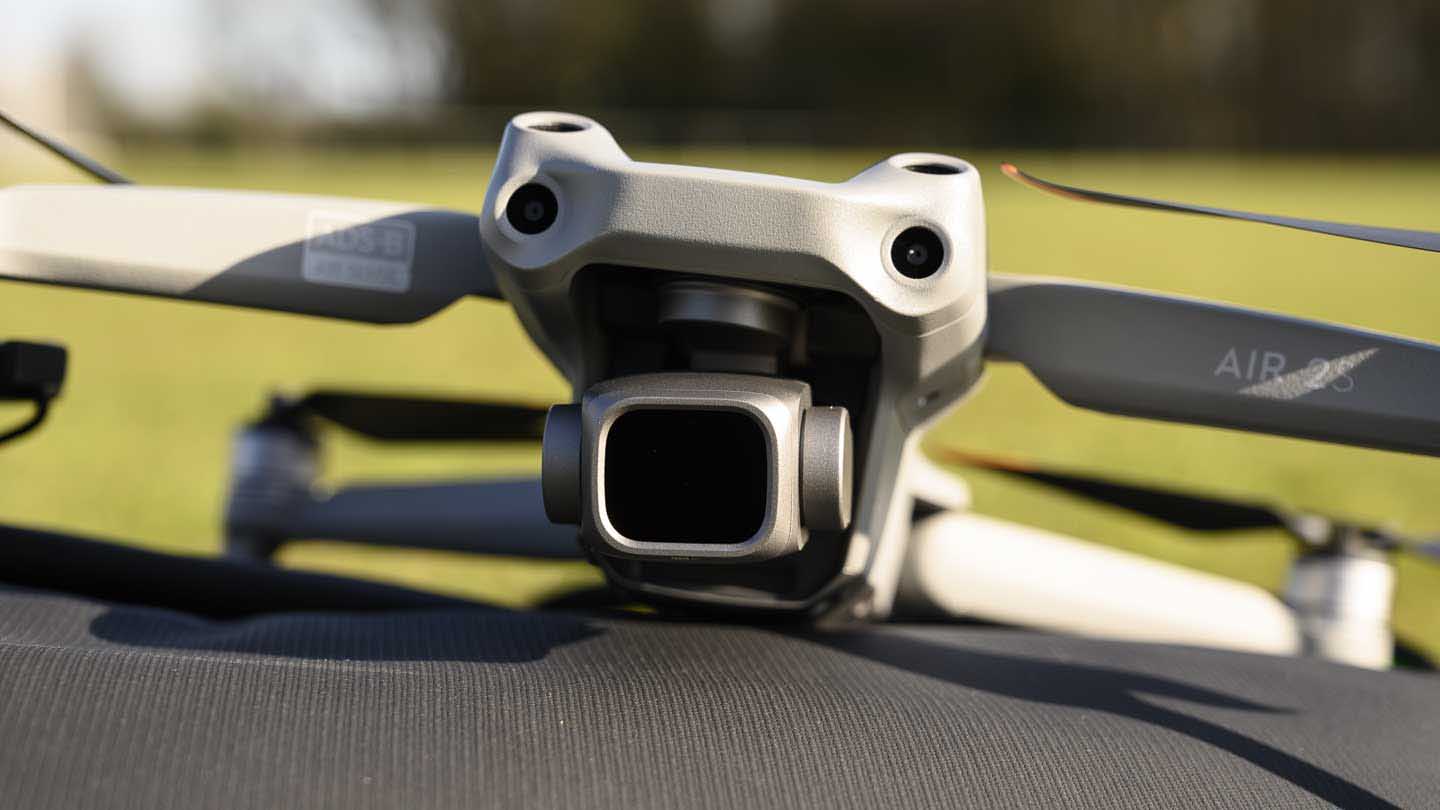
Perhaps the most head-turning feature of the Air 2S is that the sensor has been upgraded in comparison with the Mavic Air 2 to a 1-inch type with an effective pixel count of 20-million. It can also record video at up to 5.4K resolution in 10-bit D-Log and shoot stills in DNG raw or Jpeg format.
Further good news is that the DJI Air 2S has front, back, top and bottom obstacle-detection sensors to help reduce the risk of collisions. It also features APAS 4.0, DJI’s latest Advanced Pilot Assistance System that guides it around obstacles automatically.
DJI Air 2S price and availability
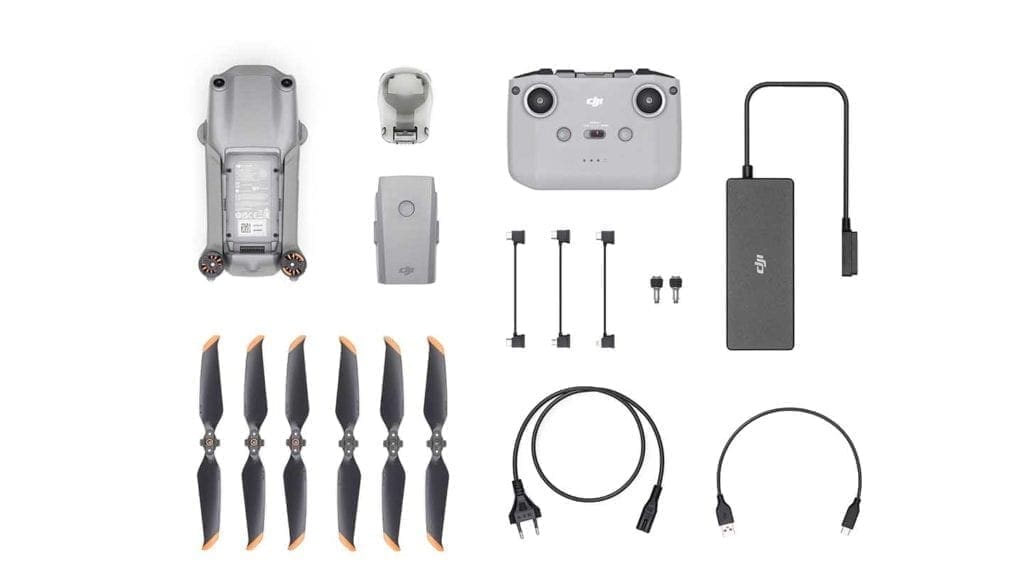
The DJI Air 2S is available in a standard kit or in a Fly More Combo. The standard kit retails for £899 or from €999 (depending on VAT) and includes the drone, remote controller, one battery and all the cables and parts needed to get into the air.
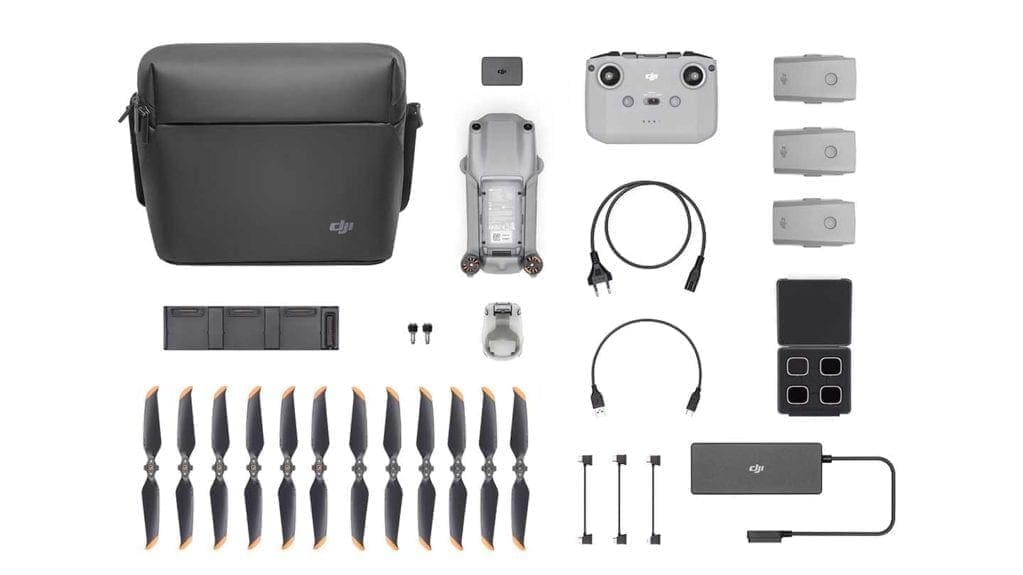
The Fly More Combo retails for £1,169 / from €1,299 (depending on VAT) and includes everything from the standard combo with the addition of two extra batteries (taking the total to three), ND filters, a three-battery charging hub and a shoulder bag.
Specification
- Sensor Size: 1-inch type
- Lens focal length: 22mm
- Lens aperture: f/2.8
- Video resolution and framerate: 5.4K: 5472×3078 @ 24/25/30fps, 4K Ultra HD: 3840×2160 @ 24/25/30/48/50/60fps, 2.7K: 2688×1512 @ 24/25/30/48/50/60 fps, FHD: 1920×1080 @ 24/25/30/48/50/60/120fps
- Sensitivity range: Stills: Auto: 100-6400, Manual: 100-12800, Video:Auto: 100-6400, Manual, 100-12800, 10-Bit Dlog-M: 100-1600 (Auto) 100-3200 (Manual)
- Max bit rate: 150Mbps
- Video file format: MP4/MOV (H.264/MPEG-4 AVC, H.265/HEVC)
- Stills resolution: 20Mp, 5472×3648 (3:2) 5472×3078 (16:9)
- Stills file format: Raw (DNG), Jpeg
- Stills modes: Single shot: 20MP, Burst shooting: 20MP (continuous burst), Auto Exposure Bracketing (AEB): 20MP, 3/5 bracketed frames at 0.7 EV bias, Timed: 20MP, 2/3/5/7/10/15/20/30/60s, SmartPhoto (including HDR and HyperLight): 20MP, HDR Panorama: Vertical (3×1): 3328×8000, Wide (3×3): 8000×6144, 180° (3×7): 8192×3500, Sphere (3×8+1): 8192×4096
- Maximum flight speed: 19 m/s (S Mode), 15 m/s (N Mode), 5 m/s (T Mode)
- Maximum windspeed resistance: 8.5-10.5m/s
- Folded dimensions: 180 x 97 x 80mm
- Unfolded dimensions: 183 x 253 x 77mm
- Diagonal measurement: 302mm
- Memory: 8GB onboard, microSD cards up to 256GB
- Flight time: 31 minutes
- Take off weight: 595g
Features
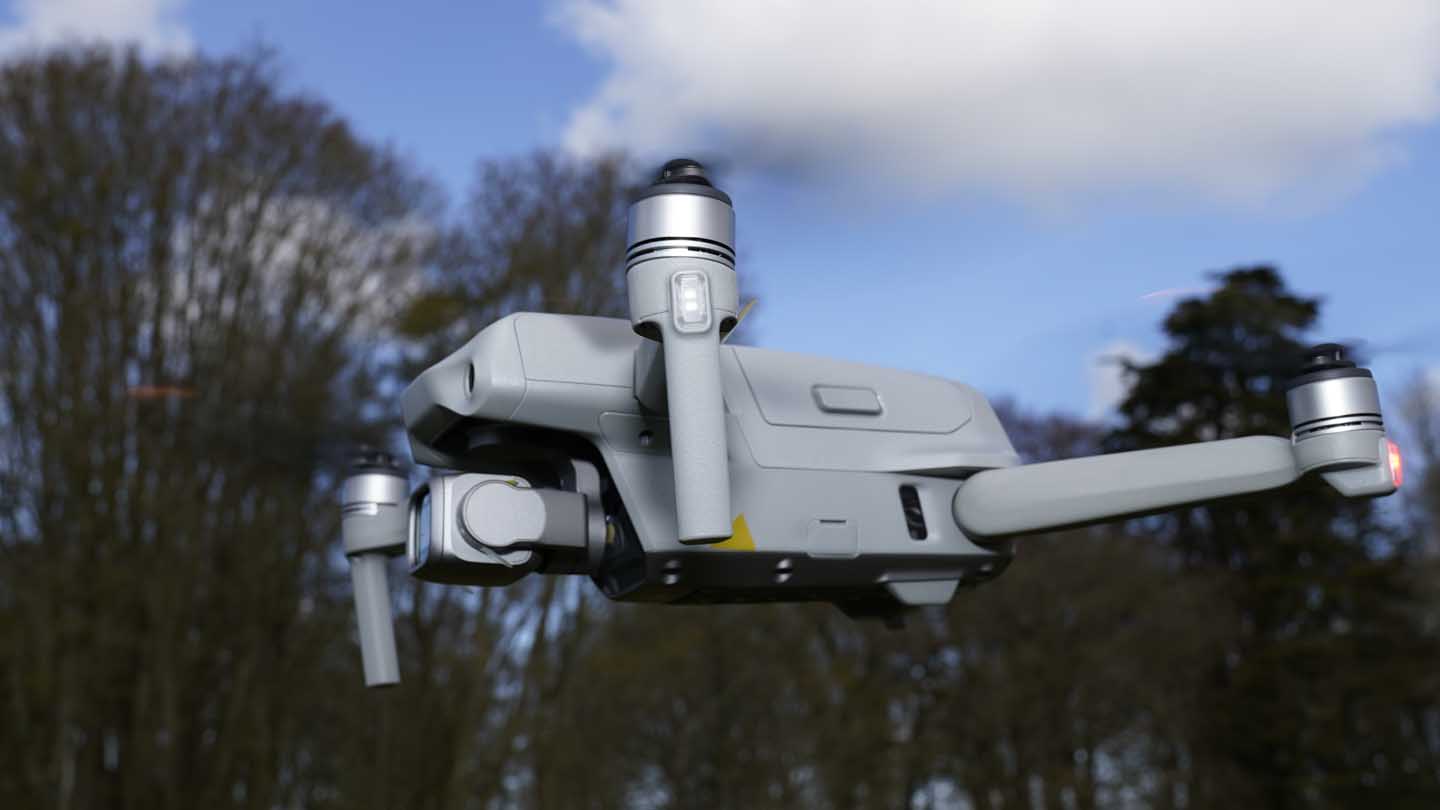
The DJI Air 2s is a four-rotor drone with a gimbal-mounted camera. It uses DJI’s latest transmission system, dubbed O3 as it’s the third generation of OcuSync.
Unlike previous systems, O3 uses four rather than two antennae and it takes the transmission range to 12Km. More importantly, it makes the transmission more stable and less prone to interference issues at normal flying distances. It’s also a high-definition, low-latency transmission.
DJI has also equipped the Air 2S with APAS 4.0, its most advanced autopilot system and there’s a four-way sensing system that looks for obstacles. When APAS (Advanced Pilot Assistance System) is activated, the drone should automatically fly around objects in its path. It’s designed to make it easy to fly the Air 2S in tight spaces or between trees.
At normal speeds, the APAS 4.0 has a wider field-of-view than previous versions. At fast flying speeds, the drone pitches forward more than others and the new upward obstacle sensor plays a role in obstacle detection and avoidance.
The DJI Air 2S also has AirSense technology that issues a warning if an aeroplane or helicopter transmitting ADS-B signals comes close. This enables the drone pilot to take evasive action – ideally landing.
DJI has also improved its Return-To-Home (RTH) feature for the Air 2S and the GEO 2.0 geofencing is on hand to advise pilots of airspace restrictions.
According to DJI, the Air 2S’s battery enables a flight time of 31 minutes.
DJI Air 2S camera
In front of the DJI Air 2S’s 20Mp 1-inch type sensor is a lens with a focal length equivalent to 22mm and an angle of view of 88°. The aperture is fixed at f/2.8, but thanks to the short focal length of the lens and the normally long subject distances associated with aerial photography, there should be plenty of depth of field in most situations.
In addition to single-shot mode, in which it can shoot 20Mp images in DNG raw or Jpeg format, the DJI Air 2S has a collection of useful shooting modes. These include Burst shooting, Auto Exposure Bracketing (AEB) across three or five images in 0.7EV steps, Timed (self-timer) with a delay that can be set to one of nine settings running from 2 to 60 seconds, SmartPhoto (including HDR, HyperLight and Scene Recognition) and four variations of HDR Panorama.
The headline video specification of the Air 2S is its 5.4K (5472×3078) capability at 24/25/30fps, but it can also shoot 4K (3840×2160) or 2.7K (2688×1512) at 24/25/30/48/50/60 fps. If you want to shoot at faster frame rates than that, you’ll have to drop the resolution to Full HD (1920×1080), at which the maximum is 120 fps.
Video can be recorded in MP4 or MOV format with the H.264 or H.265 codec. There are also three video colour profiles to choose from, Normal (8 bit), D-Log (10 bit) or HLG (10 bit). Using the Normal setting keeps things simple and HLG (Hybrid Log Gamma) is designed for use when you’re planning to watch the recorded footage on an HDR-compatible TV.
D-Log mode records flat-looking low-contrast, low-saturation video that’s better suited to post-capture grading than the Normal footage.
While the natural inclination with a drone is to fly it towards the subject that you want to film, there may be occasions when you can’t get a close as you’d like, perhaps because there are tree branches in the way or the drone is at the edge of your line of sight. With that in mind, DJI has given the Air 2S a digital zoom of up to 8x, taking the lens from the equivalent of a 22mm optic to a 176mm-equivalent lens.
However, this zoom function can’t be used at the highest video resolution or at all frame rates, it’s limited to 4X at 4K 30fps, 6X at 2.7K 30fps, 4X at 2.7K 60fps, 6X at 1080P 60fps and 8X at 1080P 30fps.
Automatic flight and recording
While the DJI Air 2S has systems onboard to make flying it far easier than the earliest drones, some manoeuvres, such as flying in a circle around a subject or flying in a perfect spiral, take time to master. That’s where DJI’s automated flying programmes come in.
DJI’s QuickShots have been around for a while and they’re an often overlooked but useful feature. They include modes such as Rocket, Circle, Dronie, Helix, Boomerang and Asteroid and they put the drone in charge of its flight path while it records a particular type of footage.
The Air 2S also introduces MasterShots which has a selection of three image capture modes, Proximity, Portrait or Landscape. It allows the pilot to set the target subject before the drone plans its flight path automatically and starts recording. You can also pick the theme for the DJI Fly app to use when it generates a video from the footage captured in MasterShots mode.
Similarly, in FocusTrack mode you can select your subject by drawing a box around it on the screen on the phone in the controller, then choose from Point of Interest 3.0, ActiveTrack 4.0 or Spotlight 2.0 mode.
If Point of Interest 3.0 is selected, the drone with fly around the subject as it films. In ActiveTrack 4.0, mode, the drone will track the subject and keep it in the frame. And in Spotlight 2.0 the subject is locked in the frame while the pilot controls the flight of the drone.
Build and handling
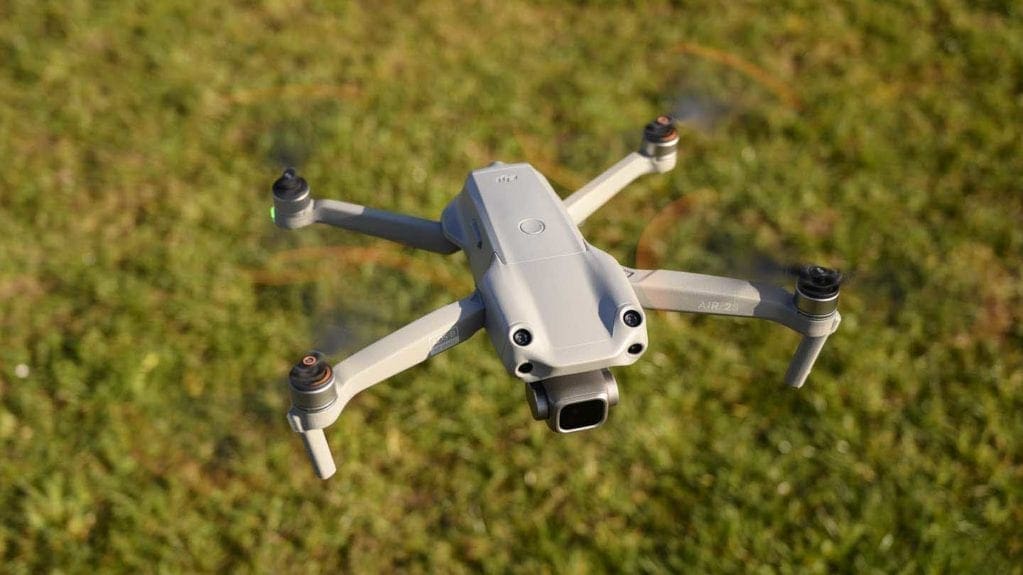
The compact design of the DJI Air 2S makes this small drone ultra-portable. The design has changed slightly with the additional sensors on the front improving the collision detection, but thankfully, these two new additions haven’t increased the craft’s size or bulk.
That means that it’s small enough to slip into a backpack side pocket as with the previous model.
Checking the dimensions of the DJI Air 2S confirms that it has the same measurements when it’s unfolded as the DJI Mavic 2 (183x253x77mm). However, when it’s folded it’s 6mm taller at 180x97x80mm rather than 180x97x74mm. It’s also slightly heavier at 595g, up from 570g.
That slight increase in size and weight is unlikely to make much practical difference to the portability of the Air 2S in comparison with the Mavic Air 2.
DJI appears to have kept the Air 2S airframe the same as for the Mavic Air 2, but the camera and gimbal are a bit beefier to accommodate the jump in sensor size from 1/2-inch type in the Mavic 2 to 1-inch type in the Air 2S. It gives the Air 2S’s a more purposefully appearance, it’s definitely for imaging.
Compared to the original DJI Mavic Air, both Air 2 models look like gangly teenage versions of the original model, their limbs have grown.
DJI Air 2S controller
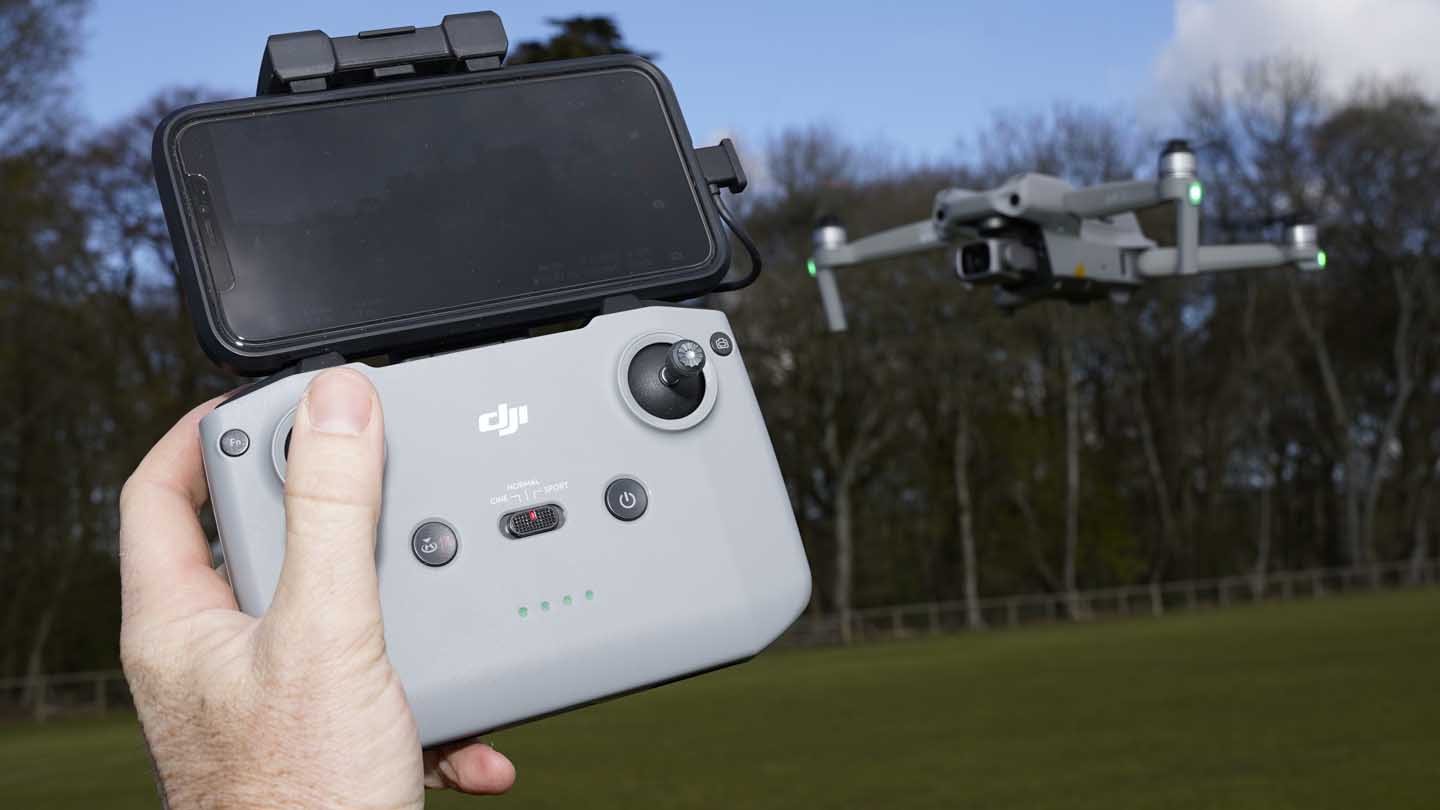
DJI also improved on the Mavic Air’s controller when it introduced the Mavic Air 2, and it’s plumped for the same RC231 controller for the Air 2S. It’s very neat and tidy and perfectly matches the design and quality of the drone.
The RC231 controller is a robust unit that gives you plenty of space for your hands and phone. The latter sits in the clamp that extends from the back/top of the controller. An iPhone 11 Pro slots in nicely, but a Huawei P30 Pro is a bit of a battle – it fits with some determination. Both mobile options connect with a single USB cable directly into the handset.
Pulling out the phone clamp for use reveals the lightning cable which is fitted as standard, but that can be replaced by the supplied micro-USB or USB-C cable to fit other types of smart device.
Conveniently, there are two storage ports on the front of the controller for the sticks, these need to be removed and screwed into the controls ready for use.
A switch between the power and return-to-home buttons is provided to swap quickly between the flight modes (Cine, Normal or Sport), which governs the drone’s speed and stopping distance. There’s also a dial on the front-left of the controller for adjusting the vertical angle of the gimbal and a shutter/record button on the front right.
Conveniently, there’s a button next to the right control stick to switch quickly between stills and video shooting. There’s also an Fn button next to the left stick that can be customised to recenter the gimbal or toggle the phone screen between the map and live view with a single or double-tap.
All of the controls are well-positioned for quick use in-flight. However, as the camera angle dial and shutter button are located where your fingers would naturally rest they can easily be pushed or rotated accidentally. Another reason to learn to control the sticks between thumb and index fingers rather than thumbs alone.
As controllers go, we’re sold on this design with the only reservation being the finish of the end of the sticks. The spiky design and rubber surround are there to ensure that your thumb and fingers don’t slip off, but you can end up with a sore thumb after an hour of use.
However, if you hold the sticks properly, you wouldn’t get the sore thumb issue.
Key settings such as the resolution, file type, frame rate, exposure and white balance are set via the DJI Fly app on the smartphone. This is also where you activate the automatic flying and recording modes.
To change the exposure settings, you just tap on the parameter that you want to alter and adjust accordingly.
Tapping the icon above the shutter button on the app reveals the various shooting modes (Photo, Video, MasterShots, QuickShot, Hyperlapse and Pano). You’ll also see the sub-modes of the selected mode, with QuickShots, for example, there’s Dronie, Helix, Rocket, Circle, Boomerang and Asteroid, and in Photo mode you’ll see Single-shot, Smart, AEB, Burst and Timed Shot. You just tap on the one that you want to use.
Tapping on the three dots in the top right corner of the app accesses more fundamental setting options such as the type of action you want the obstacle avoidance system to use (brake or bypass) and how you want measurements to be displayed (metric or imperial). It’s also possible to change how the controls work, for example, swap the functions of the left and right sticks, and calibrate the compass and gimbal if necessary.
It doesn’t take long to get familiar with what’s where and which settings can be changed with a simple tap or swipe.
Setting up the DJI Air 2S
After unpacking the DJI Air 2S, the first step is to charge its battery and the battery in the controller. The standard combo comes with a weird connection block that is pushed onto the battery connection (it has to be removed from the drone) for charging.
The Fly More Combo comes with a charger that enables up to three batteries to recharged in succession. It’s not as neat as the push-in unit that comes with the DJI Mini 2 Fly More Combo, it’s got three of those weird connection blocks in a row.
Thankfully, the controller can be charged via a USB-C connection.
As the battery charges, push forward the drone’s front arms until they snap into position, then push the back arms down and around until they pop into position. Then have a look over the drone and remove any sticky tape, there seems to be an excessive amount dotted around the body and arms.
Now you’re ready to attach the propellers. These have a bayonet mount so you just push them on and twist with no need for any tools. However, it’s important to put the correct propellers on the right arms as they work in diagonal pairs. The propellers with the orange circle around their central pinhole need to go on the arms with the orange markings on the propeller connection.
Next, take a freshly charged battery and click it into place in the top of the Air 2S and put a MicroSD card in the slot on its side.
With the drone all set, download the latest version of the DJI Fly app to your phone and either sign in to your DJI account or create one. Then put the phone in the controller’s clamp and connect the two via the appropriate cable.
Now you can power up the drone and the controller for the first time. To do this, press the button the drone’s battery once then give a second long press. Do the same press and long press on the controller’s power button. Wait a moment while the two devices have a think and connect.
As there are always firmware updates and/or database updates for new drones, it’s worth setting everything up at home the first time. Follow the directions on your phone screen to make the update, and then once everything is done, you can power done the corker and drone, pack everything away and head to your flight location.
Flying the DJI Air 2S
Once you get to the flying location it only takes a few seconds to unfold the drone’s arms again, power up both the drone and the controller and check that everything is OK, with no warnings or issues.
As the camera sits quite low on the drone, it’s a good idea to have a takeoff and landing mat. As well as protecting the front element from dew drops, a mat ensures that any long grass is kept well away from the propellers.
Before testing out these modes, you need to go through the flight checks, and here the DJI app walks you through the process; are the props attached correctly, signs of damage etc.
Once completed, you can take off – GPS connection is surprisingly quick, taking a couple of minutes to connect to the eight satellites. Just before, or as the drone takes to the air, a voice from the DJI Fly app should tell you that the home point has been updated and suggests that you check it on the map on the phone’s screen. On the off-chance that the drone still thinks it’s in China, take a look at the map and make sure it’s showing the correct location.
In the default configuration, pull the controller sticks down and inwards towards each other to start the motors and then push the left stick up to take off.
When the correct location is shown, if the drone battery gets critically low or you press the return-to-home button, the drone will automatically land at its original take-off point.
In flight, the DJI Air 2S feels responsive and quite speedy. Even in Normal mode, it nips around and tips dramatically up or down as you accelerate or decelerate. Switch to Sport mode and things go up a notch.
Cine mode is a good choice when you’re shooting video as it slows things down and smooths out some stick movements, but keep in mind that it increases the braking distance. This shouldn’t be a problem if the obstacle avoidance system is active, but it’s wise to be careful.
Performance
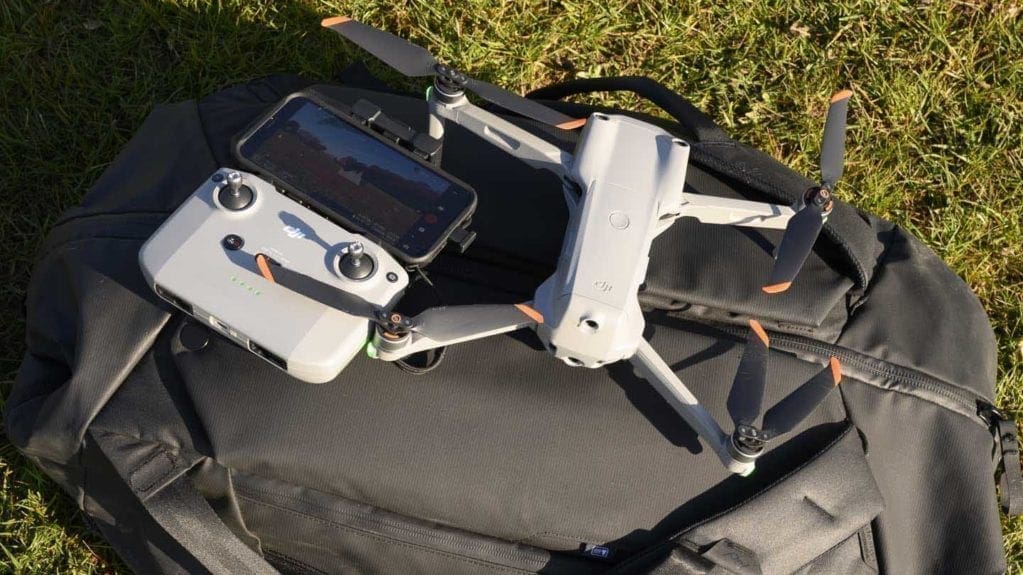
As with the Mavic Air 2, the Air 2S’s fold-up prop arms work incredibly well, and when packed down ready for transport, they stay tightly in place. One issue, however, is that there should be a velcro wrap to stop the props from catching on the inside of backpack pockets when being removed.
In this review, we’ve looked at the Combo package, which features the drone, several sets of propellers, three batteries and a set of ND filters.
Each new generation of DJI Drone sees an increase in simplicity with the setup and use.
The DJI Air 2S is one of the simplest drones yet, around five minutes to install the prop, battery, card, power on, connect the app and run through all the checks.
Setup starts with installing the sticks into the controller, connecting your phone with the cable provided, opening the DJI Fly installed and signing in, then powering on the controller using the big button on the front.
With the controller primed and ready attention can turn to the DJI Air 2S; memory card in, props in place and battery inserted and again switch on.
A few seconds later the Air 2S comes alive, small lights flick on to show that everything is connected and working.
Flight mode
The DJI Fly app has evolved over the years, and there’s plenty of options to select flight characteristics and camera quality settings.
Finding your way around the interface is easy enough, even for those new to the system. As mentioned earlier, the main flight mode is selected on the physical controller with three options:
Cine: slow and carefully balanced for silky smooth cinematic style video shooting.
Normal: this balances speed and response and gives the drone the feeling that its on sky rails.
Sport: this is an interesting flight mode for the small drone as it doesn’t seem to make a great deal of difference to the speed, just 4m/s. Instead, Sport mode makes the drone more reactive; roll or yaw the drone too hard, and you’ll get it to sky drift. Ease off on the controls, and you get a small taste of drone flight of old, albeit on stabilisers.
At first launch and the Air 2S shows just how responsive the small drone is. Roll left, right, spin, up and down along with a few more manoeuvres, and everything checks out.
Taking control
Taking off and it’s good to feel the sticks’ balance. A good amount of resistance in each direction with a firm spring back to the central position.
Likewise, in-flight, the sticks’ natural movement is vertical or horizontal with a slight resistance if you push to the diagonal.
Cine is the new Tripod mode and enables slow, steady flight. One nice feature is that you can hot-swap between each flight mode with the drone still in the air.
So if you’re in Sports mode and see something you would like to film, slide the switch to Cine and off you go. There is no need to land, reboot, change the jumper on the control board, just one easy switch, and the flight characteristics change instantly.
Cine Flight Mode: slow and steady
Starting in Cine flight mode and the 5m/s speed is slow, as is the movement in any direction. Flying in this mode is relatively dull as it really is all about getting the shot rather than simply flying for fun.
The slow pace enables you to track subjects easily or follow paths you mentally plot. Ultimately the Cine mode offers potential, and while you might not be able to get too close to your subject due to restrictions and the object avoidance sensors, the ability to film at 5.4k will enable you to crop into the frame in post.
Cine mode does one of two things, firstly this mode is ideal for filming; the drone’s speed and reactions are optimised to enable the capture of smooth footage through steady flight.
Filming a simple ground to air or circling an object or subject is extremely easy, and your reaction times can be slow and well-considered.
This speed also has an advantage for anyone new to flying, as all movement is slowed and restricted; it’s a great mode for getting started.
Normal Flight Mode
As the name suggests, normal flight mode enables normal flying, and the reactions and speed are ideally set for anyone used to flying but still likes the reassurance of automatic flight control.
In Normal, the flight characteristics mean that the pitch, roll, and yaw speed are all finely balanced to avoid any drift that could be caused by being overly reactive on the sticks.
This gives the DJI Air 2S a feeling that the drone is on sky rails and is extremely responsive, eliminating all of the skill that used to be required for flying.
The 15m/s flight speed is also not bad, if a little slow compared with the larger drones, but more than fast enough if you need to scope out an area looking for a scenic shot.
The difference between Normal mode on the Air 2S and Air 2 is noticeable, with the flight being far more refined and akin to the larger Phantom series.
As flight modes go, this is close to perfect, although a little more movement of the yaw would have been nice and can of course be adjusted through the Fly App.
Sport Flight Mode
Sport flight mode on the Air 2S doesn’t speed thing speed dramatically, just by 4m/s. However, it still enables quite a pace in flight and is great fun for zooming up and down a field and scoping out all the different shooting angles.
Speed, however, is not the major difference between Normal and Sports mode; that comes with the way the drone responds to movement.
Essentially most of the Normal mode’s safety is removed, and while it keeps the stabilisers on, the angle of the pitch, roll and yaw is greatly increased.
This means that you get a bit more drift if you turn too sharply, and the increase and decrease in height seems a little more responsive.
Sports mode is the one flight mode where object avoidance isn’t available, so a little extra caution needs to be paid when flying.
All three flight modes have been programmed to keep the drone in control, and even for those new to flying, there shouldn’t be any difficulties with getting to know how to fly or controlling the drone.
Object avoidance
Checking over the Air 2S and you can’t fail to see the number of sensors that now adorn the bodywork. They’re almost everywhere except for along the sides of the small drone.
This means that almost anything you do outside of sensible the drone will either stop you or beep loudly until you stop.
Compared with the early object avoidance of the Phantom 4, the Air 2S’s system is light years ahead. Try to fly it into anything, and there’s simply no chance.
In the ‘manual’ flying modes the DJI Air 2S’s object avoidance system works very well. It’s capable of spotting small twigs and generally keeps the drone safe – although be careful of very fine twigs at the top of trees.
If the ‘Obstacle Avoidance Action’ has been set to ‘Bypass’ in the DJI Fly app, the drone takes a very cautious approach. For example, when flying towards a tree it slows to a stop then creeps sideways only nudging very slowly forward once its path is clear. It will stop and move sideways again if it detects more branches.
When a QuickShot mode is activated, the app reminds you to check for objects as the object avoidance system isn’t active or isn’t as active as in manual mode. Beware of trees.
The ability to set restrictions through the Fly app, height and distance all work exceptionally well and help you keep within the rules.
On safety, DJI has worked extremely hard to ensure that the Fly App promotes safe flying and checks restricted zones and other information.
If you are in a restricted zone, it will tell you, and if you try to take off in a no-fly zone, then the drone simply won’t.
DJI Air 2S image quality
Without a doubt, the big feature of the Air 2S is its 1-inch image sensor, which is certainly impressive in such a small drone.
The increased sensor size also enables a couple of additional features which are of note. Firstly the 5.4k video resolution is the actual working resolution and the framerate of 30fps is not just a headline hitter.
What’s more important, the footage shot at this high resolution is detailed and impressive. The stills and video have plenty of impact with good dynamic range and lots of detail.
If we were to be hyper-picky, we’d mention that in some footage we shot of the Air 2S flying between the trunks of beech trees, the closer trunks sometimes look a little cutout. That’s partly because in the Normal colour mode, the sharpening is a little high, but there are no halos or major issues. And to be fair, the drone is really designed for photographing and filming distant objects rather than very close subjects.
The other feature that is noteworthy is the 8x digital zoom, which offers additional scope for the small drone. Usually, digital zooms lack quality, but the Air 2S produces impressive results.
During the test, we shot footage at all resolutions and mixed in framerates and recorded in 264/265, HDR and D-log colour profiles.
As an overall observation of the footage, and a common trait with most drone cameras, the Air 2S isn’t keen on lowlight or grey conditions. However, it fairs better than most.
Looking at the standard footage shot at 5.4k and 30fps, the clarity is generally good, but the results vary between bright and dull conditions. In bright conditions, tone, detail and colour using the standard colour profile are excellent. Plenty of detail is captured, and image quality is well balanced.
But as we mentioned, as the light level drops due to cloud, the detail and colour level drops considerably; but the quality is still well above what we have seen before.
While 30fps may seem a little slow for this resolution, DJI is the leader in mechanical image stabilisation and this helps to make 30fps clean, clear and crisp. Examining the results shot at different resolutions reveals the footage is equally well balanced.
Helpfully, the Fly More Combo kit includes ND filters that can be popped onto the lens in brighter conditions.
As the resolution increases, the sensitivity of the sensor also seems to increase and ND filters were needed to balance the exposure. This is especially noticeable when comparing footage shot a 5.4k and 1080p.
Shooting a straight vertical from ground to air shot, you can see some painterly pixelation as the sensor struggles with the information. However, as the drone rises, the clarity and impact of the image increases.
There is little to fault the quality at all video and stills resolutions.
Optically, the Air 2S’s lens also seems good and after flying it in bright sunshine, we can confirm that it’s much less prone to flare than the Mavic Air 2 and DJI Mini 2. Naturally, if the sun is very close to edge of the frame, it can still appear, but it’s not a significant issue.
One point to keep in mind with the DJI Air 2S is that the propellers sometimes appear in the footage. That’s not an issue we’ve encountered with the Air and Air 2. It may be a result of the way that the drone pitches up and down in flight more than those earlier drones. Again it’s not a major issue, but something that you may need to factor in when filming important clips.
DJI D-log is it worth it?
In recent years DJI has pushed raw and its D-log colour profile for video. With the Air 2S, the flat tone, contrast, and colour do their job, extending the dynamic range and enabling you much more scope in post. However, even in the Normal colour mode, the DJI Air 2S has dynamic range beyond the Mavic 2’s, and it manages to keep hold of highlights a bit better.
D-log is now well developed, and there are a host of LUTs that can be found from companies such as Bounce Color that you can use to draw out the best detail. We’re impressed with the D-log footage quality and any lack of detail compared with a larger drones camera is hidden due to the wow factor.
Overall, the video quality is excellent, and for small productions would be perfectly acceptable. Built-in drone cameras have come a long way in a very short amount of time.
FocusTrack
FocusTrack has a helpful collection of modes that enable you to concentrate on capturing the perfect moment(s) while the drone flies automatically. It’s selected by drawing a box around the subject on the phone screen in the controller. You’re then able to choose between Point of Interest 3.0, ActiveTrack 4. And Spotlight 2.0.
In Point of Interest mode, the drone flies around the subject automatically while in ActiveTrack 4.0 mode the drone tracks the subject and keeps it in the imaging frame. In spotlight mode, you’re in control of the direction and speed of flight but the drone turns to keep the subject in the frame.
All three modes work very well, keeping the subject nicely framed. ActiveTrack is particularly useful with moving subjects.
DJI Air 2S sample video
This video shows the footage that was recorded automatically in MasterShots mode on the DJI Air 2S.
The drone was set to 5.4K video, but when MasterShots is selected it defaults to Full-HD. It’s possible to reset the resolution to 2.7K or 4K in MasterShots mode. The supplied ND16 filter was used.
In MasterShots mode, the camera takes control of the drone flight path and recording. Once you hit ‘start’, the drone starts work and when it’s finished it returns to the starting point. The DJI FLY app automatically applies a theme to create a short video, but with the original footage selected in the app, you use the ‘create’ option and select another theme. All of the editing and music is applied automatically.
The first part, which is silent, is all of the original footage while the two final sections with music were created post-capture.
The following four videos demonstrate the quality of the footage that can be captured by the DJI Air 2S. These clips were shot in bright and cloudy conditions to show how the small camera copes with the different lighting conditions.
The camera’s exposure was set to auto for all of the clips and the ND filters that are included with the Fly-More-Combo kit we’re used.
DJI Air 2S 2.7K sample footage
DJI Air 2S 4K sample footage
DJI Air 2S 5.4K sample footage
DJI Air 2S Sample Images
Follow the link to browse and download full-resolution images from the DJI Air 2S
[FAG id=1377145]
Verdict
When it was announced, the DJI Mavic Air seemed like a great little drone, but it was more akin to a flying action cam in quality. The DJI Mavic Air 2 upgraded the sensor from a 12Mp 1/2.3-inch CMOS chip to a 48/12Mp 1/2-inch CMOS device which brought slightly better image quality. However, the change in the build of the drone and the controller was dramatic, both feel much more durable and better designed for their jobs.
Now we have the DJI Air 2S which makes another major step forward. This time the aircraft is only changed a little with the addition of the sensors for the uprated object avoidance system and the controller remains the same as its predecessor. The camera sensor, however, has been upgraded to a 20Mp 1-inch type CMOS device and in good light, it enables the Air 2S to capture impressively good video and stills.
Like the Mavic and Mavic Air 2, the Air 2S is easy and fun to fly, and the obstacle avoidance helps to keep the drone safe most of the time – but you still have to keep your wits about you, especially near trees.
Scanning through the specification and feature list can seem a bit overwhelming, but the DJI Fly app makes it easy to explore and select the settings that you want to use.
DJI’s new MasterShots is a fun new feature, but it would be nice to see it enable manual control over the exposure so that the drone is only responsible for the automated flying element. The themes that can be applied in the DJI Fly app are OK for producing short videos to share on social media, but the original footage has potential for much wider use.
In short, the DJI Air 2S is a very good drone that goes well beyond the status of a flying action cam. The main reservation that we have about it is that it isn’t classified under the new drone regulations. That means that, as the current regulations stand, from 1st January 2023, the Air 2S will only be allowed to fly in areas 150m from residential, recreational and commercial areas. The CAA has said that classifications won’t be issued retrospectively but in response to questions asked during an EASA (European Union Aviation Safety Agency) livestream, EASA responded ‘The market regulation in general does not allow to retrofit products already in the market. However the EU Commission recently finalised a procedure to allow the retrofit for drones. The procedure may only be activated by the drone manufacturer’ so perhaps there is some hope?