What is the Atomos Ninja V?
DSLR and Mirrorless cameras may well be the popular choice for shooting video, but, there’s no getting away from the fact that they were originally designed to shoot stills.
The less than ideal form factor and handling of interchangeable lens cameras (ILC) have led many manufacturers to design handy and innovative solutions for video; from housings, mics, handles, and of course, monitors.
Arguably one of the first and most important accessories for any video shooter has to be a decent monitor. Sure, the articulated or flip monitor on your camera may well do the job, but it still can’t match the function and features of a dedicated device such as the Atomos Ninja V.
The Atomos Ninja V does far more than just act as a preview screen; it enables the capture of clean HDMI video out from your camera, increased recording options, and so much more.
In this review, I’ll take a look at the Atomos Ninja V and what it has to offer. This review might seem a bit late as the Ninja V has been available for a few years.
So instead, as it’s a common sight in most videographers bags, and it’s key to some other products I’ve been looking at, I felt it was worth covering. Although, I’ll focus more on why you need one rather than is it any good, as that’s already a given.
Specification
- Touch Screen: 5.2-inch 1920×1080 427ppi
- 3D LUT Display: .Cube Format
- HDMI Input: HDMI (2.) 4K p60
- HDMI RAW: Apple ProRes RAW up to 6K
- Power: NPF L Series or mains adapter
- Mounting points: 1 x 3/8 & 2 x 1/4
- Dimensions: 151 x 91.5 x 31 cm
- Weight: 360g
Build and Handling
There are a few reasons that the Atomos Ninja V has become such a must-have accessory amongst the film making community. Features are obvious, but it’s the build and handling that makes this both easy to use and useful in the film making process.
Many advanced monitors, including Atomos and SmallHD, use ports and connectors that are alien to ILC users. SDI connectors are a common example used on Pro Camcorders but have no place on a stills camera.
Essentially the Atomos Ninja V brings Pro features into formats that photographers can understand. HDMI over SDI, standard SSD over external recorders and a simple touchscreen interface that enables easy navigation.
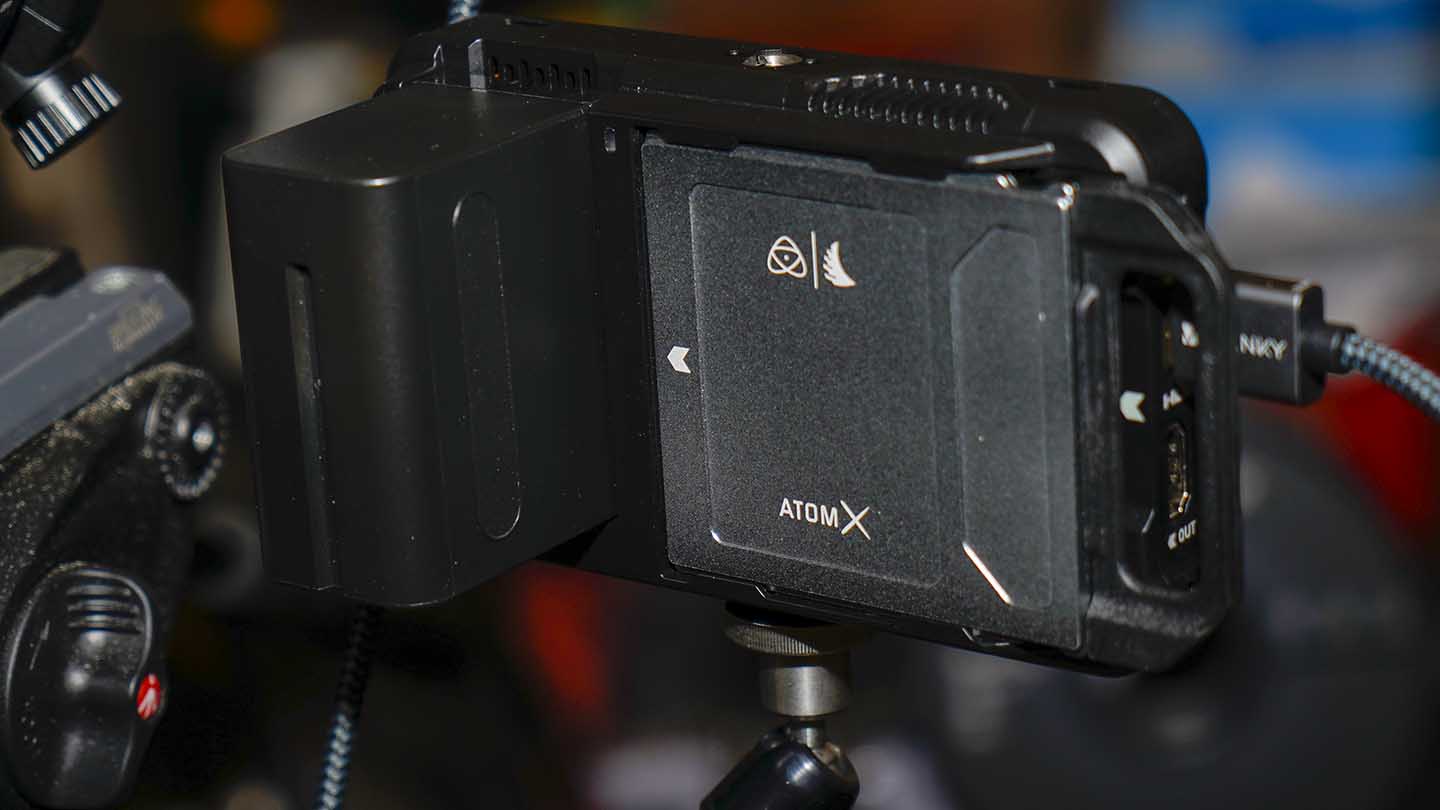
The Atomos Ninja V, like most camera kit, requires a few additional accessories. There’s a link cable between the camera and the monitor, battery and storage media for starters.
An NPF L battery supplies power. These batteries are widely available, and a standard 5200mAh will provide power enough for 2 hours of recording at 4K 60fps. Check out our review of the Berenstargh battery.
Likewise, a full-sized HDMI to micro HDMI cable is also widely available. You can get an official Atomos cable, but from experience I’ve found buy a decent quality alternative rather than the AAtomos branded version, they’re a lot cheaper and tend to be better quality.
Finally, you need storage media. This can be expensive; I have two 500GB Angelbird SSDs specially made for the Ninja V. There is little to fault with them aside from the price and the fact that the handles are an additional cost.
The alternative is a standard SSD such as the Lexar NQ100 or Samsung 870 EVO that I’ve looked at recently. These pop inside a caddy that Atomos provides with the Ninja V.
Once everything is plugged in, there are two quick steps that you will need to do before you start filming.
The first is to switch the HDMI Info Display off. Otherwise, you’ll record the info display on your screen, and the other is to format the SSD.
Performance
Using the Atomos Ninja V requires a different way of working to using the camera in isolation. First of all, you’ll need a rig to hold the camera in position, and then you need to make sure both the camera and Atomos Ninja V are working together with the right resolutions, framerates and Gamma.
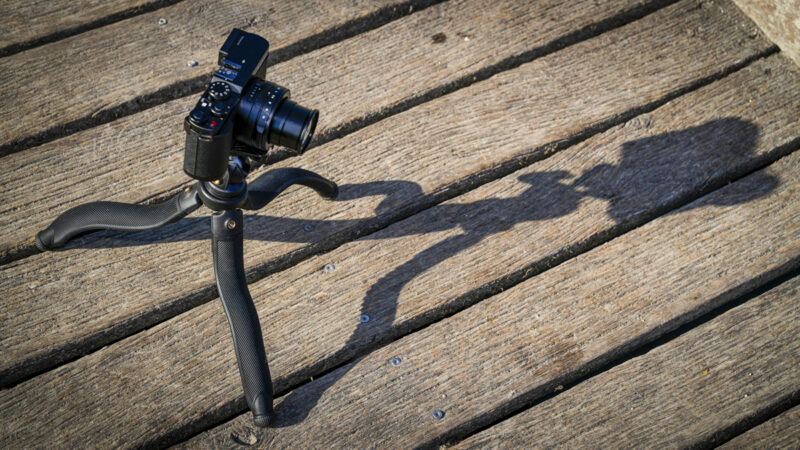
Starting with the set-up, I usually use a Manfrotto 055 with a friction control arm used to hold the monitor close to the camera’s back.
Likewise, if I shift to the Zyiyun Crane 3S with Smallrig handle, I can again bolt the monitor with another friction control arm.
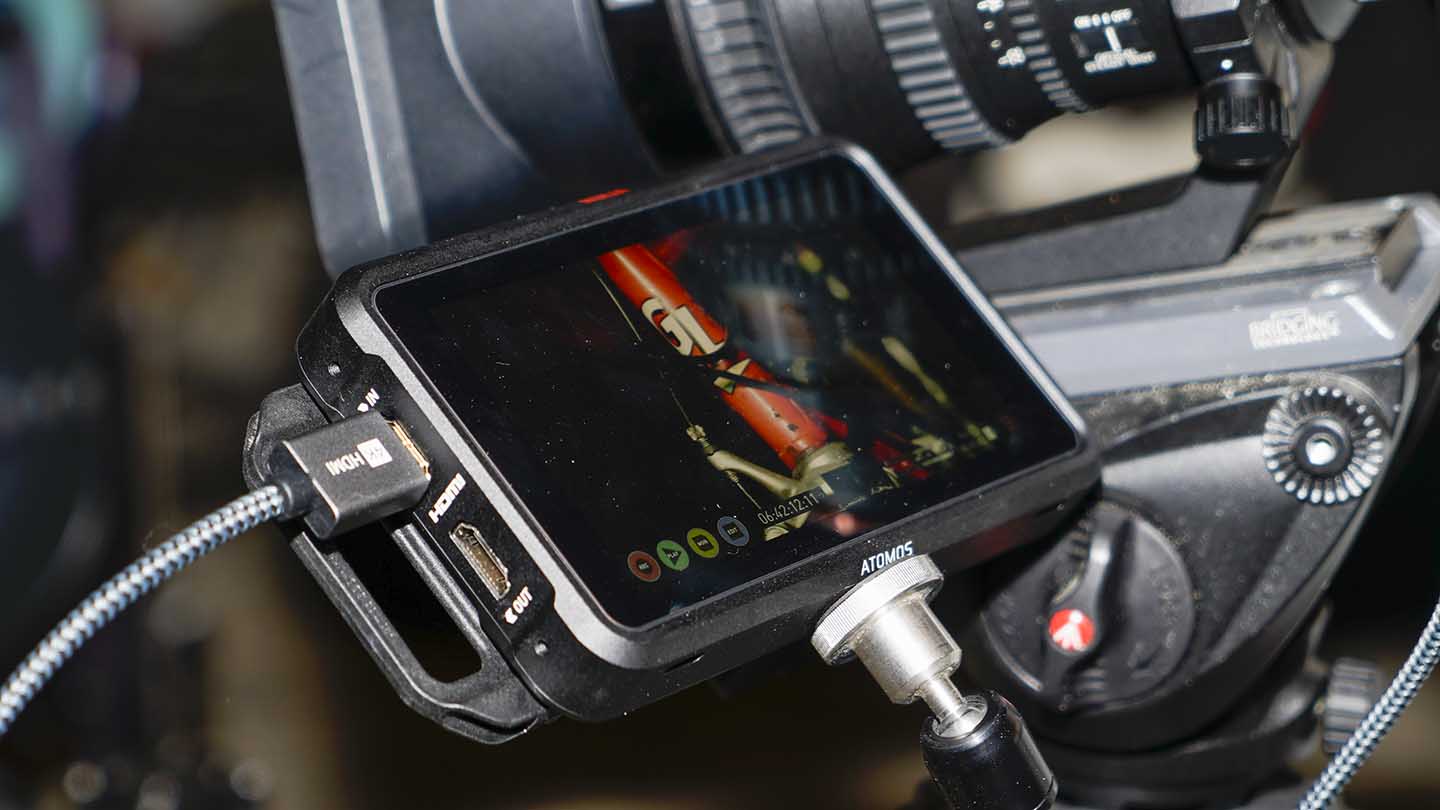
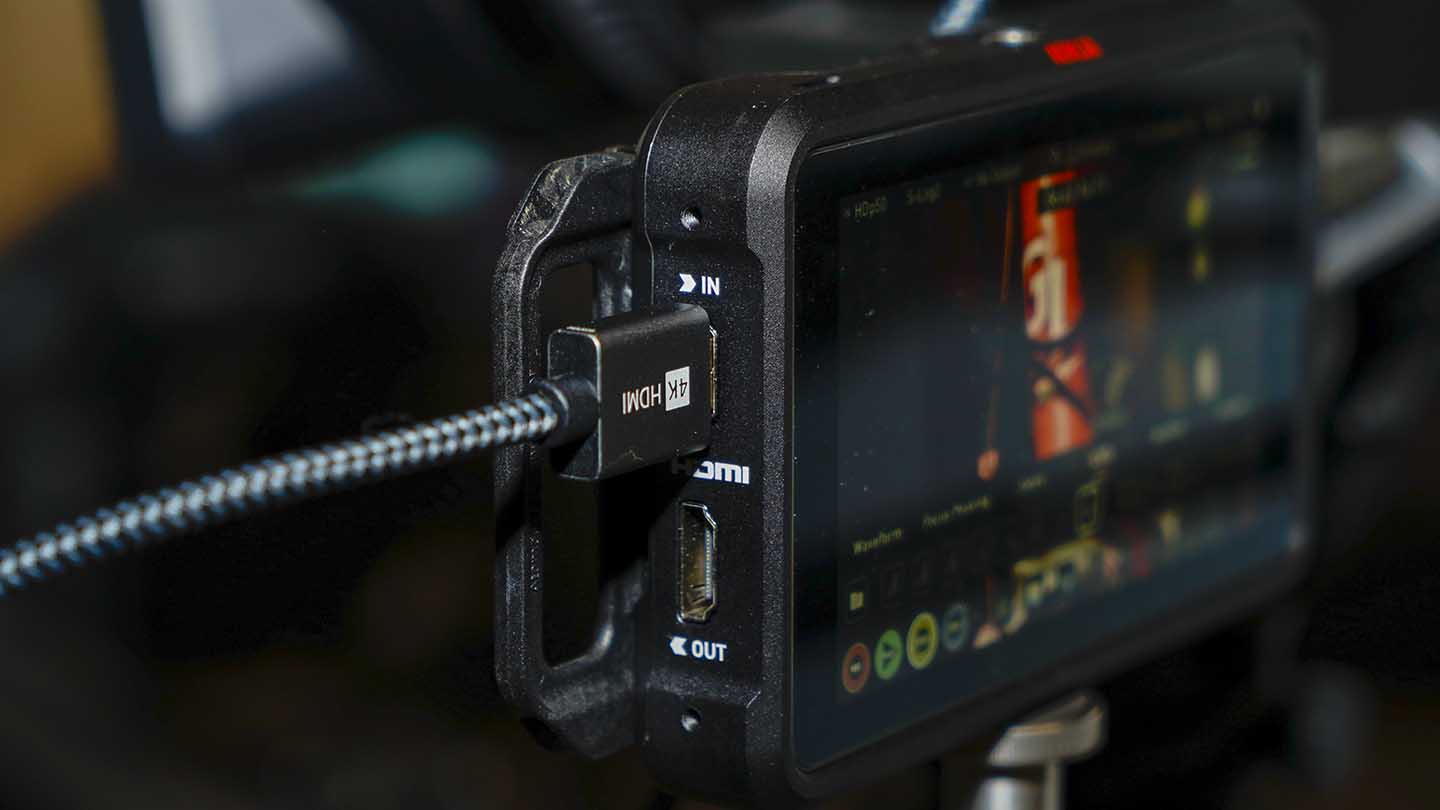
The ability to mount the Atomos Ninja V is a major feature and gives you plenty of flexibility in various shooting locations. I would recommend using a cage around your camera as this further extends the mount options, but also enables you to fix down the cables which are essential if you’re moving about.
The one cable that you need to look out for is usually the HDMI connection into the camera. Normally on an ILC, this is a Micro HDMI, so ensuring you can secure the cable in place is essential.
With the physical set-up complete you can then focus on the Atomos features, firstly checking the resolution that you’re recording and the format on the camera. This should be fed through from the camera.
A point worth highlighting is that if you’re coming to the Ninja V thinking that it will give your camera a huge video quality boost it won’t. If you record from an 8-bit camera, then the footage you’re shooting will be 8-bit, if your camera is limited to 4K 30fps, that will still be the maximum you can record at.
The Ninja does some processing and enables a greater range of codecs, but that isn’t going to greatly improve the video quality or give you huge amounts of additional scope when it comes to grading. However, it does record at 4:2:2 rather than 4:2:0, so there may be a marginal improvement in the colour data, although I can’t see too much of a difference.
So, then the Atomos Ninja V is all about workflow and performance. It offers you access to great features that will help you maximise your camera’s potential.
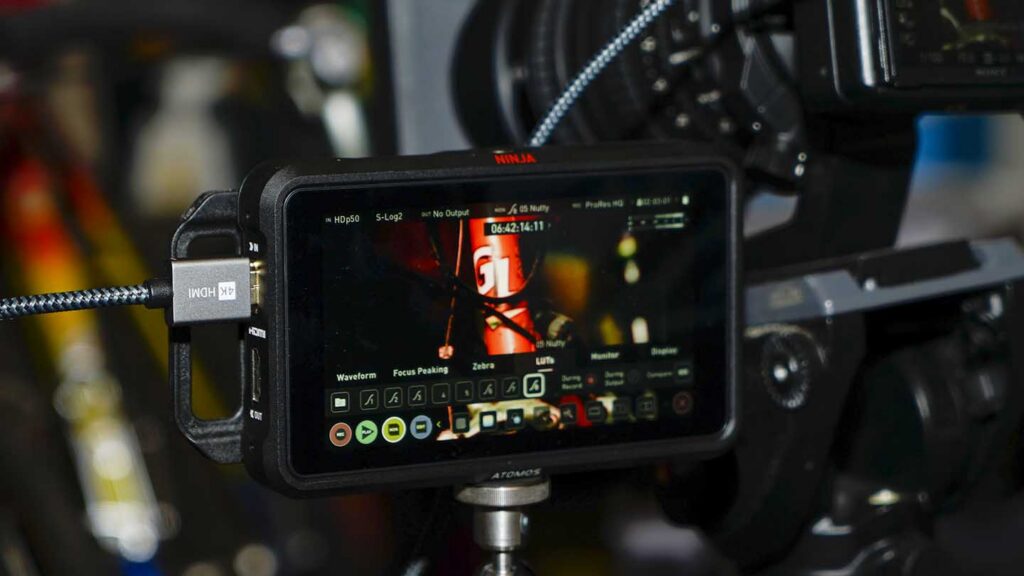
Those features include the monitor; it’s bigger and brighter with a toolset that will help you ensure exposure and focus are right.
Then on the Atomos, you have quick access to several different set-up options. The first is to tap the screen to display the options if not already showing. At this point, you should have four colour circle icons across the bottom along with time code, waveform display, levels, recording time, battery power and settings ICON.
Tap the setting ICON, and you can set-up your recording options. It’s worth pointing out here that the Ninja V doesn’t update your cameras recording settings, so if your camera is set to 1080p, then that is the resolution that will feed through to the Ninja V.
The main options you need to pay attention to when you start are the video input settings, and these should mirror the options you have selected on the camera.
It’s worth checking through these to ensure that everything is set to the right Gamma for your project. These settings for your camera will take a little getting used to especially if you’re shooting in log modes, or you want to preview how LUTs will look once applied.
What tools does the Ninja V give me when filming?
Primarily the big upside of using the Atomos Ninja V is all that addition screen size. OK, camera screens are getting bigger but not 5.2-inches.
That in itself might not seem that large, but trust me its a great size if you’re a one-person crew. I tend to use a two and three-camera set-up and have at least two Ninja’s running at any time.
The simple reason is that there is a tonne of tools that you can use to help gauge the quality of your shots, back to those icons across the bottom of the screen. Tap the yellow Mon icon, and a series of options appear, including; waveform, scopes, focus peaking, Zebras, false colour, zoom, crop and squeeze.
The squeeze option is essential if you’re using one of the excellent new Surui MTF Anamorphic lenses with a Panasonic GH5 or Olympus OM-D EM-5 MKII.
Clicking the yellow monitor icon also gives you access to the monitor settings and enables you to change options for the Waveform, Focus Peaking and Zebra. It’s also the area where you can have the most fun with the look of your footage.
For this test, I used a selection of LUTs from BounceColour. Once loaded into the Ninja V, you can then select them for the monitor, and the effect is then applied to the footage.
A feature that makes this small monitor recorder stand out is that the LUTs can be baked into the footage as it’s recorded. In the Monitor options, you can tap the ‘During Recording’ option to enable this.
Another option here is the side by side preview, so you can see exactly how the LUT effects the shot, all very clever.
The Ninja V packs in small features that make monitoring and recording videos far easier than using the camera alone. The most useful features aside from the larger brighter screen are the focus peaking, zebras, and previewing, but not applying LUTs.
What’s the difference between recording internally and externally on the Atomos Ninja V?
On the surface, you would think that there is little difference, and when it comes to core quality, there is very little difference. However, with the Atomos Ninja V, you have a few more file options.
Before we go into those, it’s worth noting that internally the A7 III stores video footage with XAVC-S compression, using H.264 in a common .mp4 container.
This footage is compressed, and surprisingly that compression doesn’t affect the quality but does affect the amount of work your computer has to do to unpack it.
ProRes is a high-quality format with far less compression. This means less uncompressing work for your computer but much larger files.
Ultimately this means there’s no need to create proxy files – I’ve checked the files size difference, and the ProRes files are larger than the XAVC and proxy files combined. However, you can get stuck straight into the editing!
Another major feature is that the monitor isn’t limited to recording times. The Sony A7 III and all DSLR and Mirrorless cameras are restricted to 29 minutes. As the Atomos records off the HDMI there is no restriction, a major advantage during lockdown and recording live performances and speeches.
I’ve already covered LUTs, but again it’s a major advantage and with the options, you can either preview the footage with the LUT applied or baked it in.
Finally, cameras such as the Sony A7 III colour are recorded at 4:2:0 whereas attached to the Atomos you can record at 4:2:2. However, this is still 8-bit, and the difference between the two as far as I’ve seen is negligible.
Ultimately the Atomos Ninja V enables you to shoot great video more easily and take some of the processing strain away from your computer.
If that’s an Intel NUC Extreme Kit, then it won’t care that you’re trying to save it some work. If that computer is an Apple MacBook Pro, then that decision will save its life.