Why keep applying a series of adjustments manually, when you can automate your favourite techniques with a Macro in Serif’s Affinity Photo software?
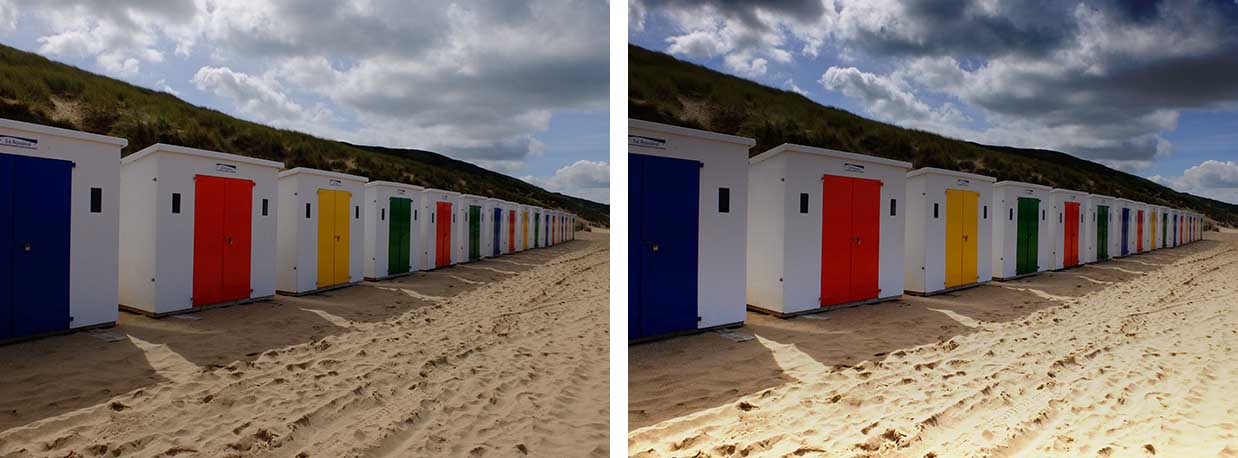
It’s often difficult to balance the brightness of the sky with the ground in landscape photography, but here’s a technique for adding drama to the sky and brilliance to the foreground which we can save as a Macro to use again and again.
Affinity Photo is an extremely powerful photo editing application which can transform your images with effects, filters, layers and masking tools, and at a surprisingly low, subscription-free price. Best of all, Affinity Photo is now available for Windows users too.
Version 1.5 brings a whole host of new features, including the ability to record a series of complex image-editing actions as a Macro, which can then be saved in the program’s Macro Library for re-use on other images. It’s even possible to add user interaction to key steps, so that with just a couple of slider adjustments the effect can be tailored to each individual image.
To show how this works we’re going to create a graduated filter effect Macro, with control over both the strength of the effect and the brightness of the image. The contrast in brightness between the sky and the foreground can vary considerably from one shot to the next, so this kind of control is essential.
Our graduated filter effect is not terribly sophisticated. You can’t control the ‘height’ of the graduated area in the way you can by adjusting the position of a real filter, but that matters less often than you might think, and what our Macro lacks in sophistication it makes up for with simplicity and effectiveness.
The graduated filter comes in two parts. The first is a Gradient Overlay effect applied directly to the image. By using a black-to-white gradient at the appropriate angle and setting its blend mode to overlay, this effect will darken the top of the picture and lighten the bottom.
The second part is a simple Brightness / Contrast adjustment layer which is useful for fine-tuning the finished picture. Both this and the Gradient Overlay effect are non-destructive – even after they’ve been applied with the Macro and you’re back in the regular Photo Persona, you can go back and adjust them if necessary.
This is just an example, of course. The real purpose of this tutorial is to show how Affinity Photo’s Macro feature works, and just how easy it is to create, modify and use your own Macros.
So let’s get started!
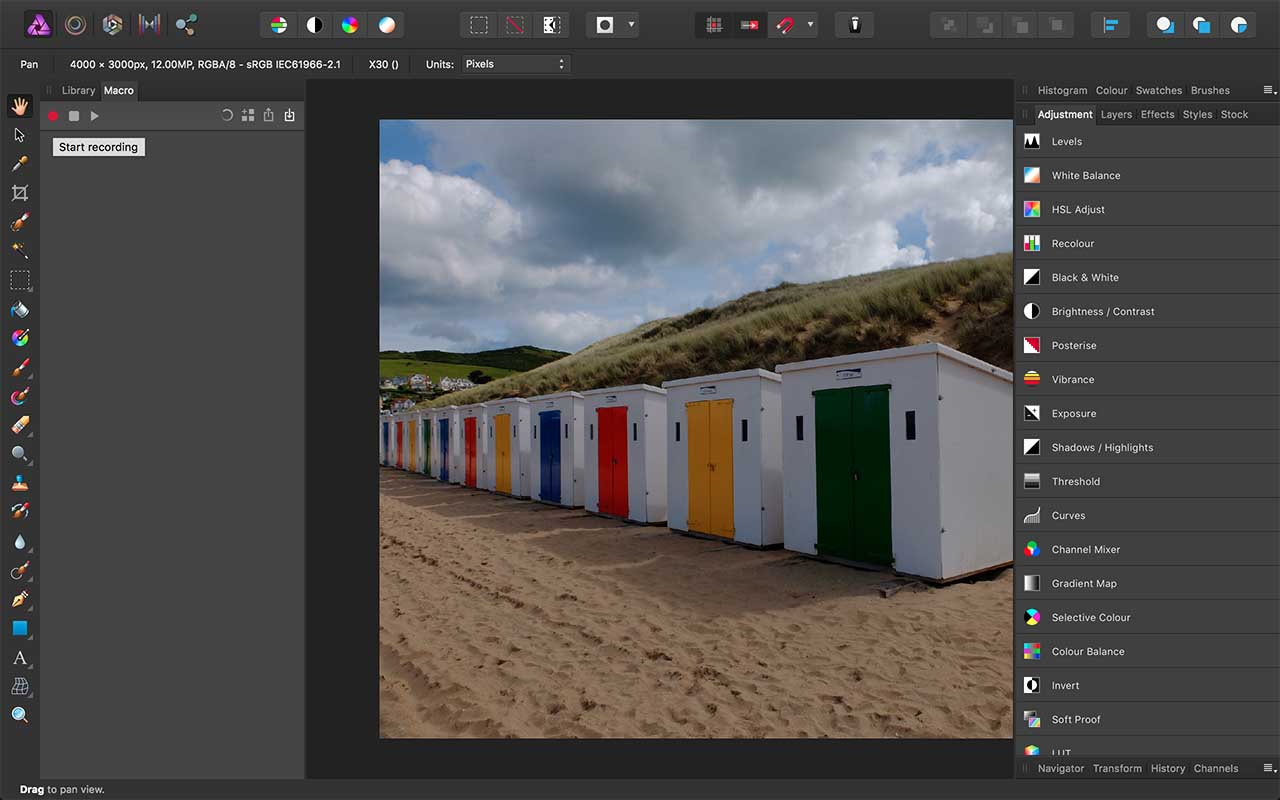
01 Start recording your Macro
First of all, if you don’t see the Macro and Library panels on the left of the screen, you’ll need to display them. You can do this by opening the View > Studio menu and selecting them from the list of panels.
Now, we’ve opened a sample image, and with the Macro panel displayed, all we have to do now is click the red button to start recording. From now on, Affinity Photo will record everything we do to the photo.
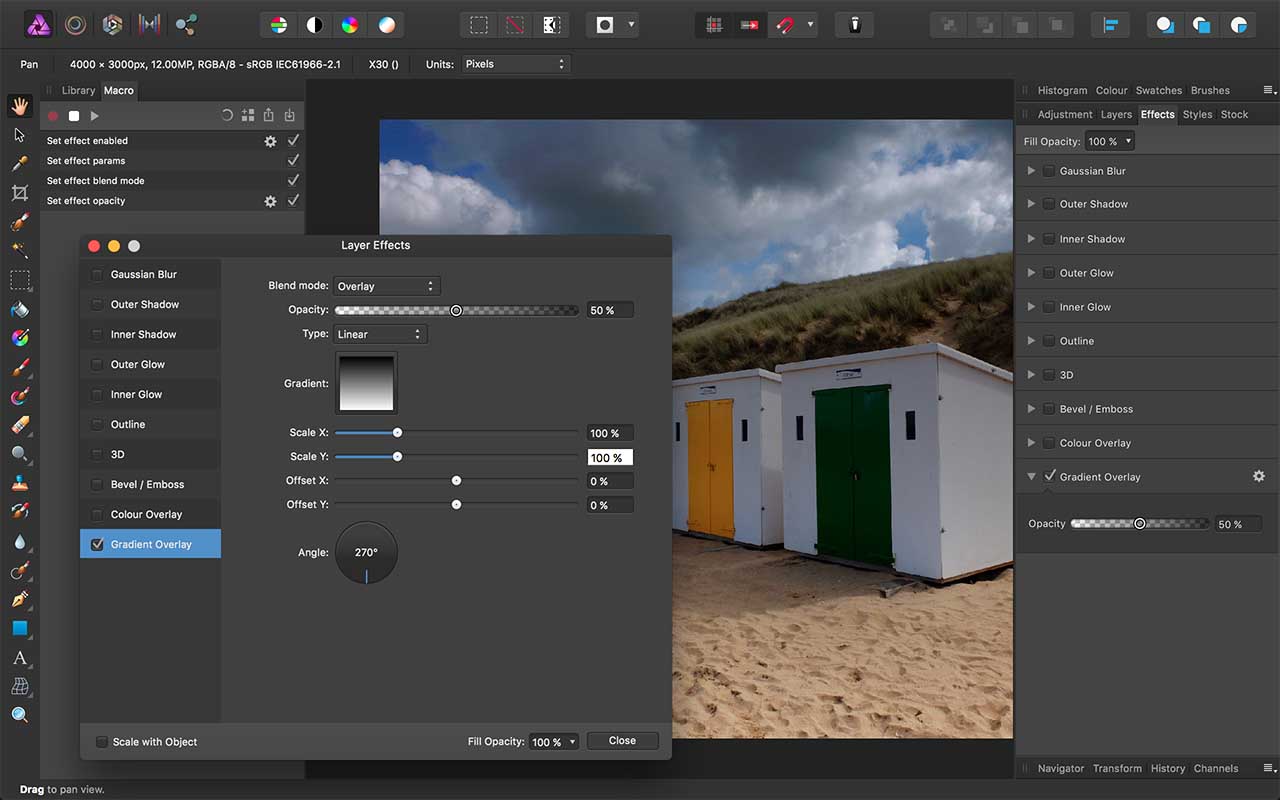
02 Add the Gradient Overlay effect
First, we switch to the Effect panel on the right and select Gradient Overlay. All the controls we need are in the Layer Effects panel (to display this, click the gear icon next to the Gradient Overlay option on the Effect menu).
We need to select Overlay mode from the Blend Mode menu and use a simple black-white linear gradient.
By default, the gradient will run left to right, so we need to set the angle (below) to 270 degrees to make it run from top to bottom. At 100% opacity, the effect is pretty strong, so we’ll reduce that to 50%.
03 Add a Brightness / Contrast adjustment
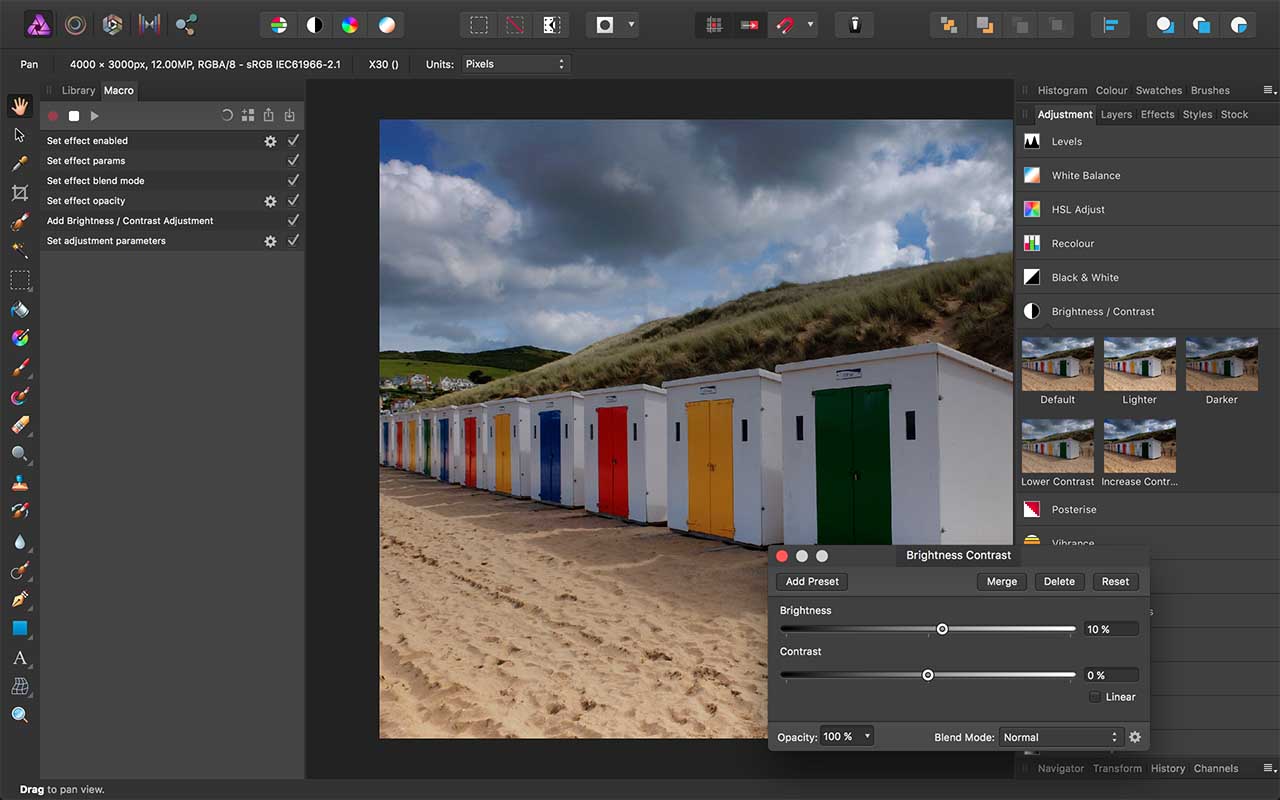
You’ll be able to see the graduated filter effect acting ‘live’ on the image in the previous step, and you may also notice that the image is now looking a little lighter or darker than you want.
To correct this, switch to the Adjustment panel and select Brightness / Contrast. This is important even if you don’t change the brightness for this image, because this Macro may be used on photos which do need this adjustment. Now that’s done, we can hit the Stop Recording button.
04 Adding user input
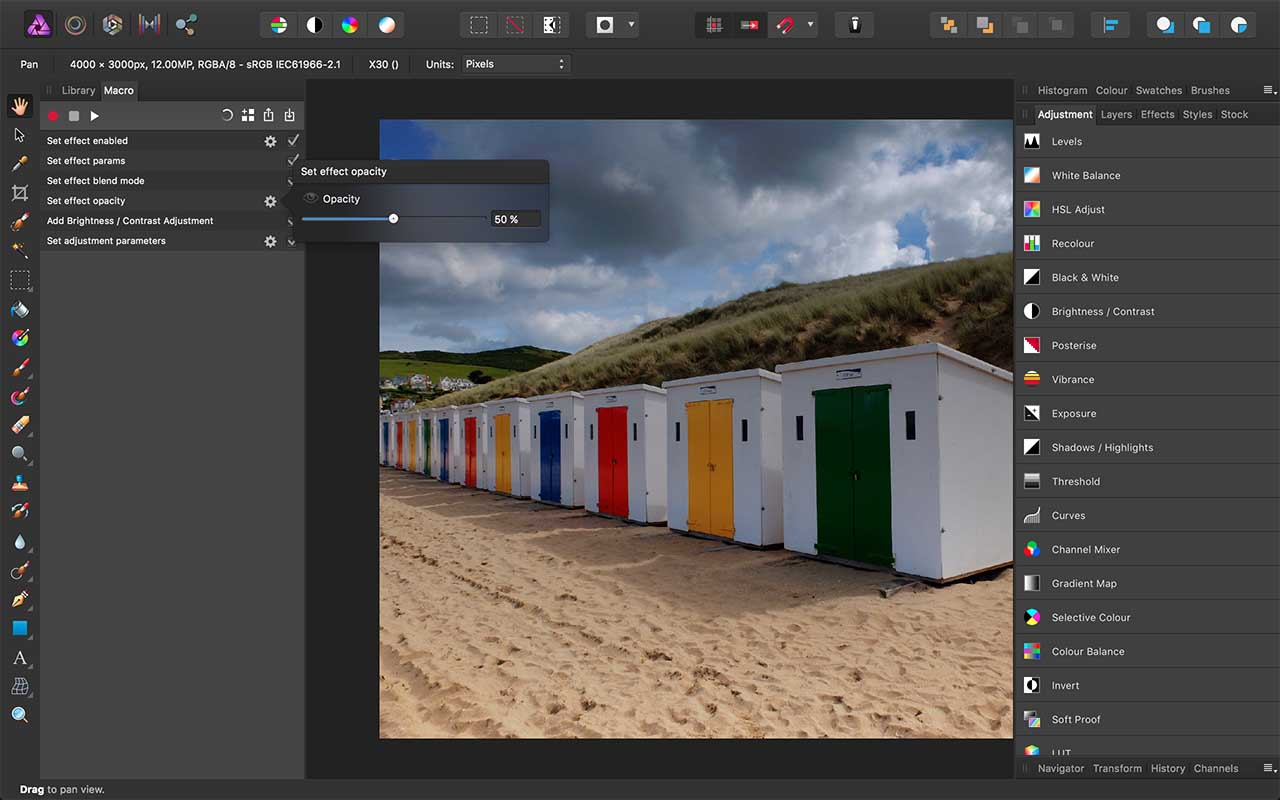
You’ll see that the Macro panel has recorded the series of actions we’ve just carried out. If we leave it as it is, though, it will use the same settings for every photo. To add user interaction, look for the steps with a gear icon alongside.
Here, we click the gear alongside the ‘Set effect opacity’ step, and click the ‘eye’ icon. This displays a slider for the effect opacity, which is currently displayed as 50% – the value we chose in the Layer Effects panel.
05 Naming your user input prompts
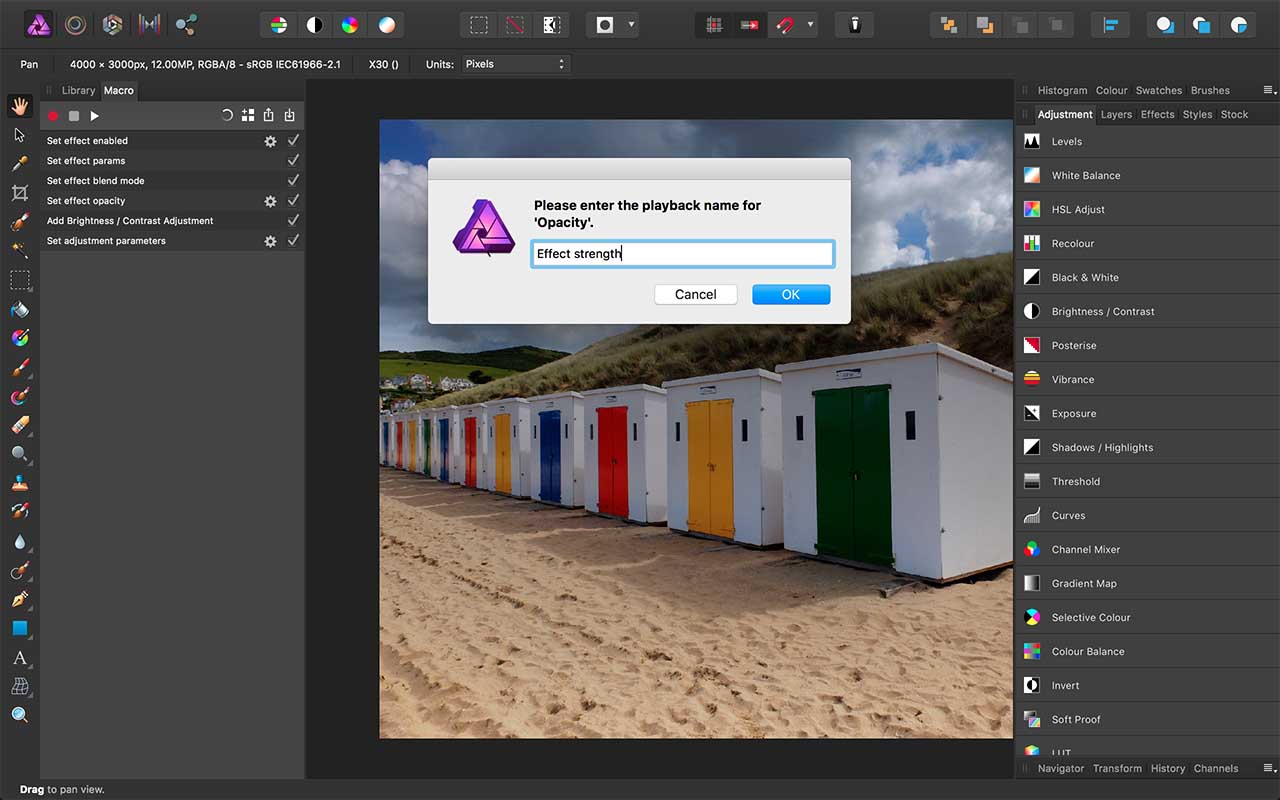
We’re adding this user input step because the opacity value you need will be different for different pictures. A setting of 50% is a good average setting, but for a stronger effect you’ll need a higher percentage, and for a subtler effect you’ll need a lower percentage.
We’re prompted to choose a name for this input step – the default name is ‘Opacity’, but we can change this to something more user-friendly, like ‘Effect strength’.
06 User input 2 – Brightness
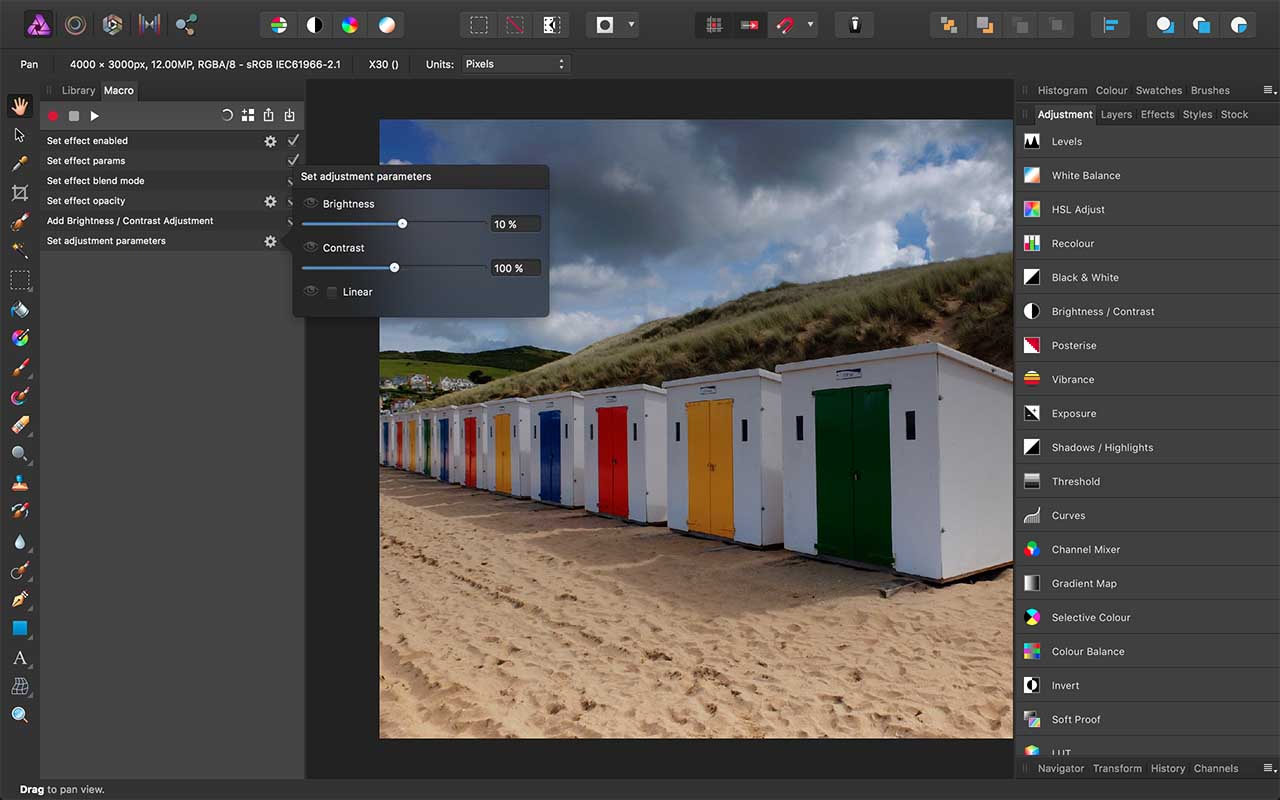
We can also give the Macro’s users control over the second step in our effect – the optional Brightness adjustment. To do this, we click on the gear icon next to the ‘Set Adjustment Parameters’ step below ‘Add Brightness / Contrast’ in the Macro panel.
There are three options here – ‘Brightness’, ‘Contrast’ and ‘Linear’. We only want to offer control over the Brightness setting, so we just click the ‘eye’ icon next to that one. The default input name, ‘Brightness’, will be fine.
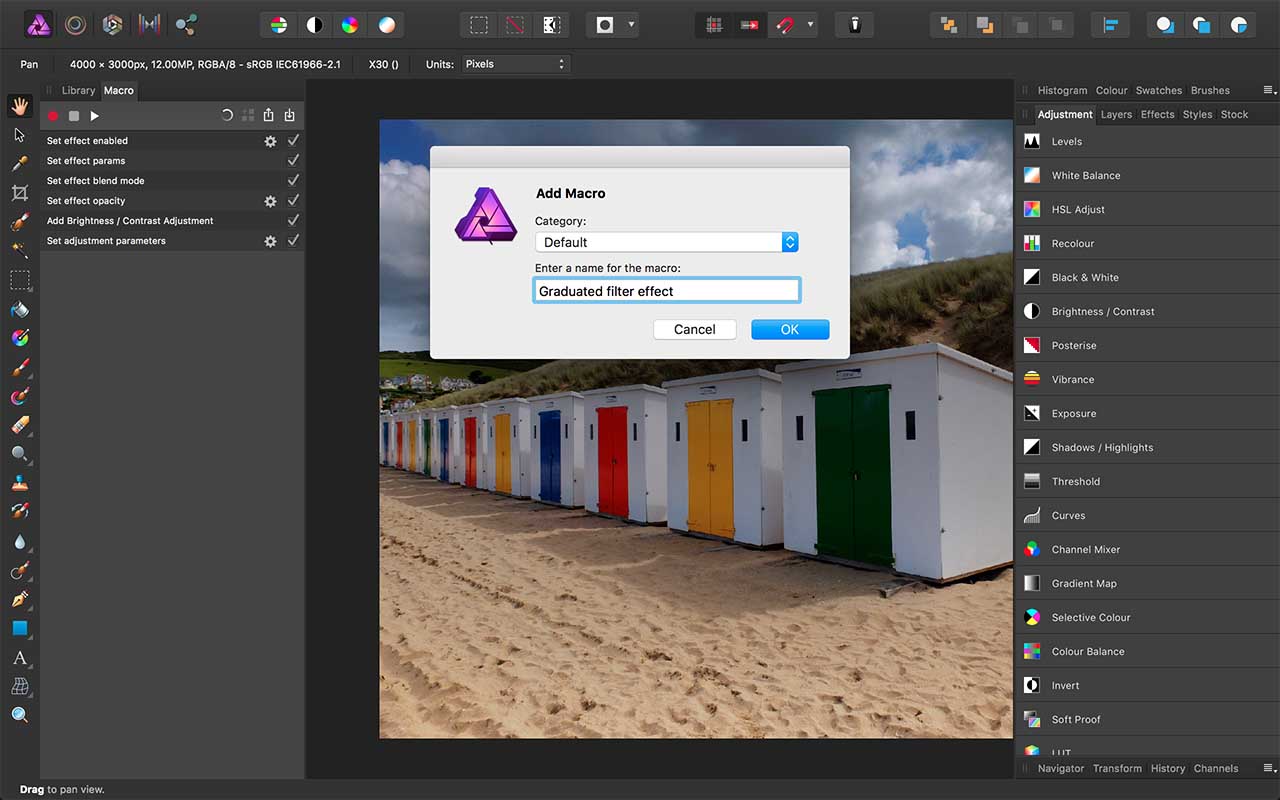
07 Save your Macro
Our Macro adjustments are finished, so now we need to save it. There’s a button for this at the top of the Macro panel, third from the right. Clicking this opens a dialog for naming and saving the Macro.
If you don’t select a different option, it’s saved to the Default category, but you can create your own Categories later if you need to organise a growing collection of Macros. To see your new Macro, and all your existing Macros, switch to the Library panel…
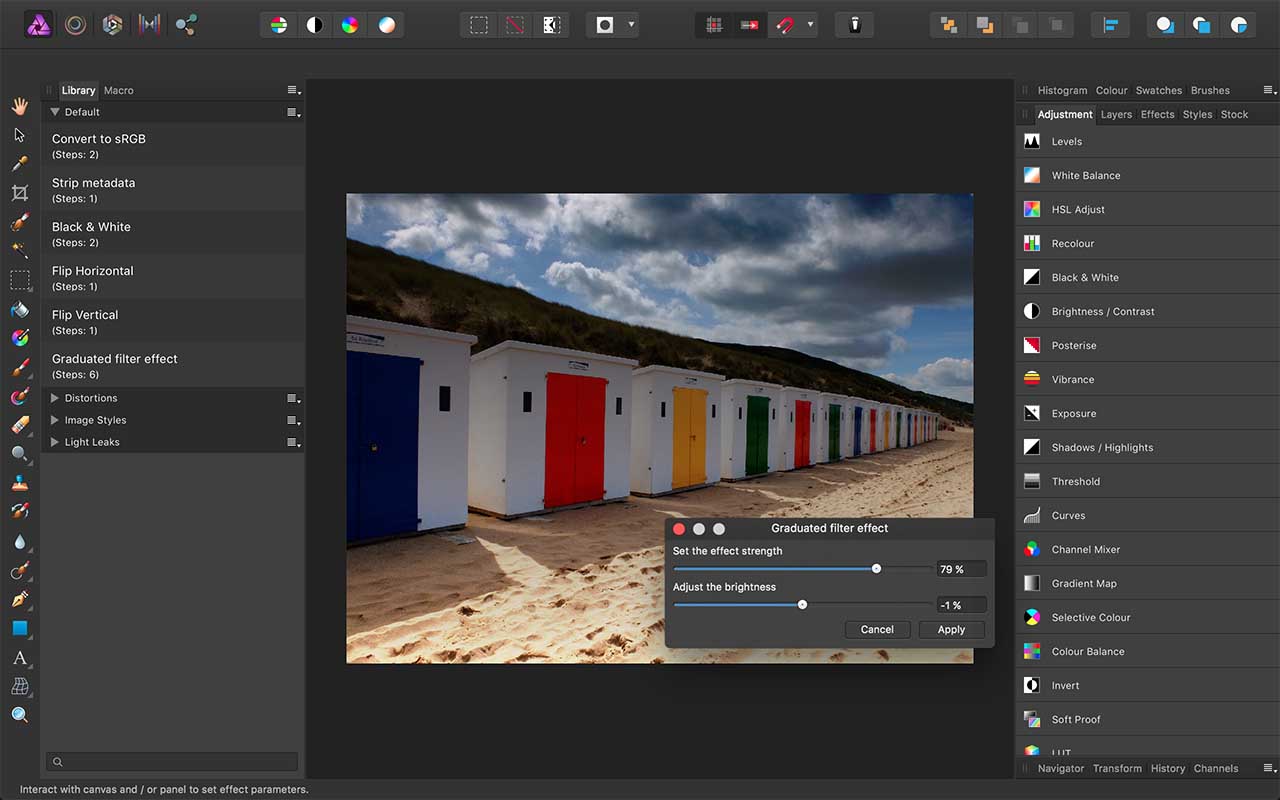
08 Run your Macro on a new image
Our new Macro is now visible in the Library’s Default category. We’ve opened a new image from the same shoot, and we can run the Macro simply by clicking its name.
The two user inputs we configured appear in a single dialog, so that we have one slider for the ‘Effect strength’ and one for ‘Brightness’ – it could hardly be simpler!
What’s more, you can adjust them both ‘live’, going back and forth between the two until the photo looks just how you want, before clicking the ‘Apply’ button.
Downloading more Macros
In the last screenshot you might have noticed that the Library also has categories for ‘Distortions’, ‘Image Styles’ and ‘Light Leaks’. These are Macro sets you can download direct from the Affinity Photo website, free of charge.
The Light Leaks are really good for reproducing the look of faded and light-streaked old photos, and all three Macro sets show just how powerful Affinity Photo Macros can be.

