If you’ve just started out in photography you’ve probably been pleased with quite a number of your images, yet disappointed in how others turned out.
This is entirely normal. In fact, even as you progress you’ll still be disappointed with how many of your attempts turn out. But it’s that act of pushing yourself to learn and try your hand at some of the more advanced settings on your camera that will help you grow.
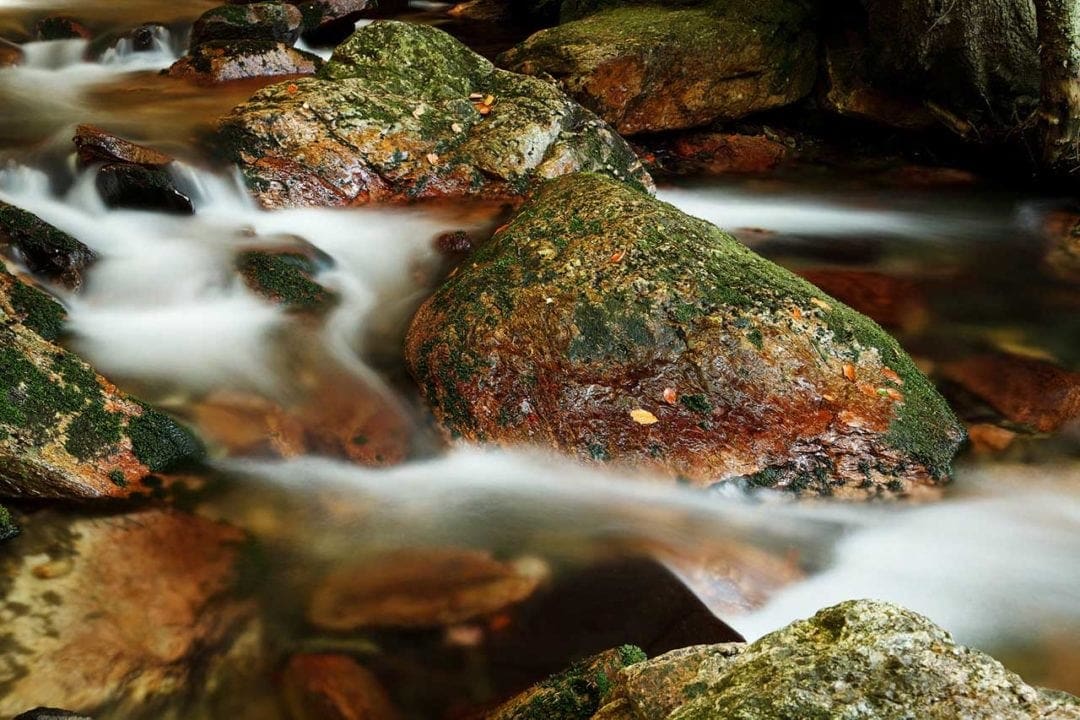
One of the more common areas where new photographers struggle is when trying to photograph movement with blur. You may have shot subjects like waterfalls but found that the running water was rendered as individual drops in your image.
Without seeing your image, I’m guessing the odds are that there were bright conditions when you took your shot, and if you were using your camera’s Auto or Program mode, your camera probably determined a shutter speed of around 1/500sec was the best option for that scene.
This is one of those instances where your camera, while very clever, is not intelligent. Your camera’s auto modes are designed to ascertain the best settings to apply for certain conditions. But they cannot think creatively!
When you shoot at 1/500sec it produces the effect of freezing movement in your image because your camera is only capturing a tiny moment of time.
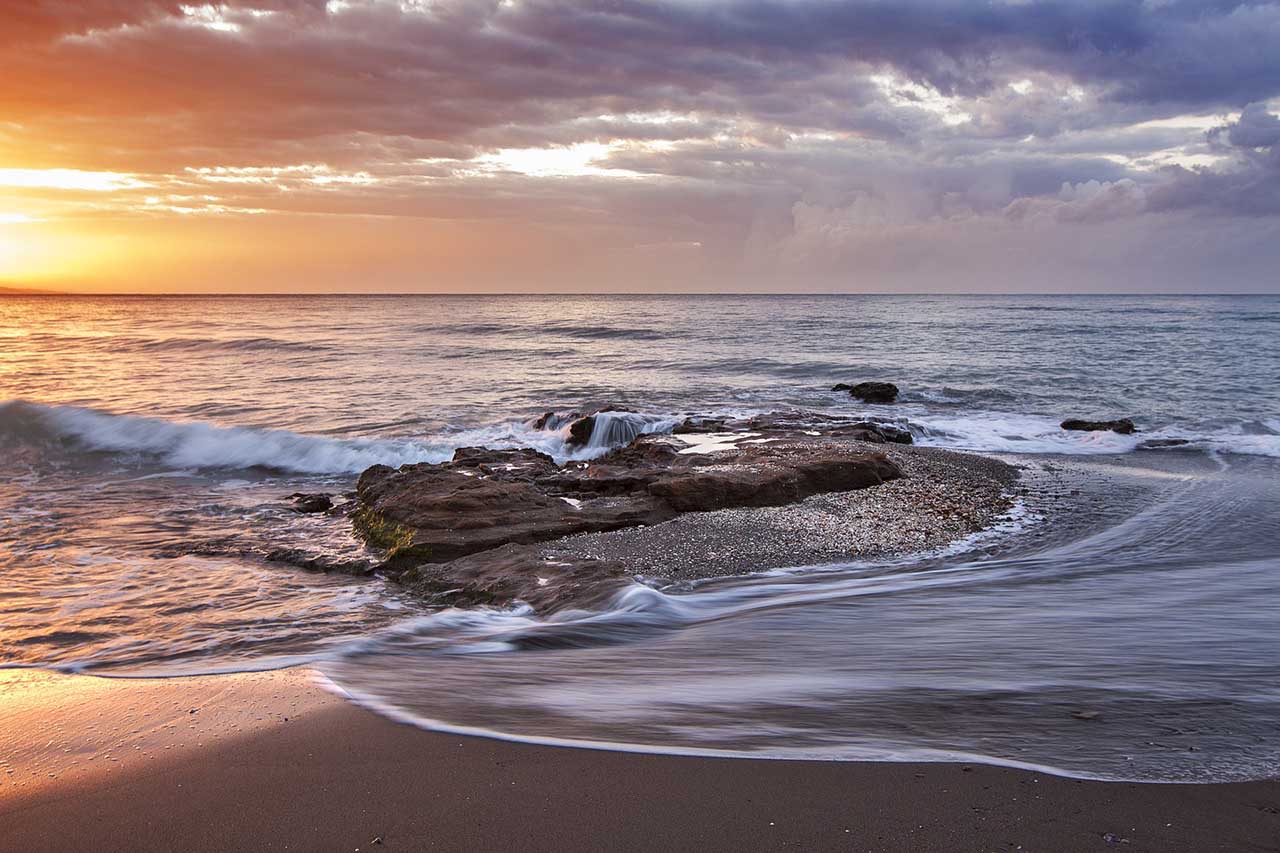
If you want to capture the movement of that water so that it’s milky white, you need to shoot at a slower shutter speed. A slower shutter speed allows the droplets of water – or cars, or kids or horses, whatever your moving subject might be – to move and follow its natural course throughout the longer exposure time.
Tips for capturing motion blur
01 Slow your shutter speed right down
I find the best way to photograph movement is to switch my camera’s exposure mode to its Shutter Priority setting. This lets me set the slower shutter speed I know I need to capture the movement at hand. The camera will then adjust your other exposure settings accordingly.
One thing to look for: sometimes if you select a shutter speed that requires an aperture your lens can’t support your camera will warn you with a flashing display or red aperture value on your LCD.
In these instances you’ll need to take a bit more control. Because you know the shutter speed and the ballpark aperture value, switch your camera to manual exposure mode and experiment until you get the right combination of settings.
02 Secure your camera
When you’re shooting motion at slow shutter speeds you are obviously expecting to capture blur within the moving subject. But if everything else in the frame is out of focus too, your shot won’t have much impact. It will just look poorly executed.
Anything you can do to steady your camera will help you eliminate the risk of camera shake during long exposures. A tripod is the best method of stabilising your camera, followed by monopods, bean bags, resting your camera on a rock or even posturing your body in such a way keep your camera as stable as possible.
03 Use your Image Stabilisation
Another way to prevent camera shake is to take advantage of your camera’s or lens’s Image Stabilisation feature. This technology has only been getting better over the years, and simply turning on this underrated tool will allow you to shoot handheld at several stops slower than you normally could.
Setting IS can be as simple as a switch on the barrel of your lens or enabling it in your camera’s main menu. Some cameras also offer a direct control button for enabling Image Stabilisation.
How long should your shutter speed be to photograph motion?
There are a number of factors to consider when calculating how long a shutter speed to use to photograph motion.
How fast is your subject moving? An ornamental fountain and a race car move at vastly different speeds, so while a 1sec shutter speed might produce a pleasing, milky white effect with the water from the fountain, the same shutter speed will probably just render a smear of colour, if anything, when trying to capture a race car speeding past at 200mph. Here you might want to try a faster – yet still slow – shutter speed of about 1/30sec.
Light will also determine how long your shutter speed will be when capturing motion. Remember: a long exposure lets more light into your camera. So if you’re photographing that waterfall we mentioned and there’s a big bright sky overhead, you’re likely going to overexpose the highlights in the clouds.
Trial and error is the best way to find the right length for your long exposure. Because every subject and light combination is different there is no definitive value. You’ll need to experiment with your settings. The most important thing here is to be mindful of not blowing your highlights by letting too much light into the camera. Luckily there are a few ways to fend that off…
How to not overexpose highlights when shooting a long exposure
As we said the section above, as well as camera shake, one of the biggest challenges of using a long exposure to photograph motion is that your camera lets more light in, potentially overexposing elements of your scene. Here are a few ways you can prevent this:
- Lower your ISO setting. Your shutter speed, aperture and ISO settings are all part of what’s often called the Exposure Triangle. When you change one value, the others must be adjusted to compensate. Photographers often increase their ISO value in low light in order to get a faster shutter speed to shoot with. The same rule applies in bright conditions: lower your ISO value and you’ll be able to shoot at slower shutter speeds.
- Reduce your aperture size. Your aperture is literally the hole that lets light into your camera. When shooting in Shutter Priority mode like we mentioned above, your camera will adjust your aperture for you to accommodate the shutter speed you want to use (remember that Exposure Triangle we mentioned and how when one value changes, the others must adjust? That). Like your shutter speed, your aperture values are divided into what are called ‘stops’. As you move from a wide aperture like this O (a low f number, such as f/2.8) to a narrow aperture like this o (a high f number, such as f/16) the size of your aperture reduces by 50% at each full stop. So going back to that Exposure Triangle… as you reduce your aperture by a stop or more, you will then need to adjust your shutter speed accordingly, thus slowing it down while letting less light onto your camera’s image sensor.
- Use an ND filter. A plain neutral density filter is one of the handiest accessories you can have in your bag as it allows you to reduce the amount of light entering the lens. It means that you can use slow shutter speeds in bright daylight and blur water and cloud movement.


