The Palette Gear is a nifty piece of hardware designed to increase workflow in the digital darkroom. It really is something a bit different. From the outset it was obvious that it’s not only a beautifully designed piece of kit, but the Palette’s functionality and integration with many imaging apps such as Photoshop means that it’s now right at the top of my must have list.
The Palette Gear is quite unlike anything else on the market when it comes to digital darkroom accessories. It’s designed as a physical user interface between you and imaging apps, with buttons, dials and sliders that enable you to adjust the values of settings and options rather than making them on screen.
It therefore provides tactile retro style interface which is far removed from the trend of the usual touch-screen every-things.
The last product to have this impact on the digital darkroom and image adjustment for me was the Wacom Tablet. The stylus of the Wacom gave infinitely more control over the accuracy of adjustment when compared with a mouse.
Now the Pallet Gear has arrived and forms the perfect partner to the Wacom enabling the same level of accurate adjustment over Adjustment Layers and other enhancement settings.
The Pallet Gear Expert Kit – What’s in the box
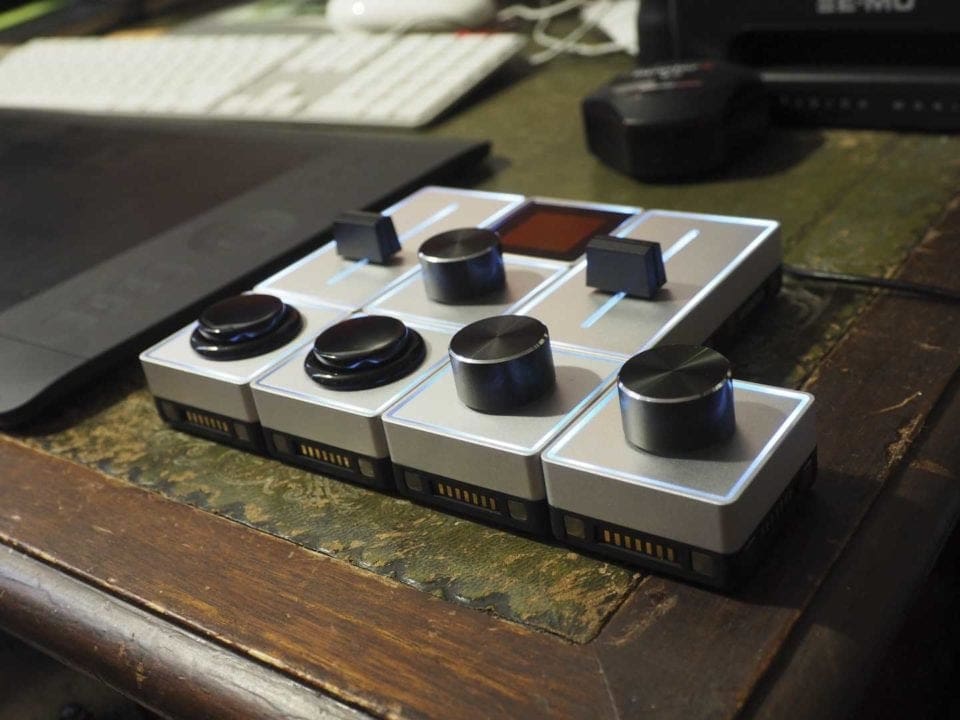
In our test we took a look at the Expert Kit which consists of three dials, two buttons, two sliders and the core. These arrive in a neat and very stylish box which contains the modules, all neatly laid out and ready to go. But there is a very immediately noticeable difference from other products.
The Palette Gear has been designed as a modular system, this means that it can be as big or small as you want, and as your needs increase, further modules or sets can be added. This means that unlike more traditional decks used by video editors, the Palette Gear can be adapted to whatever application you’re using.
Each module is different and once plugged in and configured it can be assigned a different command or setting. The modules in the form of a button, dial or slider all sit around the Core module which features a small screen and USB port that enables it to be connected to the computer.

Once the Core is plugged in then the other modules can be connected to build up the set-up that you want.
Build and Handling
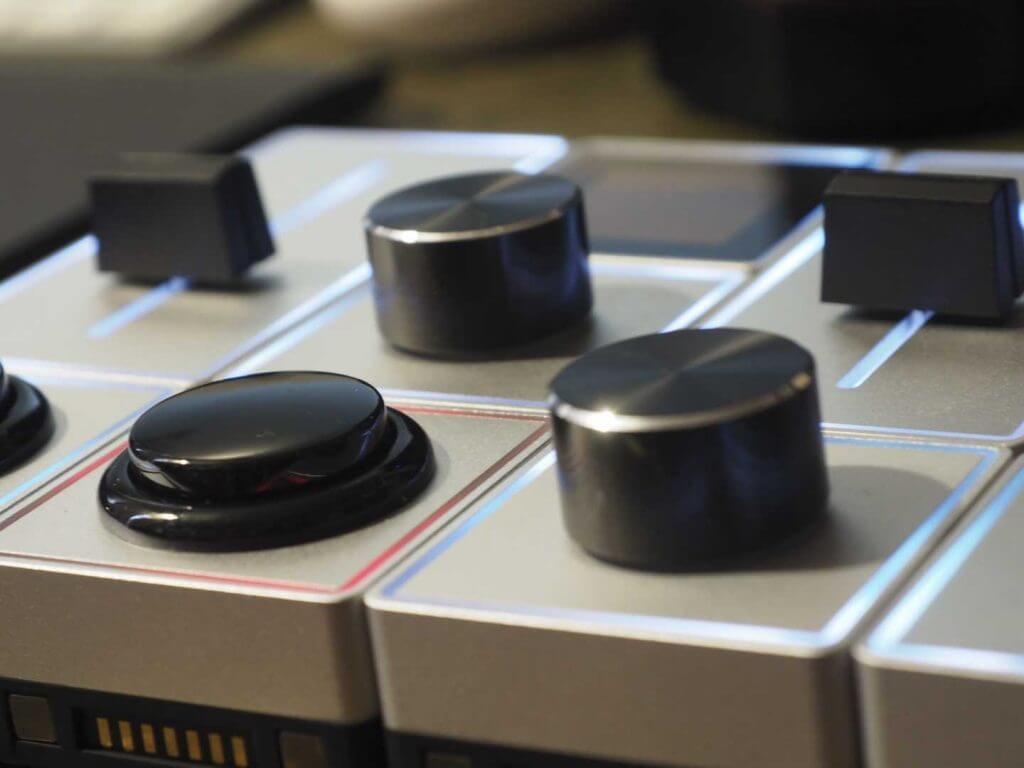
Each of the modules is completely self contained and initially they look extremely simple. The Button, Dial and Slider are all well made with the adjuster formed in a quality plastic whilst the main body is metal adding to the quality feel.
The main unit is know as the Core and this features a small LCD screen that shows which App and mode you’re in.
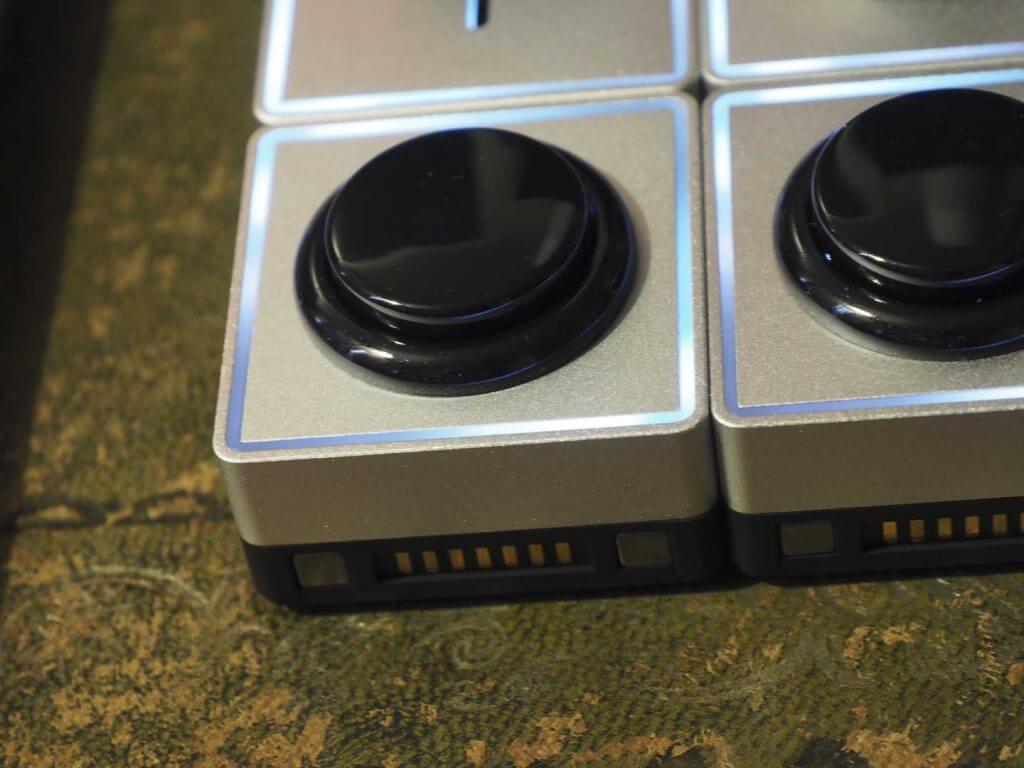
On each of the modules alongside the featured adjuster is a perimeter light, this has several functions but ultimately highlights when the module is correctly connected into the core. If you’re configuring these options yourself then you have the ability to opt for whatever colour you want for each of the modules.
On the side of the each module are the connectors. On three sides these connectors are flush to the body whilst on the final side the connectors protrude slightly so that they can make contact with another once the modules are fitted together. Magnets on either side of the connectors hold the modules together.
This connection works well and creates a strong bond between the modules so they hold firm in use. Nevertheless, its easy enough to break the modules apart when you want.
The base of each module features a rubber footing which adds to the grip of the Palette when on a work surface and it stops the unit from slipping around when in use. Although small, each module has a decent weight, further adding to the quality feel.
Setting up Palette Gear
Set-up is really quick with a small pamphlet inside the box instructing you to download the PaletteApp 2 from the manufacturer’s web site. Once downloaded and installed the software instructs you through the next few steps. Plug-in the Core and it will then appear in the App.
During this start up process you’re asked which applications you’re going to be using the Palette Gear with, such as; Photoshop, Lightroom and Final Cut, and the profiles for the integration into these apps is downloaded.

Once the Core is configured, the other Modules can be plugged in. As each module is connected it appears in the PaletteApp 2 and the module itself will illuminate to show that the connection has been made.
With all modules connected, an application such as Photoshop can be started and the Palette Gear is ready to roll.
However, as you quickly come to realise, the Palette Gear is seemingly infinitely expandable, both physically and functionally. Although there are a series of pre-configured profiles it also has the ability for you to program in your own commands.
Using Palette Gear in Photoshop
Using the Palette Gear with Photoshop shows how closely integrated the physical buttons are with the functions of Photoshop, and indeed the guys at Palette have worked hard to make sure that integration is as smooth and complete as possible.
Once you have the system set-up in the arrangement you want, and a profile selected from the PaletteApp 2, then you’re ready to get started. Staying in the PaletteApp 2 for a few moments and in the Retouching Profile you can see how each of the buttons is assigned.
Once you’ve got the idea you can switch to Photoshop and get started. Used alongside a Wacom tablet and using one of the dials assigned as Brush Size and you realise the difference the Palette will make to the speed of your workflow. Rotate the dial to adjust Brush size, hit a button to switch the colour swatches and a slider to adjust the brush opacity. The increase in the speed of working after just a couple of minutes of use is quite unbelievable.
The profiles are a handy place to get started but as you become more familiar with the system there is the option to configure. As I previously mentioned, each module can be programmed. A quick switch back to PaletteApp 2 and click on one of the Sliders to bring up the options and assign to a Levels Adjustment Layer.
For instance if you want one of the sliders to adjust the Gamma of a Level Adjustment Layer then this can be quickly assigned. In PaletteApp 2 just click the slider you want to assign the Action to, click Photoshop CC Mode > Adjustment Layer > Levels > Gamma and the slider is assigned. The Highlight Input/Output and Shadows Input/Output can then be assigned to further sliders if needed and of course available.
Once done this system works exceptionally well and with the two sliders assigned to Shadow and Highlight Input respectively this makes a quick way to adjust the Levels. The slider doesn’t just enable you to adjust the Adjustment Layer Settings but in the first instance will actually create the adjustment Layer for you. Then as you work on your image any further adjustments that you need to make to the Levels will automatically be applied to the layer that was created.
The speed of the adjustments are pretty much instant with maybe a slight delay but not so you notice. On some settings such as Exposure you have the ability to limit the range of the adjustment, so even though the sider could effect the exposure from -20 to +20 you can limit the range as you see fit, from -4 to +4, by doing this you greatly improve the adjustment sensitivity.
In more complex Photoshop documents where you may have a few Adjustment Layers the sliders will only affect the Levels Adjustment Layer closest to the Layer that you have been working on.
Photoshop, Lightroom and other Adobe apps are all well catered for, but if the app you want to use isn’t in the list then Palette can still be configured to work alongside easily enough using the Keyboard mode.
A good example of how this works is with Final Cut Pro. At present there is some Final Cut Pro integration and a profile or two has been created, but there are many common features of the application that need to be configured manually if they are to work with the Palette.
Back in PaletteApp 2 you can click on the module you want to assign and then click the Keyboard Mode. This will enable you to assign keyboard shortcuts to each of the buttons and dials, the sliders are a little more limited. After a short time it’s not too difficult to get the Palette configured for use with your favourite application to benefit from the increase in workflow speed that it enables.
Palette Gear Review: Verdict
The Palette Gear Expert Kit is one of the most useful pieces of imaging hardware I have seen to date. An intuitive design enables you to configure the layout to your exact style of working and there are plenty of options when it comes to assigning commands from a multitude of applications.
Build quality and aesthetic design are exceptional and the neat way that the system is held together by magnets is innovative and ultimately sensible. Although Palette is a relatively new product it’s at a point that many other products takes years to reach, in as far as you plug it in and just start to use it as part of your normal workflow.
Once set-up to your way of working there really is little to fault with the design, and as you switch apps from Photoshop to Lightroom and Final Cut Pro the Palette automatically switches its profile to suit.
If I was to pick fault then I’d say that I’d like to see closer integration with Final Cut Pro, a few more modules such as a wireless pack and video scrub dial, but then as this is Palette those modules could well be in development and can just be added.
Palette brings a unique analogue feel to image and video editing, it not only speeds up work flow but makes the process more fluid and natural. Palette is an exceptional product and is well worth the investment.


