Do you steer away from brush tools because they seem too random and uncontrollable? Not anymore!
Affinity Photo is a professional level photo editing program that comes subscription-free and at a price which will make most Photoshop users do a double-take. Affinity Photo 1.6, just out, brings some major performance enhancements and an extremely useful addition to the brush tools – the Brush Stabiliser.
You’d normally associate brush tools with artists and designers. Regular freehand brush tools need a good deal of skill and steady hand-eye co-ordination that most photographers won’t have. But Affinity Photo’s Brush Stabiliser gives even the most ham-fisted the kind of smoothness and control needed to produce some really great effects.
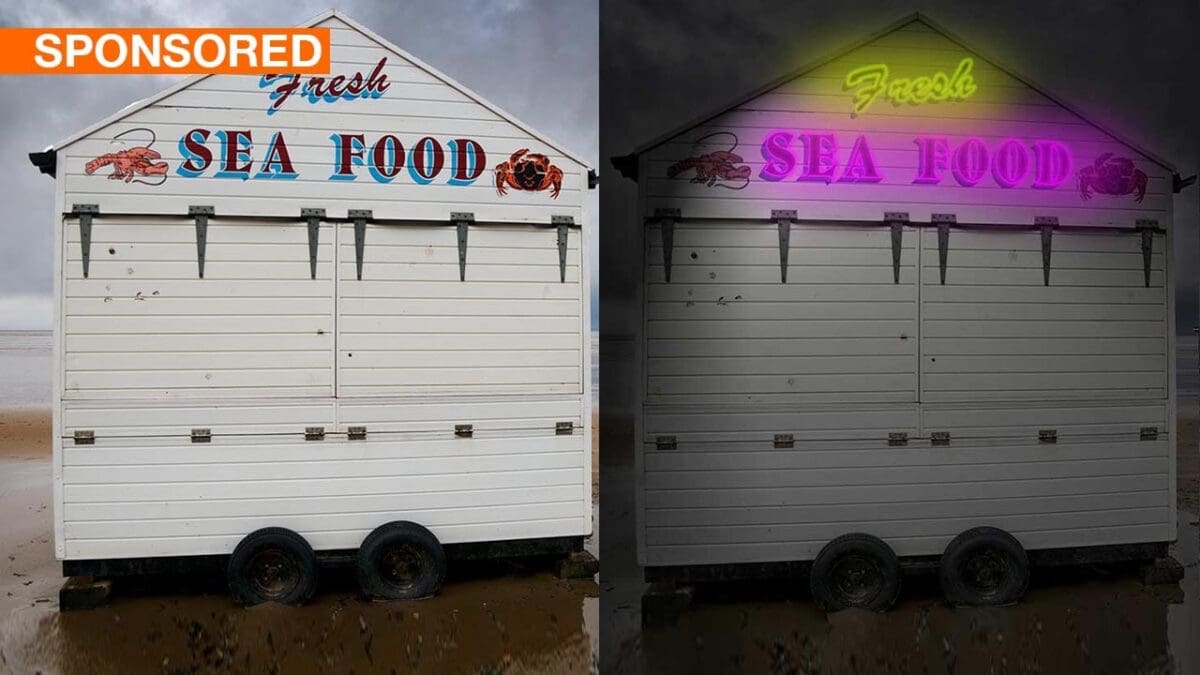
We’re going to try it out on this rather bleak-looking beach scene. In the first step we’ll create the low-key lighting and in the remainder, we’ll show what the brush tools can do.
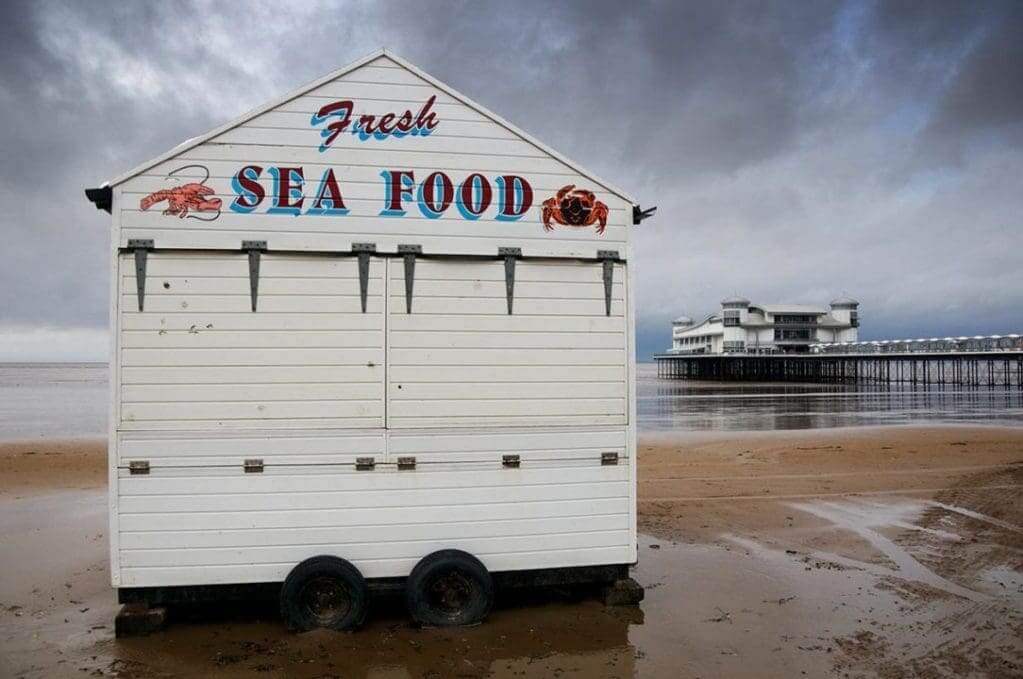
Before editing with Affinity Photo’s new stabilised brush tools
This low-key seaside scene needs a bit of neon to bring it to life, and with Affinity Photo’s new stabilised brush tools we can do our own signwriting!
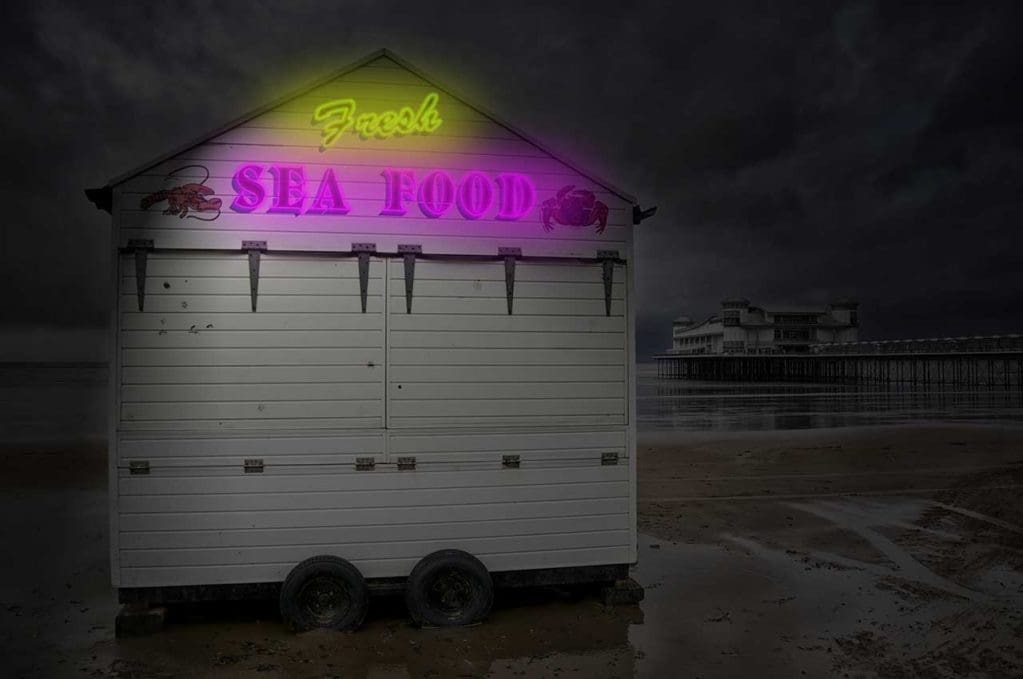
After editing with Affinity Photo’s new stabilised brush tools
The Lighting Filter
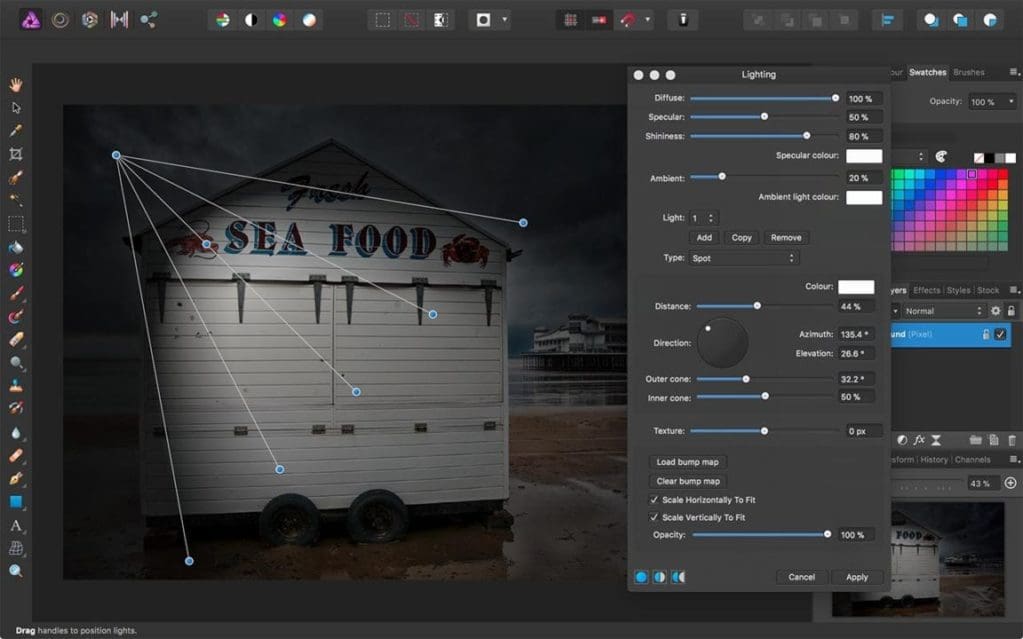
Affinity Photo’s Lighting Filter is the perfect tool to add the low-key mood we’re looking for. It’s been positioned carefully to create a pool of light for the front of this beach hut and to cast the rest of the scene into shadow. For the next step, adding our neon brushstrokes, we’ll create a new pixel layer. This makes it easier to start again if we go wrong and it gives a lot more control over how the brushstrokes blend with the image, as we’ll see.
Brush settings
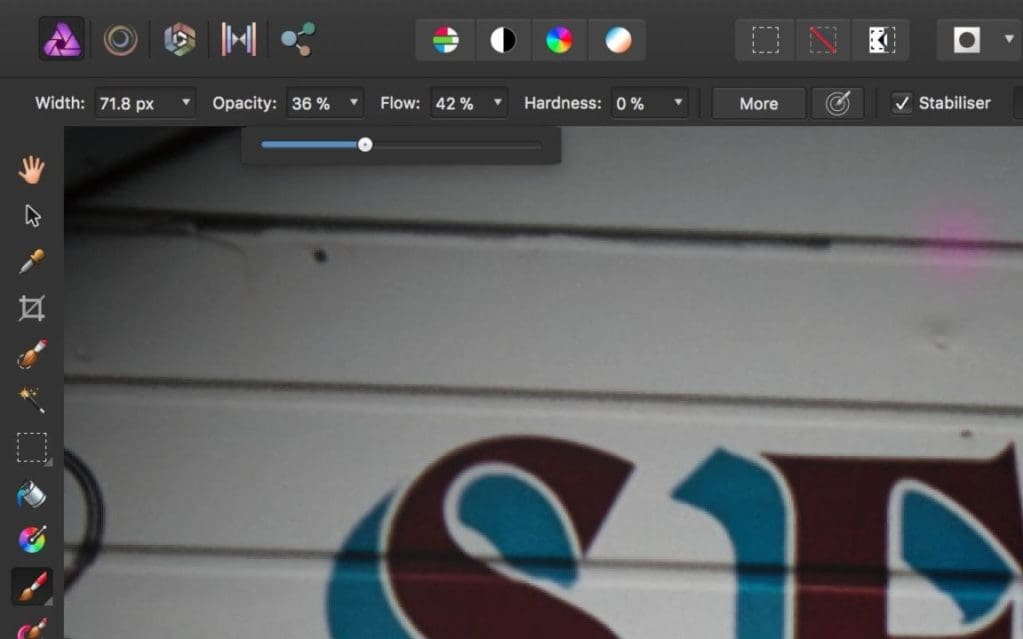
The neon effect will be created by tracing around the outline of the lettering on the sign using the Brush tool, set to a medium-low Opacity, medium Flow and zero Hardness. These adjustments, and a carefully chosen brush size, will cover the text outline and produce a soft ‘neon’ glow around it. We need to zoom right in on the text to see the outline clearly and so that we can follow it accurately with the brush.
Brush Stabiliser options
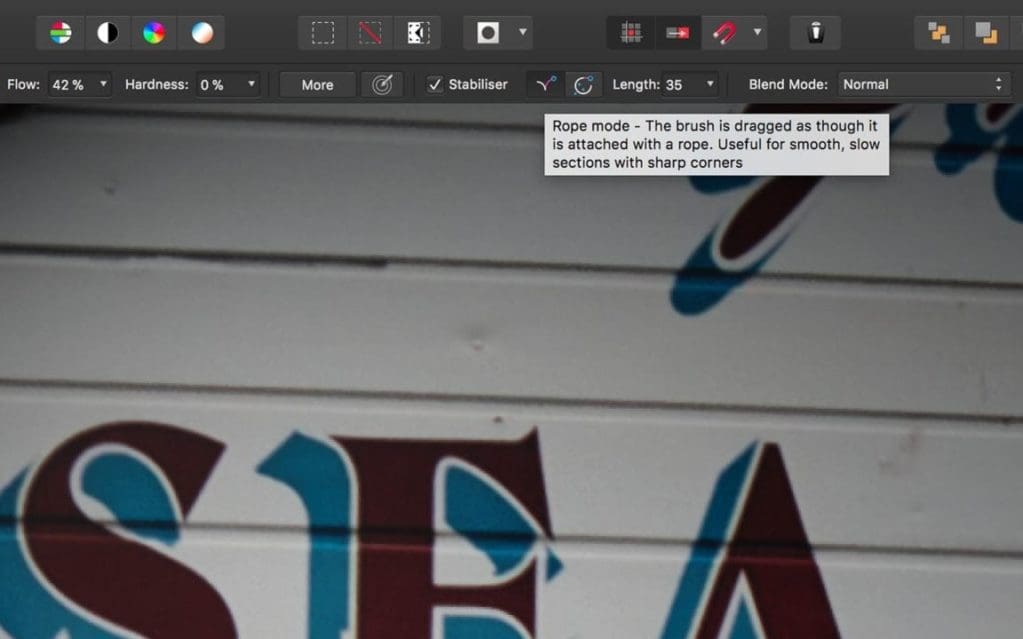
The key feature to note is the Brush Stabiliser checkbox on the top toolbar. When this is checked you can choose between Rope mode and Window mode. Window mode stabilises the brush stroke by averaging out tiny deviations as you move the mouse, but we’re going to use Rope mode, which is a little harder to master but better for the sharp direction changes in this lettering.
Understanding Rope mode
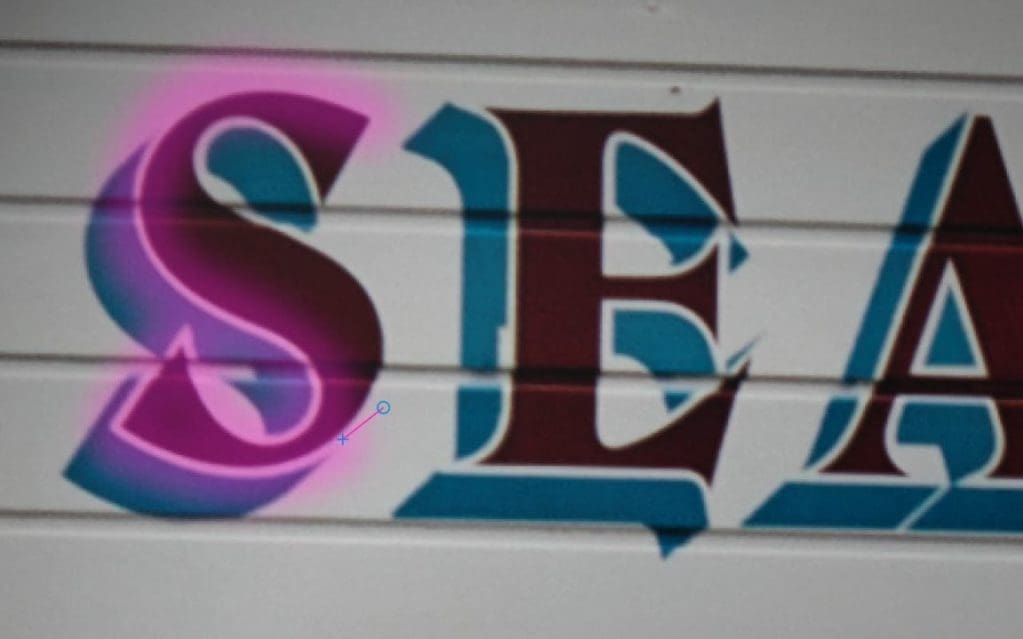
Just imagine you’re pulling the brush tip along on the end of the rope (you can adjust the rope Length). As you drag, it takes a large deviation in the mouse direction for the brush to go off course, and if you need to change direction sharply, you move the mouse pointer towards the brush to put some ‘slack’ in the rope. You can then move the mouse pointer in a new direction and when the slack has been taken up again, the brush tip will follow. It sounds crazy, but it’s beautifully simple and really effective.
Duplicating layers
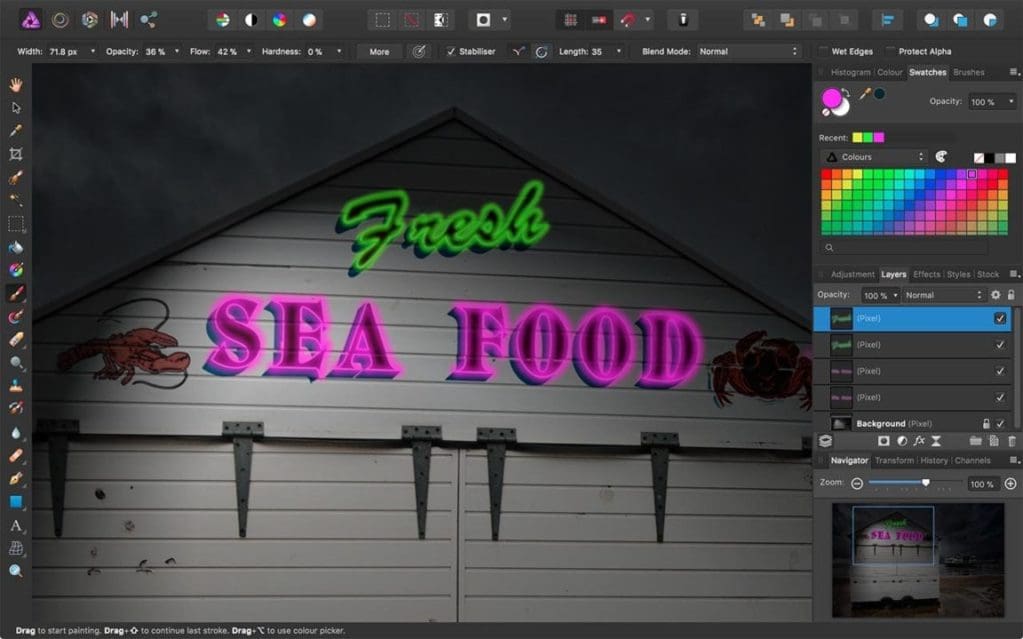
The advantage of painting our strokes on a new layer is that we can now experiment with the strength of the neon effect by changing the layer’s blend mode. Even with Hard Light mode, however, the neon glow isn’t really strong enough. But the solution is simple – we can simply duplicate the layer to intensify the neon glow.
Adding the ‘Fresh’ layer
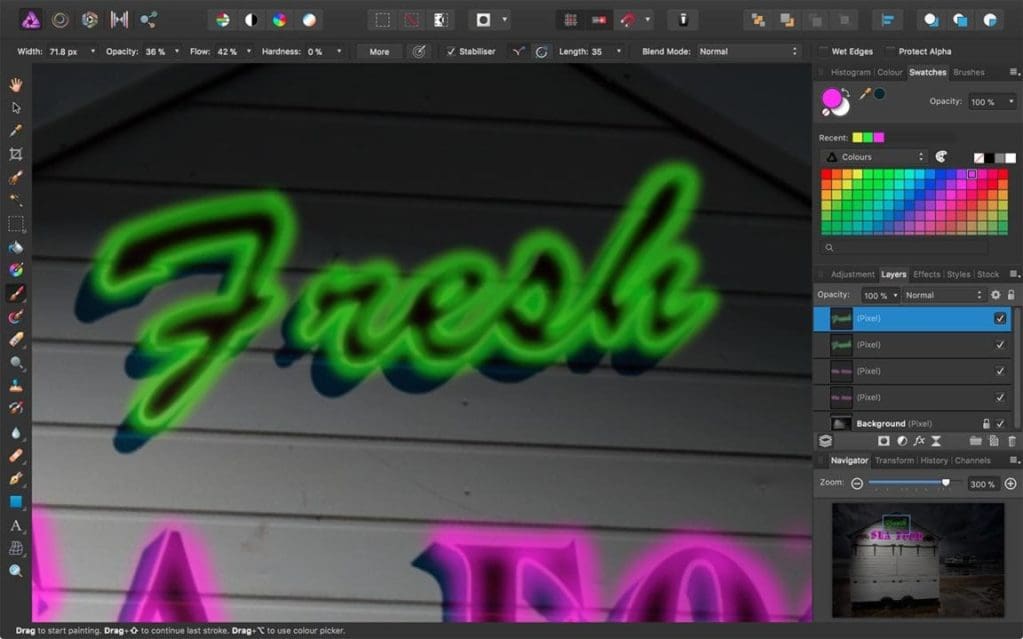
We’ve chosen a neon green for the ‘Fresh’ sign but otherwise we’ve followed exactly the same process, creating a new pixel layer and then tracing carefully around the outline of the text using the Brush tool and with the Stabiliser option in Rope mode. Our photo still needs a final touch to complete the ‘neon’ look, though…
Adding a soft glow
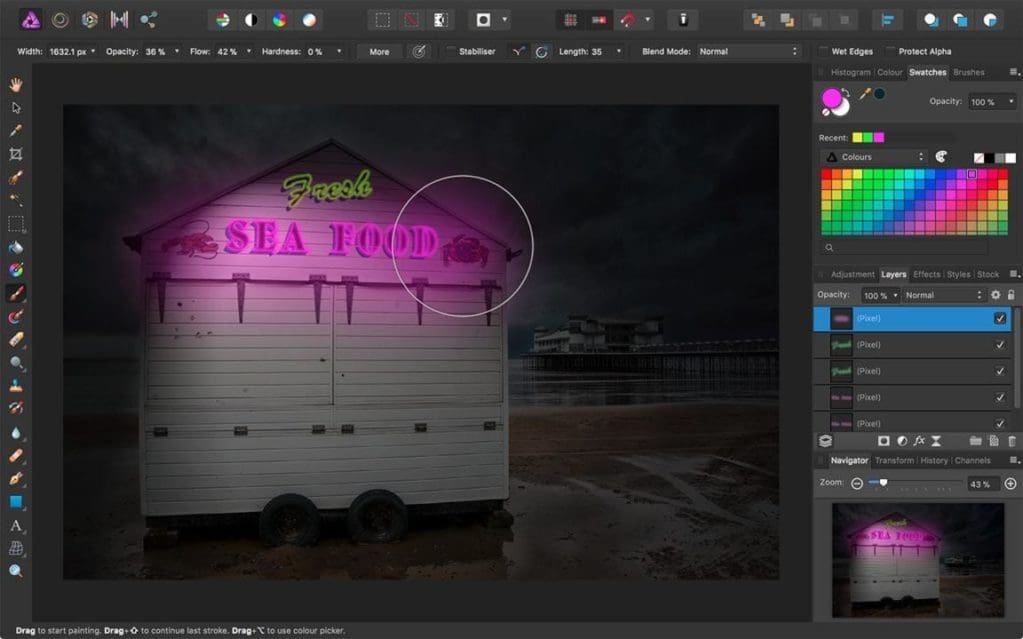
We need one more pixel layer to create a soft glow around our two new neon signs to complete the illusion. We can switch off the Stabiliser mode for this since we don’t need precise brushstrokes any more, increase the brush size and reduce the opacity. Now, using the same colour as the ‘Sea Food’ sign, we can just brush a soft ‘glow’ straight across it.
The finishing touch
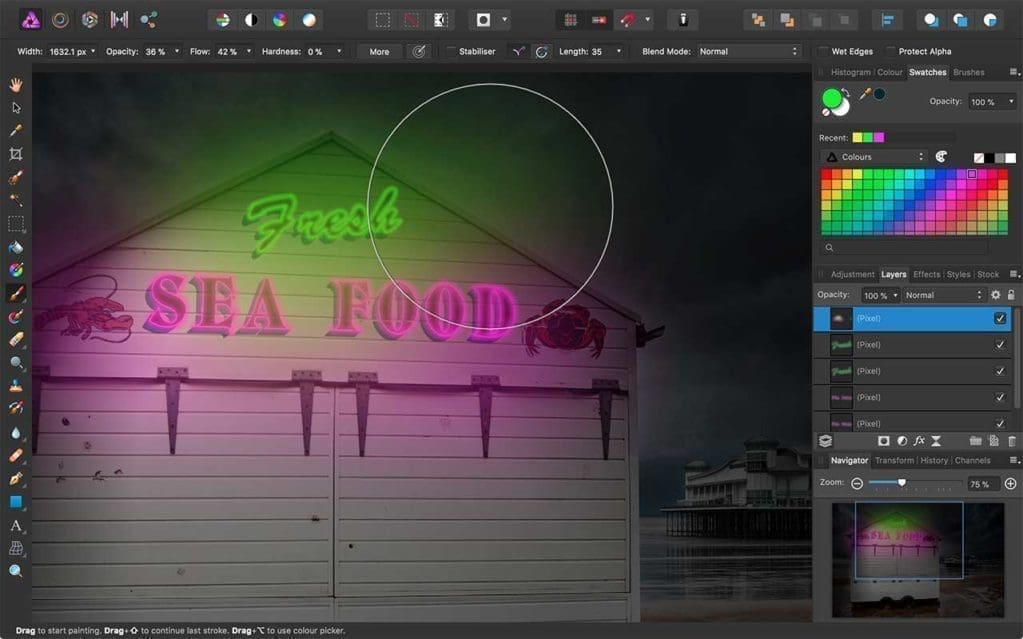
Our last job is to do the same for the ‘Fresh’ sign above, the is time using the same green colour we used to trace around the letters. Handily, Affinity Photo displays Recent colours over in the Swatches panel on the right. And with that done, our image is finished!
Where to get Affinity Photo
Mac owners can get Affinity Photo from the Apple App Store, while Windows users can buy it directly from the Affinity Store.
