Amazingly, the iPad version of Affinity Photo has all the power of the desktop version. Here’s just a taste of what it can do.

Here’s a rooftop vista turned into a miniature scene with Affinity Photo’s Depth of Field filter and a Curves adjustment, all saved in separate layers in case changes are needed later.
Affinity Photo is a powerful image editing application for both Mac and Windows which offers professional level layering and masking tools, image effects filters and enhancements. And now all this power is available on the iPad too.
Normally you’d expect a mobile version of a desktop application to be a heavily cut-down and simplified version of the original, but not this time. Affinity Photo for iPad has the same features you’ll find in the desktop version, accessed via an interface that’s been specially designed for touch control on a smaller screen.
The addition of drag and drop in iOS 11 has made it even easier to open, combine and share images with Affinity Photo, bringing it much closer to the desktop application in the way it works. Now you can choose the images you want to work from, or add new images as layers, just by dragging them from the Files app.
It might sound like that shouldn’t even be possible to create an iPad app with all the functionality of a desktop program, but it is, and it works really well. So to demonstrate it we’ll take an everyday travel shot and turn it into a tilt-shift miniature using Affinity Photo’s effects and adjustment layers.
Import your image
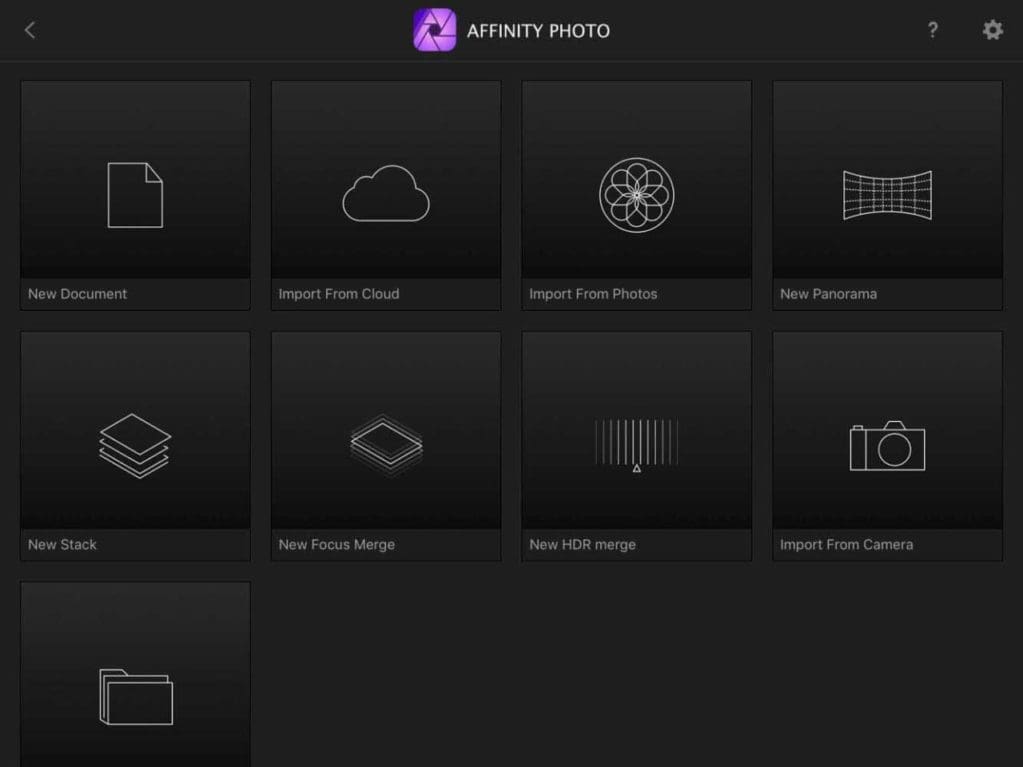
Affinity Photo for iPad will store and display all the photos you’ve worked on, and to add another photo you tap the ‘+’ icon on the main screen. If you’re using iOS 11, you can can simply drag across an image from the new Files app.
Affinity Photo has buttons for creating new images from scratch, but also for importing them from iCloud (or another cloud storage service) or Apple Photos. The picture we want is stored in Photos, so we need the ‘Import From Photos’ button.
Duplicating layers
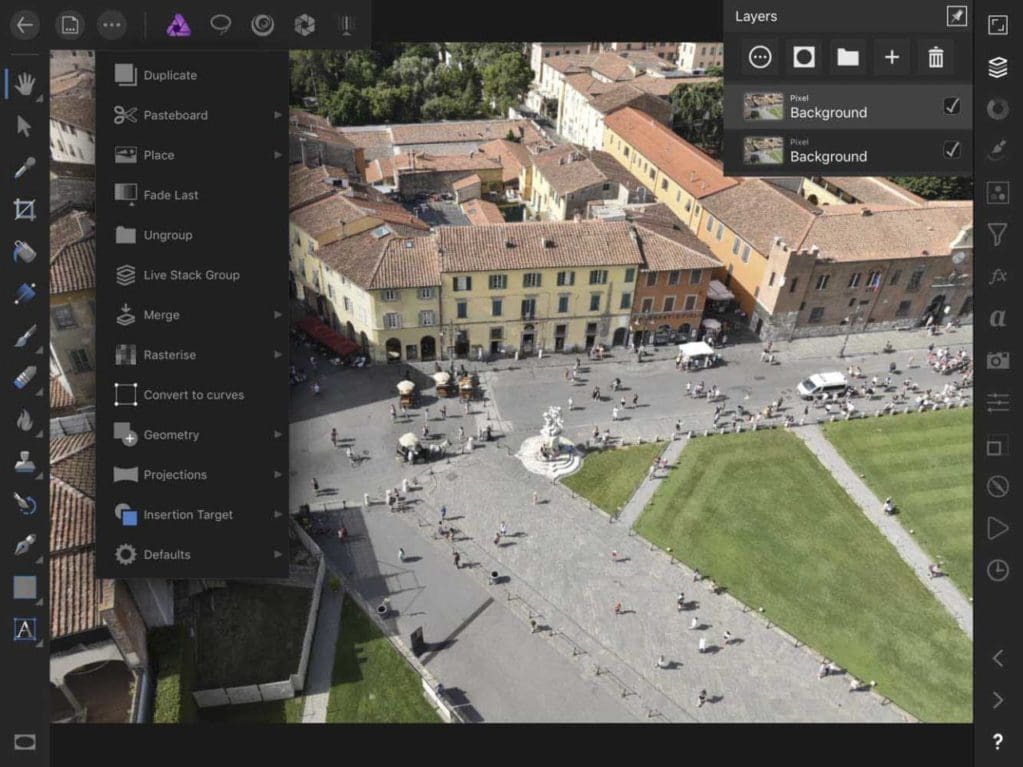
Our photo opens as a background layer but we don’t want to work on that directly. To see the Layers panel, you simply tap the Layers icon in the vertical toolbar on the right of the screen.
Now, with the background layer selected, we can tap the ‘three-dot’ menu on the top toolbar and tap the ‘Duplicate’ option. You can see in the Layers panel that we now have a duplicate background layer to work on.
Display the Filters panel
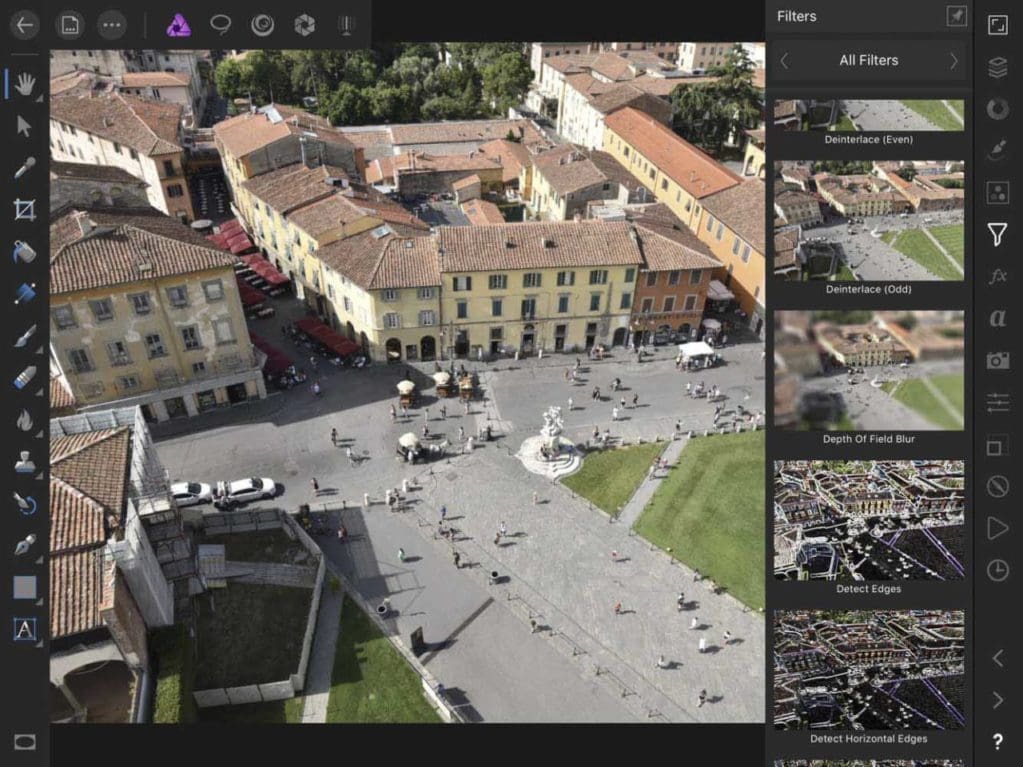
The Filters panel works in the same way as the Layers panel – you just tap on its icon in the sidebar to display a fly-out list of filters, and you can swipe up and down to scroll through the list. The one we want is the Depth of Field Blur filter.
This has an Elliptical mode for blurring the picture around a sharp centre, or a Tilt-Shift mode – the one we want – for blurring the top and bottom of the picture.
Adjusting the Tilt-Shift effect
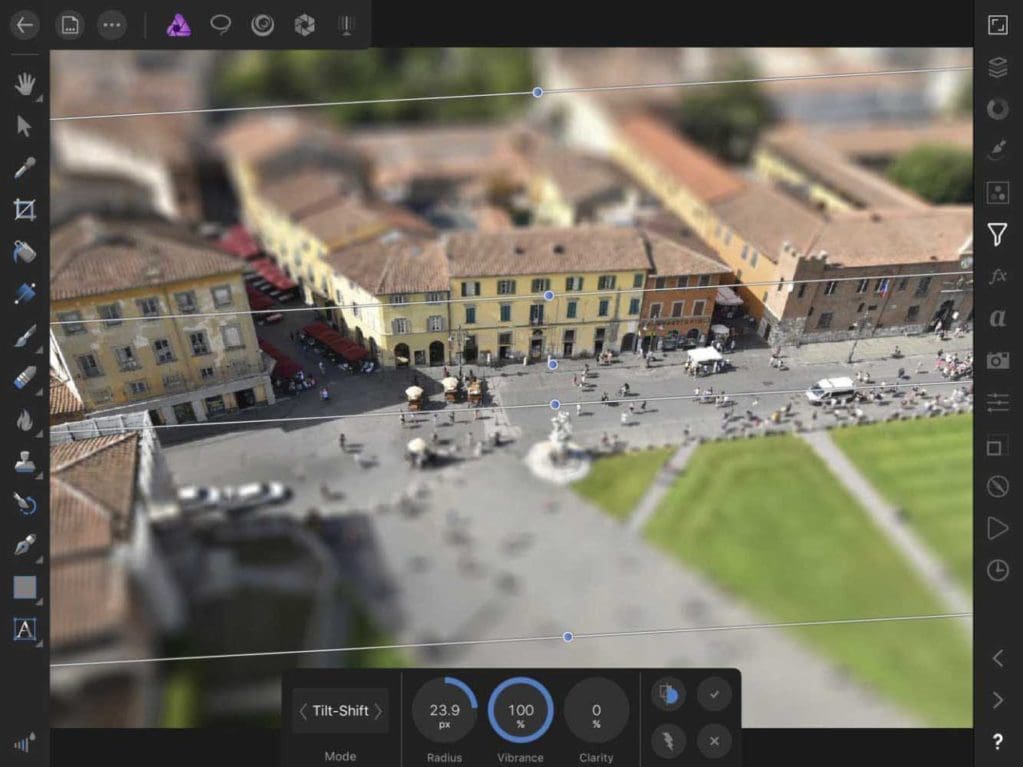
The Depth of Field filter is really easy to use. In Tilt-Shift mode there’s a sharp centre strip which you can drag up and down the picture, two lines that show the width of this strip and two outer lines to show where the blur reaches its maximum.
You can adjust the angle by dragging on the blue dots, and to adjust the circular settings dials at the bottom, you just touch-drag left or right on the setting you want to adjust.
Adding a Curves adjustment
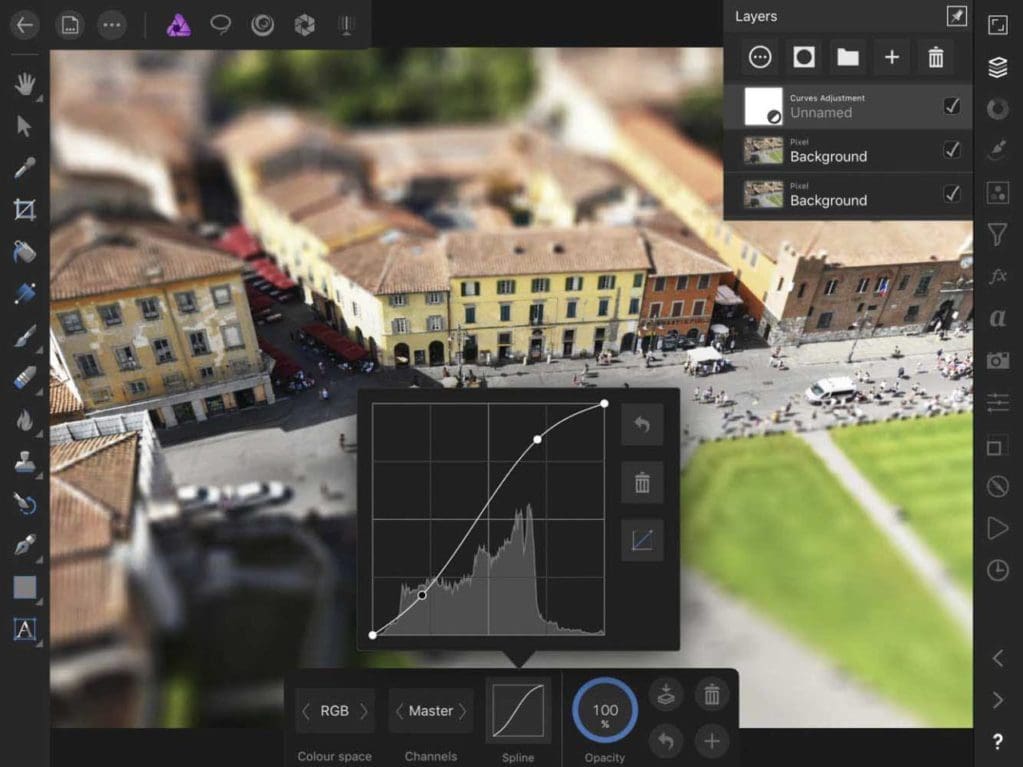
Our photo also needs a small contrast boost, and for this we tap the Adjustments button and select Curves from the flyout Adjustments panel.
Here, we’ve added an S-shape to the curve just to increase the mid-tone contrast a little, but you’ll see if we open the Layers panel that Affinity Photo has created a new Curves adjustment layer rather than applying the adjustment directly – that’s really handy if we need to make more changes later.
Saving your photos
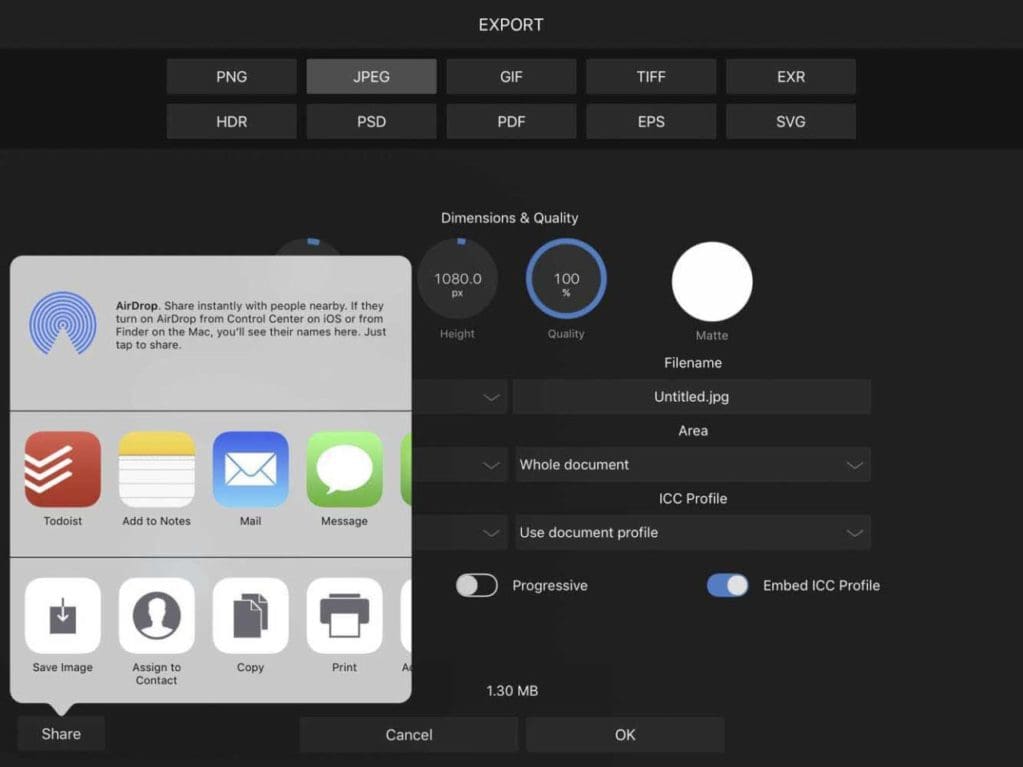
By default, Affinity Photo saves all your photos as re-editable images you can access from the main screen. But often you’ll want to share your photos with others or save them to the cloud so that they are accessible from your desktop machine.
To do this, you need the Export option on the Document menu on the top toolbar. Here you can export photos in a variety of formats – or tap the Share button to share them directly or tap ‘Save Image’ to save a copy back to Apple Photos.
Where to get Affinity Photo for iPad
It’s remarkable how Serif has managed to squeeze all the power, features and performance of its desktop application into this iPad version – and still make it perfectly straightforward to use.
Affinity Photo for iPad is available direct from the iOS App Store for a one-off charge of £19.99 with no subscription, and supports the iPad Pro, iPad Air 2 and iPad (early 2017). Older iPads are not supported.
