In this feature, I’ll walk you through the basics of getting started with video—no fancy setups, just practical advice for anyone with a camera, smartphone, or any device capable of shooting video.
Whether you’re using your phone or a mirrorless camera like the Fujifilm X-M5 or the Sony A6700—both of which I’ve recently reviewed—video has become a core feature. And while the range of settings and terminology can feel overwhelming at first, it doesn’t take long to grasp the essentials and start capturing solid footage.
The truth is, we now have the technology to shoot cinematic-quality video with gear that fits in our pockets. Yet, many people still struggle to capture even a few seconds of clean, engaging footage.
So, let’s break down the basics of what makes great video, and explore the gear, settings, and simple techniques that can make a real difference from the start.
Getting Started with Video: Choosing the Right Capture Device
Over the past few years, I’ve tested more cameras and phones than I can count, and one thing is clear: video has become central to how we all capture and share the world around us. Whether you’re looking to film your next trip, launch a YouTube channel, or just play around with creative storytelling, now is the perfect time to dive in.
The good news? You probably already have everything you need to get started.
Your Next Camera Might Be in Your Pocket
We’ve reached a point where the devices we carry every day—phones like the iPhone 16 Pro, Samsung Galaxy S24 Ultra, Huawei P70 Pro, and Vivo X200 Pro—are capable of producing truly stunning video. These aren’t just for casual clips. With features like 4K and 8K recording, built-in stabilisation, and even ProRes and cinematic modes, they’re genuine creative tools.
The Vivo X200 Pro, which I recently reviewed, really impressed me with its ZEISS lens setup and gimbal-like stabilisation. It’s one of those phones that makes you question whether you need to carry anything else at all.
Why You Might Want to Step Up to Mirrorles
That said, if you’re curious about getting a bit more serious with your video, a dedicated camera can still offer a huge leap in quality and control. I’ve recently spent time with some excellent new models that strike a great balance between performance and ease of use.
The Sony A6700, for example, is compact but incredibly capable, with 4K 120p recording and some of the smartest subject-tracking I’ve ever used. The Canon R50V is another standout—aimed squarely at vloggers, it’s lightweight, easy to use, and shoots lovely colour-rich footage straight out of camera.
Then there’s the Sony ZV-E1 II, which really nails the solo creator vibe. It’s packed with automated features that help you stay in frame, stay focused, and stay stable—even when filming yourself. And for those of you who want full-frame quality without breaking the bank, the Nikon Z5 II is well worth a look. It’s a solid, reliable hybrid camera that handles video surprisingly well.
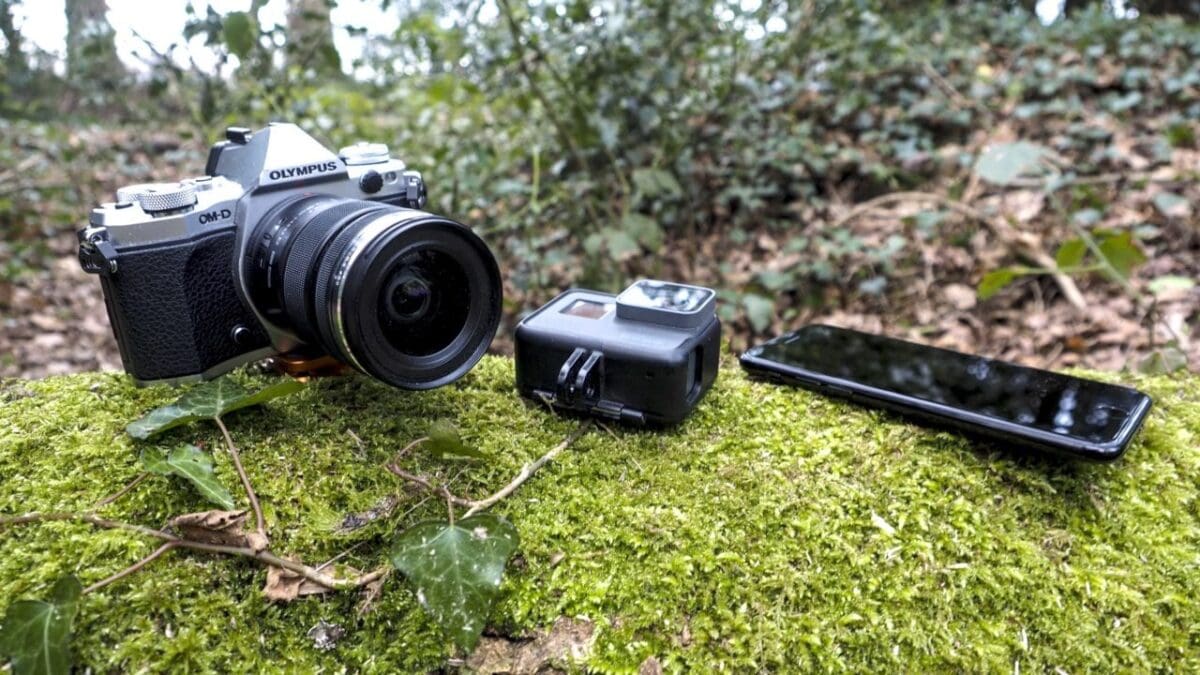
Don’t Overlook Action Cams
While I love mirrorless cameras for their flexibility, there are times when nothing beats the sheer practicality of an action cam. The latest GoPro Hero13 Black and DJI Osmo Action 5 are both excellent, offering brilliant stabilisation and build quality that lets you shoot in almost any environment without a second thought.
If you’re someone who’s constantly on the move—or just want something compact and hassle-free—the Insta360 Ace 2 Pro brings a different flavour entirely. Being able to reframe your shots after filming with 360 capture is game-changing, especially for fast-paced or unpredictable scenes.
What Should You Start With?
This is the question I get asked most often: What’s the best camera for video if I’m just getting started? And my answer is almost always the same—use what you already have.
Most people own a perfectly capable device already, whether that’s a recent phone or a camera they picked up for stills. What matters more than gear is simply starting to shoot, learning how to use the tools you’ve got, and experimenting as you go.
How to Get Started with Video on an iPhone
Let’s face it—your iPhone is probably the most powerful video camera you own, and you carry it around in your pocket every day. Over the past few years, I’ve tested more dedicated cameras than I can count, but I still come back to the iPhone when I want to shoot something quickly, easily, and with surprisingly high quality.
If you’ve never shot video before, or you’ve only dabbled, getting started can feel intimidating—but it doesn’t need to be. A few small tweaks to the settings can go a long way toward improving your footage. So let’s dive in.
The Basics: Shooting Your First Video
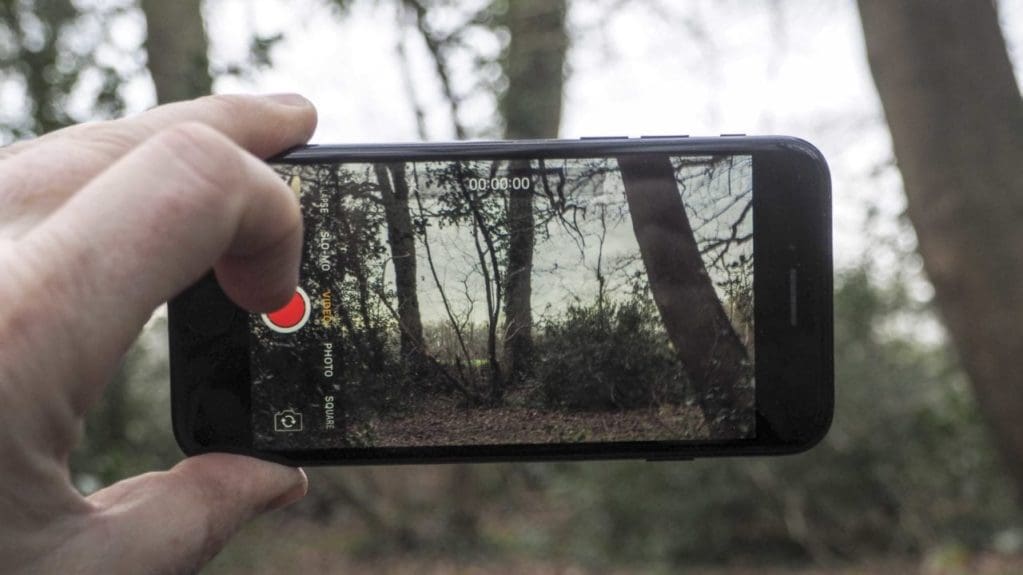
First things first, open the Camera app. Along the bottom, you’ll see options like Photo, Portrait, and Pano—swipe across until you reach Video.
Before you hit record, give the lens a quick wipe. I know it sounds obvious, but a smudgy lens is one of the most common reasons footage looks soft or hazy.
Now you’re ready. Hit the red record button to start filming, and tap it again to stop. That’s the foundation—and honestly, that’s as far as most people go. But the iPhone can do a lot more if you’re willing to dig just a little deeper.
Understanding Resolution and Frame Rate
Here’s where things get a bit technical, but stick with me—it’s worth it.
Resolution is simply the size of the video—the number of pixels in each frame. You’ve probably heard terms like HD or 4K, and this is what they refer to.
- 4K = 3840 x 2160 pixels (Ultra sharp, great for future-proofing)
- Full HD (1080p) = 1920 x 1080 pixels (Still excellent quality, and more storage-friendly)
- HD (720p) = 1280 x 720 pixels (Lower quality, better for quick uploads or saving space)
If you want your footage to look crisp on a modern screen—or if you plan to do any cropping or editing later—I’d recommend shooting in 4K. It gives you more flexibility and simply looks better, especially on larger displays.
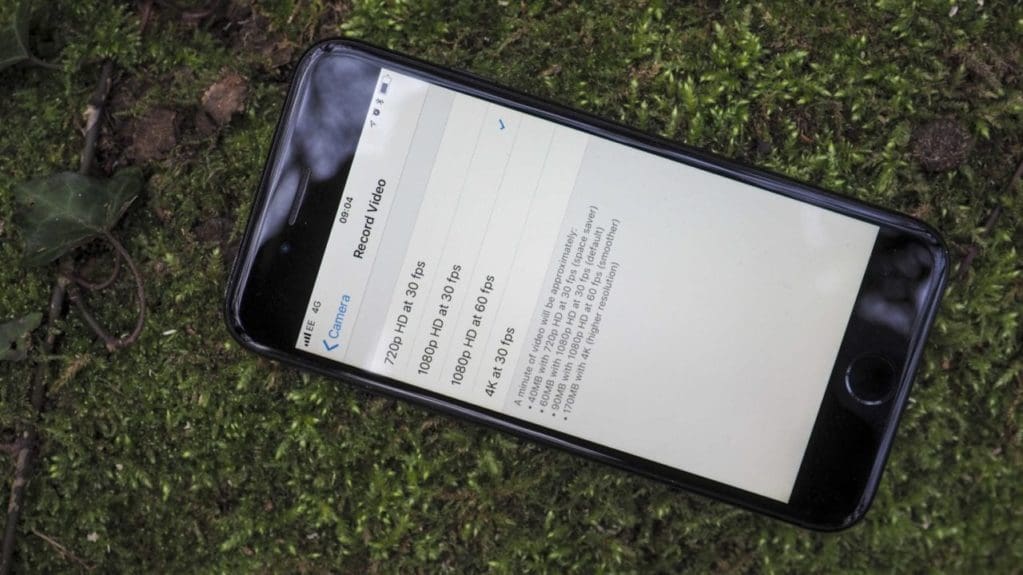
To change your resolution, go to:
Settings > Camera > Record Video, and select 4K at 30fps or 4K at 60fps depending on what you’re filming (I’ll talk frame rates in a sec).
So… What Frame Rate Should I Use?
Frame rate is the number of frames (or pictures) captured per second. It affects how smooth your video looks and how much motion is captured.
- 24fps – Classic film look, great for cinematic feel
- 30fps – Standard for most casual video
- 60fps – Smoother motion, ideal for action or slow motion editing
If you’re just getting started, I’d suggest 30fps as a solid default. It works well for everyday filming—whether that’s walking through a market, filming your dog in the park, or talking to the camera. If you’re filming fast movement, like sports or dancing, 60fps is a great choice.
Quick Tip: Enable Gridlines
One bonus tip while you’re in your camera settings—turn on gridlines. This helps with composition and keeping your horizons straight. You’ll find this under:
Settings > Camera > Grid > On
It’s a tiny tweak that makes a noticeable difference in framing.
If you’re just starting out, then I would recommend filming in Full HD. This resolution is more than enough to playback on large format TVs, on the web or most other video outlets including YouTube and Vimeo.
Full HD also takes up less storage on your phone than 4K and is a little more future proof than HD.
Another factor is that editing 4K video requires far more processing power. Although 4K recording capability is pretty widespread, viewing it is another matter – though 4K TV sales are doing well.
However, there are plenty of benefits to shooting in 4K aside from the increased resolution. For example, the larger image size enables you to recompose the shot when downscaling to Full HD for the final output.
But as we’re just starting out with video, lets keep things simple and stick to 1080p Full HD.
What Frame Rate Should I Use on iPhone Video?
When you dive into the iPhone’s video settings, you’ll notice something interesting—under Full HD (1080p), you have the option to shoot at either 30fps or 60fps. So, what’s the difference? And when should you use one over the other?
As someone who’s filmed with everything from high-end mirrorless cameras to smartphones like the iPhone 16 Pro, I can tell you this: frame rate matters—but not always in the way you think.
In simple terms, frame rate refers to the number of individual frames (or images) captured every second. So, 30fps means the camera captures 30 frames per second, while 60fps captures twice as many. The idea is pretty straightforward—the higher the frame rate, the smoother the motion. That’s why 60fps footage often looks more fluid, especially when filming fast-moving subjects like sports, pets, or anything with rapid action.
But here’s the catch. While 60fps delivers smoother motion, it comes at a cost. Because the camera is capturing more frames, each individual frame contains slightly less data. That means a potential dip in visual quality, especially in low light. You might notice subtle pixelation or softness, particularly when comparing side-by-side with 30fps footage.
It’s a trade-off that most people won’t spot, but if you’re aiming for the best possible image, it’s worth being aware of. And to be honest, 30fps is more than enough for most situations. It’s been the industry standard for decades, and thanks to a phenomenon known as “persistence of vision,” our eyes and brains are tricked into seeing smooth motion even at lower frame rates.
The iPhone makes it easy to compare how different frame rates affect file size too. Here’s a quick breakdown of typical sizes:
720p at 30fps = 40MB per minute
1080p at 30fps = 60MB per minute
1080p at 60fps = 90MB per minute
4K at 30fps = 170MB per minute
So not only do you get larger files at 60fps, but they’ll also take up more space on your device—something to keep in mind if you’re filming longer clips.
Here’s a simple rule I follow: if I’m filming static subjects—family at the dinner table, a quiet street scene, or a piece-to-camera—I stick with 30fps. It keeps things looking clean and natural, and I retain that extra bit of image detail. But if I’m filming action—kids running around, cycling shots, or fast-moving events—I’ll switch up to 60fps. The footage looks smoother and gives me more flexibility if I want to slow it down later in post.
And speaking of slow motion, this is where 60fps gets even more useful. If you shoot at 60fps and play it back at 30fps, you can stretch a one-second clip into two seconds of beautifully smooth slow-mo. Try doing that with 30fps footage, and you’ll quickly notice the choppiness—it drops to 15fps playback, which is nowhere near enough to trick the eye.
I’ll go deeper into slow-mo in another article, but for now, here’s the quick takeaway:
Static subjects = 30fps
Moving subjects = 60fps
If you’re just starting out, a great default setting is 1080p at 30fps. It delivers high-quality video, manageable file sizes, and footage that looks great straight out of the phone. And before you press record, do one final thing—clean the lens. It’s the easiest fix for bad footage and also the most overlooked. You’d be amazed how many shots are ruined by smudges and fingerprints.
That’s it—you’re ready to shoot. But before you do, here are a few quick tips that I’ll be expanding on in future features:
Lighting is everything, so try to film in bright conditions
Avoid filming directly into the sun unless you’re going for a silhouette
Use your iPhone’s built-in light if you need a little fill
And once you’ve shot your footage, there are plenty of editing tools to help bring it to life. If you’re just getting started, I’d recommend:
iMovie (Mac) – Simple, clean, and free
Premiere Elements – Great balance of control and usability
PowerDirector – Ideal for mobile editing
Lightworks – Lightweight and fast
DaVinci Resolve – Full-featured and powerful (and there’s a free version)
So there you have it. Choosing the right frame rate is all about understanding what you’re filming and how you plan to use the footage. Once you’ve got that sorted, the rest becomes much easier—and a lot more fun.