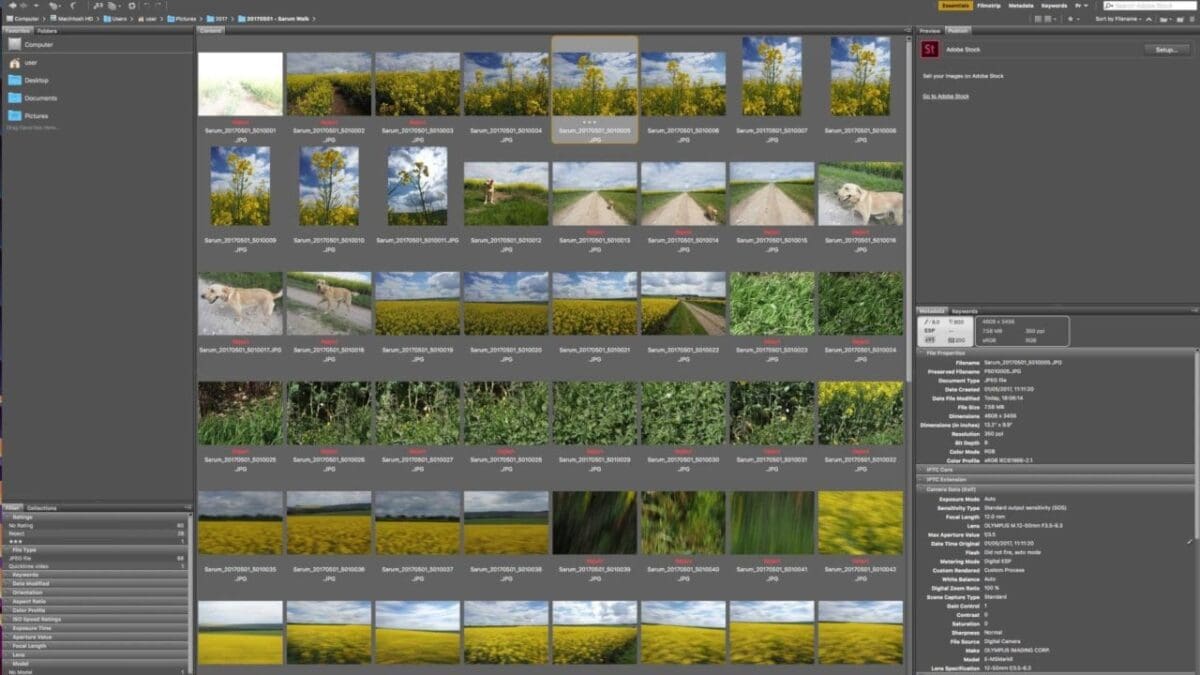
One of the biggest advantages of digital is that you can shoot vast quantities of images without having to reload rolls of film and worry about the cost. This freedom greatly increases the likelihood of you capturing the shot you want. However that abundance of images can also be a huge problem especially when it comes to filtering through and locating the few pictures that you actually need from the shoot. A quick way to sort through these is by rating images in Bridge and in this tutorial I’ll take a look at just how easy it is.
On a recent shoot it’s fair to say I was a little trigger happy, but with well over 50 images required by the client and with only one short day to shoot I had to make every second count.
The tally at the end of the day was around a thousand, yes OK slightly over the top on the trigger, but in the end the client was able to use 100 images and I walked away tired but happy that the brief was fulfilled.
As ever the shoot is only the start of the journey and after day’s hard toil you need to filter through those images before they get sent to the client, be that a paying individual or if even if you’re taking images for yourself.
The client definitely doesn’t want to see test shots of your model picking their nose, you having a cuppa, the ceiling, floor or those shots that quite simply didn’t work.
For your own integrity you need to filter them down, and the only way to do this is to become your own worst critic. Even if you did shoot a thousand shots do you want your client to know that?
Of course not, you want your client to think that every shot you take is a winner and you really are a seasoned pro. If you’re shooting for pleasure then you just want to get to those gems as quickly as possible before you lose interest.
The big problem is time and turn around, a client will want to see those shots as quickly as possible, likewise you don’t want to spend a day going through them and then another day processing, especially if you have agreed on a fee upfront. Who’d do something that amateur!
Be it a professional shoot, a shoot for the family, friend or you just love camera craft the process is the same. Like touch typing the more you filter your images the faster the process will become.
Telling you that filtering your images is a great idea, but how do you actually do it?
Adobe Bridge is an ideal application for getting your images sorted, it features a wide variety of tools that enable you to delete, reject, rate and tag your images at speed.
In this tutorial we’re going to look at the speed side of filtering in Adobe Bridge, this is for when time is short, the client, friend or partner is desperate for the images and you just need to get on with it..
When it comes to filtering down your images in Adobe Bridge at speed we’re going to look at:
- Delete the dud images
- Reject the images that aren’t right, but one day might be useful
- Rating the decent images
- Filter the images so you just see the best
Step 01: Delete the dud images
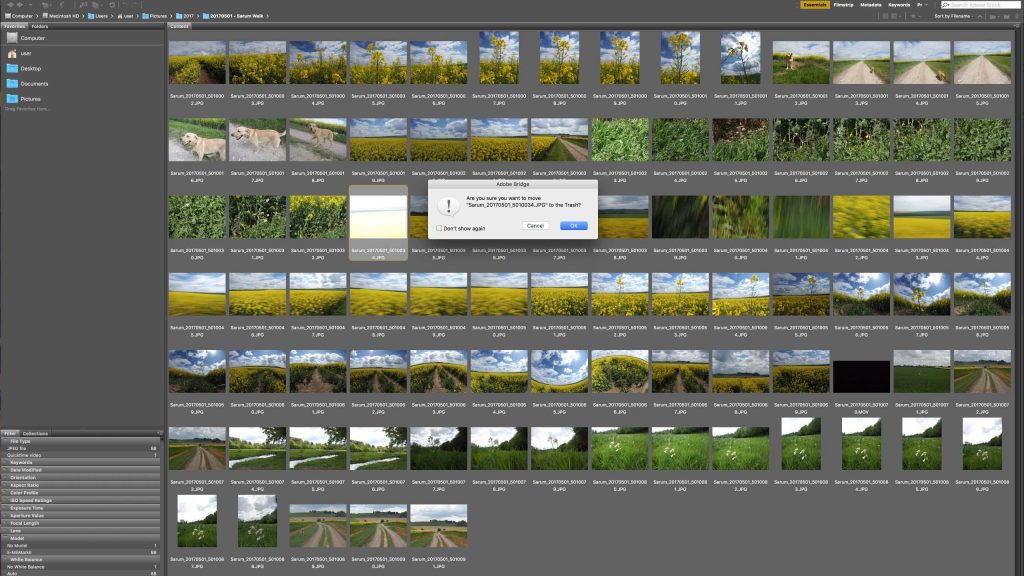
Start by navigating to the folder of images you want to sort through, then adjust the thumbnail size so you can get a good idea of the image but you don’t really need to see all the details. Now hold down Ctrl / Click on a PC cmd / Click on a Mac on each of the image you want to delete. Once you have made your selection hit Ctrl / cmd delete to permanently delete the file.
Step 02: Reject the images that aren’t right, but one day might be useful
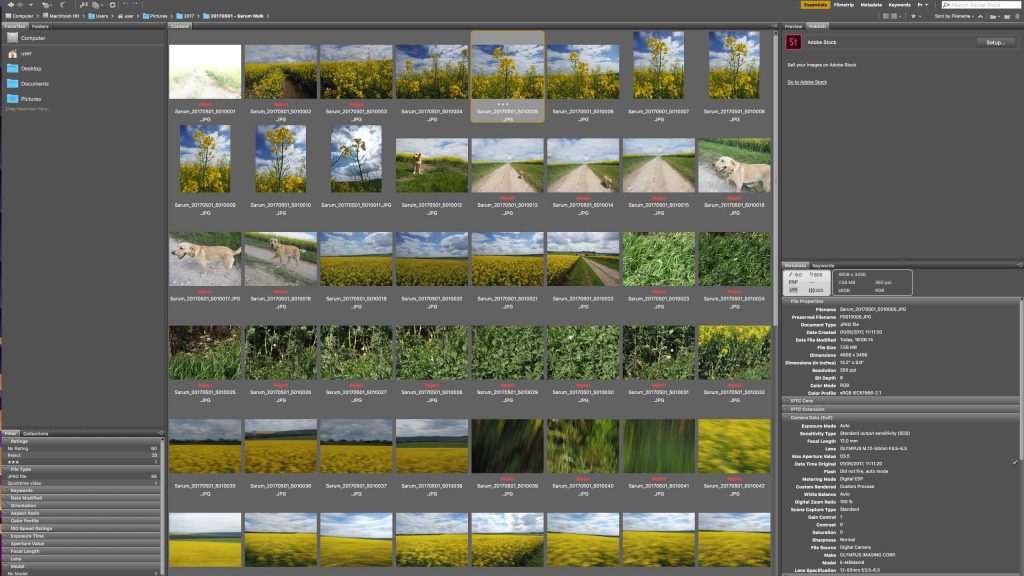
Rejecting images isn’t as harsh as deleting them as they stay on your system and can be recalled in the future. In the same way as before use Ctrl or cmd Click to select the images you want to reject and then alt / Click to reject. Once done go to View > Show Reject Files to hide or reveal the files in Bridge.
Step 03: Rating the decent images
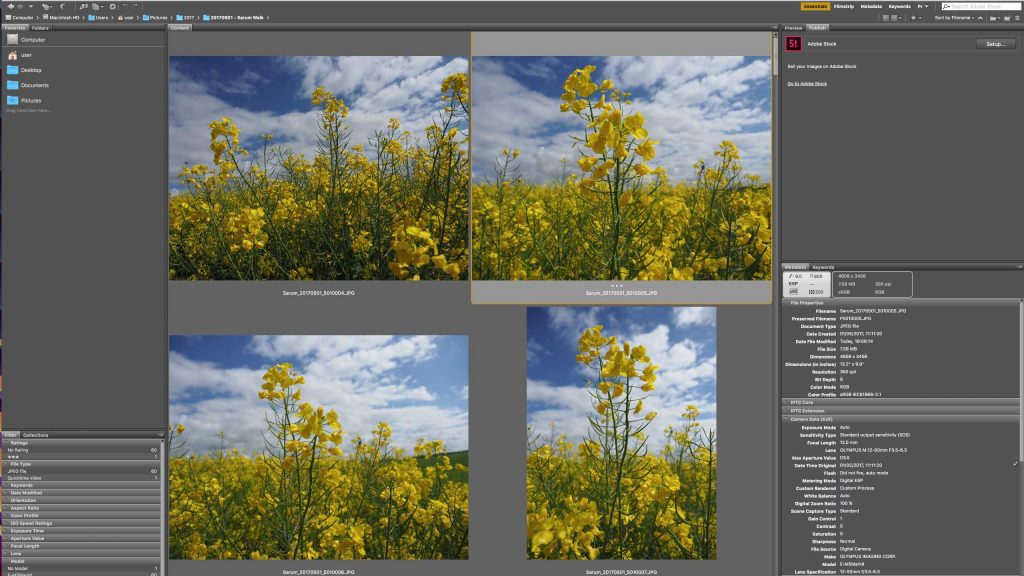
One of the fastest ways to filter images is through a star rating. Click on an image and just below the thumbnail and above the file name you’ll see a row of small dots, click the third dot and you’ll see three stars appear, meaning that you have now given that image a three star rating. You have five stars for which you can rate images. As with the delete and reject command you can select and rate multiple images.
Step 04: Filter the images so you just see the best
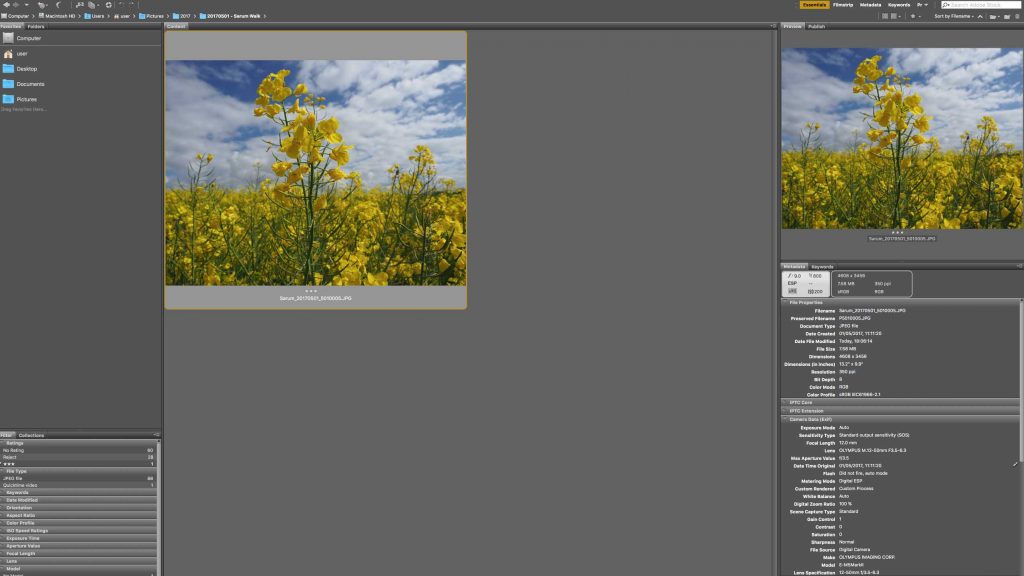
On the right of the screen you’ll see the filter options. There’s plenty of meta tag data here that you can use to filter the images, but here with speed at the heart of what we’re doing we’re going to filter by stars. The top Filter should be ratings and will show the different star ratings that have been applied to the images. I usually start with three and as I filter down the images I drop some down to two and increase others to four until I’m left with only the images I need.
