


In most situations your camera’s light meter can properly read the brightness of a scene and suggest the optimum exposure settings to capture a great image with a nice range of tones. But as intelligent as camera technology is these days, there are still those times where it gets confused.
The key is to recognise these situations in advance and take control over your camera’s exposure settings to ensure you get a great image.
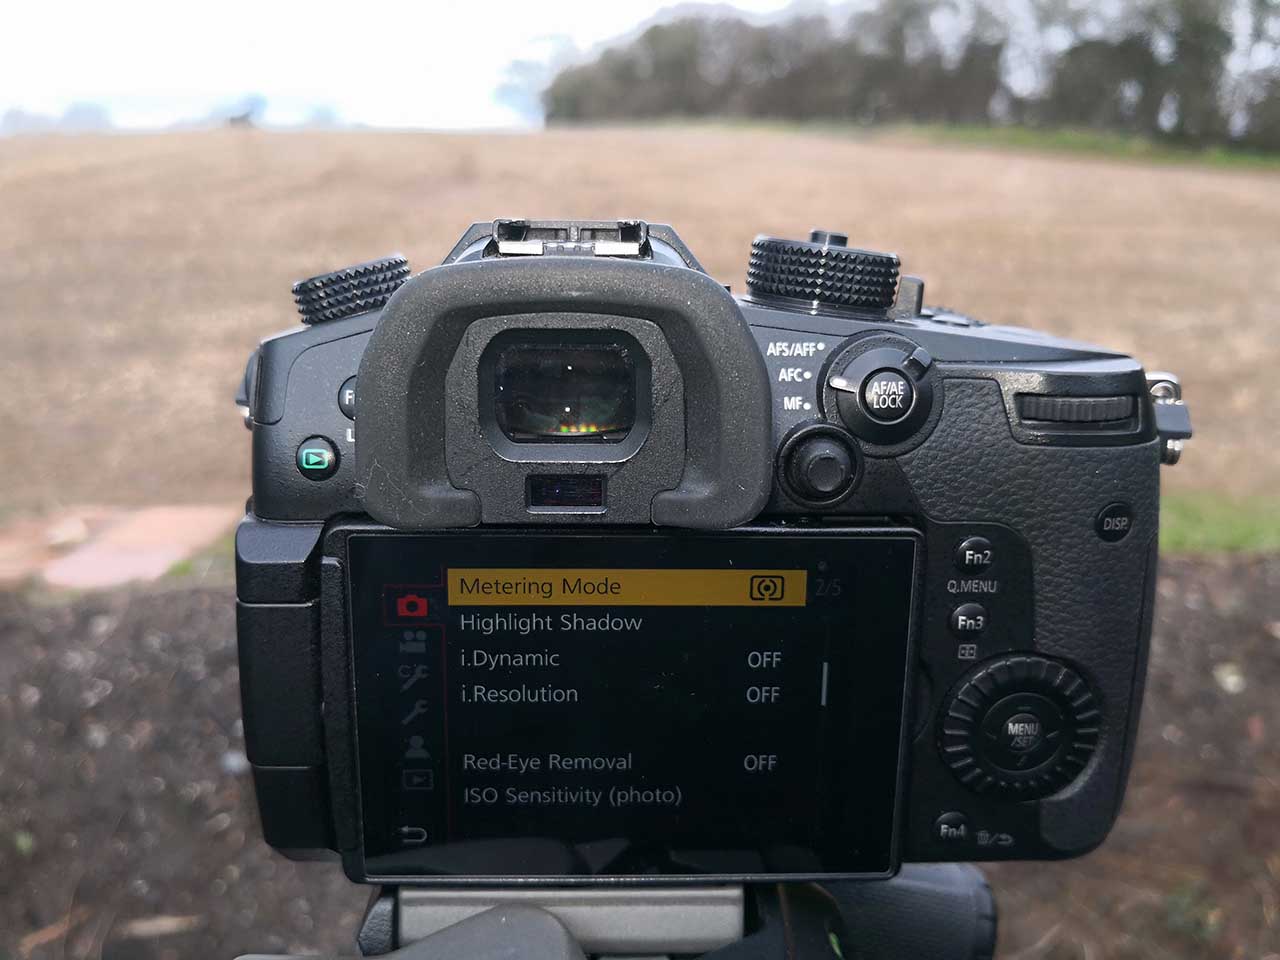
What are my camera’s metering modes?
All cameras are different, but there are three metering modes that are pretty standard and will cover you in about 99% of your conditions. Here’s what they are and what they do…
Centre-weighted metering
This is the metering mode you’ll want to use in really high-contrast scenes. What centre-weighted metering does is lock your exposure to a specific area of the frame to ensure that the most important area is exposed correctly.
It’s not fool-proof, of course, because nothing is. So you may need to tweak your exposure slightly with exposure compensation.
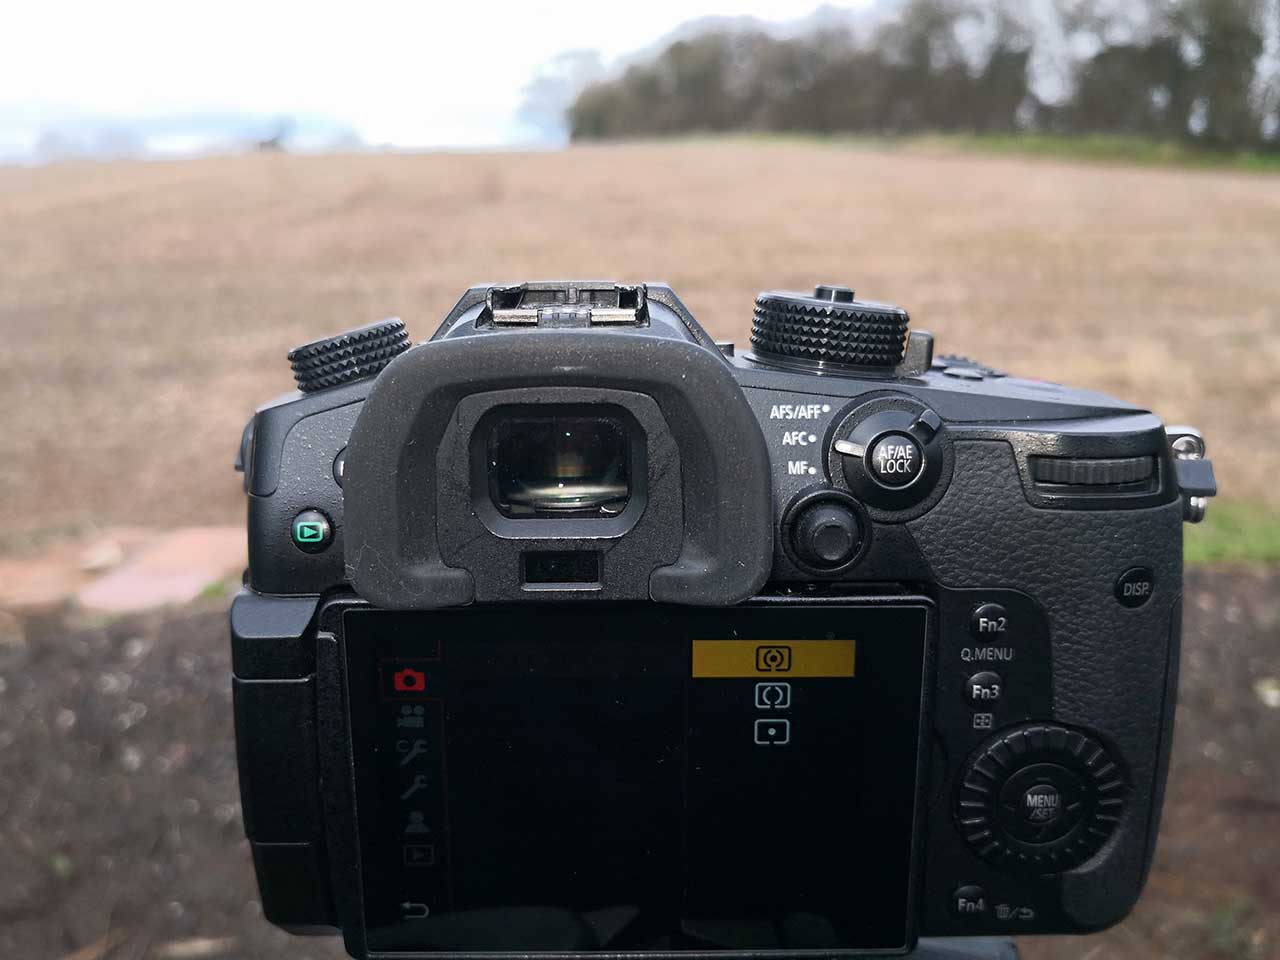
Evaluative metering
This one has many names, from Matrix to Multi-segment to Average metering. This is your all-rounder. With Evaluative metering set, your camera takes a look at all the light coming into the frame, takes an average reading of it all and suggests an exposure that will provide the best balance.
The problem, though, is you can often get unwanted silhouettes or whites might turn out grey. Dialling in some exposure compensation is the best away around this issue.
As a general rule, to stave off those unwanted silhouettes you might get from strong backlighting, dial in some positive exposure compensation – around +/- 2EV most likely.
Conversely, if your subject is in front of a dark background you can prevent those whites becoming grey by applying negative exposure compensation. Try +/-1 EV and fine-tune from there.
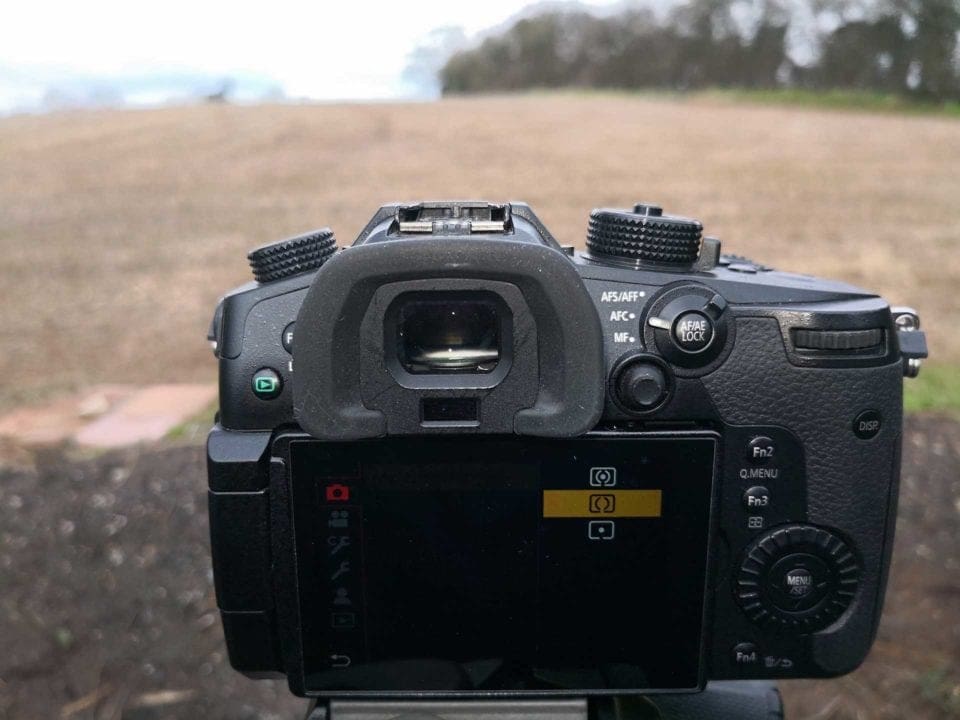
Spot metering
Last but certainly not least is the all-important spot-metering mode. We have a really thorough spot metering tutorial here, but what you need to know is that spot metering takes an exposure reading from a single point within your scene.
This metering mode is useful in scenes where most of the frame is dominated by something very bright or very dark and your subject is in contrast to that. You can then place the ‘spot’ over your subject and ensure it’s exposed properly.
That said, it’s often best practice to take several ‘spot’ readings from around the frame and calculate an average for the best exposure.
7 times your camera’s light meter will fail you
Here are the seven most common situations when your camera might read a scene’s brightness wrong and you’ll need to take control of the exposure settings.
01 Backlighting
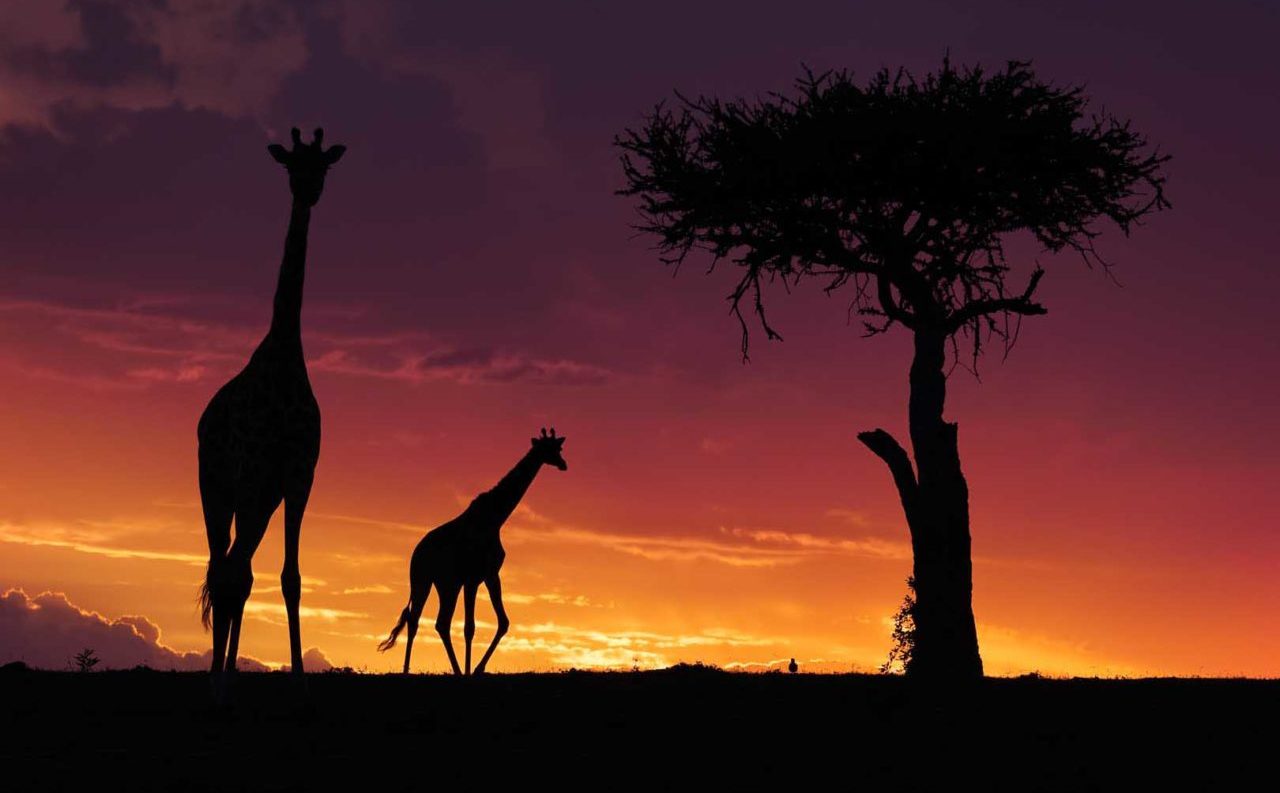
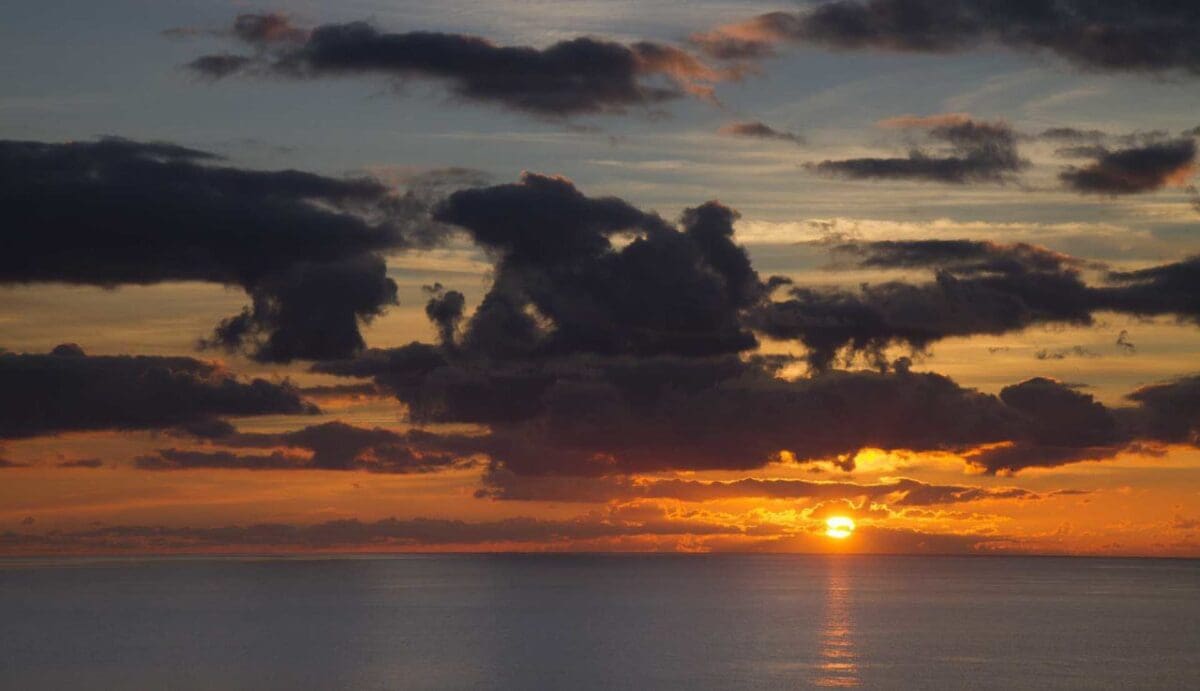
If your subject is lit from behind, such as a flower on a window sill, the background will be very bright while the subject itself looks quite dark.
If you shoot using the exposure settings that your camera recommends when the light meter is set to its standard general purpose mode (often called Evaluative, Matrix or Multi-zone), the extreme contrast and brightness around your subject is likely to make the subject look even darker than it does in reality.
Even if it get things right so the image matches the scene, the chances are that this is not how you want the image to appear. In many case you will need to increase the exposure to brighten the subject. This may mean that the background burns out, but it’s more important to get the subject right than the background.
It’s usually advisable to use your camera’s spot metering facility when shooting backlit subjects as this will enable you to take a light measurement from a very small part of your subject. The spot meter will recommend exposure settings that will render the measured area a mid-tone, which is often exactly the result you want.
If not, you’ll have to increase the exposure a little to brighten the subject, or decrease it to darken it.
02 High contrast conditions
Some camera’s light meter’s fail to deliver correct exposures in very high contrast conditions because they weight the exposure towards the subject under the active AF point.
If that area is in deep shadow the camera will respond in a similar way to when the scene is very bright and will over-expose the rest of the scene to render the focus zone a mid-tone. And if that areas is a bright highlight, the camera will under-expose the image.
The trick here is to be alert to where the active AF point is and if possible ensure it’s over a mid-tone area. If that’s not possible, use your camera’s Auto Exposure Lock facility to lock the exposure settings to those required by a mid-tone area and then recompose the image to take the shot.
Most enthusiast-level cameras have a dedicate Auto Exposure Lock button, which when pressed locks the exposure settings for a few seconds or until the shutter release is pressed.
03 Dark subjects
Very dark scenes are just as problematic for a camera’s meter as bright ones, but the error is in the opposite direction so the image is much brighter than the scene. You can see this for yourself by photographing a black subject and then a white subject.
In each case you should aim to fill the frame with the subject and let the camera set the exposure itself. You are likely to find that both images have the same brightness with each subject being rendered grey rather than black or white respectively.
The solution with a very dark scene is to decrease the exposure using the exposure compensation dial or switching to manual exposure mode.
Typical examples include music gigs and stage productions where much of the scene is likely to be very dark.
04 Bright scenes
If the scene you are photographing is very bright your camera’s light meter will suggest settings that will underexpose it, making it much darker than it should be.
This is because the meter generally expects scenes to have an average brightness equivalent to a mid-tone. It will therefore recommend, sensitivity, aperture and shutter speed settings that make much of the scene a mid-tone, but that’s darker than it actually is.
This problem can be overcome either by using your camera’s exposure compensation control to increase the exposure, making the image brighter, or by setting exposure manually. If you set exposure manually you need to set values that the camera indicates will lead to over-exposure.
The degree of over-exposure or exposure compensation that you need to dial in depends on just how bright the scene is. Keep an eye on the camera’s histogram view and try to retain any important highlights, but increase the exposure until the graph trace reaches the far right to indicate that there are some white pixels in the image.
This is a typical problem with snow scenes, on beaches with bright sand and when shooting water, which is very reflective and the exposure usually needs to be increased by a stop, possibly two.
05 Manual flash or studio lights
Your camera is unable to meter for manual flashguns or studio lights that pump out light at whatever power you set them to. The camera will suggest settings that will exposure the scene correctly without the lights, so if you use them and fire the flash, the image will be too bright.
The best way to set the correct exposure when using manual flash units is to use a flash meter. This measures incident light and can either be connected to a flash via a cord to trigger it to fire, or can it work wirelessly responding to sudden pulse of light and measuring its brightness.
Flash meters (and ambient light meters) are useful because they measure incident rather than reflected light. This means that they are held in front of the subject, pointing back towards the camera to take a reading and they’re not influenced by the brightness of the subject itself.
If you don’t have a flash meter you can use the flash units guide number (a type of power rating) and its distance form the subject to calculate what the exposure should be using the formula:
Aperture = Guide Number / Distance.
For example, with a flashgun that has a Guide Number of 35m at ISO 100 is set to manual and positioned 3m from the subject, the aperture should be set to 35/3=11.66, which can be approximated by f/11.
Of course, if you’re shooting with a digital camera you can just fire off a few test shots and make adjustments until you get the settings right.
Shutter speed must be set below the camera’s flash sync speed, often 1/125sec or 1/200sec. If the subject is to be primarily illuminated by flash the shutter speed doesn’t matter too much provided that it’s not set so long that ambient light starts to have an impact.
06 Live music
If you’ve ever shot a music gig with flashing stage lights you’ll have noticed that your camera’s light meter constantly changes its suggested exposure settings. The best approach in this situation is to set the camera to manual exposure mode and use the spot meter to take a reading when the main subject is illuminated by the lights.
Set the suggested settings and take a test shot when the lights fall on the subject again. If the image looks correctly exposed, you’re good to go. If not, make an adjustment to the exposure and try again.
Once you’ve found the settings that you need to use, keep them the same and ignore the camera’s meter, it will jump all over the place as the lights flash and move.
You just need to bide your time, focusing on the subject waiting for the lights to be in the right area and for your subject to do something interesting.
07 Painting with light
Painting with light involves setting a long exposure and then using an external light source such as a torch to illuminate the subject by passing the light beam over it.
Like when using a studio or manual flash unit, the camera cannot know how much light you intend to paint over the subject so it cannot recommend helpful exposure settings.
The easiest way to assess exposure when painting with light is to take a few trial shots. Use an exposure time that gives you long enough to move the light over the subject and find a balance between aperture and sensitivity that gives you the depth of field that you need and keep noise levels down.
As with a flash, moving the torch closer to the subject will increase the intensity of the illumination, while moving it further away reduces it.

How to get better exposures from your camera
Use your histogram
The best way to get an accurate exposure is to view it on your camera’s histogram, which is literally a graph charting your exposure from shadows to highlights.
There’s a lot of nuance here, but generally, if the peaks of your histogram are bunched towards the left – the shadow area – your image is underexposed. If they’re on the right, it’s overexposed.
Underexpose to boost colours
Sometimes even though your camera’s light meter shows an even exposure, your colours might come out pale – especially the sky. If you dial in some negative exposure compensation and underexpose just a bit, this will saturate those colours.
And you can always brighten those areas that need it on your computer. Remember, it’s easier to boost brightness in darker areas at the editing stage than it is to recover blown highlights.
Overexpose in bright scenes
If you’re in a snowy landscape or a beach scene where lots of light is reflecting back off the ground, try adding a little bit of positive exposure compensation. Overexposing scenes like this can cut down on some of the light and make colours look more natural and less washed out.
Overexposing can also be useful in the studio. Some photographers will overexpose their subject’s skin to produce smoother skin tones.
Highlight Warning
If you’ve ever looked at the shots you’ve just taken on your camera’s LCD screen and notice the sky blinking, this is what’s called your Highlight Warning. This feature in playback mode is designed to let you know when you’ve blown your highlights so that you can set up again and re-shoot.
It can be a life-saver sometimes, so it’s worth turning this feature on.

How to use a hand-held light meter for accurate exposures
Using a light-meter is the most accurate way of assessing the correct exposure on any subject matter.
All light meters are different, but the general principles are the same.
With a handheld light meter you can select the type of lighting you’re in. Then you’ll want to press the ISO button and dial in the sensitivity you’re shooting at.
Get as close to your subject as you can and then point the little white dome on the light meter at your camera. Press the button to take a reading and the light meter will come back with a list of suggested exposure settings ranging from small and wide apertures and fast and slow shutter speeds. All of these will produce the same optimum exposure. What differs between them will be the depth of field.
But you can also take more control. Let’s say you’re on a location shoot doing some lifestyle portraits and you know that a wide aperture is important to the look you’re going for. You can set your desired aperture and the ISO on your light meter and it will tell you the best shutter speed to use.
Likewise, if you’re shooting motorsport and you know the shutter speed you need to use to freeze the action, enter your desired shutter speed and ISO and it will tell you which aperture to use for a proper exposure.
You can also meter in two different ways: incident and reflected metering.
Reflected metering is just as it sounds: using this mode your light meter measures the light reflected off your subject and back into the meter. Incident metering measures the light falling directly on your subject.
In most instances you’ll want to use the incident metering mode. This also helps eliminate the metering problems you encounter with light or dark backgrounds, or glare.
Reflected metering is like spot metering and is best used on distant subjects, or for subjects you can’t get close to for whatever reason. It’s also very useful for subjects that have highly reflective surfaces or are producing light themselves, such as a bonfire or neon lights in a cityscape.