

Rim lighting is a great way to add impact to an image. It’s useful for creating striking portraits, but it works well with still life and product shots too – especially when the subject is shiny and transparent.
Gavin Hoey, an Olympus Ambassador and photography educator, decided to combine both aspects for his super shot of a model blowing bubbles.
What is rim lighting?
Rim lighting is a technique that puts light around the edges of a subject. It’s something that can be achieved outdoors when the sun is low in the sky, and in the studio, it’s often just a case of moving the lights behind the subject instead of in front.
However, as Gavin explains in the video below (recorded using Zoom video conferencing), it’s not quite as simple as plopping a couple of lights behind your subject and firing away – especially if you’re including bubbles in the image. But with Gavin’s tips, it’s a great look you can create easily.
Visit Gavin Hoey’s website
Follow Gavin on YouTube
Follow Gavin on Facebook
Follow Gavin on Twitter
Follow Gavin on Instagram
How to create rim lighting
As Gavin explained in the video, rim lighting is quite easy to achieve, but creating a flattering look and getting a transparent subject perfectly illuminated takes a bit more care. Here’s how it’s done:
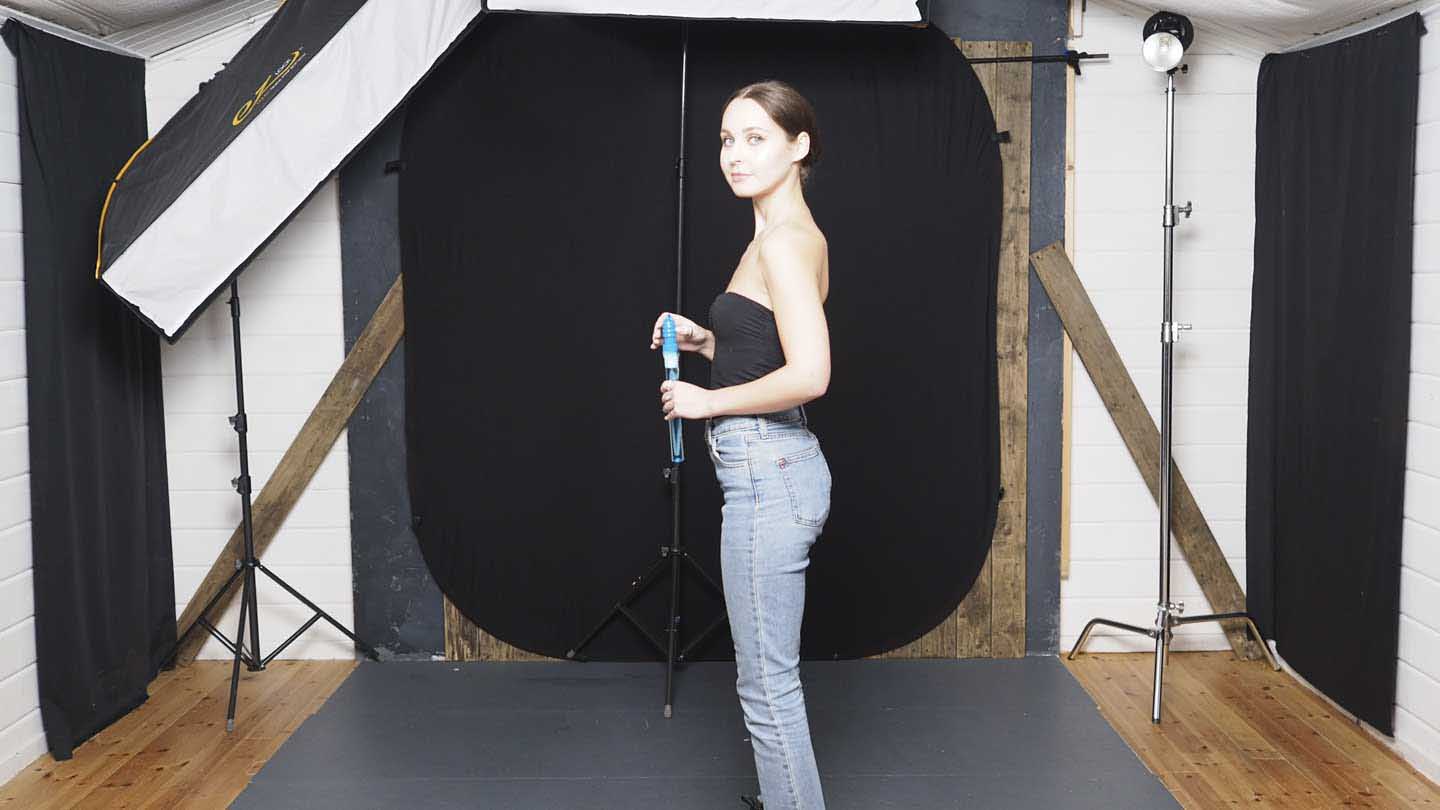
01 Use a black background
Using a black background emphasises the rim lighting and gives your image more impact. However, having lots of black in the scene means you have to be careful with your exposure to ensure that the image isn’t overexposed. You also need to avoid spilling light onto the background as you want it to stay deep black.
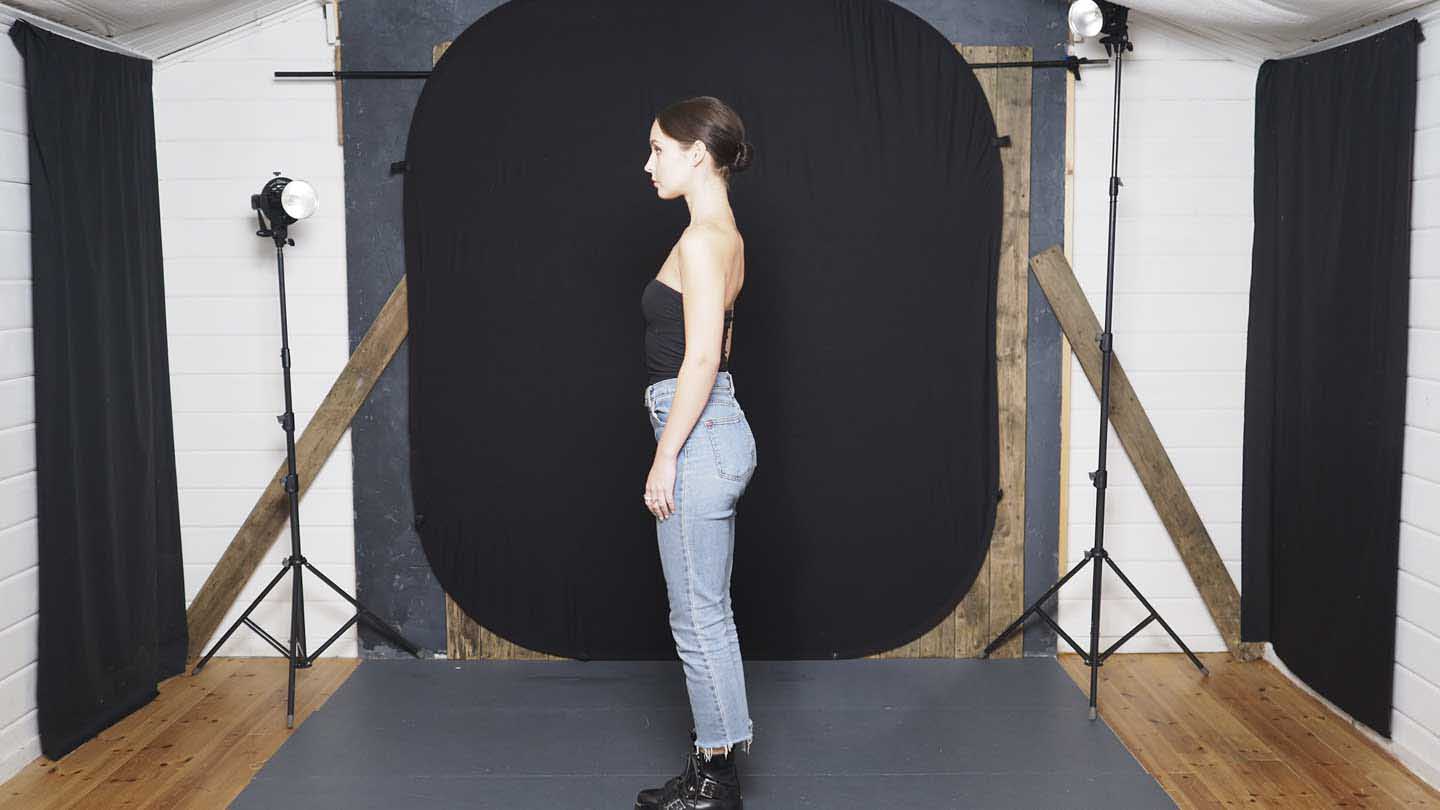
02 Position the lights
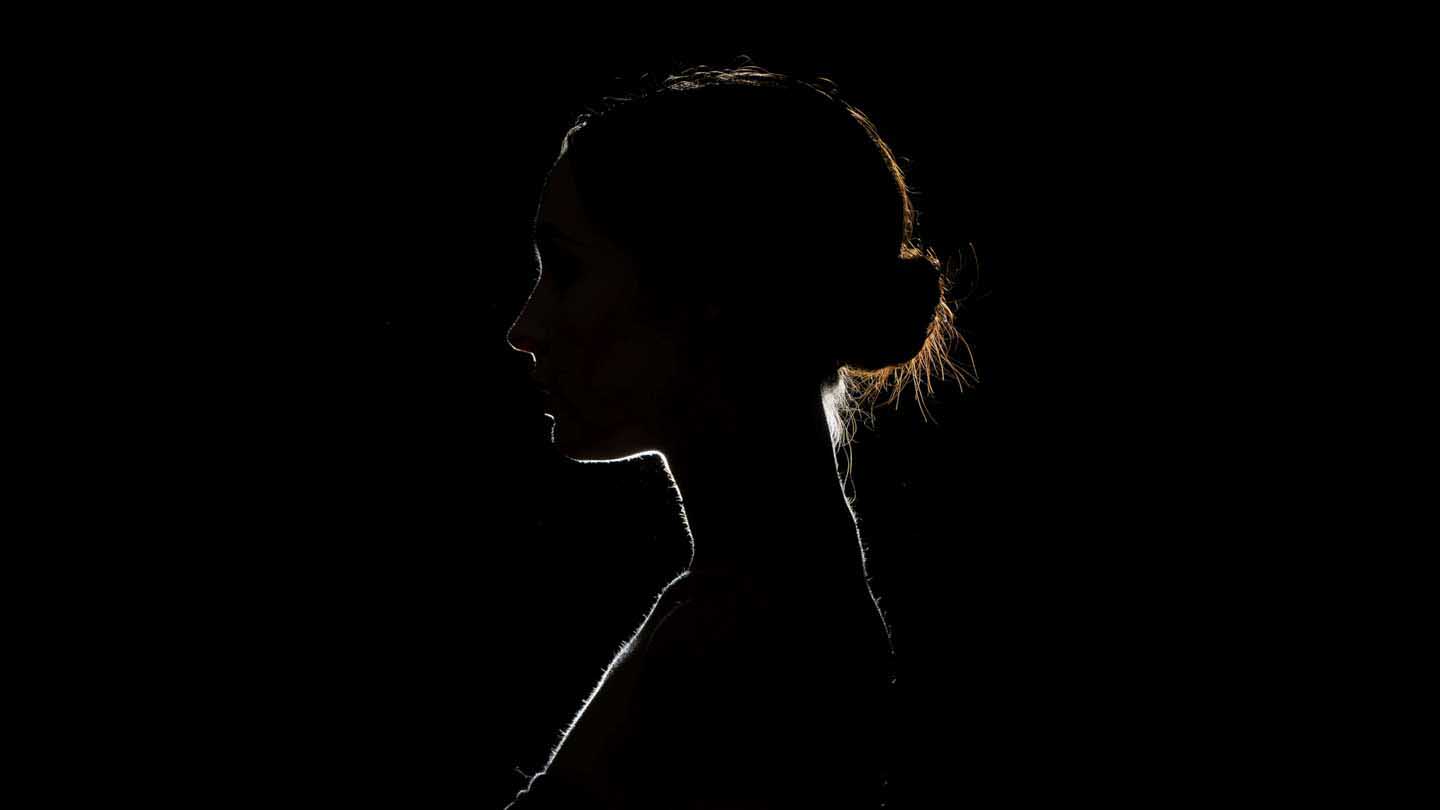
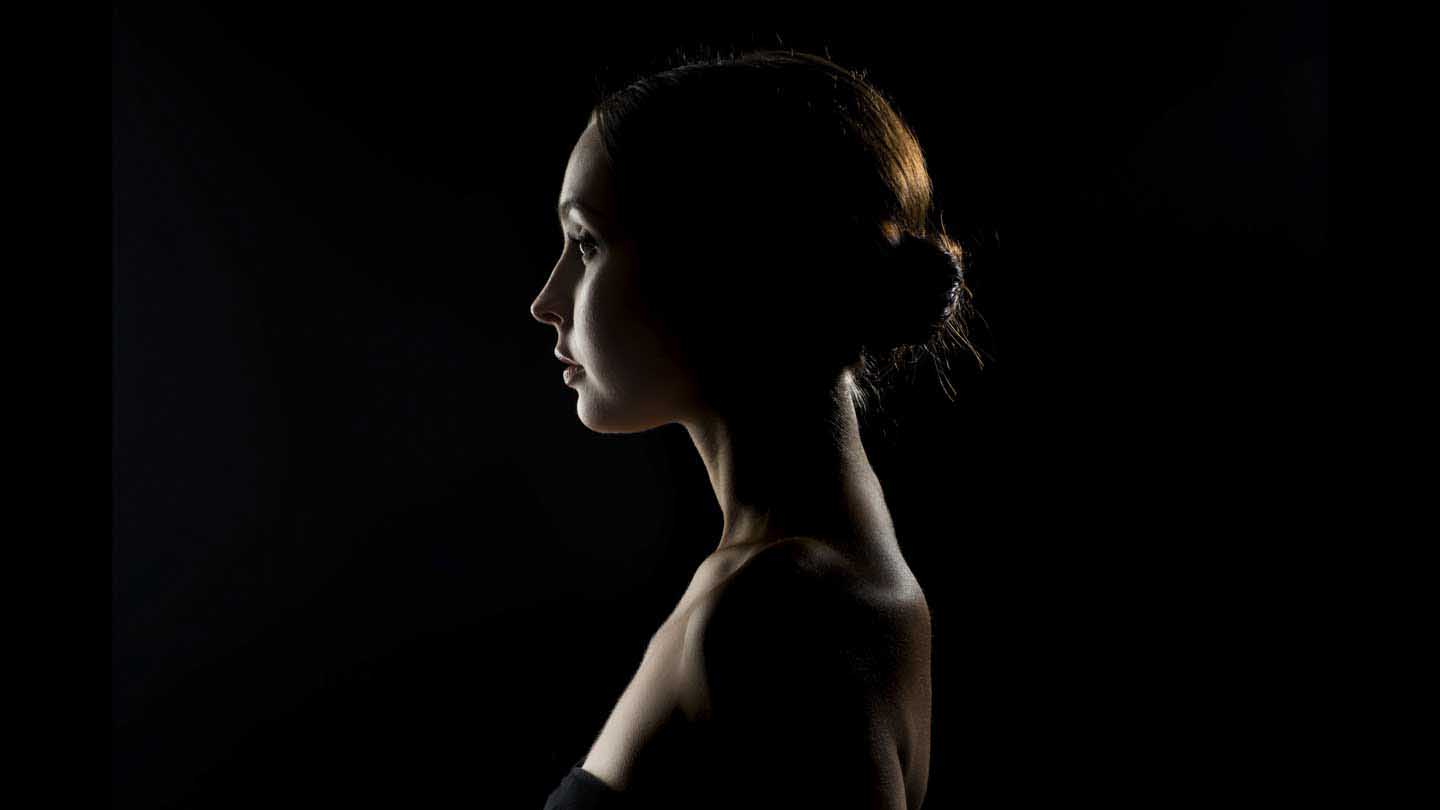
Rim lighting involves lighting the edges of a subject and in the most dramatic examples, the light comes from directly behind it. However, as the image above shows, this produces very stark light that highlights the tiny hairs on our skin. It’s not a great look for human subjects.
Consequently, it’s better to move the light to the side and behind your subject as shown in the above-left image. However, using bare lights produces harsh light with deep shadows that bring out every flaw in your subject’s skin – as shown in the image on the right above.
03 Use a strip softbox
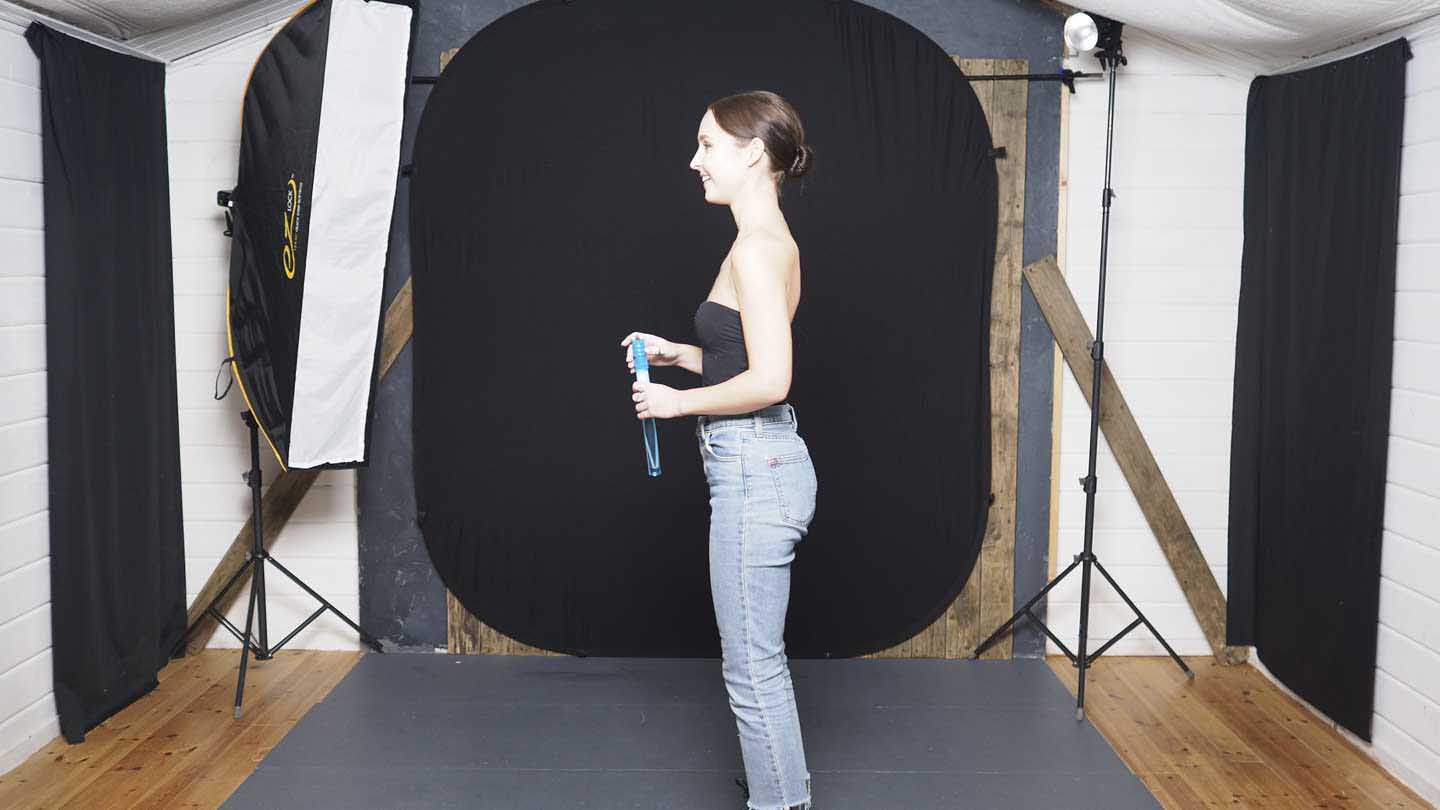
It’s important to be able to control the spill of the light as you don’t want it to bounce around your room or wrap around your subject too far, but softer light is more flattering on a subject’s skin. A narrow softbox, strip softbox or strip box is the ideal solution. This created a narrow band of soft light that you can direct onto your subject.
If you don’t have a strip box you can use black fabric or card to reduce the width of the beam of light produced by a regular softbox.
The image above is much more flattering than the shot captured using bare lights in step 2.
04 Dealing with transparent subjects
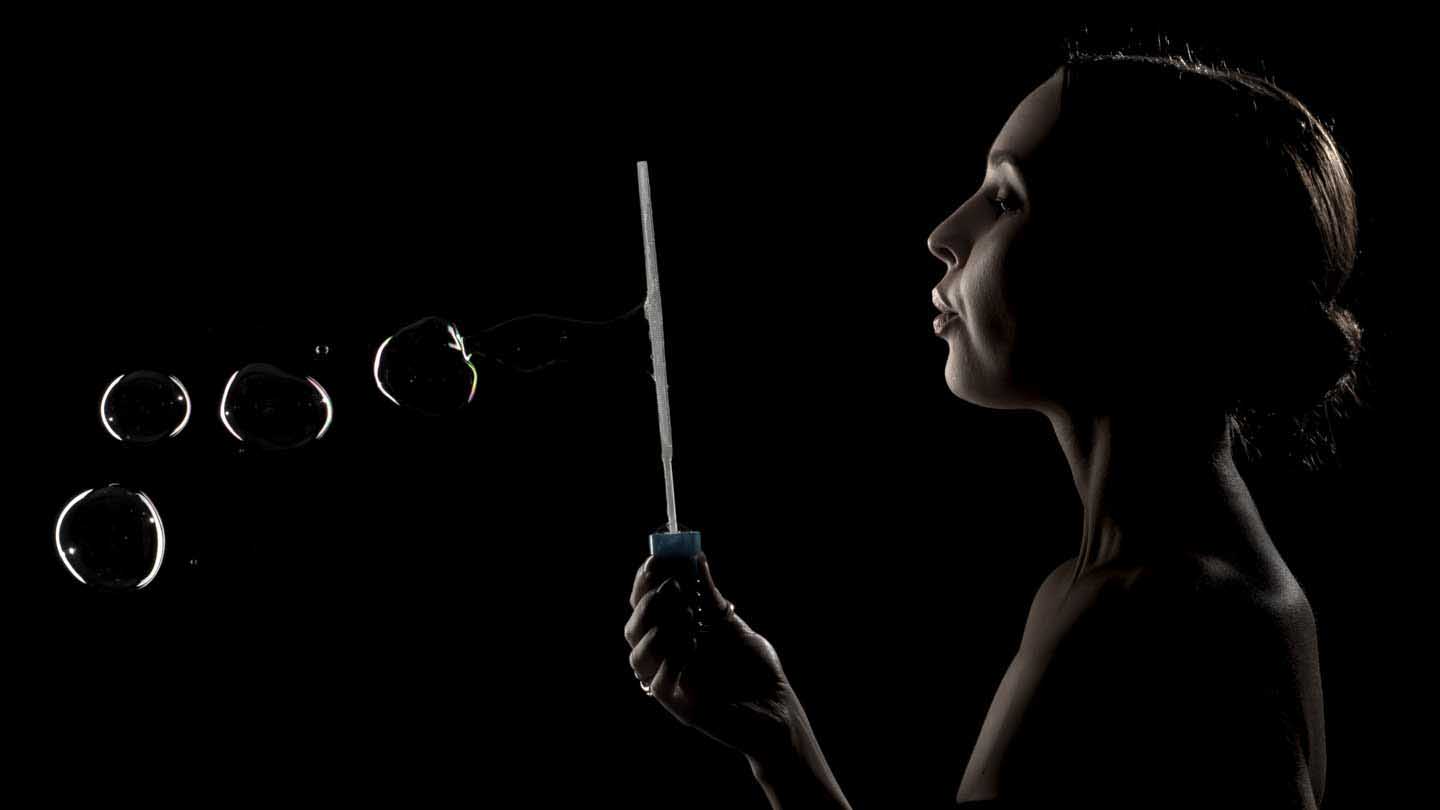
Although using one strip box and a bare light produced a satisfactory image of the model in Gavin’s set-up, the bubbles looked like sets of brackets () with pin highlights inside. That’s because each light illuminates one side and is reflected in the other.
In order to complete the circle, there needs to be some light from above as well as the side. Consequently, Gavin added a third light with a strip box and positioned it above and behind the subject – as shown below.
05 Creating perfect bubbles
As Gavin discovered, it’s worth experimenting with different bubble mixes and wands to get the bubbles you want. Gavin tried a variety of shots but in the end he settled on getting a good image of the model blowing a bubble and then added additional bubbles from a second image.
Provided that you keep the lighting the same and you use a black background, it’s very easy to create a composite image so your rim-lit portrait has plenty of bubbles.