At the age of 19, Hannah Couzens made the record books by becoming the youngest qualified member of The British Institute of Professional Photography. Since then she’s gone from strength to strength with her portrait photography business, photographing a huge range of clients including a few celebs like footballer Nicolas Otamendi and former footballer turned actor, Vinnie Jones. She’s also a Sony Alpha Universe Ambassador and a speaker and educator for Profoto.
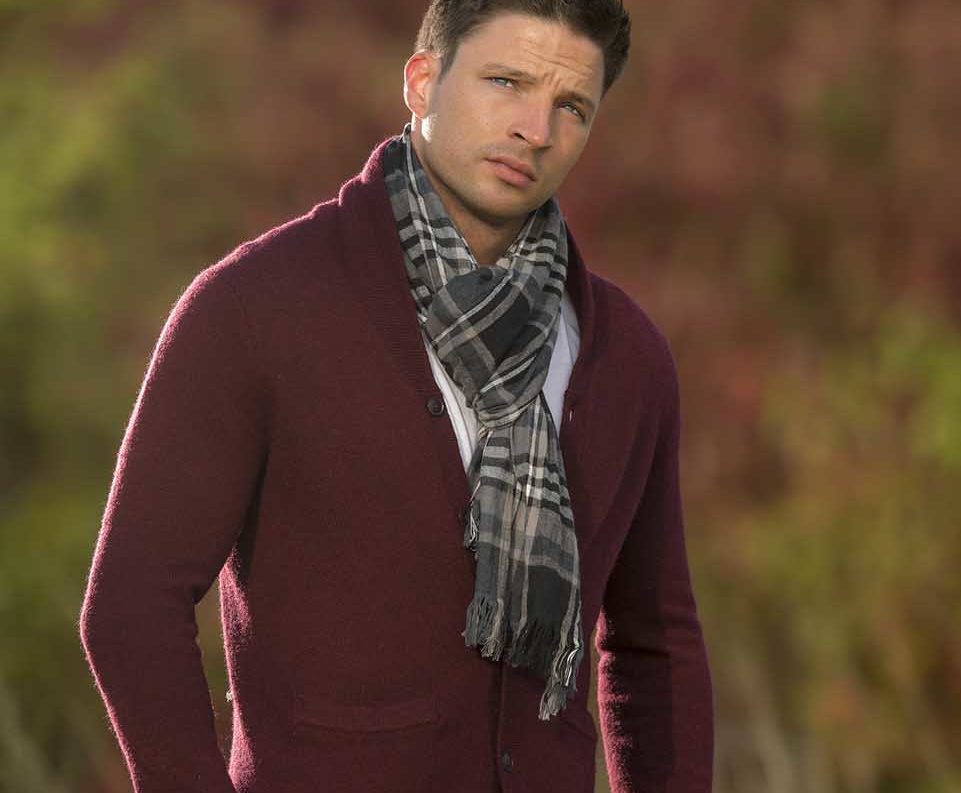
During the lockdown portrait photography has become off-limits unless your subject is part of your household. But luckily for us, Hannah was able to persuade her partner to pose for a series of images to demonstrate five different looks that can be achieved using just one light.
In video below, which was recorded via Zoom video conferencing, Hannah explains to me how she achieved the different styles of image and gives her tips for better portrait photography. I’ve summarised her tips further down in this post and lower down still, there’s a video of her creating the images.
Visit Hannah’s website
Follow Hannah on Facebook
Follow Hannah on Instagram
Follow Hannah on YouTube
Hannah Couzen’s tips for better portrait photography
01 Keep things simple
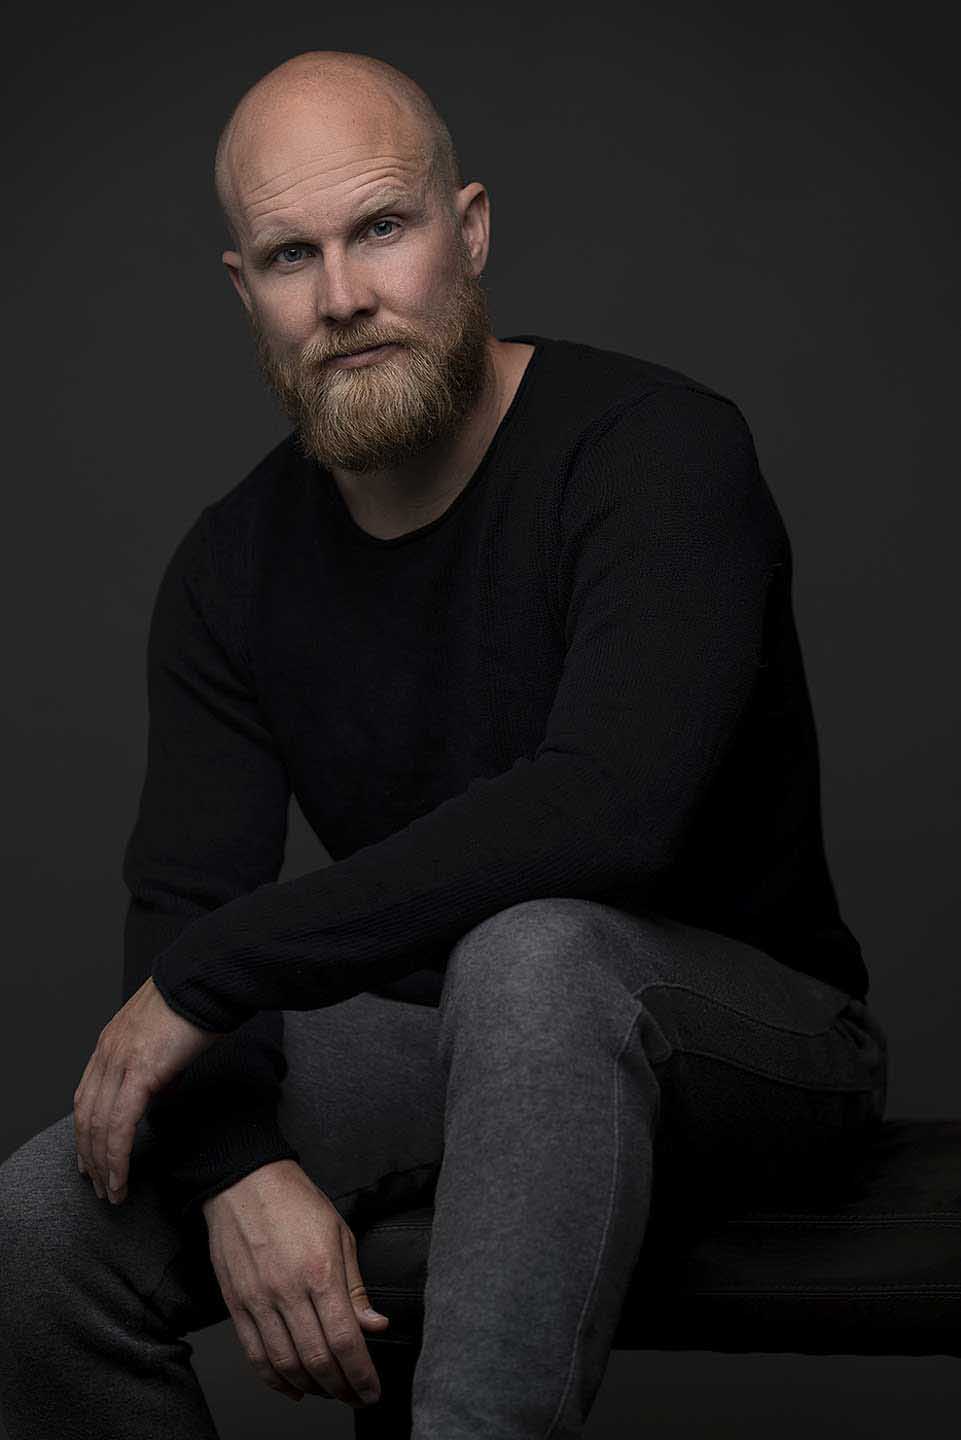
Hannah has access to lots of different lights and a wide range of modifiers, but she never uses a light for the sake of it. If she can get the result she wants using just one light, that what she does.
For this image, Hannah used a medium white umbrella with a diffuser directly in front of the subject. She shot from underneath it.
This set-up created soft light that wrapped around her subject, while still giving soft shadows. As the subject is a little away from the background, the light doesn’t spill onto it, but it isn’t completely black.
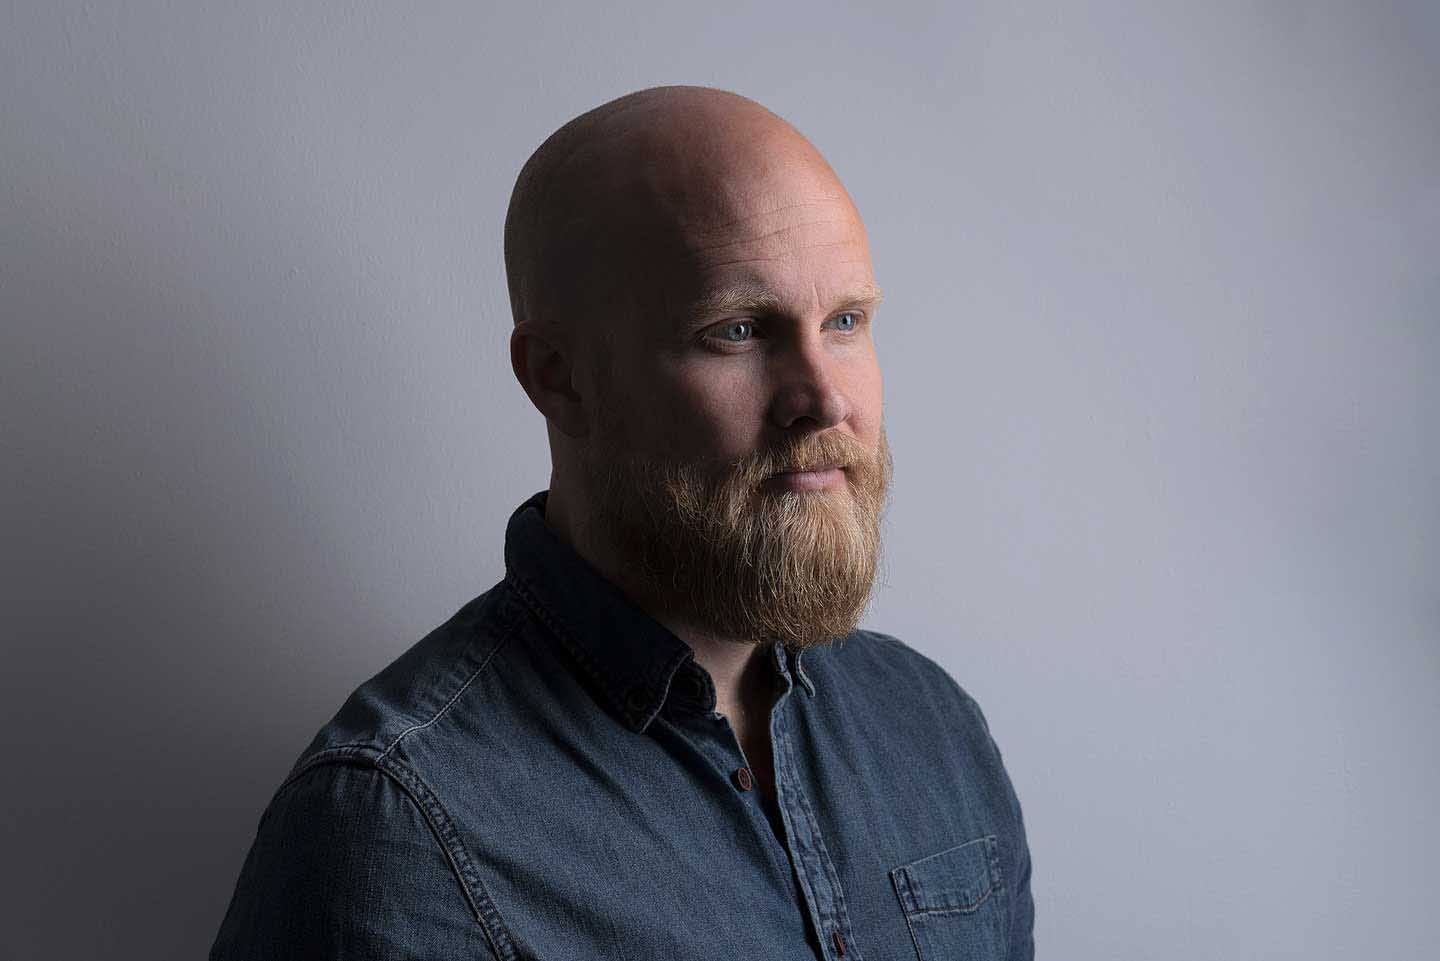
02 Use walls as reflectors
White walls make great reflectors, bouncing the light back into the shadows. By positioning your subject close to a wall, and with the light opposite, you can fill shadows and reduce contrast.
Use the modelling light to check that you’ve got your angles right and that the light is going to hit your subject where you need it to.
03 White to reflect, black to absorb
White walls and reflectors are very useful for making the illumination from a single light go further, but sometimes you may want to stop the light bouncing around. A black flag (basically a black reflector) absorbs the light to create shadow instead of filling it with light.
04 Use walls for posing
Asking your subject to lean against a wall can help them relax and feel more natural in front of the camera. If they turn slightly side-on, they present a slimmer profile to the camera.
06 Give your subject something to do
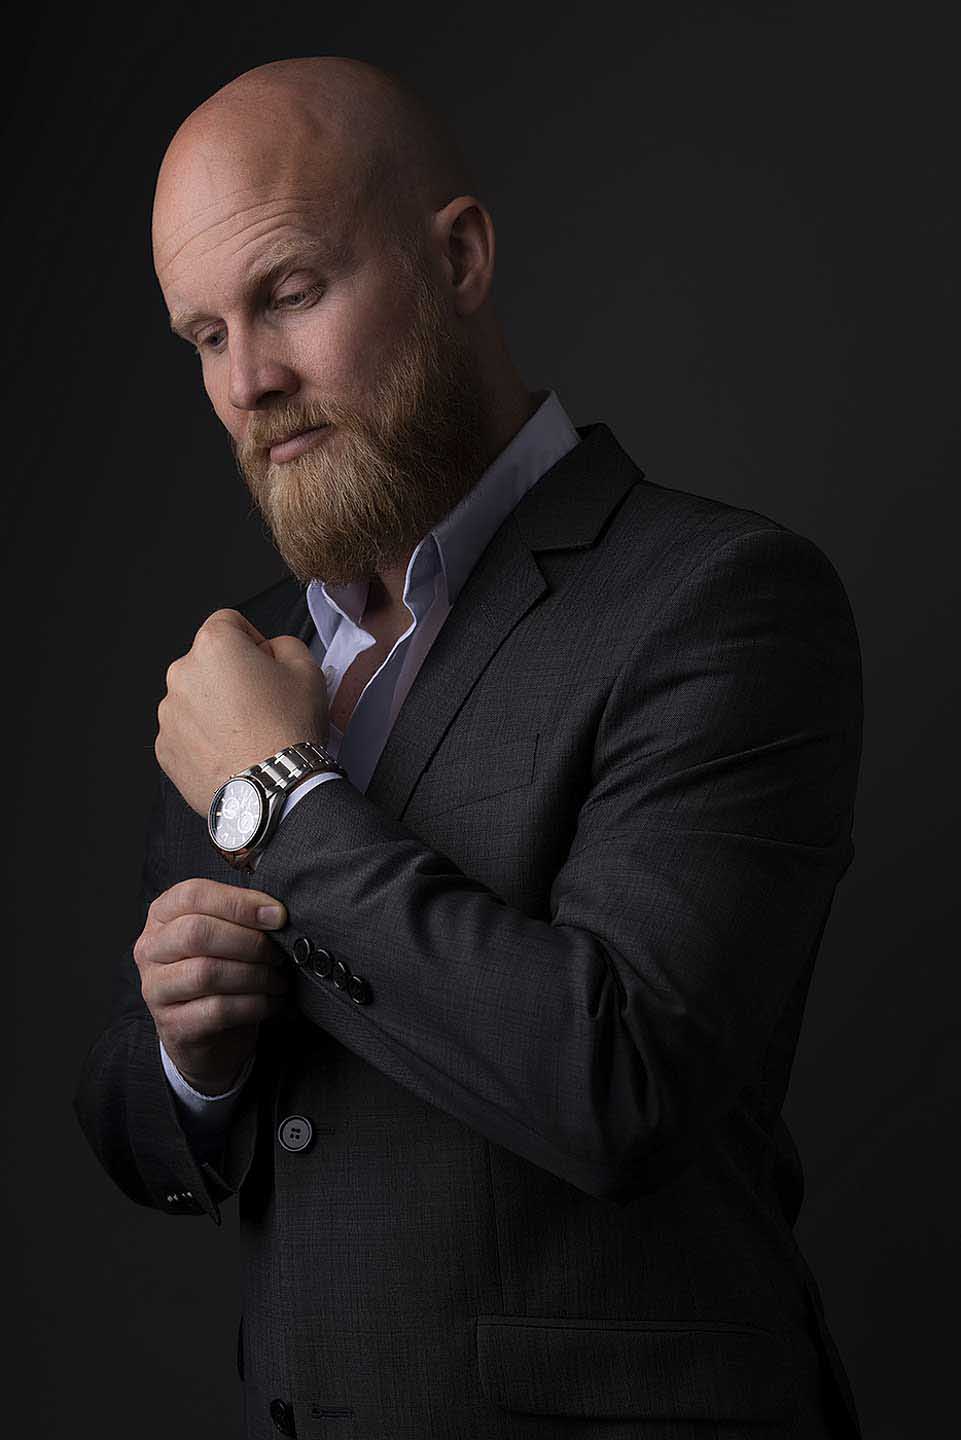
It’s often a good idea to give your subject something to do in an image, and rather then asking them to pretend, get them to go through the motion of fiddling with their watch or cufflinks – the end result will look more natural.
07 Try different modifiers
Different light modifiers allow you to control the light in different ways and produce alternate effects. A large umbrella or softbox is great when you want to create very soft light over a wide area, but sometimes you may need to contain it a little. Hannah likes to use strip lights, long, thin softboxes that produce a narrow band of soft light that’s flattering on your subject, but doesn’t spill onto other areas.
She also likes to use a beauty dish with a diffuser to create soft, easily directable light.
08 Think about the clothes
The colour of your subject’s clothes and how they contrast or not with the background has an impact upon your image. If the background is black, and they’re wearing a black jumper, for example, the two elements will merge in the shot unless you light the jumper – and you don’t want to do that when you’ve just got one light.
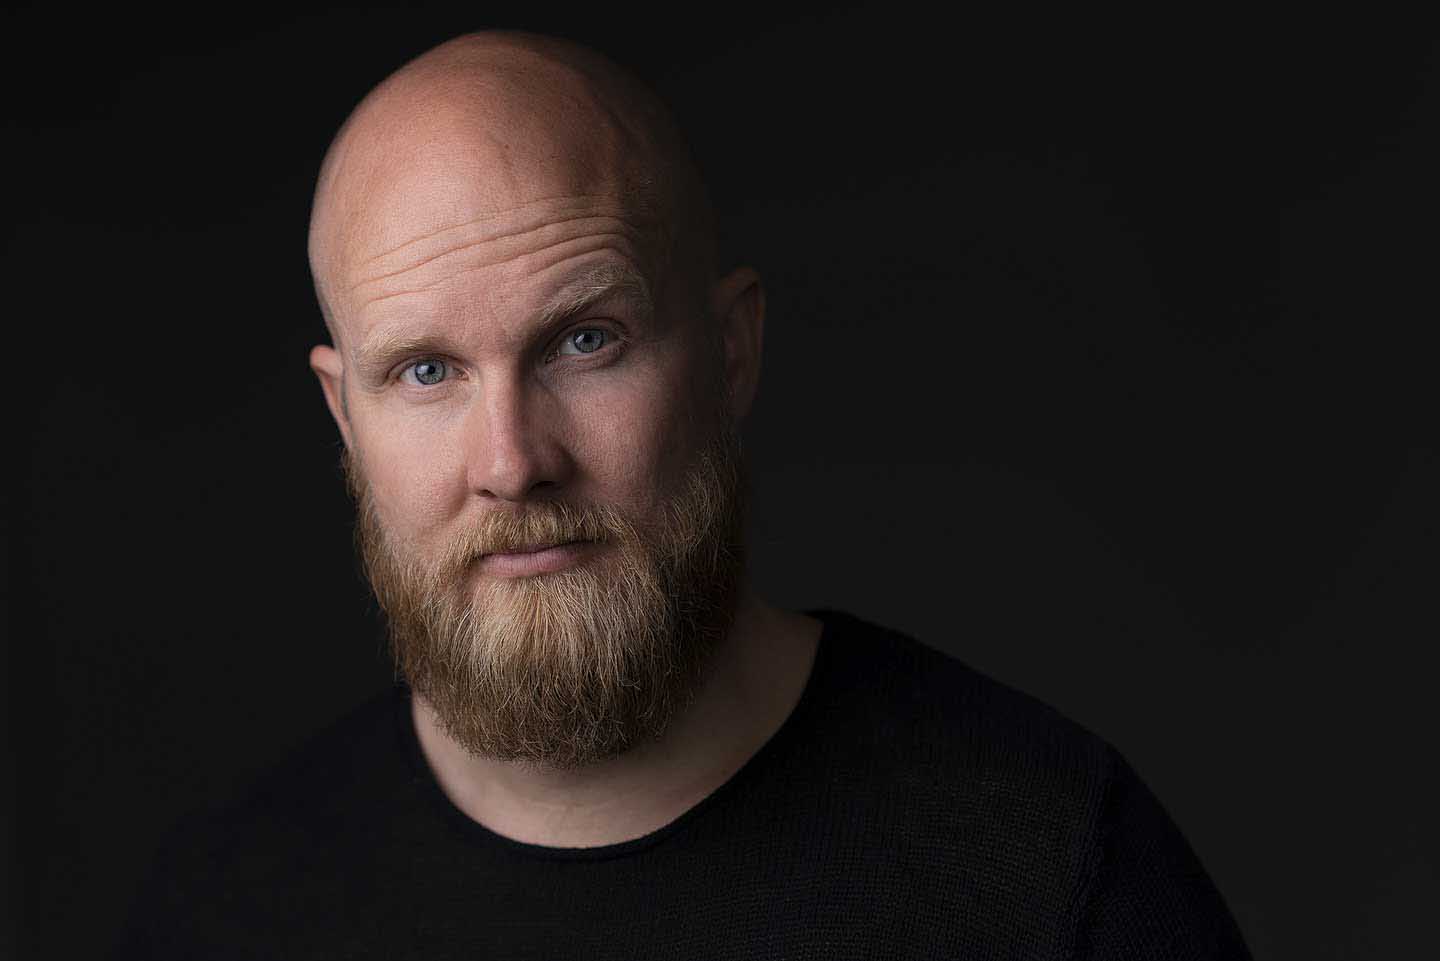
09 Eye contact or not?
Eye contact tends to be the norm in portrait photography, but you don’t always have to ask your subject to look directly into the lens. Sometimes you get more interesting, atmospheric or emotional images when they look away.
10 Use Eye AF
If you go for eye contact and your camera has Eye AF, use it to make sure that they focus is exactly where you want it to be. If you shoot with a very large aperture and get the focus on the eyebrows or even the eyelashes rather than then pupils, the eyes won’t be super-sharp.
For more information about how Hannah achieved the five different looks, take a look at her video: