


Affinity Photo is extremely effective at enhancing, retouching and transforming single images, whether they are JPEGs or camera RAW files, but it goes even further than that.
Using multi-shot exposures and Affinity Photo’s Layer Stack feature, it’s possible to fix three major problems faced by any photographer shooting in less than ideal condition – and let’s face it, that’s quite a lot of the time!
First, we’ll show you how you can combine different exposures to retain both bright highlight and shadow details in tricky lighting conditions. Affinity Photo has its own Tone Mapping persona and HDR tools for true HDR effects, of course, but the Layer Stack method is great for very quick and very natural-looking results.
Second, we’ll demonstrate object removal using multiple exposures and a Layer Stack. When you need to photograph a public space or building, you often find the public gets in the way – so this method can be used to clear your scene of all these unwanted passers-by.
Third, we’ll use a Layer Stack to drastically reduce image noise in a high-ISO image. If you’re shooting handheld in dim lighting you have no choice but to increase the camera’s ISO setting and put up with increased noise, but if you take several shots and combine them in a Layer Stack, you can banish noise more effectively than any noise-reduction tool.
Step 01
When there’s no ‘correct’ exposure

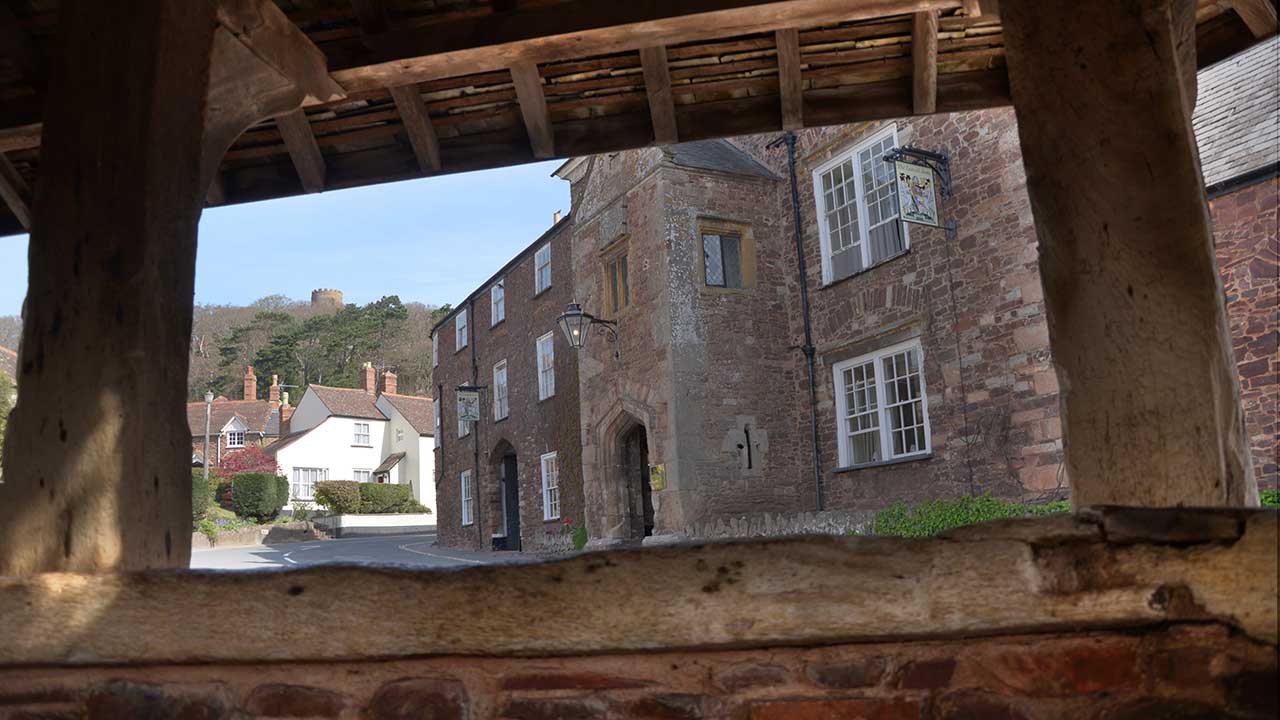
This was a tricky situation. If we set the exposure for the street in the background, the stonework in the foreground would be lost in shadow. If we set the exposure for the foreground, the background would be overexposed. If we set the exposure in the middle, as here, neither would be quite right!
Step 02
Bracketing and stacking
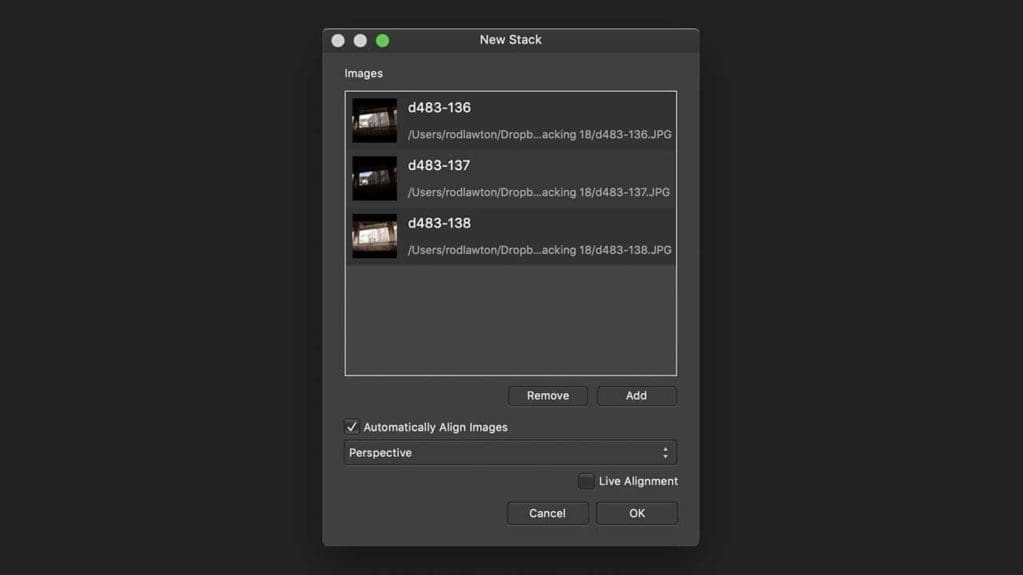
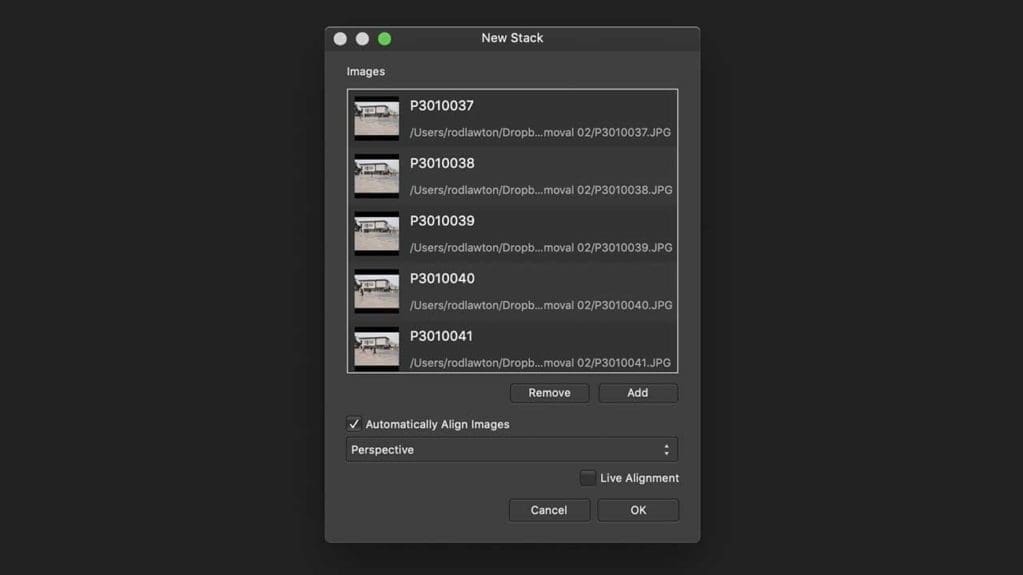
The solution was to shoot three versions of the shot at three different exposures, which was easy enough to do with the camera’s auto exposure bracketing function, then use Affinity Photo’s File > New Stack command. This prompts you to choose the images you want to stack, so we select our three bracketed exposures (Affinity Photo can automatically align handheld images).
Step 03
Your stacked image
Affinity Photo now merges these three ‘stacked’ images into one. Straight away we can see that the exposure is more even and there’s more detail in the shadows and highlights. You can deselect layers in the stack to see what effect they have on the results, but there’s another way to change the look of your stacked image…
Step 04
Changing the merging method
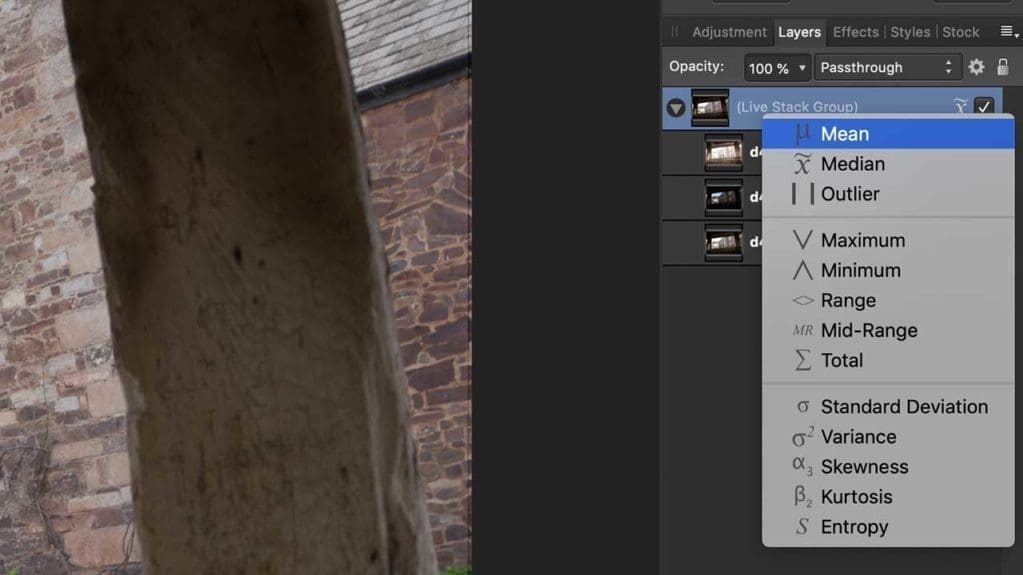
Just to the right of the Live Stack Group thumbnail in the Layers palette you’ll see an icon which represents the method used to merge your images, and you can click this to see a drop-down list of options. Many are quite technical but we will use the top two: the Median method gives a good result, but the Mean method gives lower contrast and a wider dynamic range. (Maximum is great for stacking light painting effects, while Mean, Median and Maximum can be used for simulating the movement effect of long exposures.)
Step 05
Use the Merge Visible command
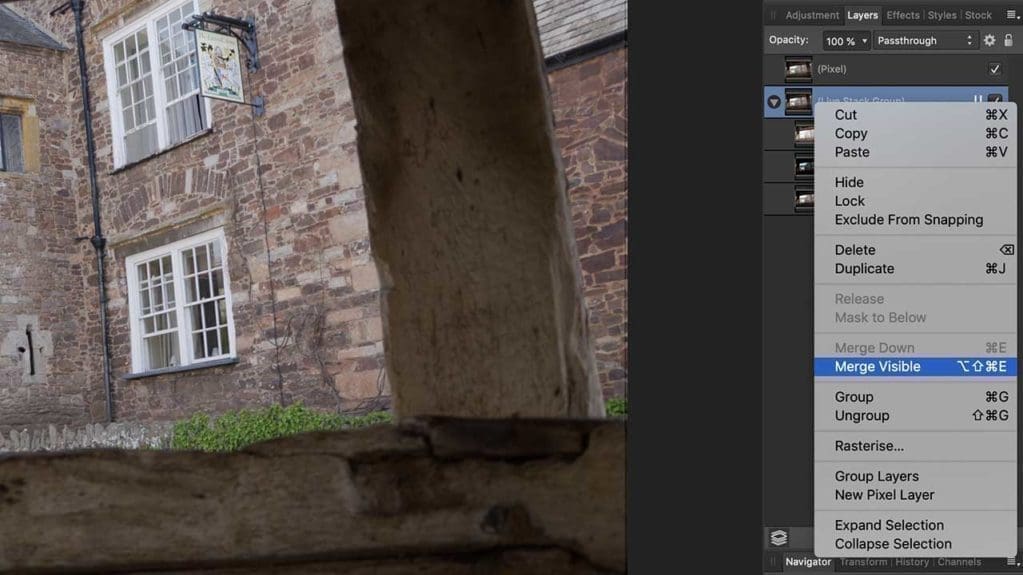
Now you can stop there if you like the look of your stacked exposures, but the results can sometimes look a little flat, so we’re going to finish off with some dodging and burning. To do this, we need a layer we can edit directly, so we right-click the Live Stack Group and choose Merge Layer…
Step 06
Dodging and burning to finish off
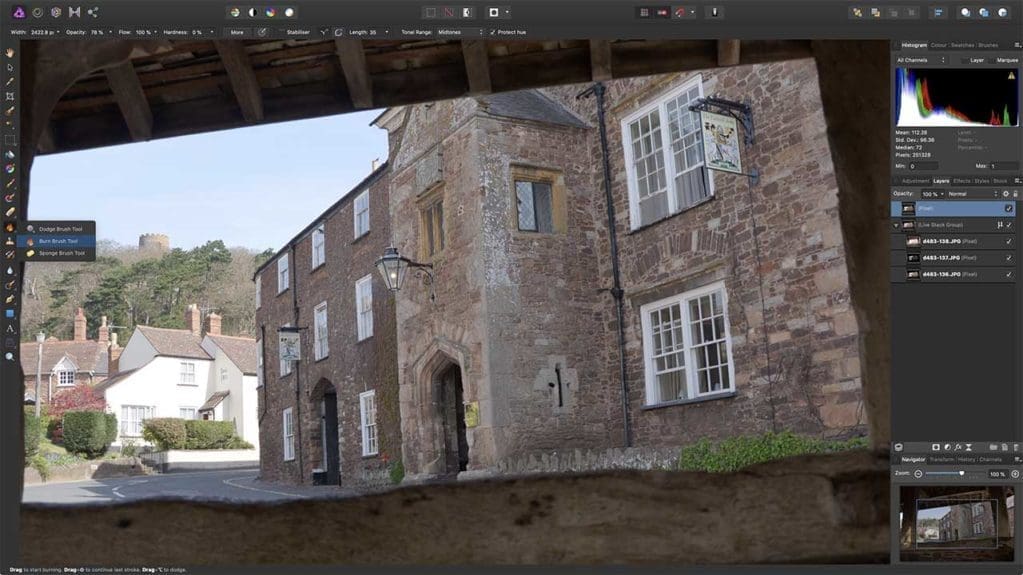
Now we can use Affinity Photo’s Dodge and Burn tools to deepen the blue sky in the background (Burn tool, with the Tonal Range set to Highlights) and lighten the stonework in the foreground (Dodge tool, seen in action here, set to act on the Highlights).
Step 07
The finished image

Now we’ve been able to get a deep blue sky in the background and detail in the stonework in the foreground, all from a set of three bracketed JPEG images straight from the camera. It needed a little dodging and burning to bring it to life, but the merged image had all the tonal range needed.
Step 08
When you’ve got people in the way!

OLYMPUS DIGITAL CAMERA
Here’s another everyday problem. We need a shot of this open square, but it’s a busy time of day and there are people passing in front of the camera all the time. We took a dozen shots, and everyone had somebody in it. But that doesn’t matter, because we can sort it out with a Layer Stack!
Step 09
Stack your images
This time, we don’t need to change the exposure between shots, we just need to take as many as we can so that any passers-by are always in different positions. The more you take, the longer it will take to load and process the stack, but it can help with extra-busy scenes.
Step 10
Use the Median method
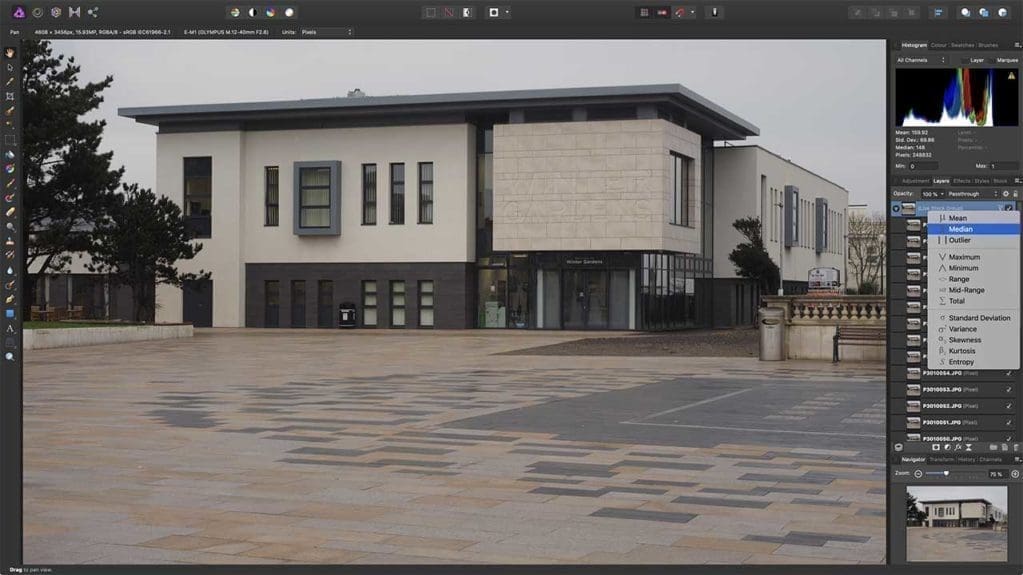
And here’s the merged image. As if by magic, every single pedestrian has disappeared, even though there wasn’t a single shot in the stack that didn’t have somebody in it. The Median method is the one to use for object-removal, and if you were expecting it to be more complicated, you’ll be disappointed – it really is this easy!
Step 11
The ‘cleaned up’ image
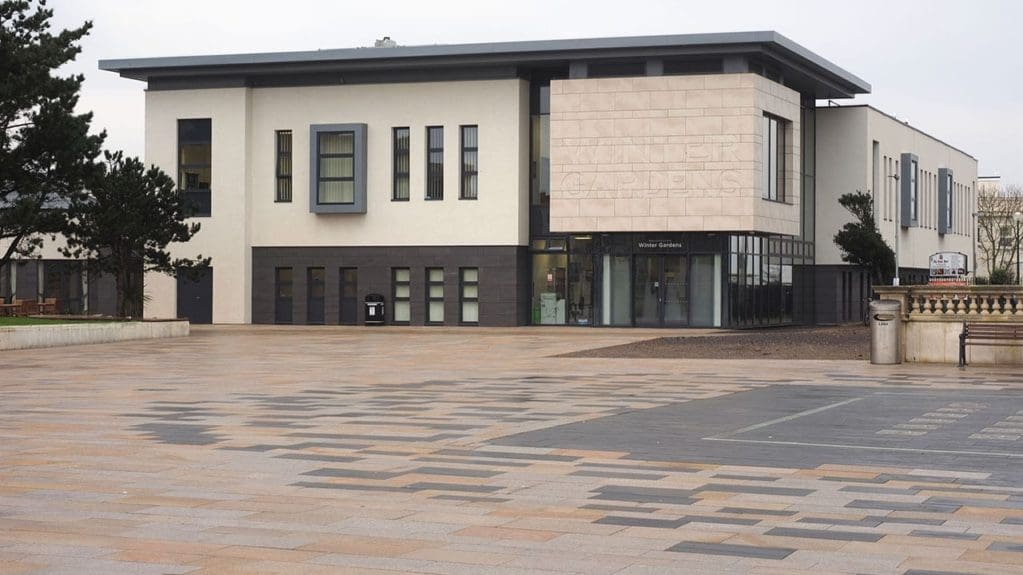
This technique can be used in all sorts of situations, whether you’ve got traffic in a street scene or tourists spoiling your view of a landmark. And if you have a ‘rogue’ shot with camera shake or bad framing, that’s easy to fix too – you can open the Layer Stack and disable any ‘bad’ image to stop it influencing the rest.
Step 12
When you have to use a high ISO
OLYMPUS DIGITAL CAMERA
If you don’t have a tripod, you will need to increase the camera’s ISO setting to get shake-free shots in dim lighting. This means more noise and reduced definition. This picture was taken at ISO 12,800 and at this level the camera’s image quality is borderline unacceptable.
Step 13
Smoother and sharper

So the answer is, again, to take a series of shots at the same camera settings and then combine them in a Layer Stack in Affinity Photo. This increases the signal to noise ratio (reducing the noise), but you only need a few as diminishing returns set in after a while. We won’t repeat all the steps shown previously, but here you can see how smooth the image now is when zoomed right in. We can even create a new layer with Merge Visible and apply some sharpening!
Step 14

By merging several high-ISO images, we’ve achieved an amazingly smooth and detailed result from a camera that was right at its maximum ISO limit. The key here is to make sure the camera moves as little as possible between exposures, and if you can do that you can extract a level of image quality at high ISOs that you wouldn’t have believed possible.
So those are three key uses for Affinity Photo’s Layer Stack feature. It’s extremely straightforward to use and can achieve amazing results. Its ability to merge different exposures to capture natural-looking high dynamic range images is useful enough, but its potential for object removal and high-ISO quality is just amazing.
Where to get Affinity Photo
Mac owners can get Affinity Photo from the Apple App Store, while Windows users can buy it directly from the Affinity Store .