


Snap Verdict
The Rode RodeLink Filmmaker kit allows you to record high-quality audio to your camera without a wired mic, giving you greater freedom and reducing the risk of an expensive tangle and trip. It’s quite a bit bigger than the Rode Wireless Go, but it’s a bit more flexible and has greater range. It also comes supplied with a lavalier mic, is very easy to use and delivers high-quality sound. It’s a shame you can’t add extra receivers and mics to record more than one voice though
However, Rode now offers a solution for anyone wanting to record two sides of a conversation, the Rode Wireless Go II. This new wireless microphone system has all the great features of the original Wireless Go but with a much great range (up to 200m by line of sight) and dual-channel recording.
Rode RodeLink Filmmaker Kit Specifications
- Transmission type 2.4GHz Fixed Frequency Agile System
- System dynamic range 112dB
- Distance range Up To 100m
- Frequency range 35Hz – 22kHz
- Distance range Up To 100m
- Maximum output level 1v Rms (2.8v P-p)
- Max input signal level 1v Rms (2.8v P-p)
- Max latency 4ms
- Power 4x AA batteries or MicroUSB
- Dimensions Receiver: 111 x 65 x52mm, Transmitter: 111 x 65 x 40mm
- Distance range Receiver: 190g, Transmitter: 190g
Features
Like the Rode Wireless GO and Wireless Go II, the RodeLink Filmmaker Kit is a wireless microphone system designed for recording audio via a camera.
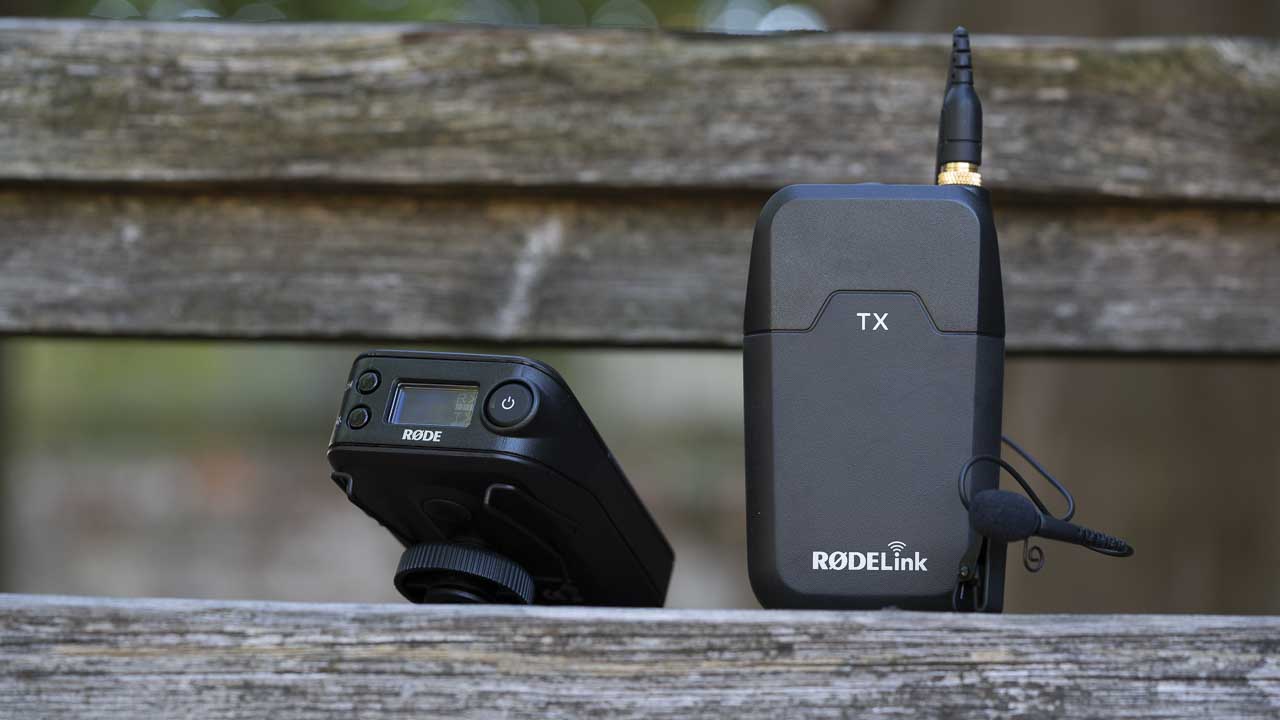
Unlike the Wireless Go, however, the Filmmaker Kit doesn’t have a microphone built-in. This means that it’s made up of three main parts, the receiver, the transmitter and a lavalier microphone.
The receiver connects to your camera using the supplied 3.5mm cable while the transmitter has a clip that allows it to be carried on a belt or pocket. And the microphone connects to the transmitter, then clips on your shirt or lapel.
The transmitter and receiver can communicate across 8 user-selectable channels, each with a thousand frequencies. That means you can have up to 8 kits working in the same location and they won’t interfere with each other. However, the Filmmaker monitors the signal, looking for the strongest frequency available and it switches automatically to maintain the best signal.
As Rode uses Series II 2.4GHz digital transmission with 128-bit encryption, the Filmmaker Kit can be used anywhere in the world without a license. It also has a range of up to 100m, that’s 30m more than the Wireless Go.
Read our Rode Wireless Go review
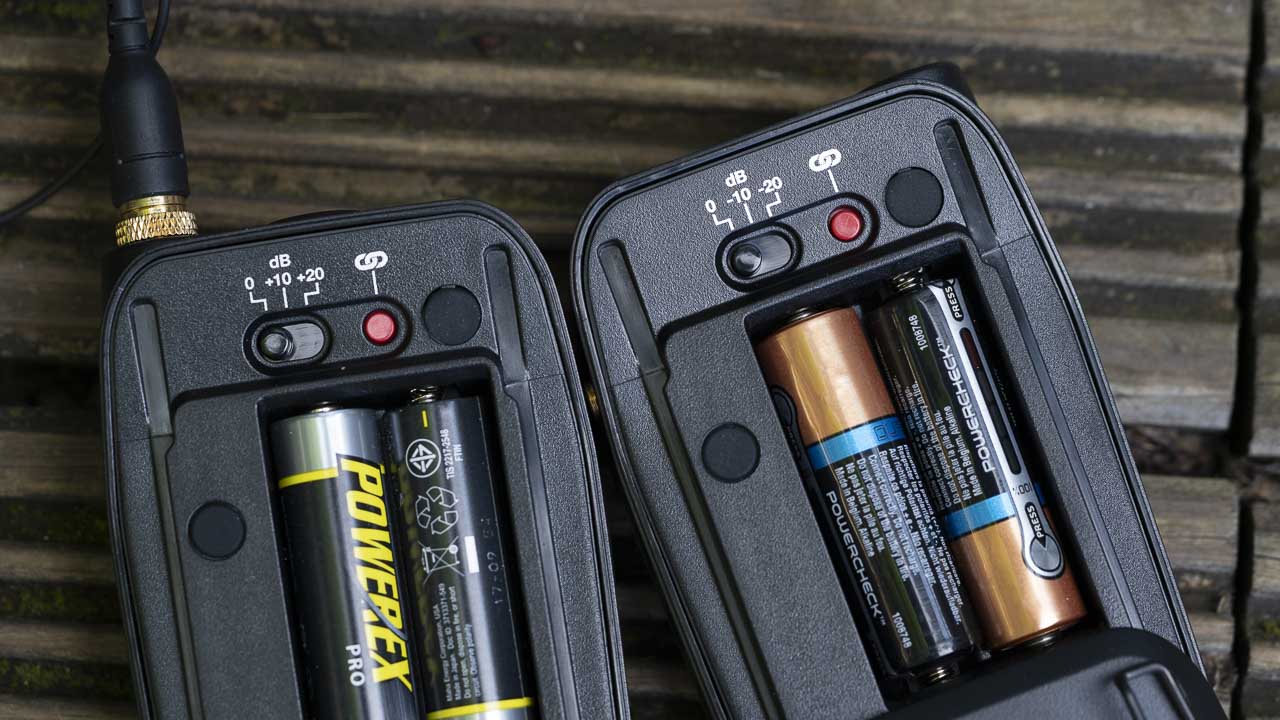
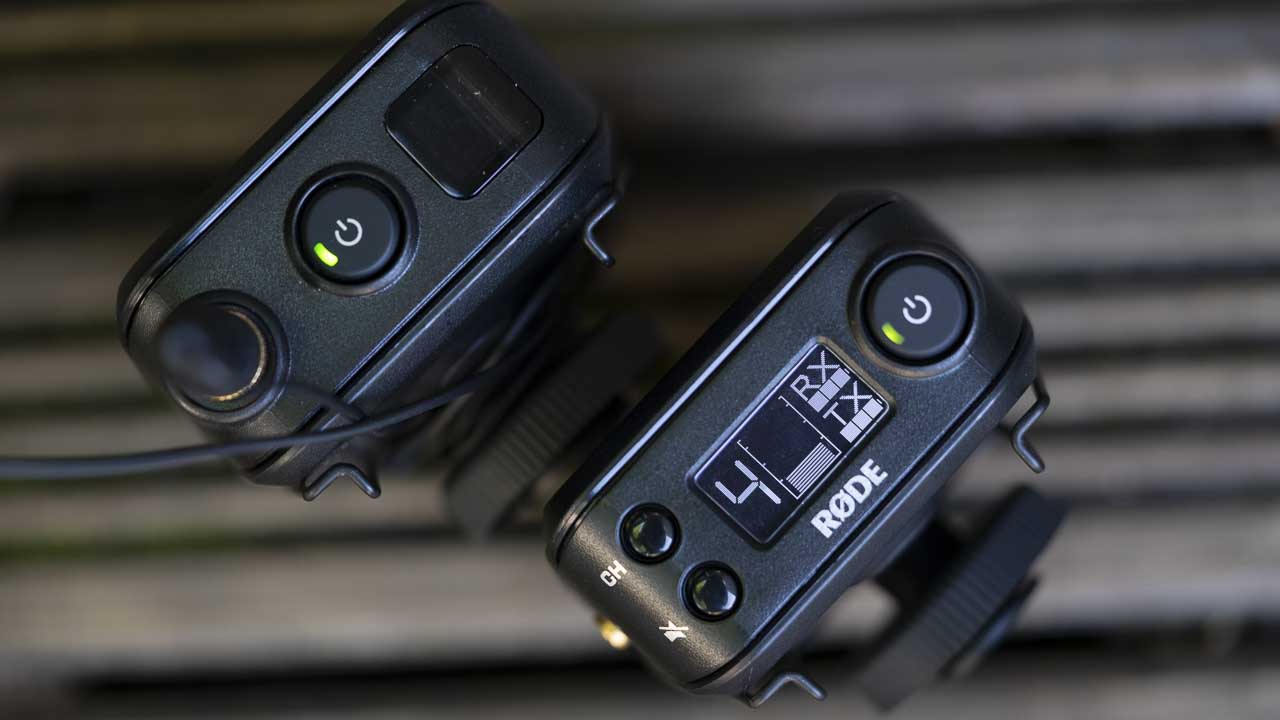
The transmitter and receiver each take two AA batteries for power, and you can expect to get more than a day’s use from a set. However, they can also be powered by a USB-connected supply or powerbank, which is handy. Helpfully, the battery power of both units is displayed on the receiver’s screen.
Build and Handling
While the Rode Wireless Go units are each about the size of a (square) box of matches, the Filmmaker kit transmitter and receiver are both around the size of a packet of cigarettes – although be honest it’s a long time since a handled one of those!
They feel nicely built, but not the sort of thing that you’d want to drop onto a concrete floor or step on.
It’s good to see that the transmitter’s 3.5mm mic port has a thread so the mic can be locked and not accidentally disconnected.
Another advantage of the Filmmaker kit over some other manufacturer’s wireless mic systems is that the antennae are built-in. That makes them a bit neater and easier to pack in a camera bag.
Conveniently, you can mute the mic by pressing the transmitter’s power button for half a second, or pressing the receiver’s dedicated mute button. But if there’s a risk of the transmitter being accidentally muted, you can lock the mute option via the receiver.
Setting the Channel and Gain
It’s easy to set the transmission channel if you need to. Simply slide the receiver open to reveal the controls and batteries and then press the small red button. This causes the channel number flash on the display screen. Then press the channel (CH) button on the outside of the unit to toggle through the channels from 1 to 8.
After setting the channel number you want to use on the transmitter, slide open the receiver and press its red button. The two units pair automatically – often almost instantly.
The transmitter and receiver both have three gain settings which are set using the switches on their insides – next to the red connection button. I found the transmitter’s 0dB setting worked well for me, but use the audio signal indicator on the receiver as a guide and switch to +10dB or +20dB if necessary. Look for a good range of signal without any peaking.
The settings on the receiver are designed to enable you to turn down the camera’s pre-amp (if that’s available) which should result in less noise being recorded. It takes a little experimentation to find the best settings for your camera.
Camera Connection
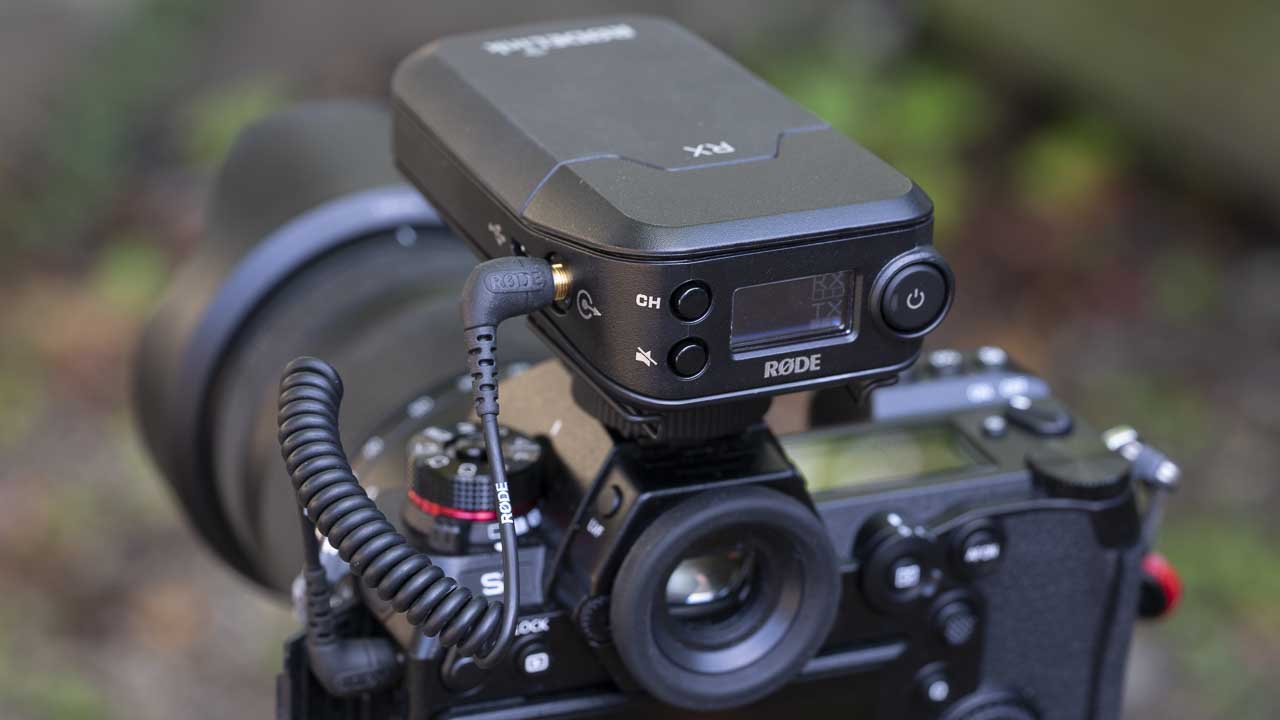
The receiver has a cold shoe attachment that allows it to be slotted into a camera’s hot shoe. If necessary, however, this can be removed to allow the clip to be used. Naturally, mounting the receiver in the hot shoe puts it conveniently close to the camera’s mic port. All you need to do is connect the receiver to the port using the supplied curly cable.
A second cold shoe mount is supplied should you need one for the transmitter, but it’s often more convenient to use the clip to attach it to the talent’s belt or pocket.
As I mentioned earlier, the lavalier (or any other mic) connects to the transmitter’s mic port. The mic clip lets you attach it to a lapel or shirt with the cable tucked inside and out of sight.
Performance
Rode RodeLink Filmmaker kit enables great-quality audio recording. The signal is also maintained well over the 100m range, which is much further than I usually want to get from my camera. Objects coming between the transmitter and receiver can reduce the range, so it’s worth running a quick test if you want your talent to emerge from behind a wall or something solid.
With the lavalier mic clipped to my t-shirt, I found that the Filmmaker kit did a nice job of capturing the sound of my footsteps on a gravel drive, while still keeping my voice clearly audible. It makes for a natural sound.
Read our Rode Wireless Go Review
Verdict
The word ‘wireless’ can often instil a sense of fear or foreboding. Will it be easy to set-up? Will you be tapping in passwords or scratching your head trying to make the two parts communicate with each other?
As with the Rode Wireless Go and Rode Wireless Go II, the Rode RodeLink Filmmaker Kit is very easy to set-up and use. The transmitter and receiver connect automatically and they stay connected. Even if you should wander out of the 100m range, or a large solid object gets in the way, they reconnect quickly once they are back within range.
There are also neat features such as the easy muting and mute lock, the clear display on the receiver and the excellent battery life with USB-power back-up. These aspects, plus the greater range, give the Filmmaker kit some advantages over the Rode Wireless Go, but it’s also bigger and more expensive. I think the Wireless Go is perfect for many vloggers and photographers getting into video, even those who are pretty serious about video – especially when paired with a lavalier mic. But if you think you may need the extra range and other features, the RodeLink Filmmaker is an excellent piece of kit
The only thing that’s a little disappointing about the Rode Filmmaker Kit is that it’s not possible to add additional transmitters to enable more than one mic to record to a single camera. That would be great for conversation and interview situations. For that, you need the Rode Wireless Go II because it’s a dual-channel system and comes supplied with two transmitters.
It will be interesting to see what Rode’s plans are for the Filmmaker range. If there’s a Rode Filmmaker II, I think it will be capable of working with two transmitters, offer on-board recording, have a safety channel and have a working range of at least 200m.