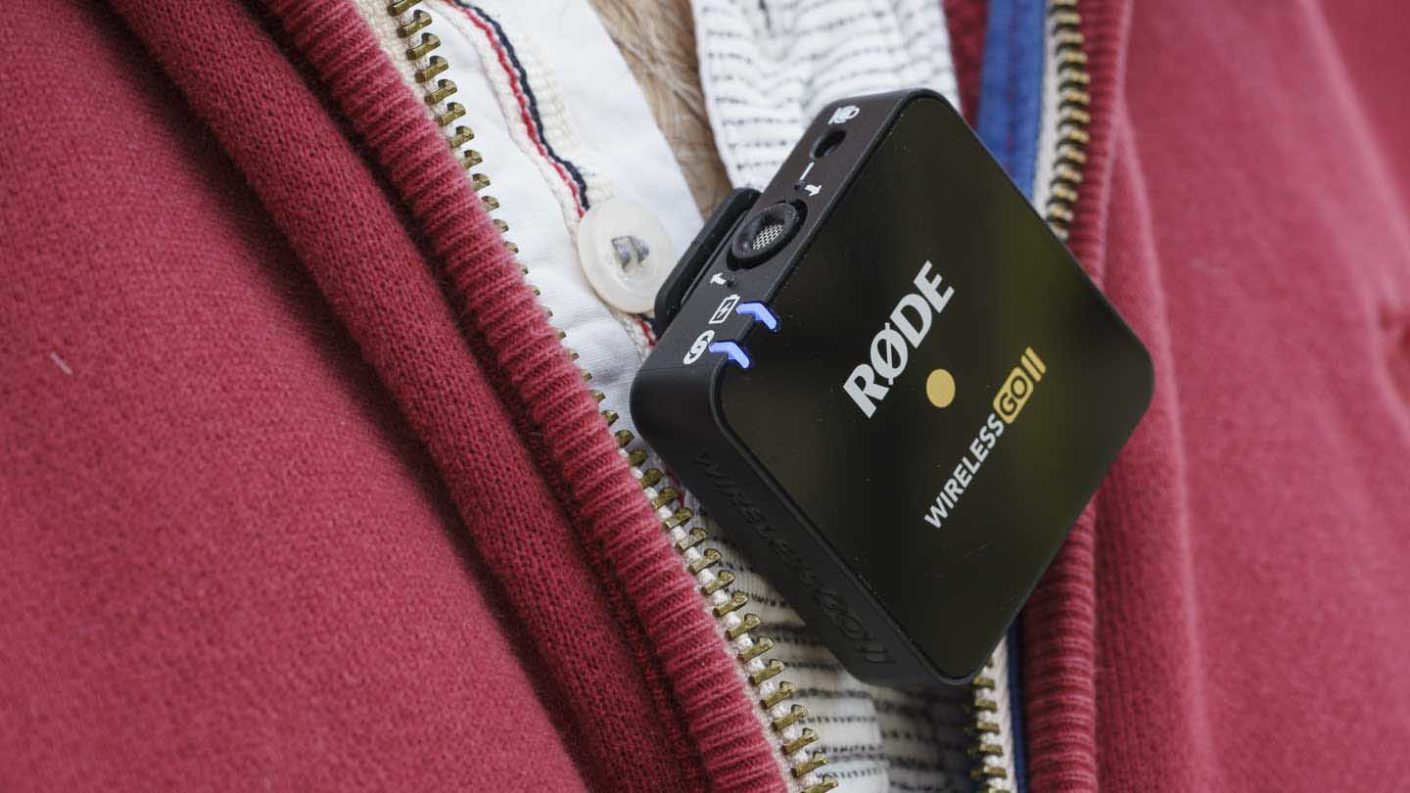
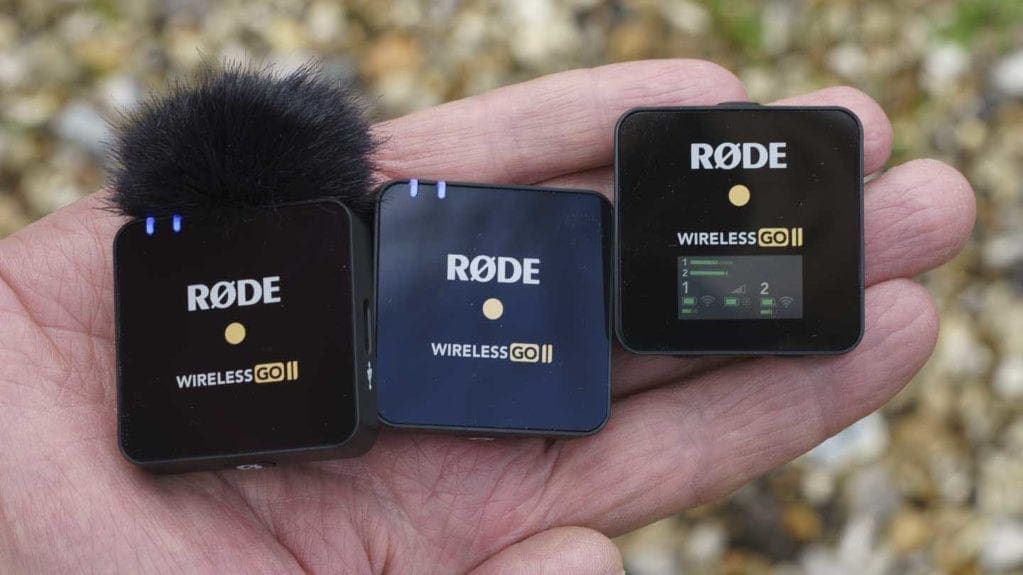
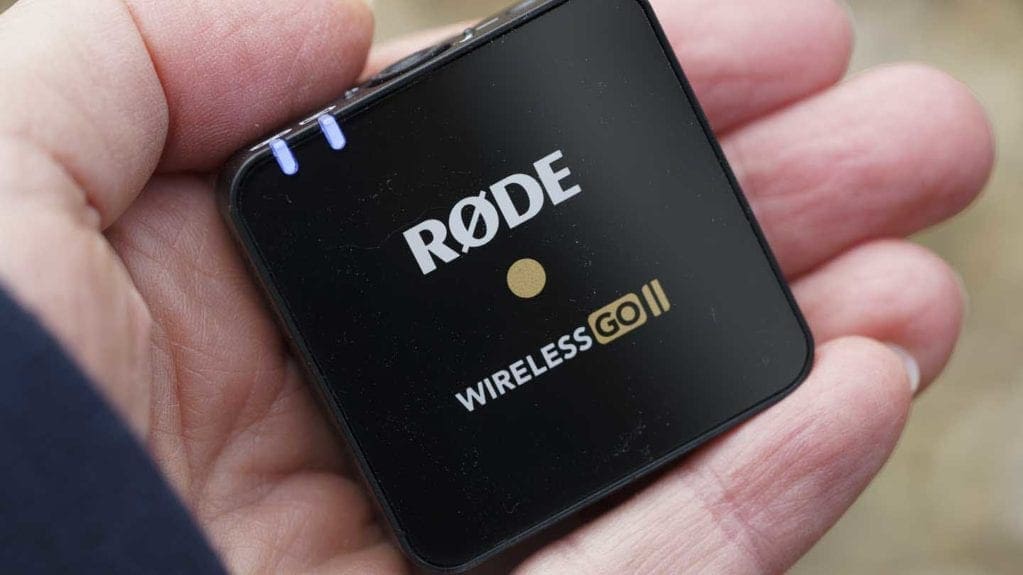
One of the key attractions of the Rode Wireless Go II is that the units are small. The transmitters measure 44×45.3×18.3mm while the receiver is 44×45.5×18.3mm, making the units a bit smaller than a small box of matches. The Wireless Go II units look almost identical to the Wireless Go units.
The receiver has a clip that can slip into a camera hotshoe or be attached to another recording device or a camera strap. Similarly, the transmitters have clips that enable them to be attached to clothing. They’re also compatible with Rode’s Magclip Go which enables them to be attached to clothing by magnetism. That’s handy if you’re wearing a t-shirt or jumper rather than a shirt, jacket or tie.
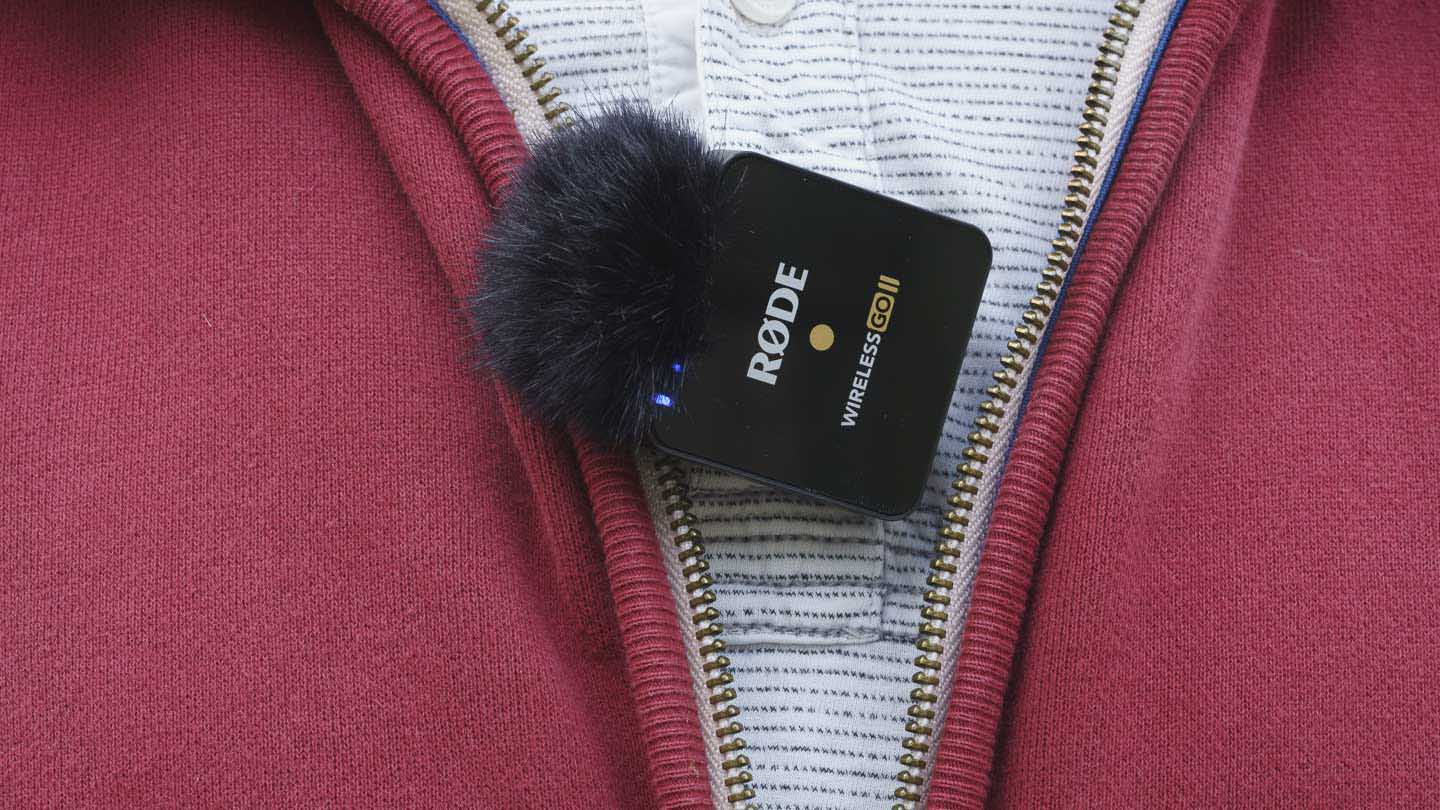
Rode supplies three furry windshields with the Wireless Go II. These attach to the transmitter with a new ‘twist-to-lock’ connection, similar to a lens bayonet mount, which makes them less prone to being knocked-off than the original Wireless Go’s windshields. It’s a really secure fix.
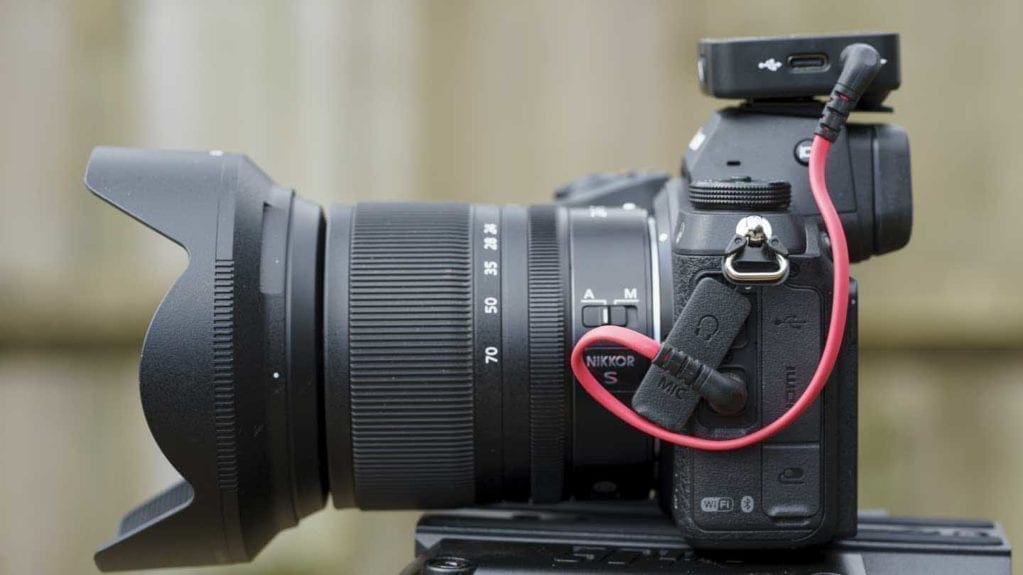
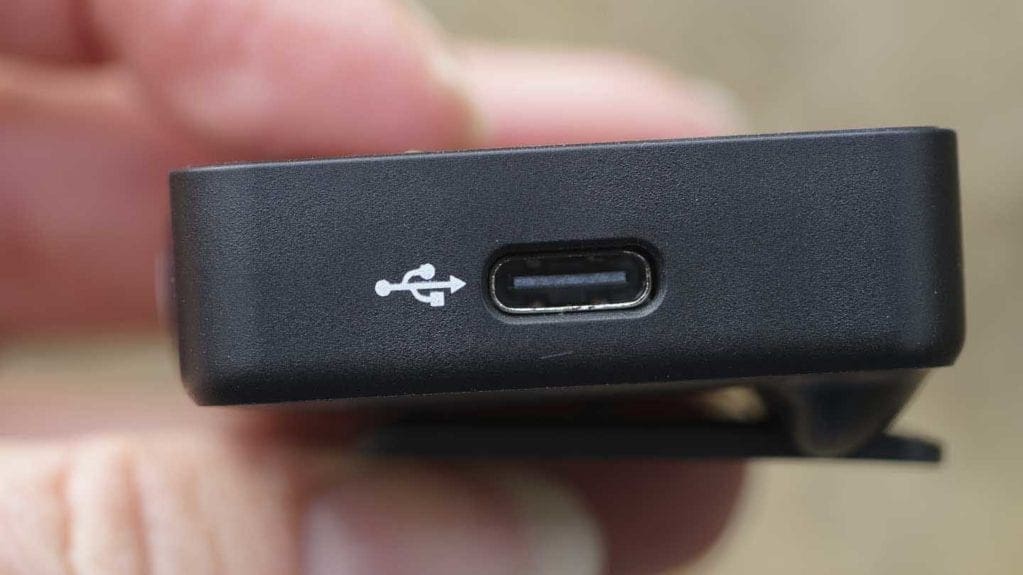
There’s also the SC5 cable for connecting the receiver to a camera or recorder with a 3.5mm input, and three USB cables for charging or recording to a computer or other USB device.
The SC5 is a flat cable rather than a curly one and it’s easy to bend it around your camera so it doesn’t get in the way.
-
-
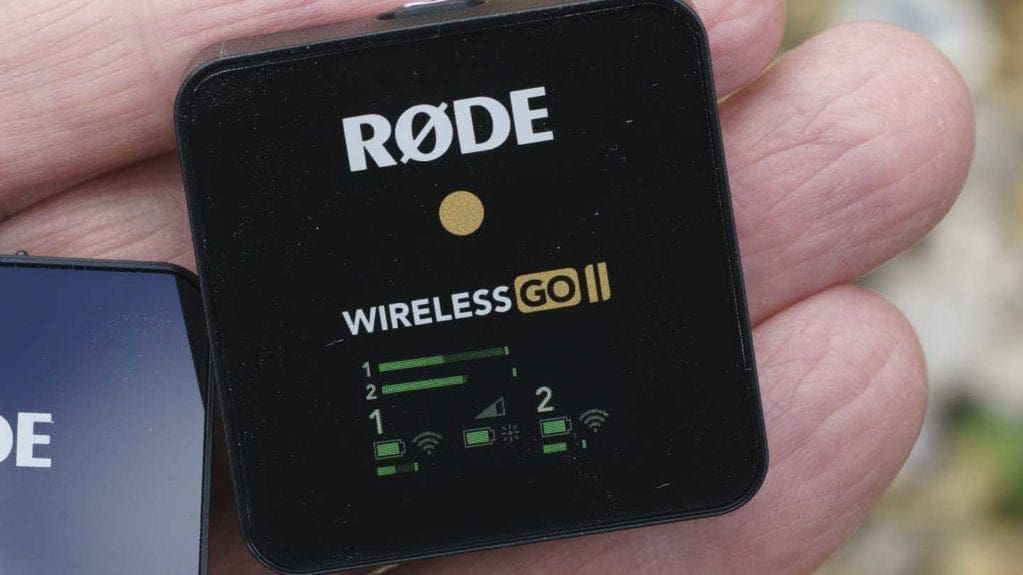
Receiver screen
-
-
Receiver power button
-
-
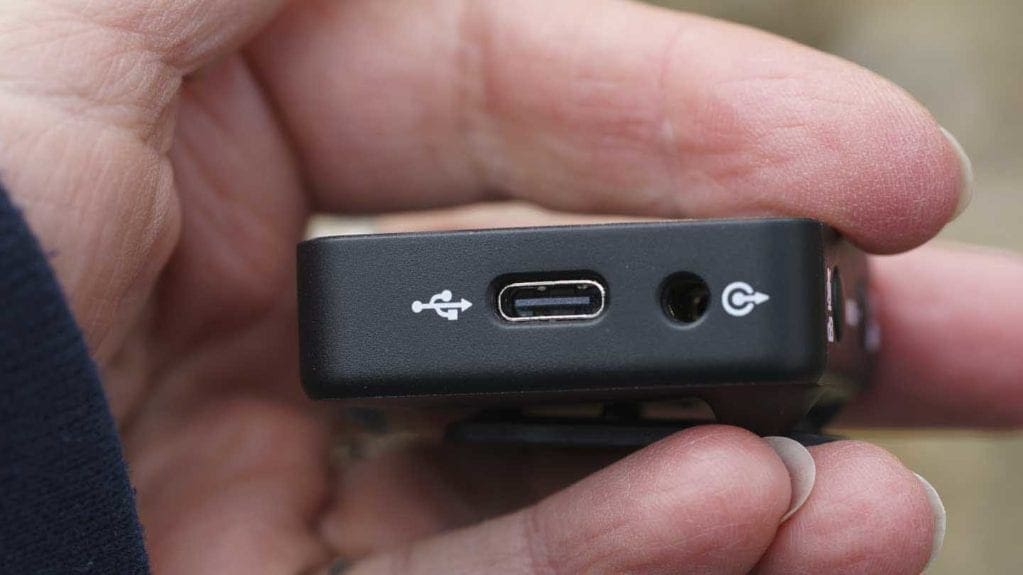
Receiver connection ports
-
-
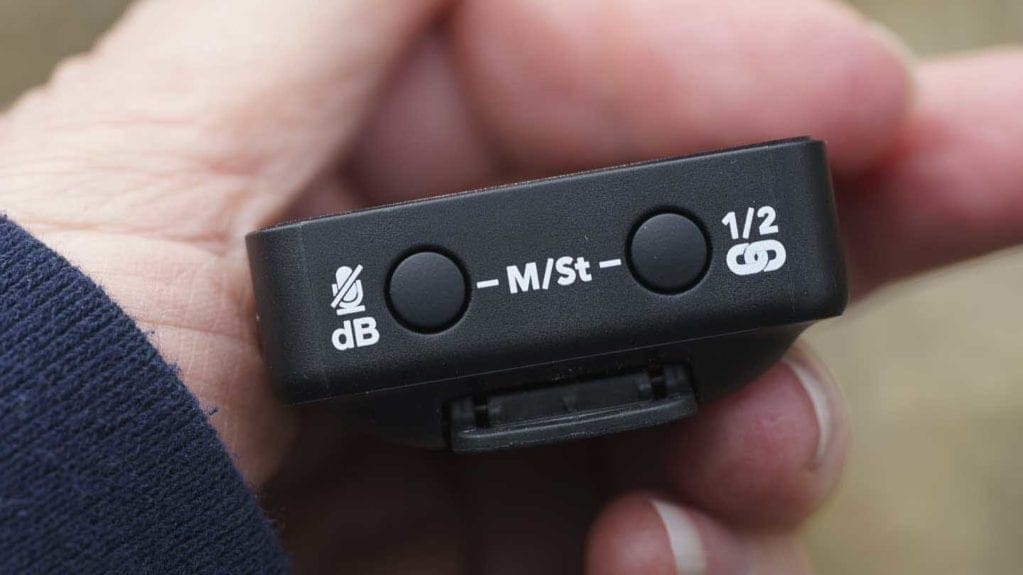
Receiver control buttons
-
-
Transmitter top
-
-
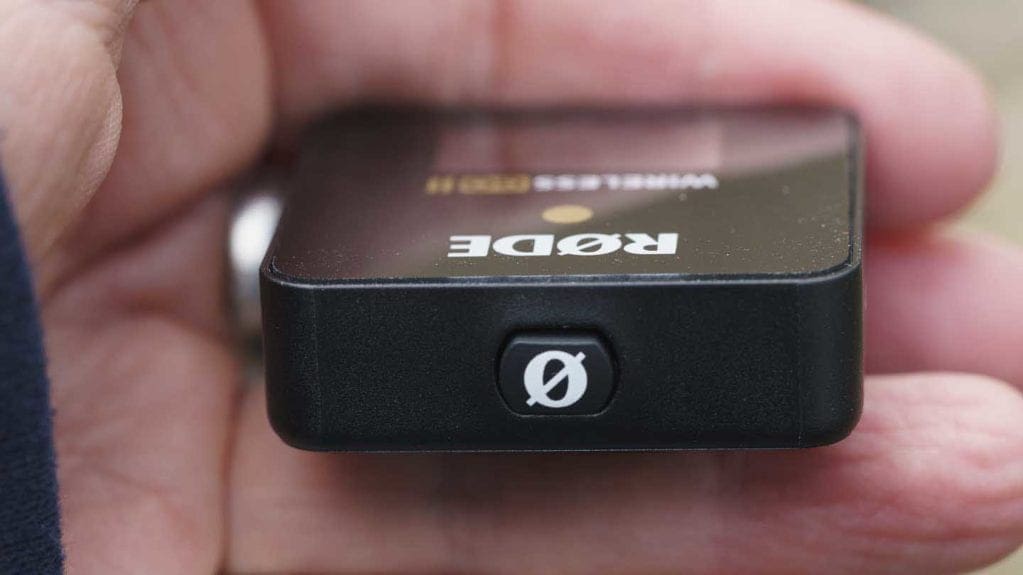
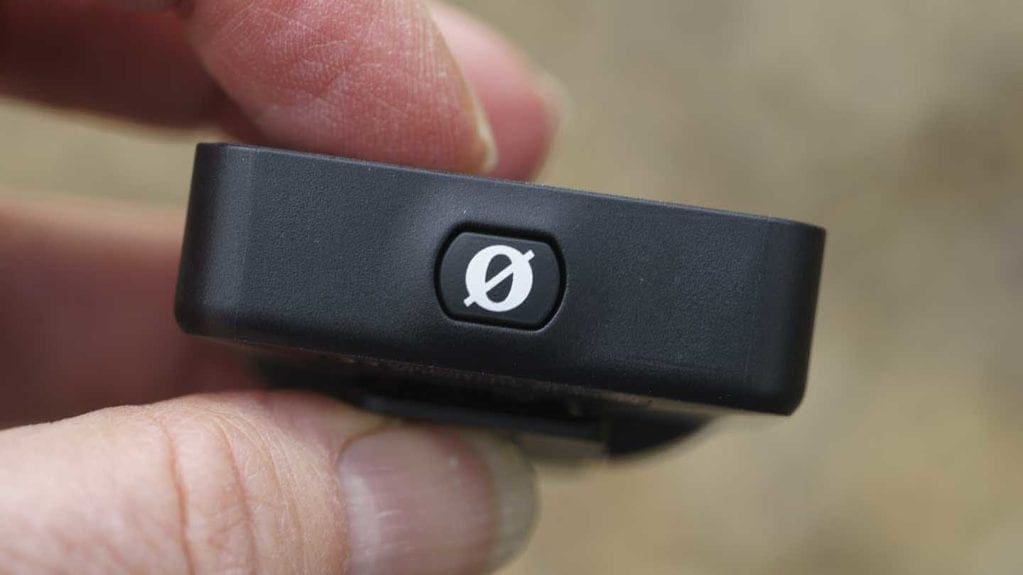
Transmitter power button
-
-
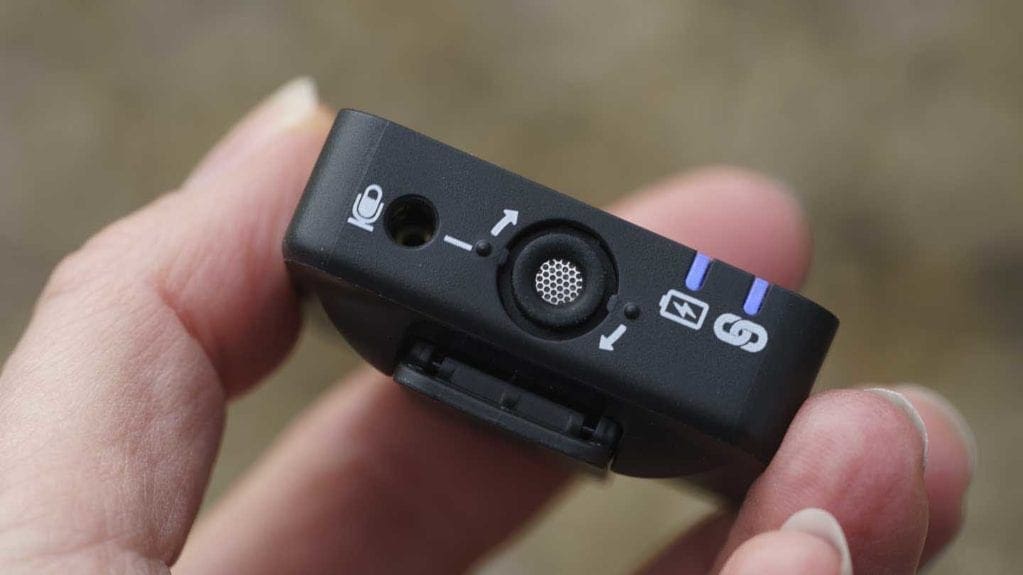
Transmitter USB port
-
-
Transmitter mic and mic port
In a nice touch, Rode supplies a slim neoprene case that has room to store the complete kit and keep everything protected.

The transmitters and receiver are paired right from the get-go, but they can be disconnected and reconnected if necessary. However, unlike with the Rode Filmmaker Kit, there’s no option to set the connection channel, it all just happens automatically.
Controls
With just two control buttons and a power button on the receiver, the Rode Wireless Go II is pretty straightforward to use and it only takes a little while to become familiar with which features are accessed by pressing both buttons, which needs a single button press and which needs a long press.
Conveniently, it’s possible to mute either or both of the transmitters via the receiver. Simply press the pair (chain link) button on the receiver to select the transmitter that you want to mute, then press the mute button. The muting is clearly displayed on the receiver screen.
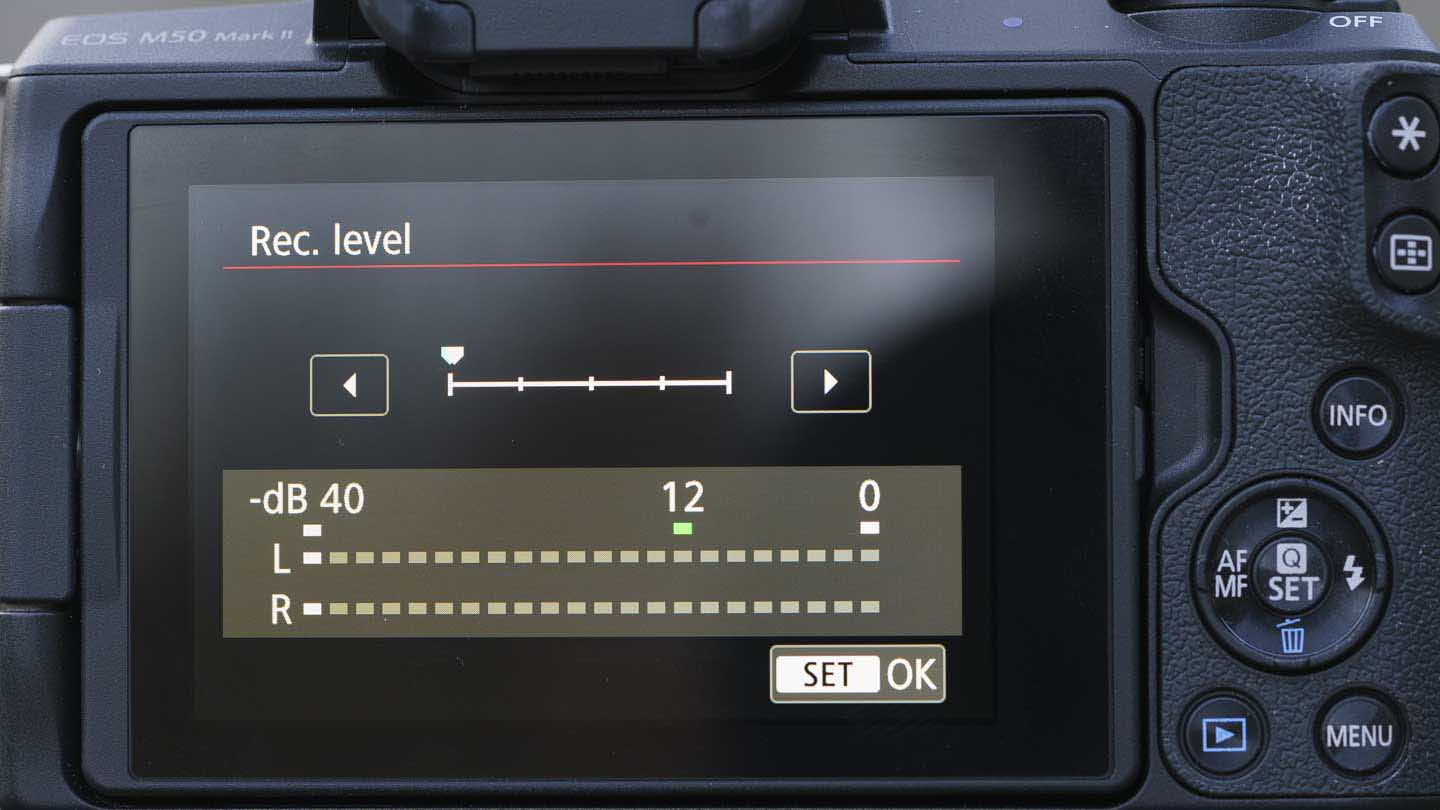
There’s also a 3-stage gain control button or pad on the receiver. This adjusts the output level in 12dB steps and pressing it toggles between high (0dB), medium (-12dB), and low (-24dB) gain settings. Alternatively, fine gain control mode can be enabled using Rode Central.
When the fine gain control is selected pressing the gain button on the receiver toggles through the options in -3dB steps from -30dB to 0. That means if you miss the setting you want, you have to make quite a few more button presses.
The level icon in the middle of the receiver’s screen shows which gain setting is selected while the output meter on the receiver makes it clear whether your audio is in the right range.
If the system is set to record in ‘Merged’ (mono) mode, only one output level is shown, even if two transmitters are in use. If ‘Split’ (stereo) mode is selected, two levels are visible. If you’re only using one transmitter, it’s best to set the Wireless Go II to ‘Merged’ mode as this pushes the audio across both channels rather than just the left or the right.
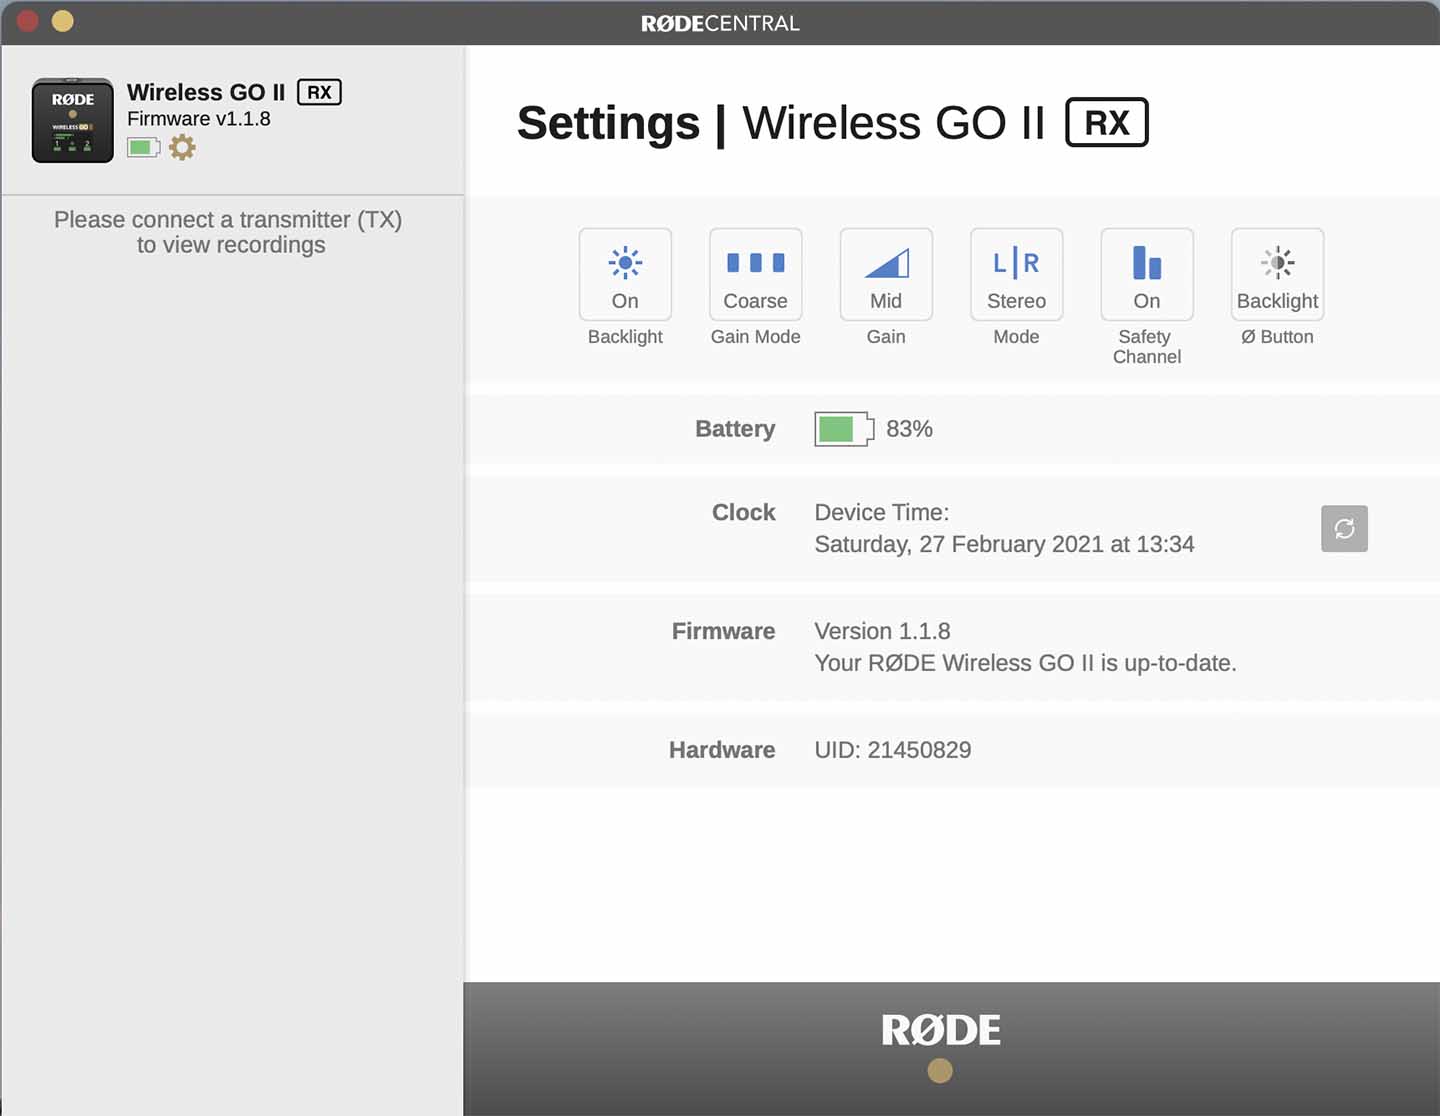
Rode Central
The transmitters or receiver must be connected to the computer via one of the three supplied USB-C cables to enable Rode Central to access them.
The Wireless Go II is the first of Rode’s microphones to use Rode Central, but other mics, including the VideoMic NTG and AI-1 will be integrated in the future.
As soon as a Wireless Go II transmitter or receiver is connected to my computer when Rode Central is running, I can see its battery status and the current settings. If there’s new firmware, you’re notified straight away and you can set it to install with a click.
Connecting a transmitter or receiver doesn’t trigger Rode central to open, you need to fire it up from the applications list.
Rode Central is easy to use, just connect the receiver to adjust the settings or select the mode (Merged or Split), and connect the transmitters in turn to access their recordings. Oddly, there’ no disconnection option, once you’ve made the settings changes that you want, you just disconnect the USB cable.
It would be handy if the settings could be adjusted via a smartphone app rather than requiring a computer. If you’re out on a job and you realise that the sound level is very varied, for example, you might want to activate the safety channel. This can only be done via Rode Central Computer app.
On-Board adjustments
Although you need to use Rode Central to activate the advanced features, you can adjust the settings using the receiver’s two control buttons. Here’s a breakdown of what adjustments or settings can be changed using the on-board controls:
Power and pairing: Press and hold the receiver button to power it up. Doing the same on either transmitter will power it up and it will pair automatically with the receiver.
Gain: Single-press the gain (dB) button on the receiver to toggle through the gain values. Use this same control whether the gain is set to coarse or fine.
Reconnecting: If a transmitter loses the connection with the transmitter, the blue LED above the link symbol will flash. To reconnect it, press and hold the pair (link) button on the receiver for three seconds then single-click the transmitter power button. The two units will automatically connect.
Disconnecting: if you want to disconnect a transmitter for some reason, select it on the receiver by pressing the pair (link) button, then press and hold the button again be three seconds.
Merged or Split Mode: press and hold both control buttons on the receiver for three seconds and watch for the output level meter to change. If you see one level, the Wireless Go II is in Merged mode, if you see two, it’s in Split mode.
Mute Control: Click on the pair (link) button until the transmitter that you want to mute is selected then single-press the gain control/mute button. Alternatively, press the transmitter power button once to mute or unmute it.
Power Save Mode: In Power Save Mode the receivers LED backlight turns off after 10 seconds of inactivity. To turn this mode on or off, single-press the receiver power button. A small sun icon shows next to the middle battery symbol if power save mode is active.
Rode Central Adjustments
The following settings can only be activated or deactivated via Rode Central:
Fine gain control: Use the Gain mode control to toggle between Fine and Coarse gain control.
On-board recording: this is activated or deactivated and the recording quality) compressed or uncompressed) is set individually on each transmitter via Rode Central.
Mute Lock: Prevent accidental muting of the transmitter from the transmitter
Safety Channel: The safety channel can only be activated if the receiver is set to ‘Merged’ mode. If ‘Split’ mode is set, the Safety Channel setting is greyed out.
Recording Quality: After the shoot, the audio files recorded on the transmitters can be played back and downloaded using Rode Central. With the desired file selected, click on ‘Export’ to access the file settings and set the file name, file the (WAV or MP3), bit rate and sample rate.