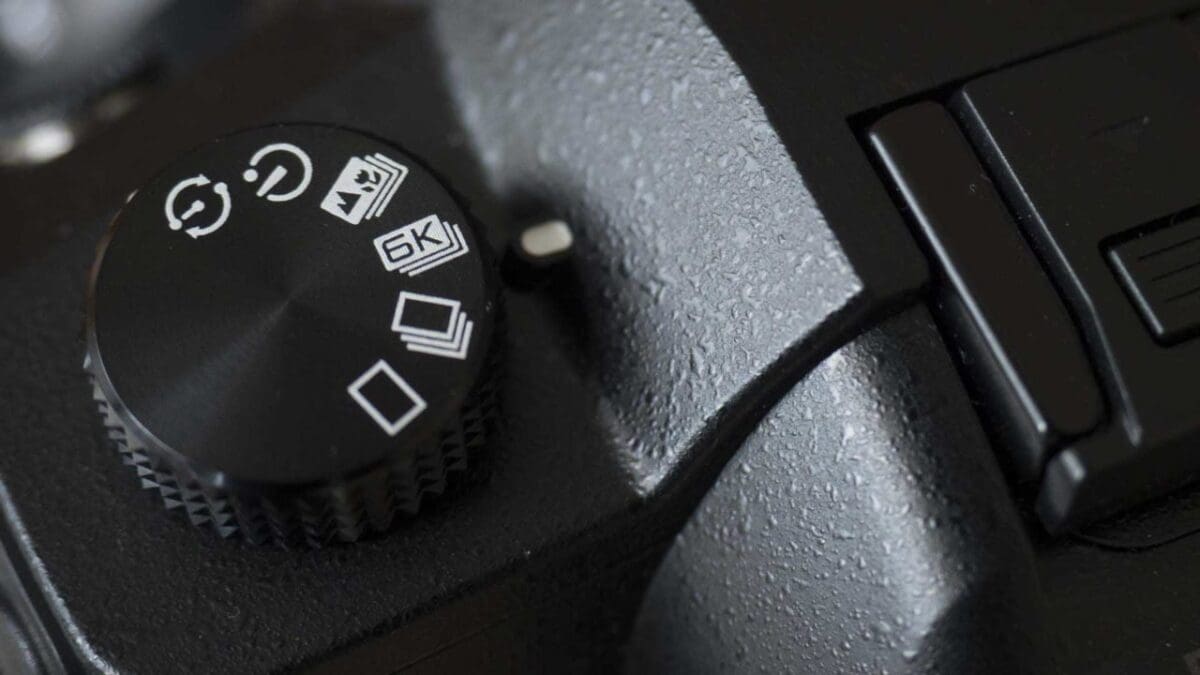


Recent Panasonic cameras have had 4K Photo Mode, but now the GH5 has a 6K Photo mode. It’s designed to help you to capture fleeting moments simply by letting you shoot at 30fps.
Further good news is that continuous autofocus mode is automatically activated in 6K Photo Mode provided that the camera isn’t set to manual focus mode. It’s also possible to shoot in any of the exposure modes including aperture priority, shutter priority and manual mode.
What is 6K Photo Mode?
6K Photo Mode is like Panasonic’s 4K Photo mode but at higher resolution. It draws on 6K video technology to enable you to shoot 18Mp images at 30fps (frames per second). When the option is selected via the GH5’s drive mode dial you can shoot a clip of 6K video and then extract 18Mp stills in-camera.
What are the 6K Photo Mode options?
There are three 6K Photo Modes, 6K Burst, 6K Burst (S/S) and 6K Pre-Burst. These modes determine at how and when the footage will be recorded.
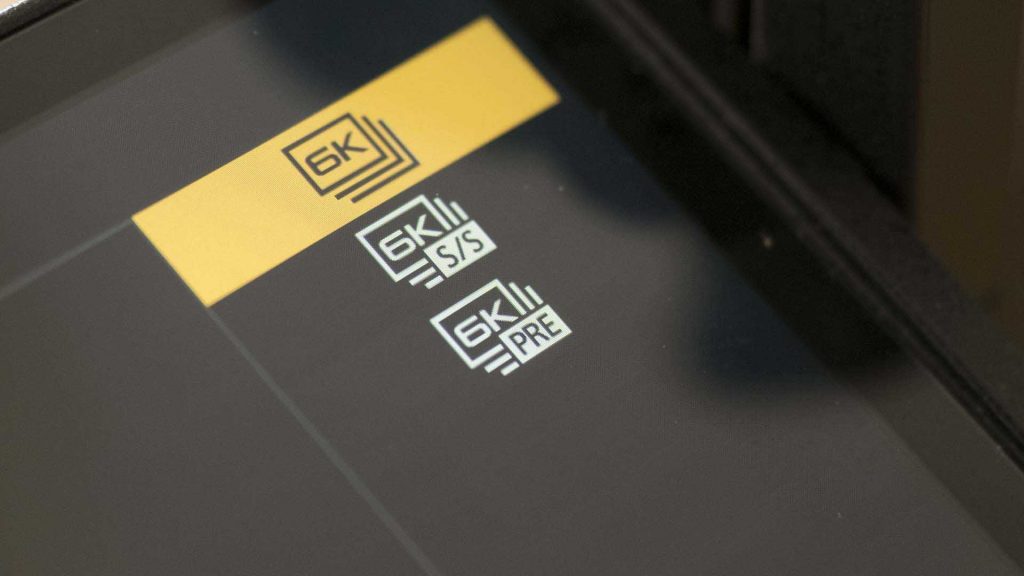
For example, in 6K Burst mode the camera shoots 6K footage for as long as you hold down the shutter release button.
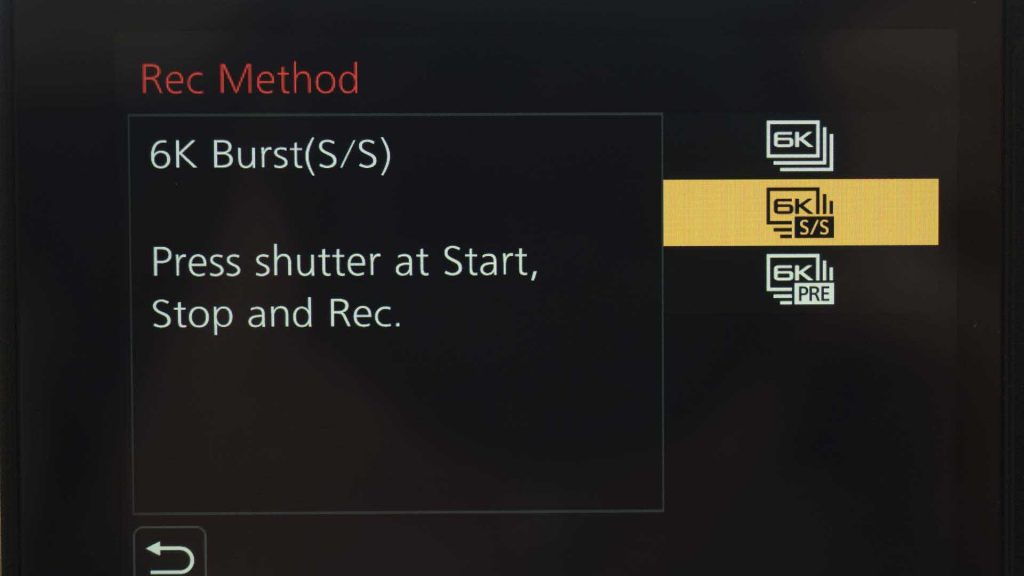
In 6K Burst (S/S), S/S stands for Start/Stop and recording is started and ended with a press of the shutter release. This is the mode I prefer to use if possible as you can start recording with a press and then leave the camera to it own devices while you deal with the subject. Once you’re happy that you’ve got what you want, you just press the shutter release again to stop recording.
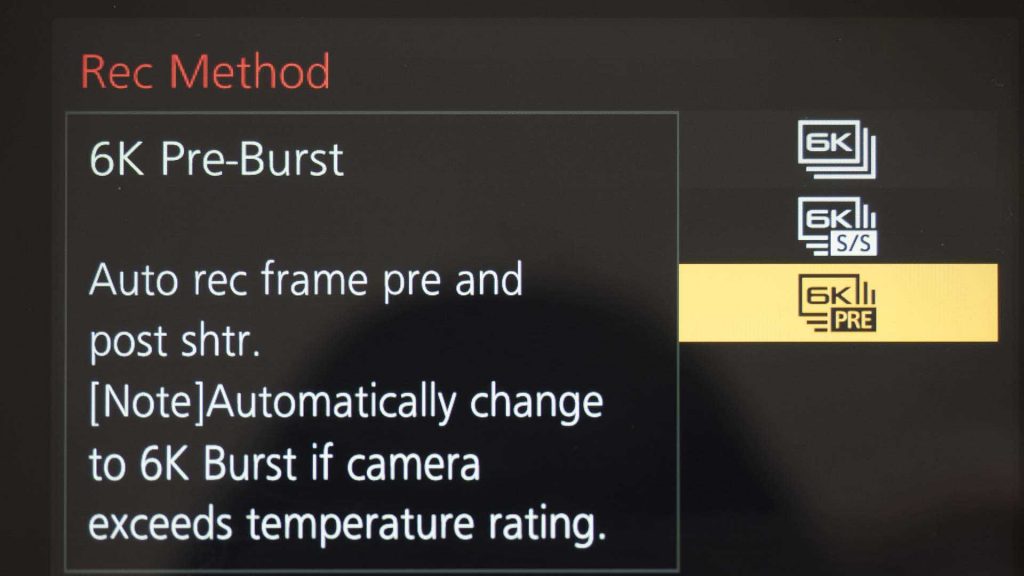
6K Pre-Burst mode is useful for short bursts of action because it only records for 2 seconds. However, the camera starts scanning the moment it’s active and it records the 30 images from the 1 second prior to you pressing the shutter button as well as the 30 from the 1 second after you pressed it.
How do you extract stills from 6K Photo Mode footage?
Extracting 18Mp stills from the GH5’s 6K Photo Mode footage is pretty easy as follows:
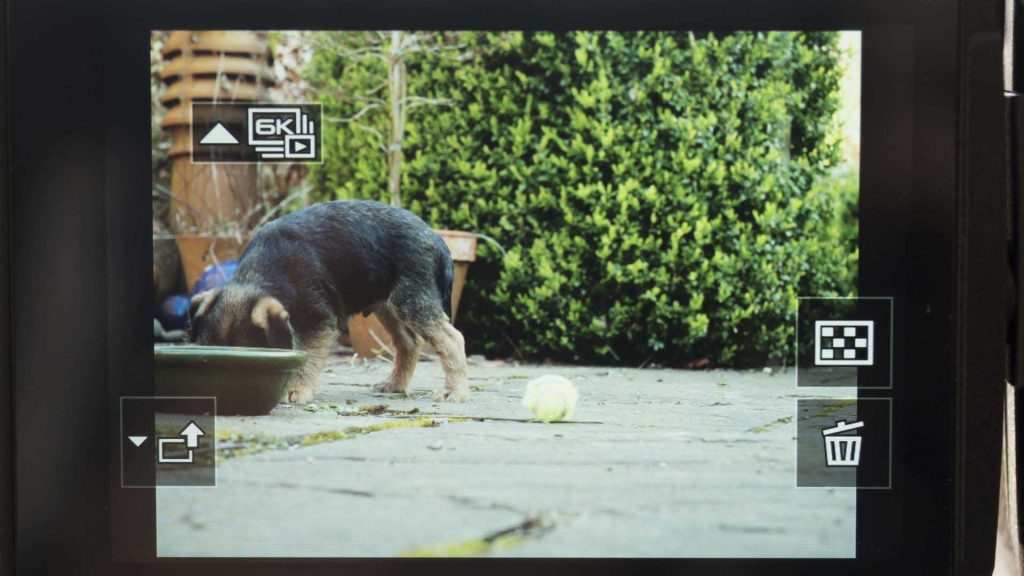
1. Press the play button to located the files. Clips recorded in 6K Photo Mode are marked with the 6K Photo icon to make the easy to identify.
2. Once you’ve found the clip you want, either tap the 6K Photo Icon on-screen or the Up navigation key.
3. If you have a long clip with fleeting moments of action you may like to use the slide bar at the top to quickly scroll to an interesting bit of footage. Alternatively, there’s a playback option (button Fn1) that you can use to play and pause the movie.
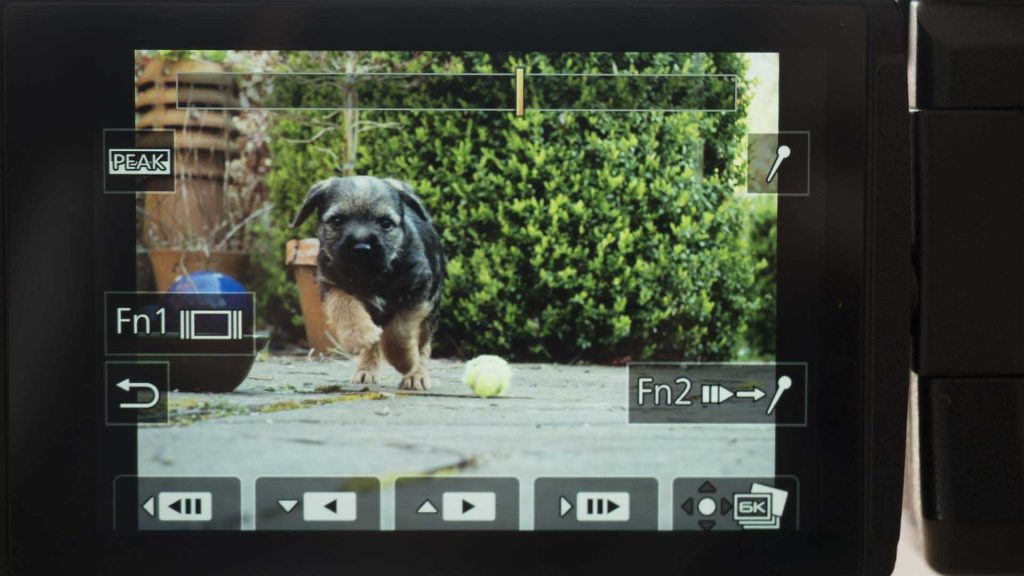
4. Once you’ve found the area you’re interested in, tap the Frame View Icon to see a scrollable stack of frames, just swipe right and left to locate the best shots.
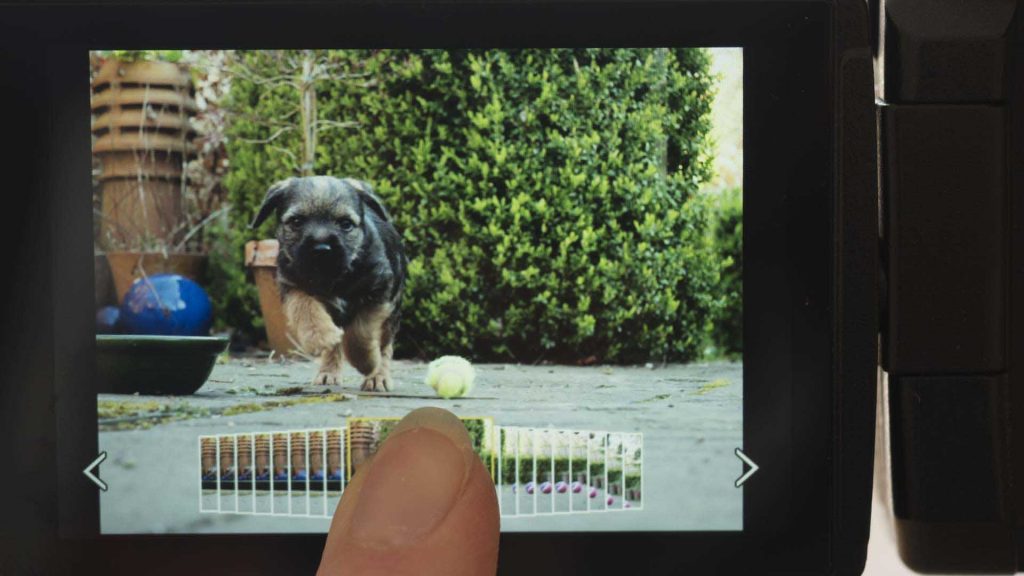
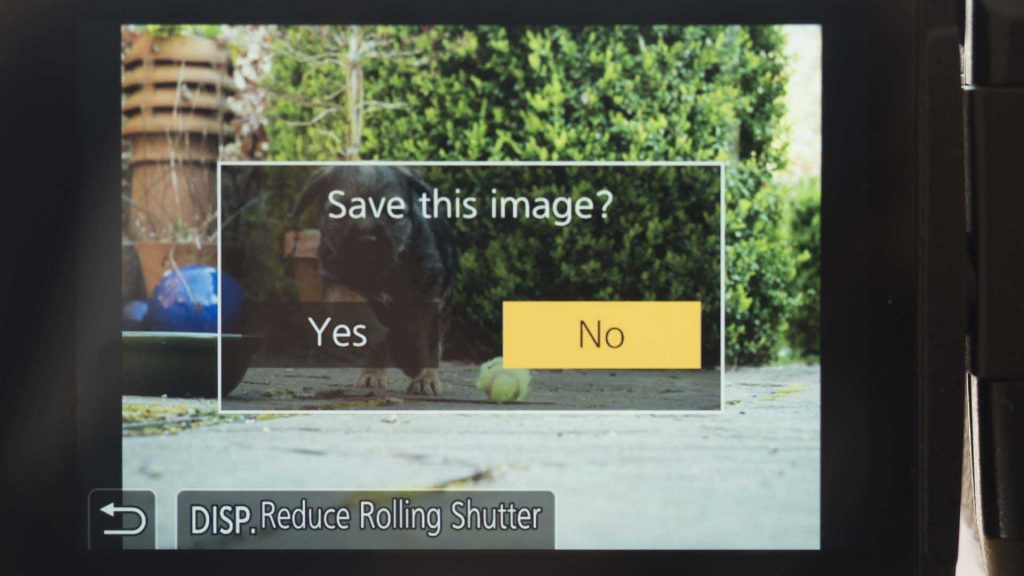
5. When you find an image you like, tap the Menu/Set button or 6K Icon to save the image. Images are saved as jpegs.
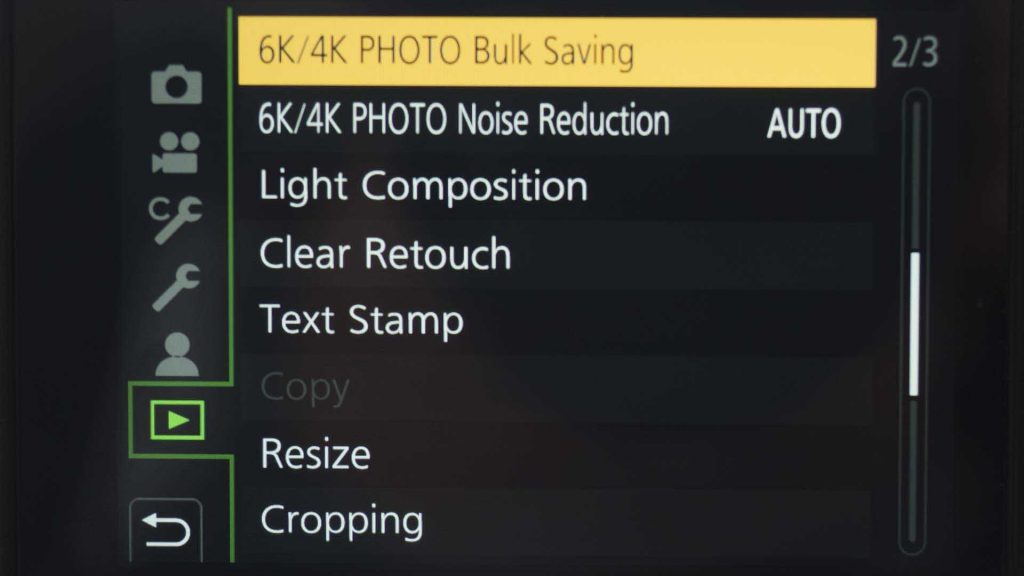
Bulk Saving 6K Photo Mode images
If you prefer, it’s possible to save all the frames from 5 second sections of your 6K movie. To do this:
1. Tap the Menu button and scroll down to Playback (the 6th tab), then scroll to the second page of options and select 6K/4K PHOTO Bulk Saving.
2. Then swipe on the screen until you find the clip that you want to extract stills from.
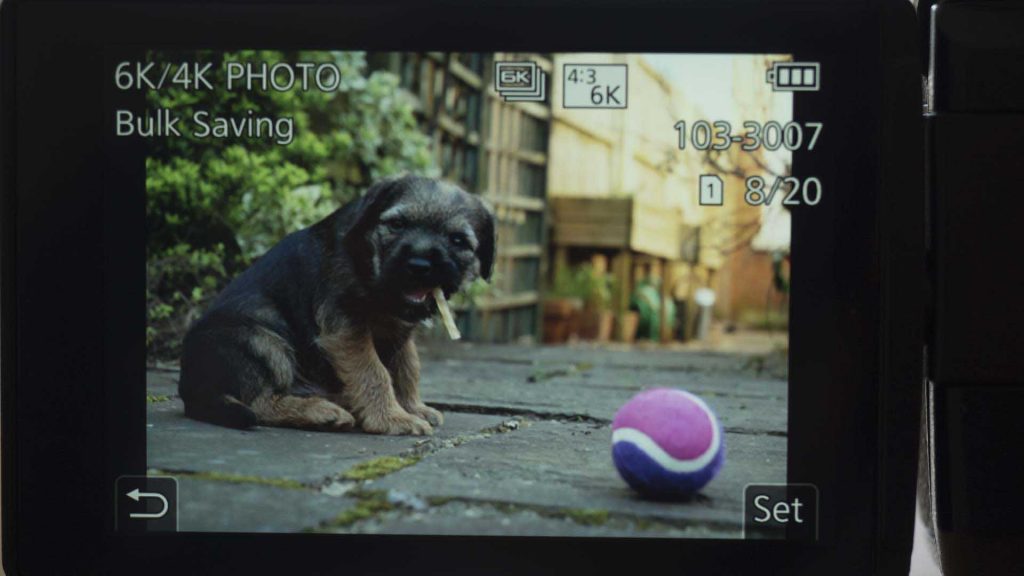
3. Now use the same on-screen movie navigation controls as you used before to find the first frame of the 5 seconds that you want to pull the stills from and tap the 6K Photo icon to save it and the image from the next 5 seconds.
Great explanation that will help me use 6K on my G9. By the way your site has far too many annoying pop-up ads which I really hate & distracting
Thanks Ian. We’re not fans of the ads either but they are what enable us to publish the site.