


Timelapse videos are popular subjects to shoot because of their ability to show changes that take place slowly over time. One of the great things about the Nikon D850 is how easy it is to capture a timelapse video. In fact, there are two ways in which you can capture a timelapse with the Nikon D850: via its Interval Shooting mode or its Timelapse Movie mode.
In this Nikon D850 timelapse tutorial we’ll show you how to set up your camera to create videos using both the Timelapse Movie and Interval Shooting modes. But first…
What’s the difference between Nikon’s Timelapse Movie and Interval Shooting modes?
The difference between the Nikon D850 Timelapse Movie mode and Interval Timer mode is really down to control. With Interval Shooting you can program the D850 to begin shooting images at a certain time and continue at set intervals (eg one frame every minute or hour). You then set how many images you want it to take, and the D850 will use this interval timer to shoot until it has reached that figure.
The D850 will also save this sequence of images in its own folder on your memory card so that you can find them all easily and not muddy the waters. You can then upload these images to video editing software, or even Photoshop, and create and animated sequence that cycles through each frame at a pre-set duration per image, showing the timelapse sequence in all its glory.
With the D850’s Timelapse Movie mode, you once again set the camera to shoot at pre-set intervals for a pre-defined duration. But in this mode the D850 takes your images and automatically generates that video in-camera, leaving you with a .mov file that’s ready to share. Which then begs the question…
Why shoot with Nikon’s Interval Timer over Timelapse Movie?
- more control over images
- more control over time within your movie
- full pixel count images
- resizing options
Again, control. While Timelapse Movie mode adds convenience by generating that moving image sequence for you, with Interval Timer you have the flexibility to edit images, individually or batch processed, and remove frames from the sequence.
You also are getting images at their full resolution, which you can resize or crop into.
For our timelapse video below we shot with the Nikon D850’s Interval Shooting mode. As you can see, we had some really extreme changes in light during our timelapse. We shot it the day after a snowstorm here in the UK over the course of about six hours.
The temperature had warmed, and the snow began to melt quite quickly. But with the warmer temperatures came heavy rain and hail, and the light shifted from extreme sun to dark clouds.
We had the D850 exposure set to auto, with the interval set for 1 frame per minute over about six hours.
Setting up Interval Timer Shooting
Navigate to the last page of your Shooting menu and highlight the Interval Shooting option. Press the centre OK button or right arrow on your four-way controller.
You’ll now be in the Interval timer menu and you’ll need to set a few options before you can begin your timelapse.
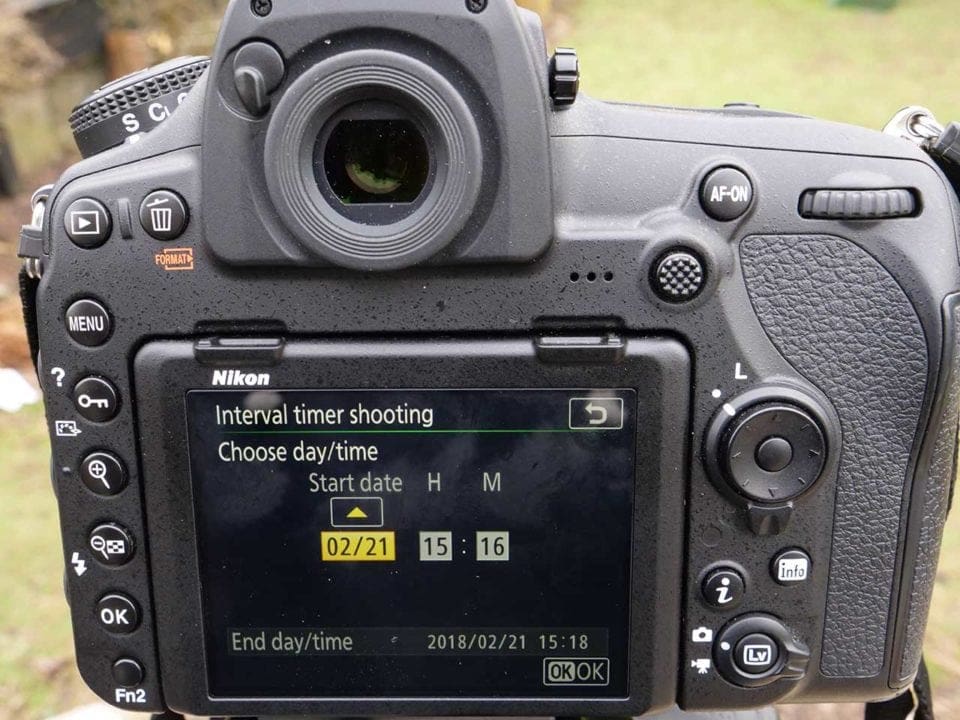
01 Set the date and time your sequence should start
First you need to set the date and time at which you’d like your interval timer to begin, or alternatively you can select NOW. Press the centre OK button in your four-way controller to set.
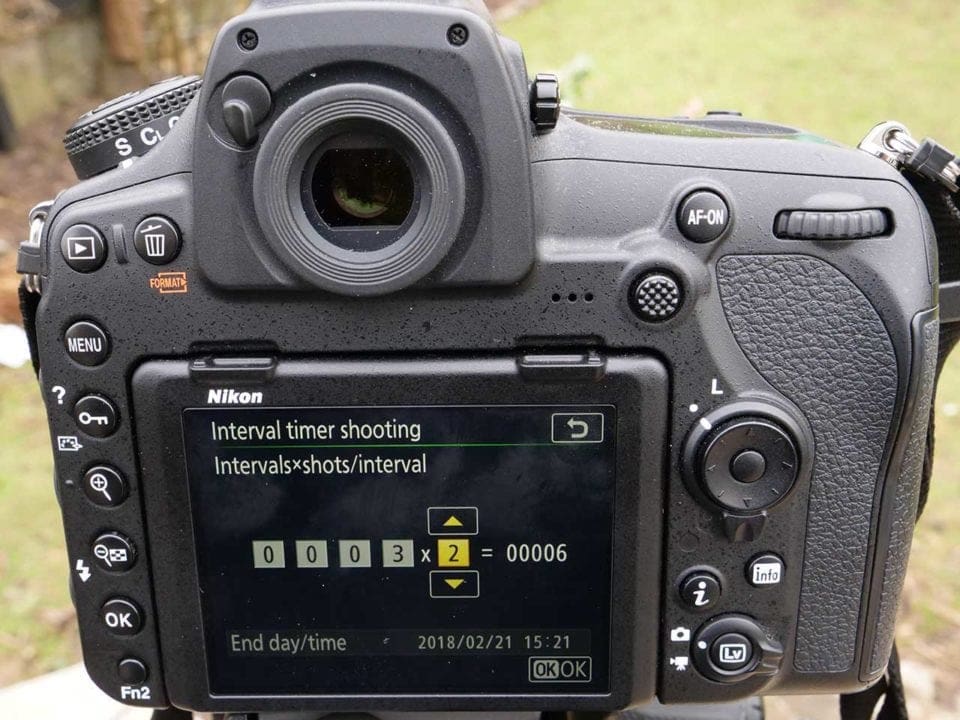
02 Choose the number of intervals and shots per interval
Next you need to set the number of intervals and shots per interval. For instance, we set ours to 360 intervals at one frame per interval. This equates to one shot per minute over six hours.
Here you need to think about how long your sequence might take to transpire in realtime, but also about how it will translate to video. Thirty frames equates to one second of cinematic video. So 360 frames is about 12secs.
There are also apps, such as PhotoPills Timelapse Calculator, that can help you with the numbers if math isn’t your strong point!
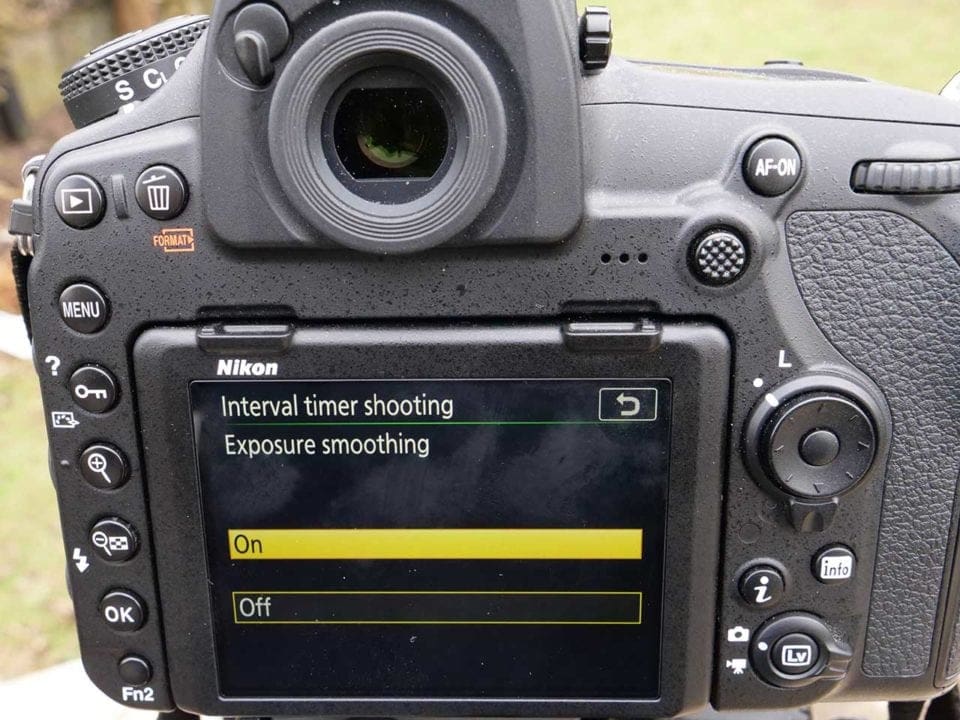
03 Enable exposure smoothing
Like the Nikon D850 Focus Shift mode, you also have an Exposure Smoothing option you can enable, which smooths the transition between frames. Though in the extreme light changes we faced, it’s sometimes inevitable.
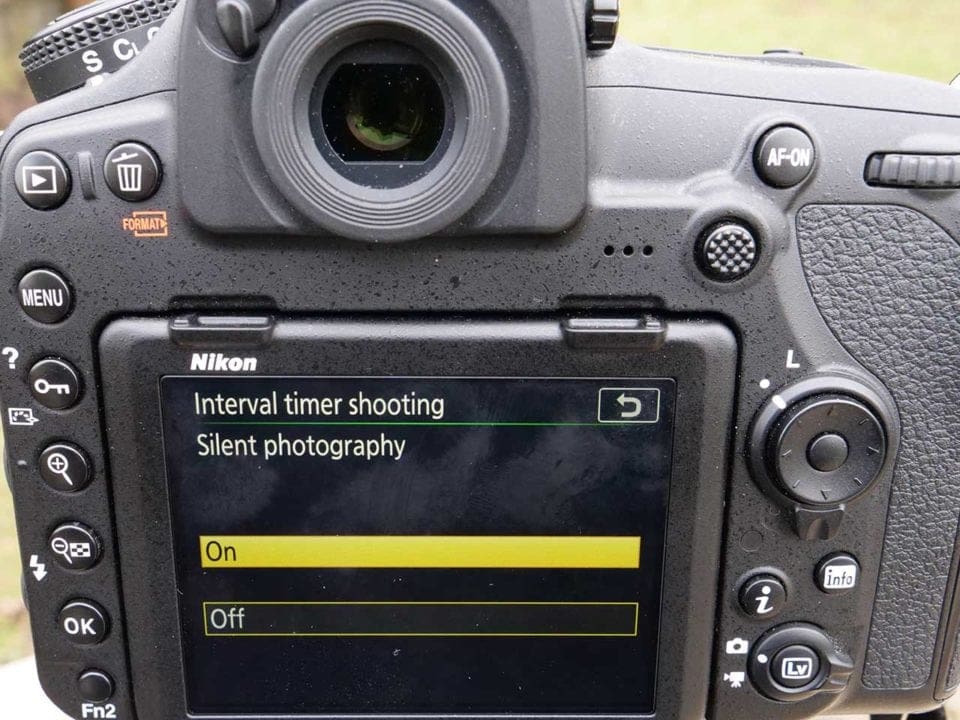
04 Enable silent photography mode
Again, like the Focus Shift mode, the Nikon D850 enables you to switch to the electronic shutter for silent shooting during your Interval Timer shooting. This helps reduce vibrations and potential camera shake.
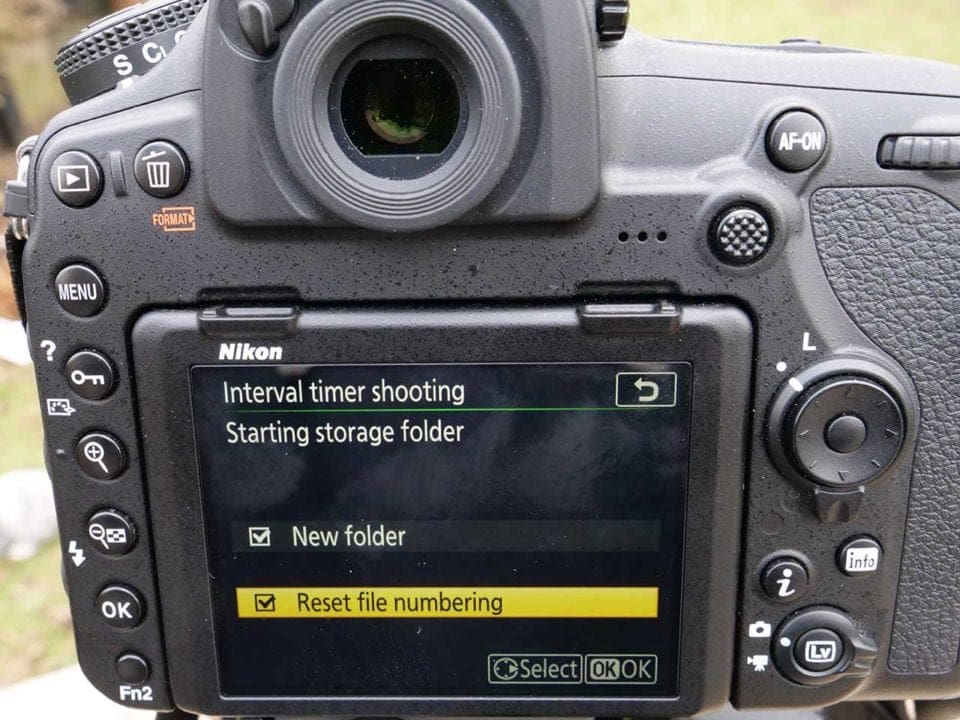
05 Set images to appear in a new folder
It’s also worth enabling the D850’s option to store the images from your sequence in a separate folder on your memory card. This just makes them easier to access and import later on. You can also reset the file number for the sequence.
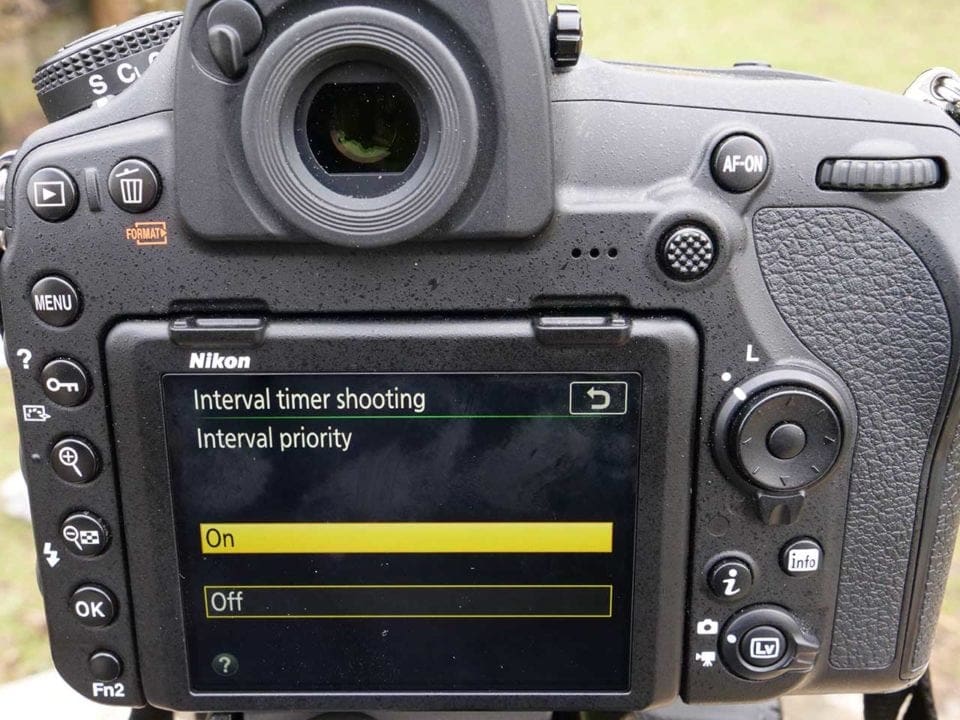
06 Do you prioritise the intervals or exposure?
Finally you can enable the D850’s Interval Priority, which gives priority to maintaining your interval between shots. Leaving it disabled prioritises your exposure.

07 Start the sequence
You’re now done. Navigate back to the top of the Interval Shooting menu and highlight Start, then press OK. Your interval timer will now begin shooting at its designated time!
How to set up the Nikon D850 Interval Timer Shooting: Summary
- Choose your start day and time
- Select the length of your interval, then choose the number of intervals you’ll shoot and how many frames per interval
- Enable exposure smoothing
- Enable silent photography mode
- Set images to write to a new folder on your memory card
- Decide if you want to enable Interval Priority, or prioritise exposure
How to turn your timelapse images into a movie
The one downside of using the Nikon D850’s Interval Timer Shooting mode is that you need to create your timelapse movie yourself. But this is really a small price to pay for the control you have over the process.
You can create your movies in professional software such as Final Cut Pro if you like, but really all you need is some basic free software. We created ours in iMovie simply by importing all of our images in the sequence, setting a duration of 0.2secs per image in each clip and then exporting the file. It took minutes.

You can also create a moving image sequence in Photoshop. When you open your batch of images you’ll see there’s an option to tick to create a sequence. You then need to enable a timeline view, and there are a few more steps. We’ll explain all this in a future tutorial. But it’s very quick and intuitive.
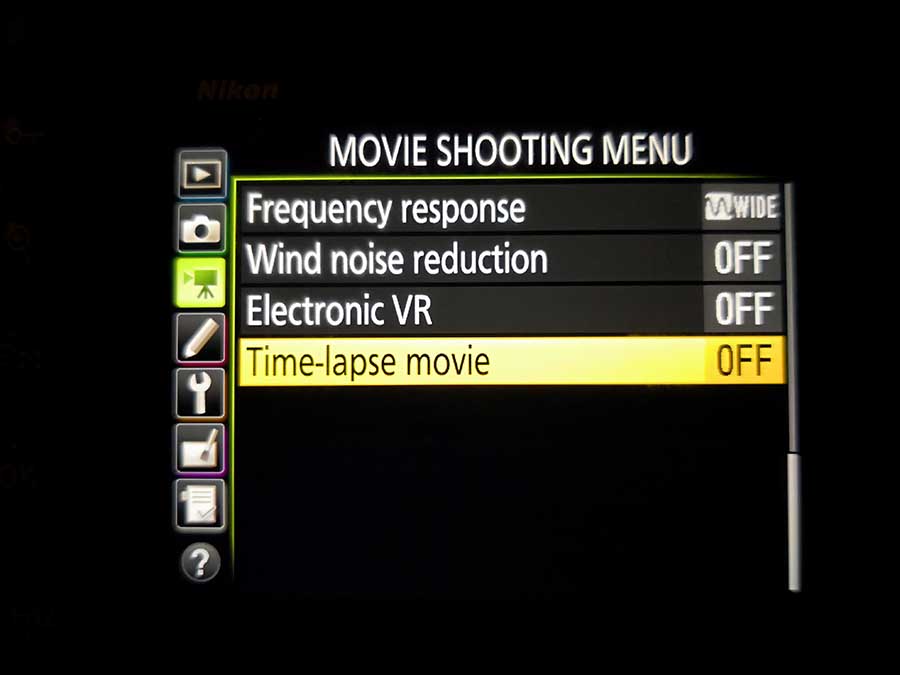
How to set up the Nikon D850 Timelapse Movie mode
The Nikon D850’s Timelapse Movie mode is very similar to the Interval Timer Shooting set-up process. You’ll find this option on the last page of your Movie Shooting Menu.
Again, there are some options and settings you need to dial in first, but most of these are the same as the Interval Timer mode.
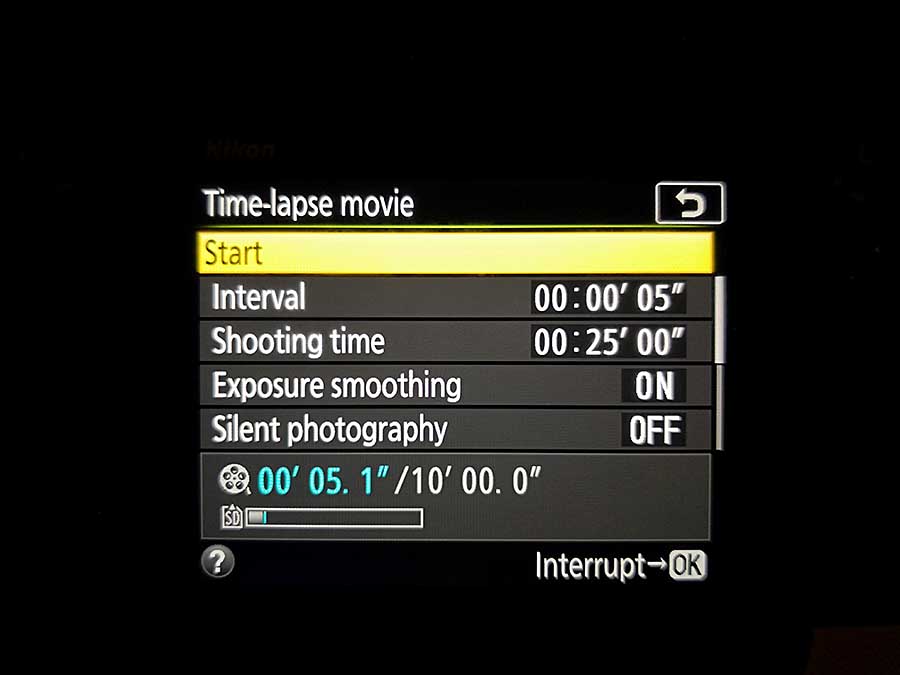
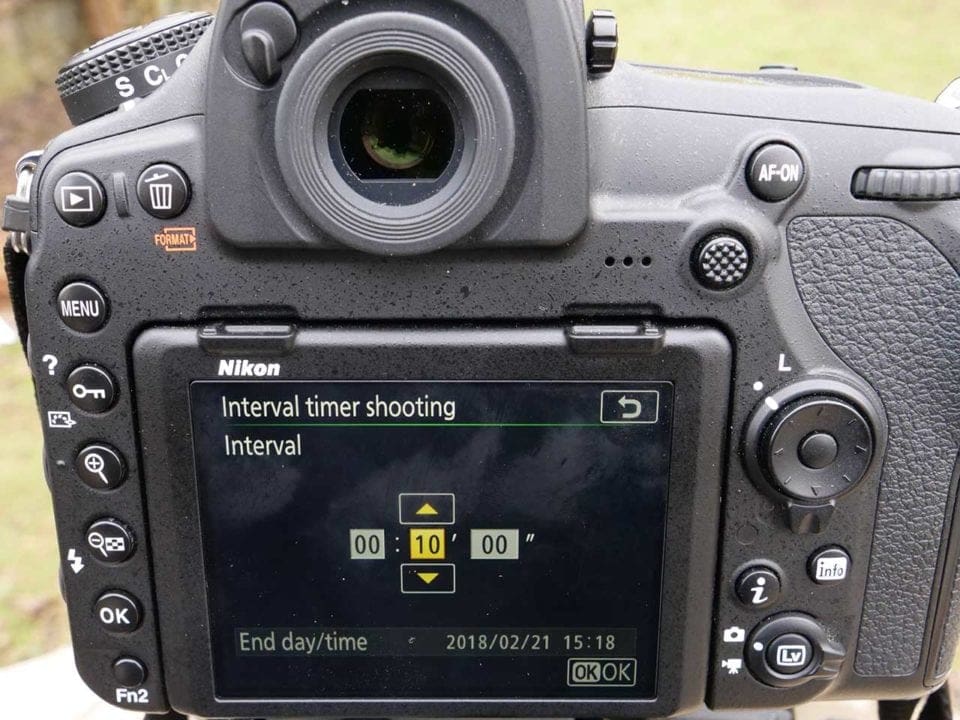
- First, select the interval time. Again, this will vary based on how fast your subject is changing and depend on how long you want the movie to be. A sunset will occur more quickly than our melting snowman, for instance, so you might want to set a shorter interval to capture the subtleties of its change.
- Next dial in your shooting time. Once again, this depends on your subject and how long the movie should be. That sunset we mentioned, you might want to shoot for 25 minutes at 5sec intervals. Our melting snowman we shot over six hours at one frame per minute.
- You’ll again find Exposure Smoothing to ensure consistency between frames and Silent Photography to reduce vibrations on longer exposures.
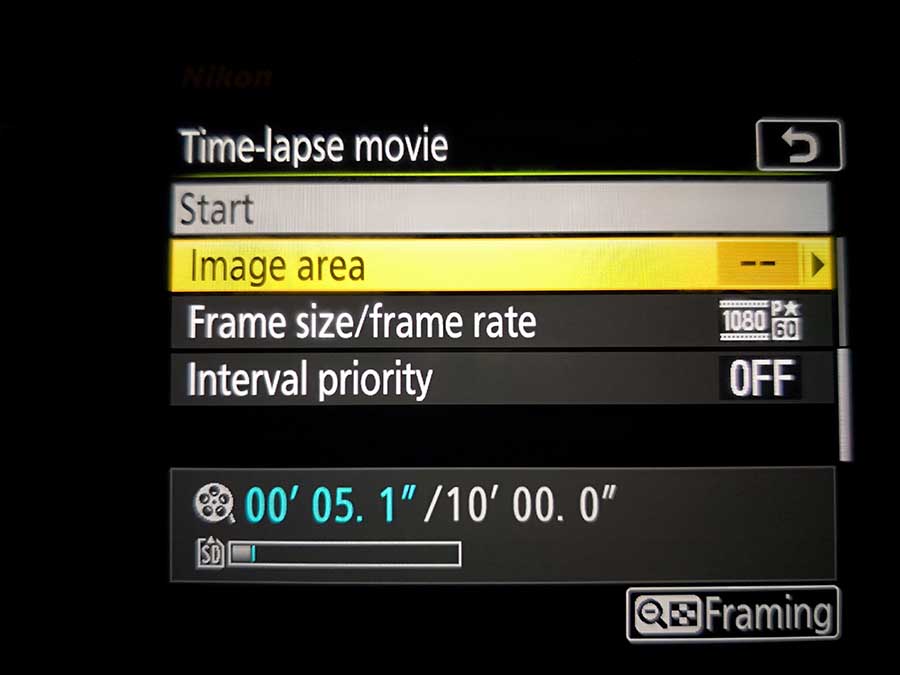
- Next you can choose the Image Area. This basically means, do you want to shoot in the Nikon D850’s full-frame FX format or switch to its DX-format crop mode.
- Now you can select your movie’s frame rate. Options vary from 3840 x 2160 at 30/25/24p, 1920 x 1080 at 60/50/30/25p and 1280 x 720 at 60/50p.
- And finally you can choose to enable Interval Priority during your movie just like in Interval Timer mode.
Final Tips for Timelapses
- Make sure you’ve set up your time zone properly. Because the camera is using the timer to begin a timelapse at a particular time, if the time is set wrong you could miss that sunrise.
- Ensure you have enough storage space on your card to account for all your images. The Nikon D850 has dual card slots so it’s worth putting in a second card for long timelapse sequences.
Do you know any way to use interval timer with Flash ??… I cant find a way