


One of the benefits of most Android smartphones is that they tend to have very well-featured native camera apps. This gives you lots of different shooting options, including manual modes which are great for experimenting with and learning more about photography.
The Samsung S10, and its larger brother, the S10 Plus, are some of the best smartphones currently on the market, especially for those who place a high value on the quality of the onboard camera.
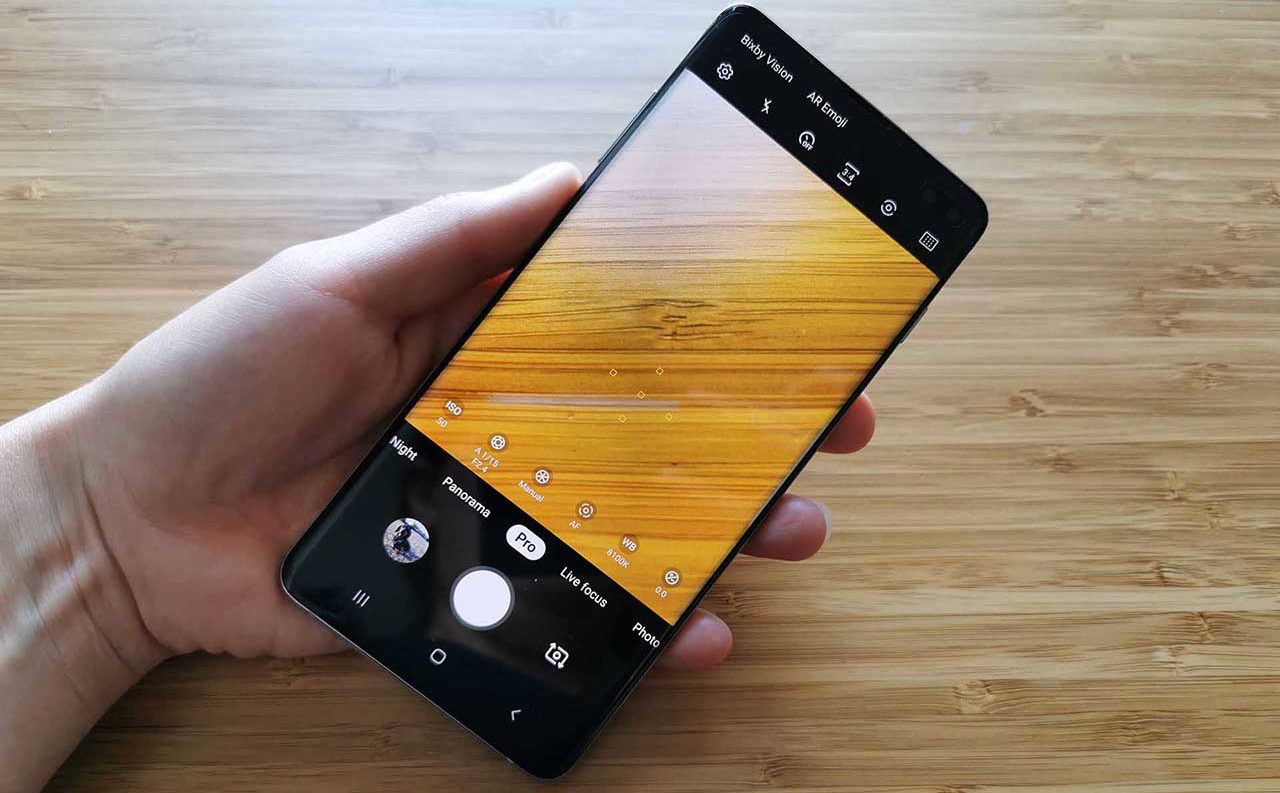
Both the S10 and the S10 Plus include a “Pro” mode in the native camera app. It can be found by default on the home screen of the native app – simply swipe along the bottom of the screen to activate it.
In this piece, I’ll explain what all of the different parameters do, as well as advice for when you might want to use those settings.
How to switch on raw format shooting with the Samsung S10
First things first, if you’re serious about your photography, you might want to consider switching on raw format shooting. It’s not an absolute must-do, but it can help if you want to edit your shots in post-processing in programs such as Photoshop.
The S10 can shoot in the universal DNG raw format, meaning it can be read by many different types of programmes. Enabling it is a little bit hidden away – first you’ll need to enter the Settings menu by tapping the cog icon in the top left hand corner of the screen.
Next under the Pictures sub-heading, tap “save options” – and you’ll be able to enable “RAW copies”, which is something you can only do in the Samsung S10 Pro mode.
Now back to the different Samsung S10 camera settings…
Options within the Samsung S10 Pro camera mode
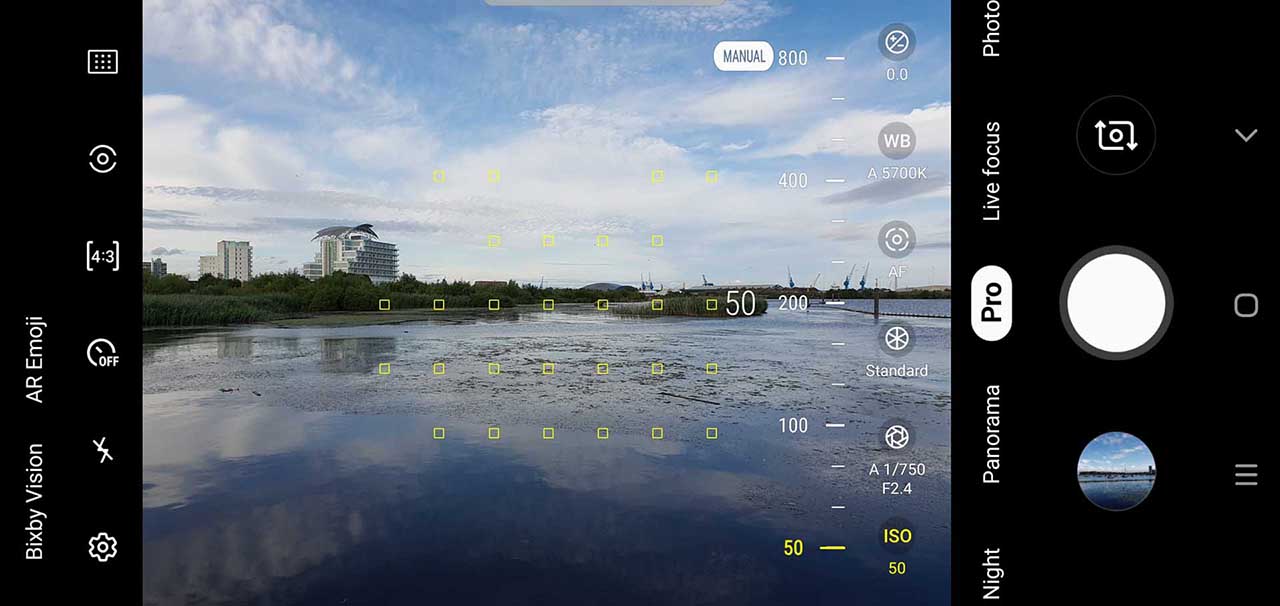
ISO
Choosing your own ISO speed (sensitivity) is usually most needed when shooting in low light. Smartphones can often be guilty of ramping up the ISO, which can lead to problems with image noise creeping into your photos.
Although most of the time, leaving this setting in Auto is absolutely fine, if you find the phone is choosing a speed which is too high for your liking, you can select a lower speed.
You’ll need to keep the phone as still as possible – if your hand isn’t that steady, try steadying yourself and the phone against something like a wall, or a table. You could even invest in a smartphone tripod to keep your phone perfectly stable.
To use this setting, tap the ISO option and drag the slider to the setting you wish to choose.
Aperture
Aperture is the opening of the lens through which light travels. Most mobile phones have lenses with a fixed aperture, but with the Samsung S10 / S10 Plus, you can choose between two different aperture settings. If you look carefully at the lens, you’ll even be able to see the aperture opening and closing.
Tap the aperture icon and you’ll be able to select either f/1.5, or f/2.4, Use f/1.5 when light is on the low side to allow as much light as possible to hit the sensor, while in brighter conditions, f/2.4 is a better choice to ensure a better exposure.
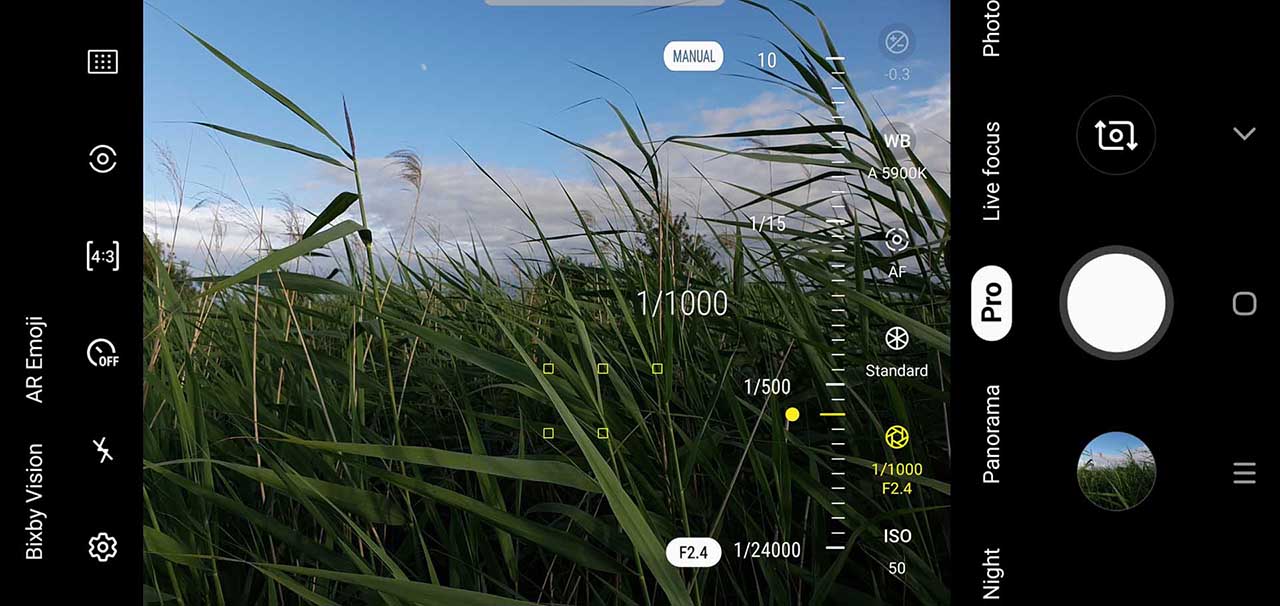
Shutter Speed
One of the fundamentals of photography is shutter speed – which is simply how long the camera’s shutter stays open to allow light to hit the sensor. The slower (longer) the shutter speed, the more light will hit the sensor.
If light is good, then you’ll want to use a fast shutter speed to avoid your images becoming overexposed (too bright), but if light is low, using a slower shutter speed won’t be underexposed (too dark).
Experimenting with shutter speed is also useful for creating a number of different effects. A fast shutter speed will freeze action, such as water splashing, while slower shutter speeds will create a blurred effect, creating a milky sort of effect for water, or creating effects such as light trails.
An important thing to remember is that if you use a slow shutter speed, you’ll also want to use a low ISO to keep your exposures balanced. This isn’t always possible with a smartphone, so long exposures in bright light can be tricky, but they’re much easier in darker conditions.
Remember also that longer shutter speeds can also introduce blur from handshake, so keep the phone as steady as possible.
To change the shutter speed, tap the aperture icon again and use the slider to choose a speed between 1/24000 up to 10 seconds.
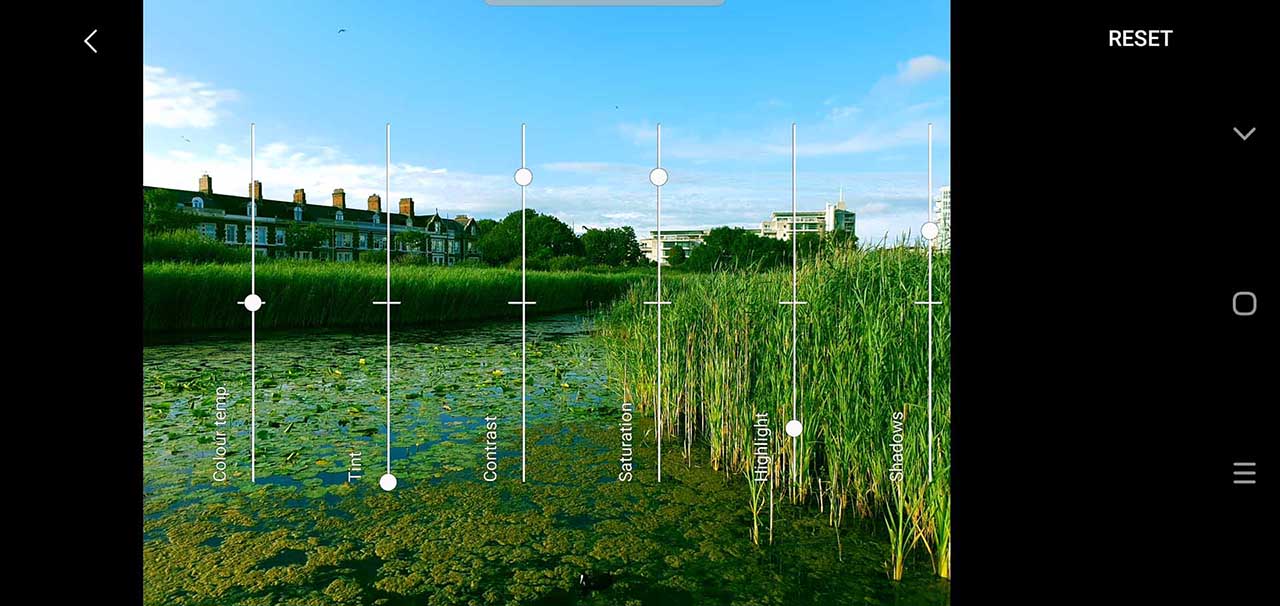
Manual
There’s an area of Pro mode called “Manual”, which contains a number of different settings. These are “Colour temp”, “Tint”, “Contrast”, “Saturation,” “Highlight” and “Shadows”. These are all things we’d perhaps normally expect to see available in post-processing software, but with these options, you can make changes prior to shooting.
One thing you can try with this group of settings is to create “arty”, or “experimental” shots. Colour temp is similar to white balance, in that you can use it to create a warmer or cooler effect. Tint is also very similar too – you can use them in conjunction with each other to finely tune the colour effect of your images – or go a bit wild and create something wacky.
Adjusting contrast can have a big effect in your image. Boosting the contrast can make it look sharper, but also give it a more harsh appearance. Bringing down the contrast can give your photo a subtler, softer look.
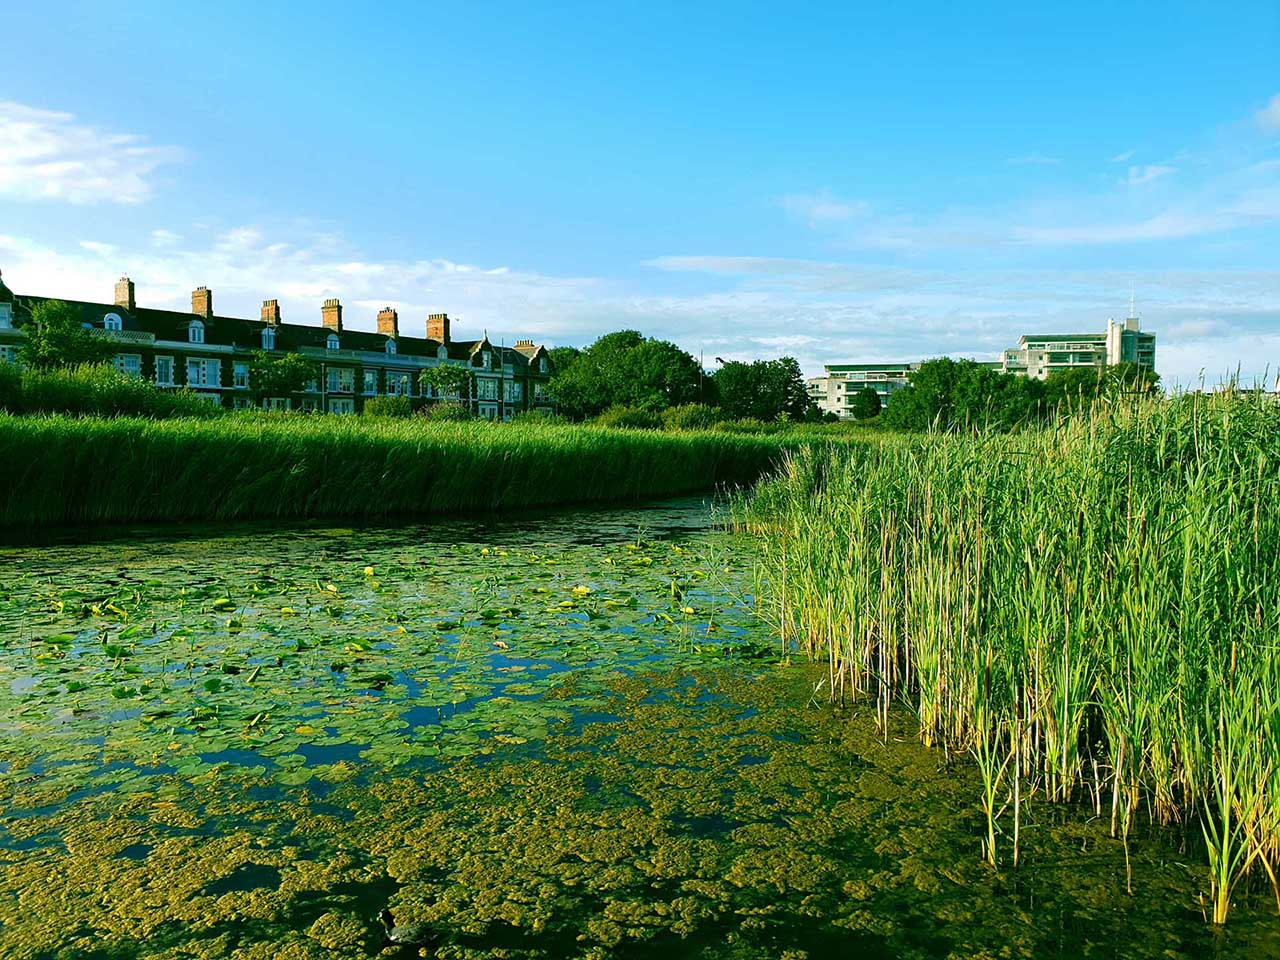
Saturation can be used to shoot in black and white, since if you move the slider all the way to the left, all the colour saturation will be removed. If you go all the way to the right, colours will be really vibrant and pop – but they will also likely be unrealistic.
Highlight refers to the bright areas of your image. If you’re shooting somewhere where there’s a lot of light flooding into the scene, reducing the highlights can help to create a more balanced exposure. As you might expect, Shadows is the darker areas of the image – using the slider can help bring out detail in shadow areas which might otherwise have become lost.
AF
Tapping the AF icon will allow you to manually focus. Most of the time you’ll probably be fine to stick to autofocus, but for certain subjects, such as close-ups, using manual focus can ensure you get exactly what you want sharp.
Tap on the setting and use the slider to move between the closest focusing setting – which is represented by a flower icon – and the furthest focusing setting – represented by a mountain.
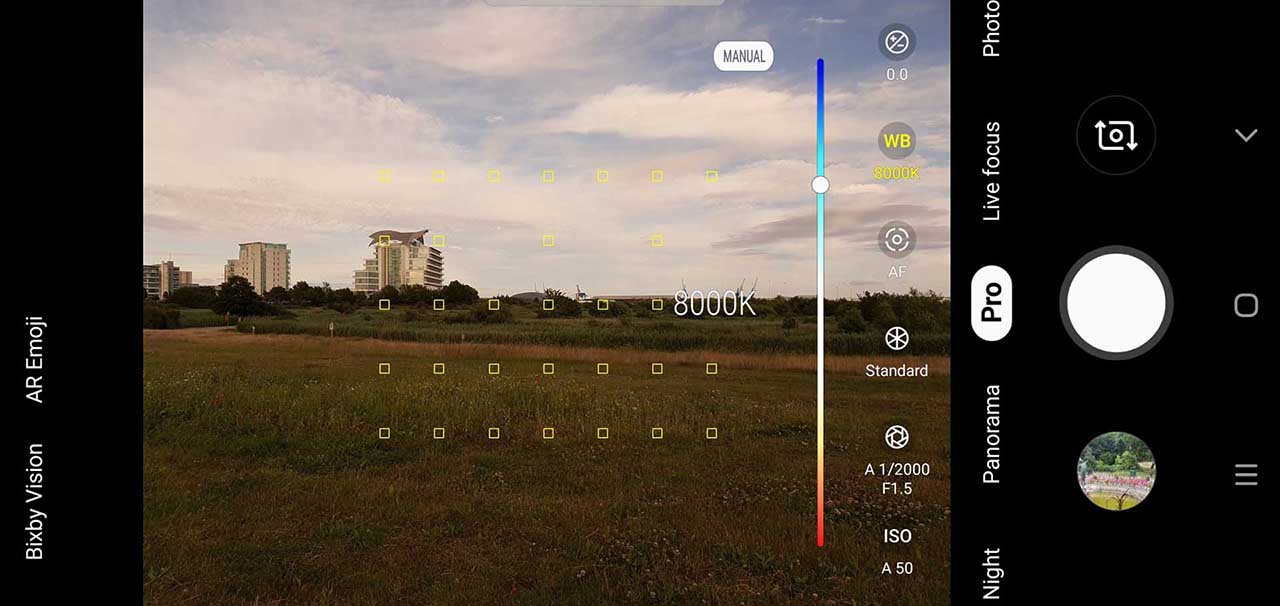
WB (White Balance)
Sometimes, different lighting conditions can confuse a camera or smartphone, leading to unrealistic colours. This is typically most problematic under artificial lighting, but sometimes cloudy skies can also lead to overly warm colours.
You can tap the WB (white balance) setting to make a change which more accurately reflects the scenario.
Slide along the coloured bar to change the setting, and you’ll see various K numbers, as well as icons (such as a sun, or a lightbulb) pop up to help you pick the most appropriate one for the shooting scenario you’re in.
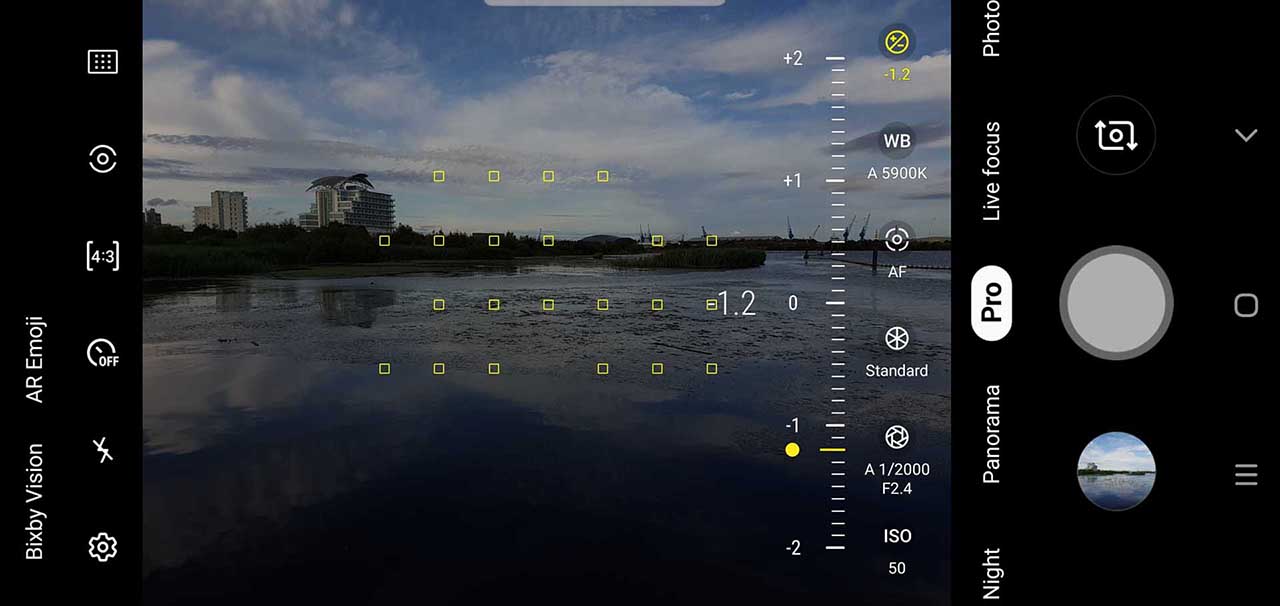
Exposure Compensation
If you tap the +/- icon you can adjust the brightness of your image by sliding along between -2 and +2.
Drag the slider to the left when shooting in bright conditions to help prevent over exposure (where the image is too bright), or to the right in darker conditions to help prevent under exposure (where the image is too dark).
This option comes in particularly useful where lighting is mixed and the phone might find it tricky to accurately determine the best exposure setting.
The best way to learn how to use all of the different settings you’ll find in Pro mode is simply by experimenting to see how all they all work.
You don’t have to adjust every setting – you could leave the majority of them in the Automatic setting and just tweak one of the setting, or you could tweak almost all of the settings, leaving just one or two in automatic – the choice is yours.
Will you be using Pro mode?
Useful – but I wasn’t able to work out which icon was the aperture icon from reading this.
I could NOT find exposure for the life of me!! I still can’t and I need to know >:(