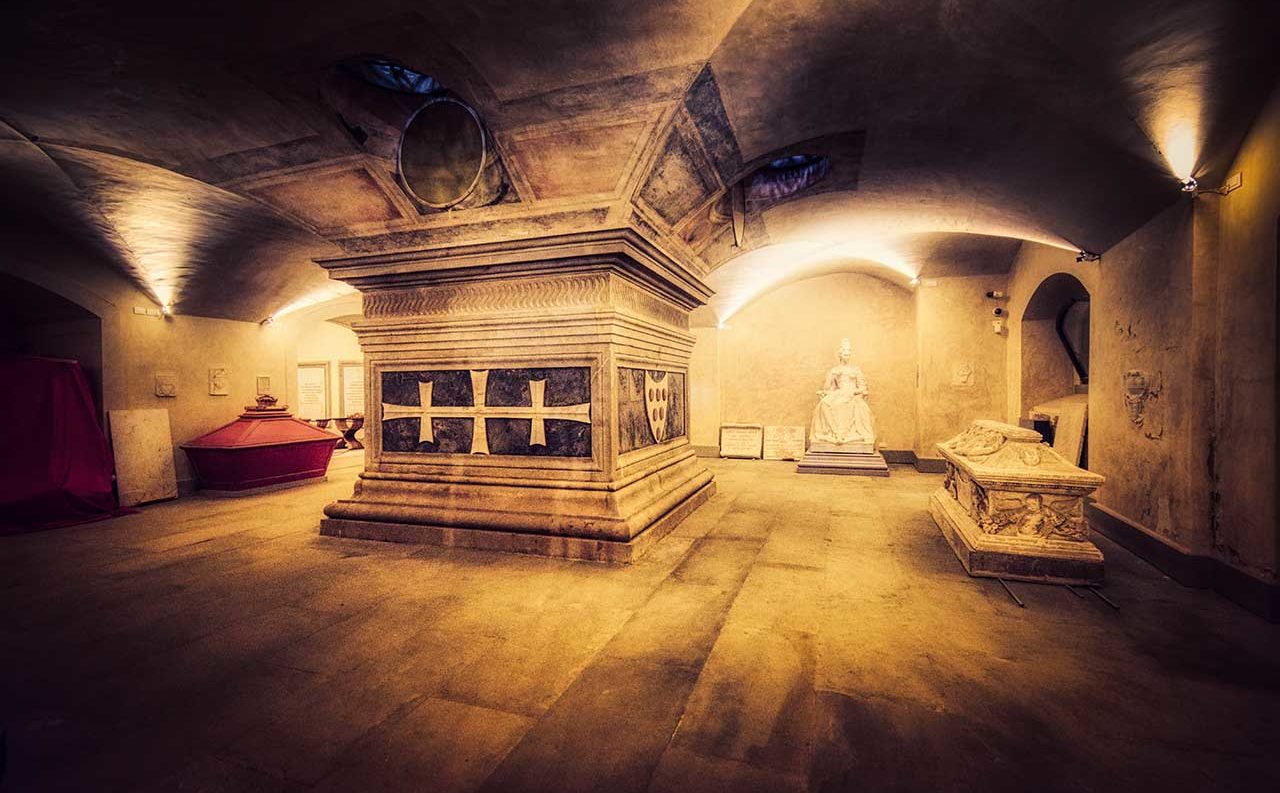

Aurora HDR 2019 brings some stunning new tools and effects, with much more dramatic and natural-looking effects than ever before. It also retains the original’s excellent system of layers and masks to offer a practically infinite range of effects on top of the standard ‘Looks’.
Aurora HDR is designed for merging a series of bracketed exposures to produce a wide dynamic range image for editing, but very often you can capture a wide enough brightness range with a single raw file, and that’s exactly what we’ve used here.
It shows how much detail Aurora HDR can squeeze out of raw files, and how it can produce spectacular effects even without a set of bracketed images.
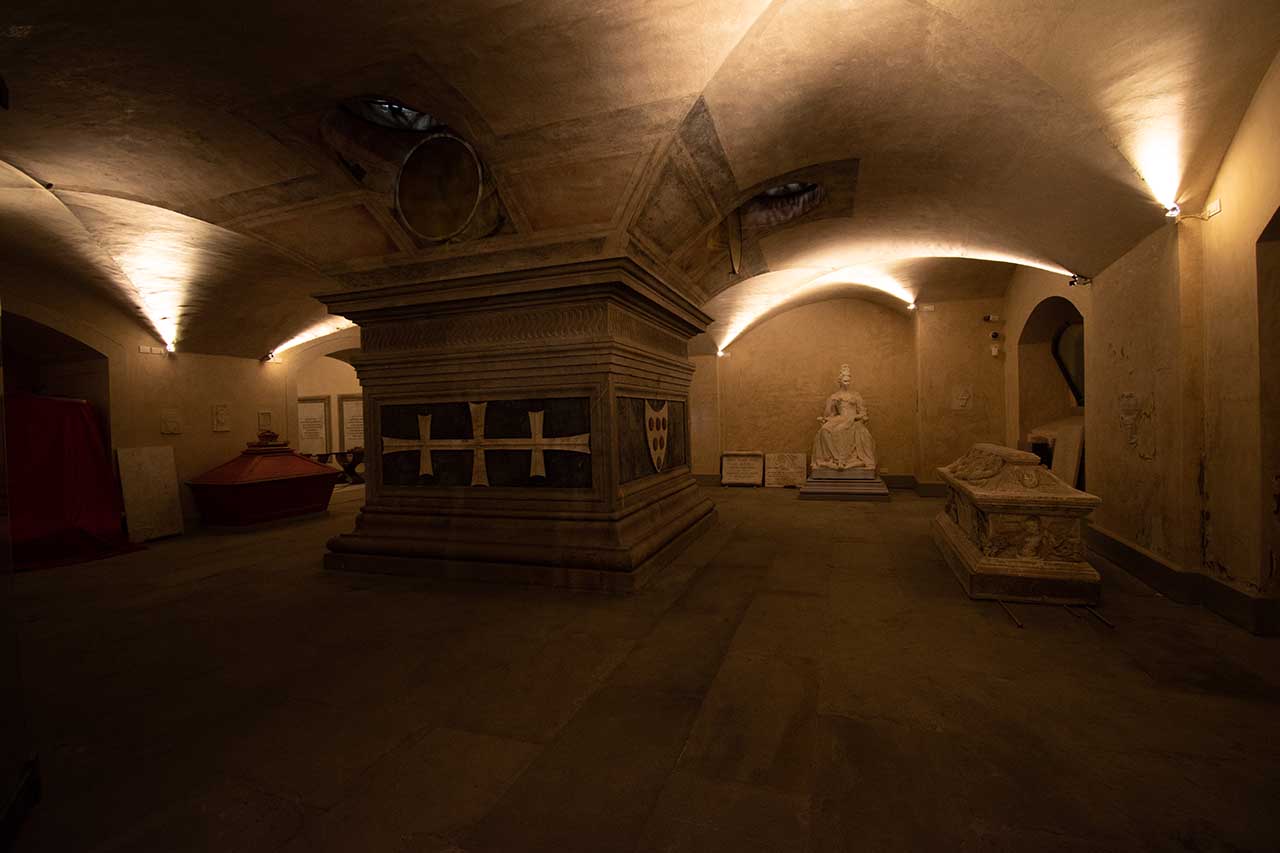
Our ‘before’ shot. See our ‘after’ shot at top.
We’re going to take a detailed step-by-step look at Aurora HDR’s Adjustment Layers and masks as we transform a decent but dull-looking shot of an underground crypt into something a whole lot more spectacular.
You don’t always have to go to these lengths to get great effects. Aurora HDR 2019 comes with some amazing preset ‘Looks’ which you can apply with a single click, and we use two of them in our walkthrough below.
But it’s also useful to know how these Looks work, how they are actually preset combinations of Filter settings, and how you can modify these and add Adjustment Layers to combine Filters and Looks using masks.
So you don’t have to follow this walkthrough right to the end to learn some useful tips on Aurora HDR Looks, Layers, Filters and Masks, but if you stay with us all the way through you’ll get some idea of just what this program is capable of.
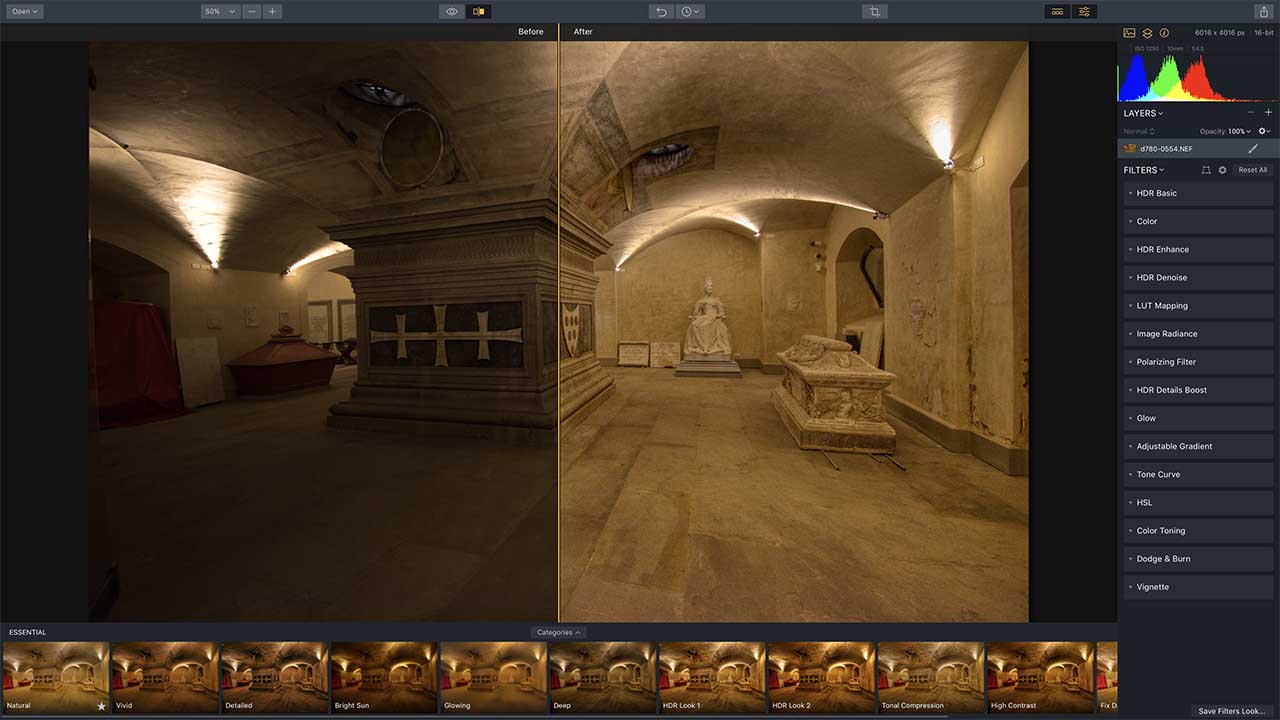
When your image first opens in Aurora HDR 2019 it will have a few basic adjustments applied by default, but it’s also possible to see what it looks like with no adjustments at all. In the panel on the right side of the window you’ll see a list of Filters, and all you need to do here is click on the ‘Reset All’ button at the top.
Even with no Filters applied, you can see how Aurora HDR has improved the tonal balance of the original image – you can use the split screen view to see the difference.
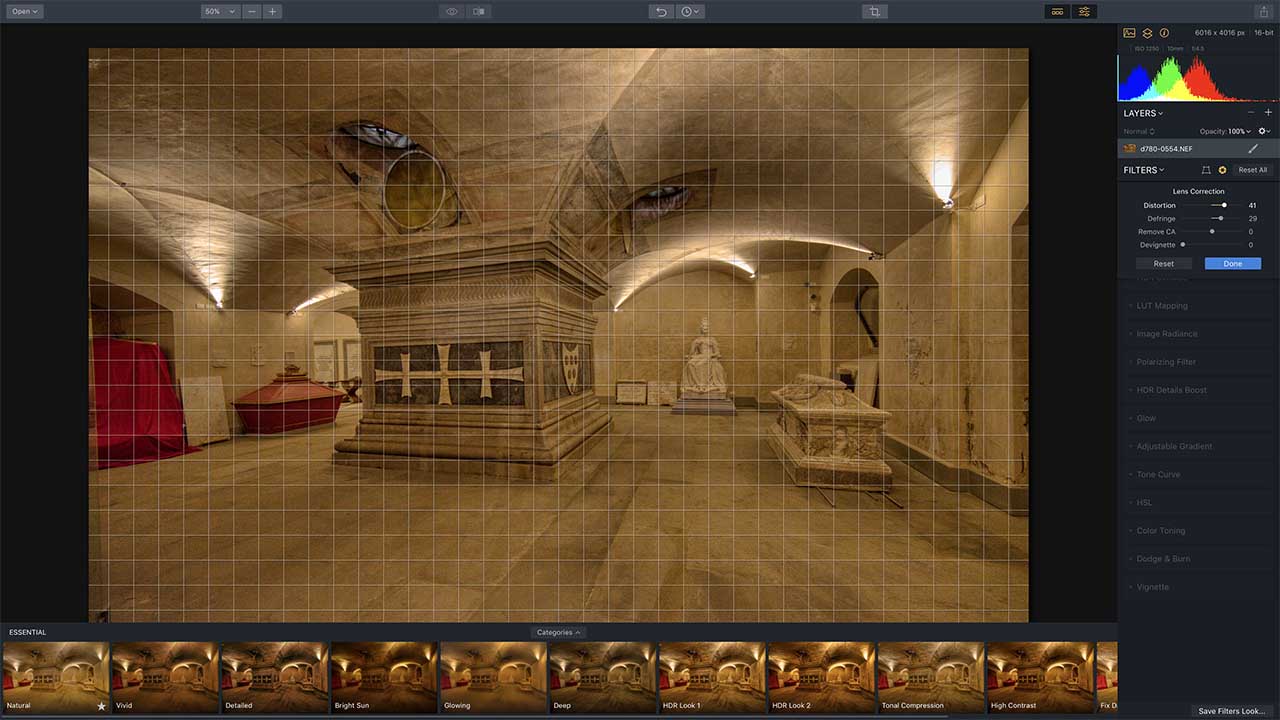
In this same side panel you’ll see a Layers section at the top. At the moment we’re working on the base image layer. You can apply ‘Looks’ and Filters to this layer or Adjustment Layers above it, as we’ll see shortly, but this base layer is the only place you can apply Lens Corrections and Transformations.
Here, we’ve corrected the distortion produced by our wideangle lens and fixed some colour fringing with the ‘Defringe’ slider.
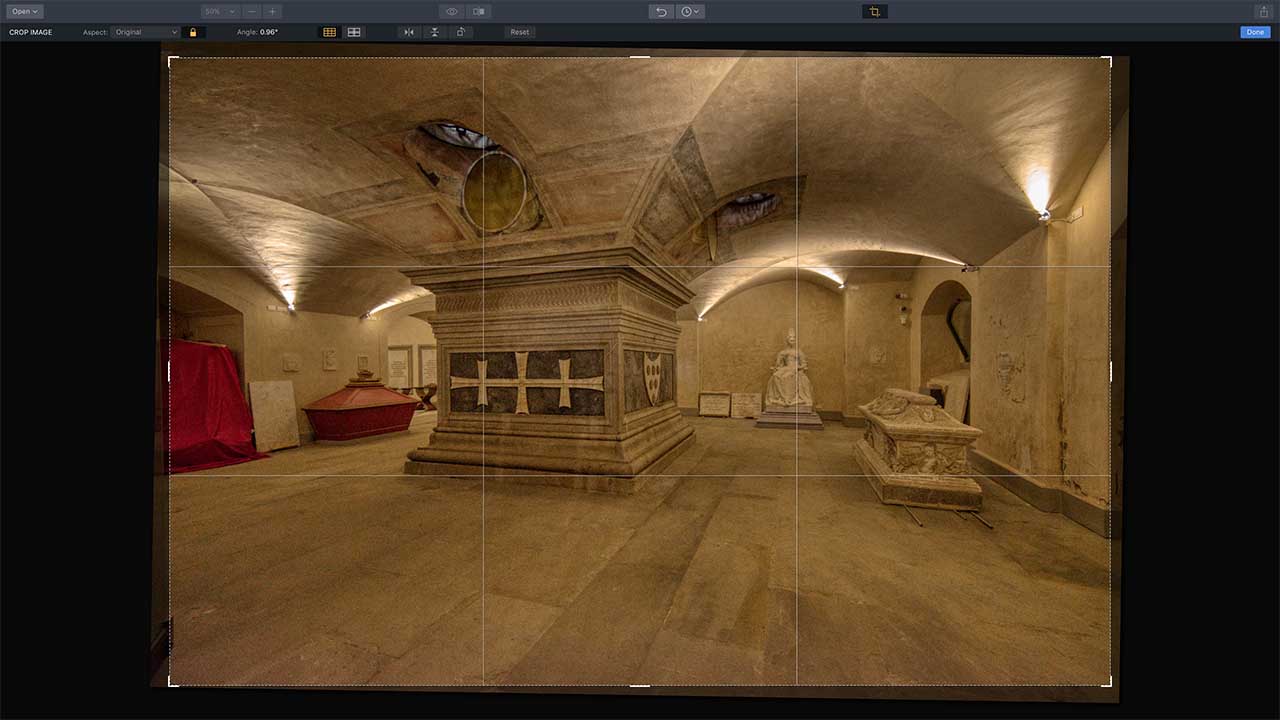
When you use lens corrections or the transform tools, you’ll get small wedges of empty space around the margins of the picture, so you’ll need to use the Crop tool to get rid of these – you’ll find it on the top toolbar. In this instance we can use it to straighten the picture up slightly too.
You can use the Crop tool whatever layer you’re working on – it’s a global tool that applies to the whole picture, not individual layers.
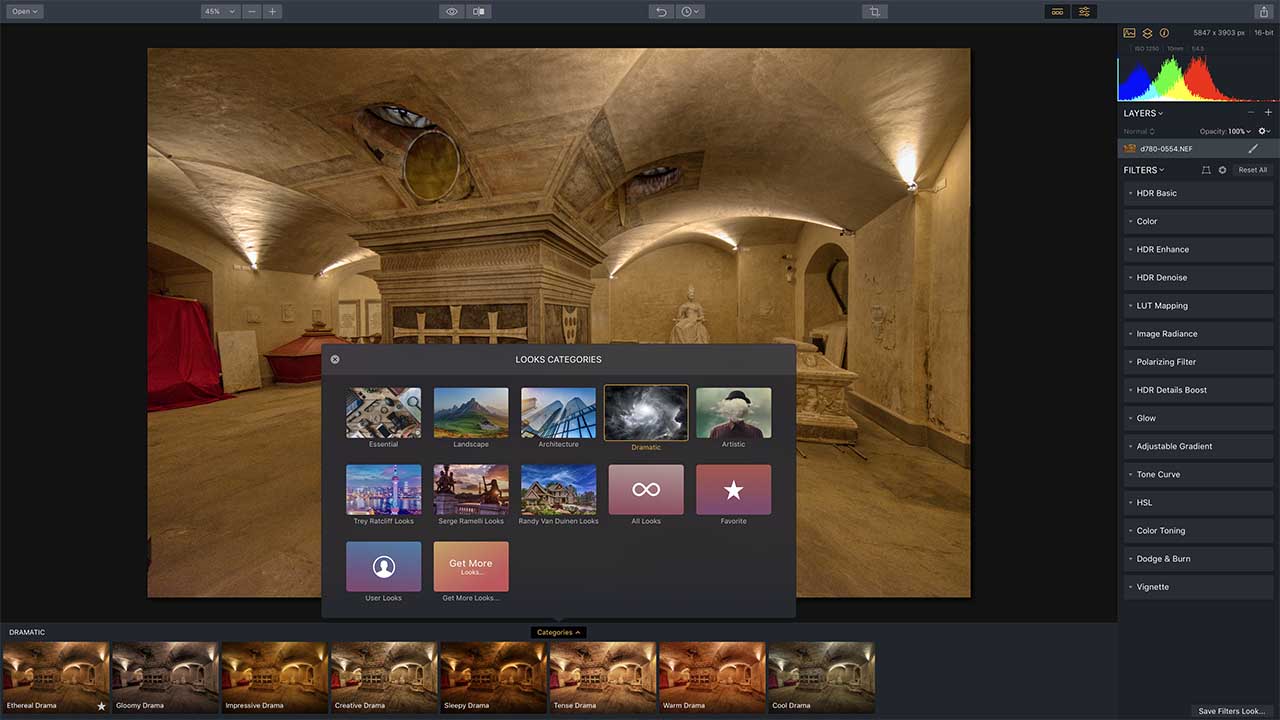
So now let’s apply a Look to see how these work. There’s a button on the top toolbar to show or hide the Looks panel, which is displayed at the bottom of the screen.
Looks are arranged into Categories, which you can display using the pop-up ‘Categories’ menu at the top of the Looks panel. We’ll go for the ‘Dramatic’ category, but there are lots more to try out later.
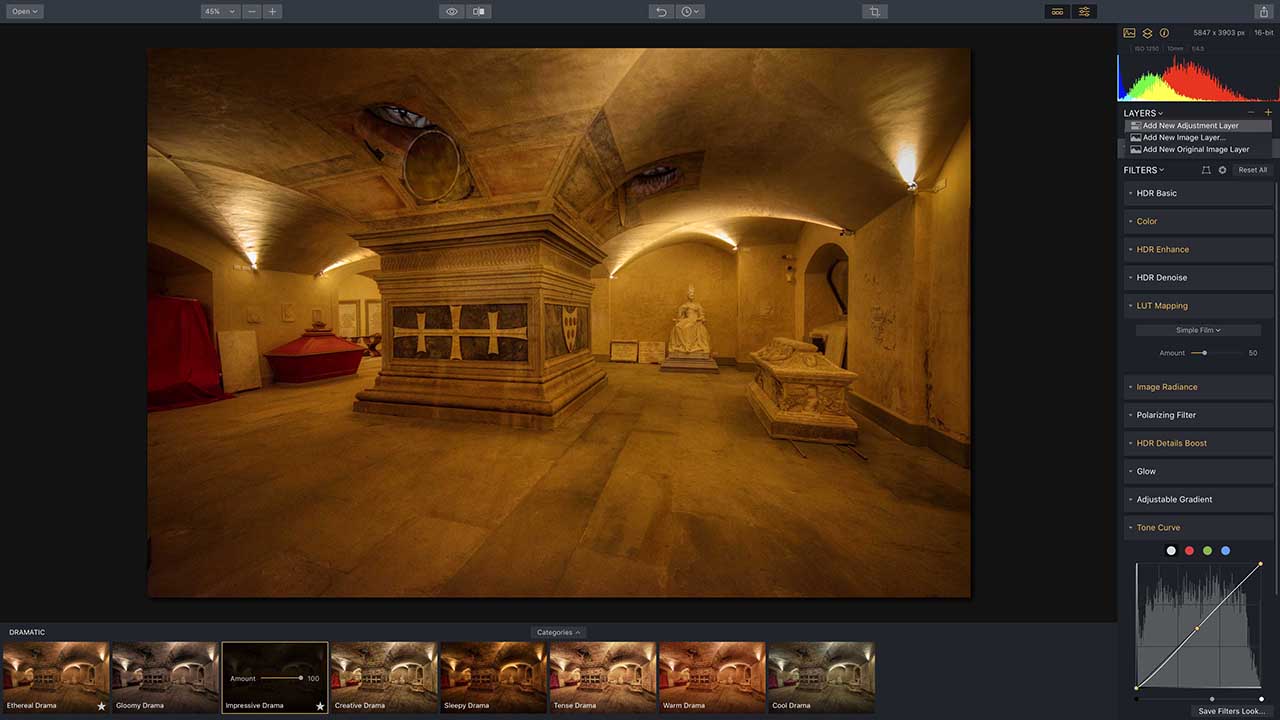
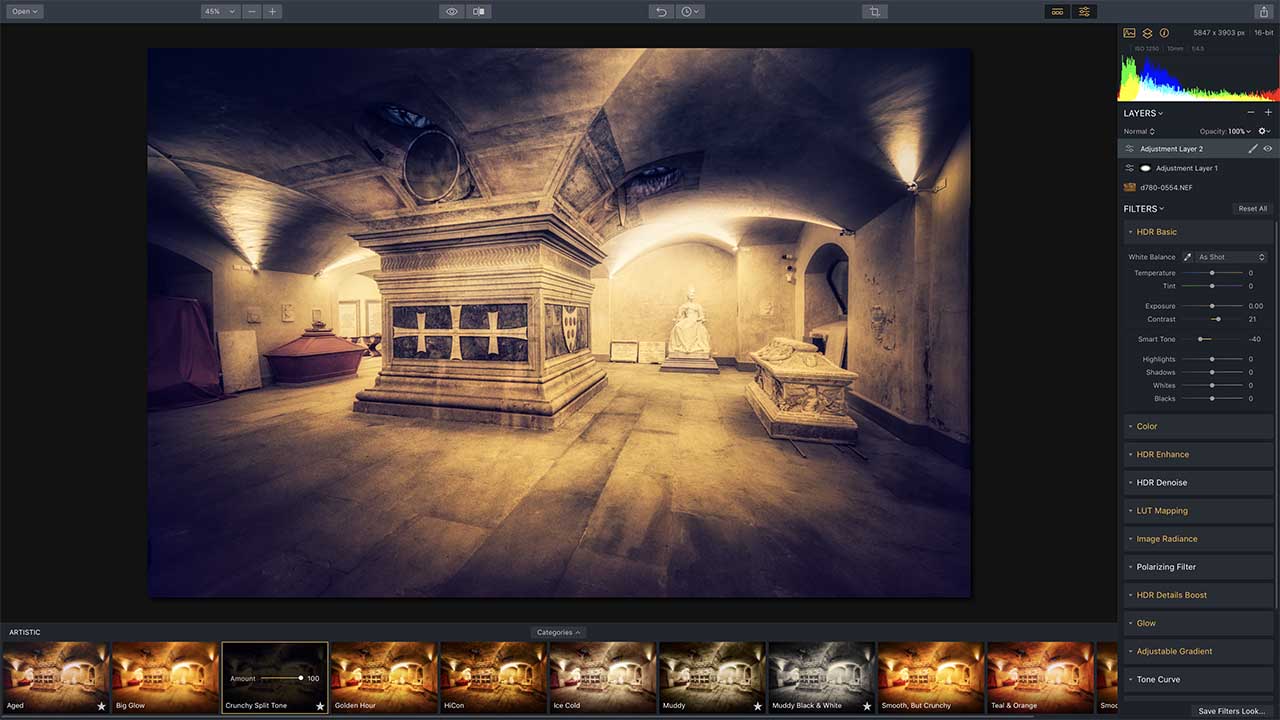
We’ve chosen the ‘Impressive Drama’ Look from this category, and over in the right side panel you can see that it’s applied a whole series of Filter settings to create its effect. Where the Filter title is white it means that no adjustment has been made, and yellow filter headings indicate adjustments.
You can ‘expand’ each filter to see and modify the settings, so here, for example, the Impressive Drama Look has changed the Tone Curve, amongst other things. We can change these settings to tweak the effect, but they would apply across the whole image and we might ‘break’ the effect we’ve just applied with some clumsy alterations.
The solution to both is to add a New Adjustment Layer using the ‘+’ button at the top of the Layers panel…
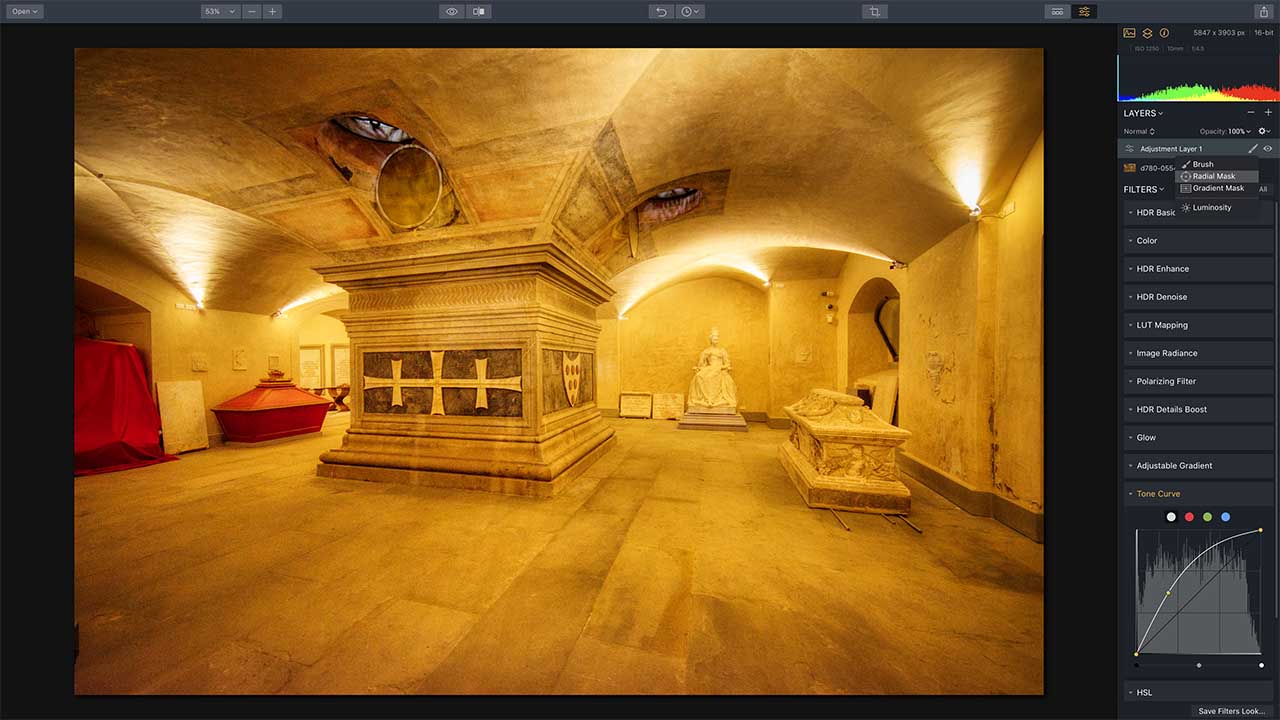
We want just the centre part of this picture to be brighter, and this is going to be a two-stage process. First, we push up the centre part of the curve in the Tone Curve Filter to get the lightening effect.
Because we’re working on an Adjustment Layer, this doesn’t replace the Tone Curve Filter adjustment on the base layer below; instead, it’s applied on top of that existing adjustment.
Now we need to ‘mask’ this effect by clicking the Mask (paintbrush) icon next to the new layer and choosing ‘Radial Mask’ from the drop-down menu.
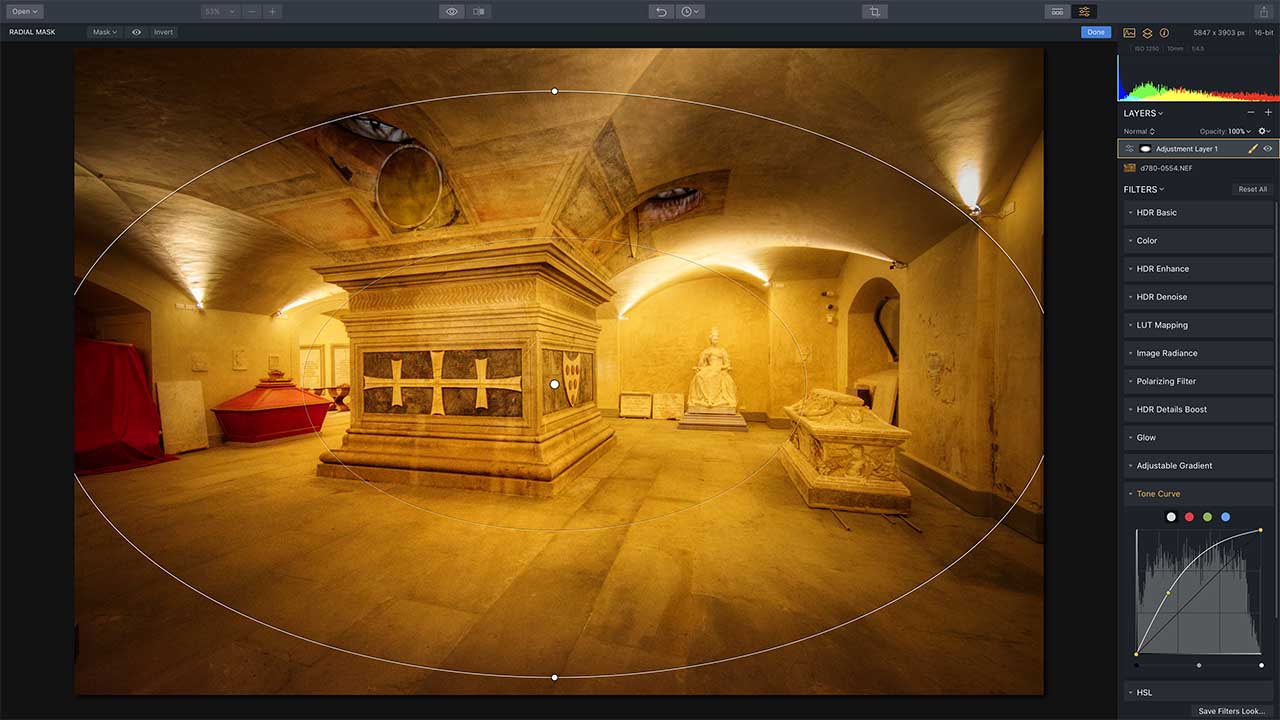
To use the Radial Mask tool, you click and drag out a circular area on the image. The outer border is where the mask finishes, the inner border marks the area of full strength and the space between is where the mask is blended in, or ‘feathered’.
You can now drag the edge handles of the mask to reshape, reposition or rotate it. By default, it’s the inner region that’s masked (darker) but we want it the other way round, so we click the ‘Invert’ button on the top toolbar.
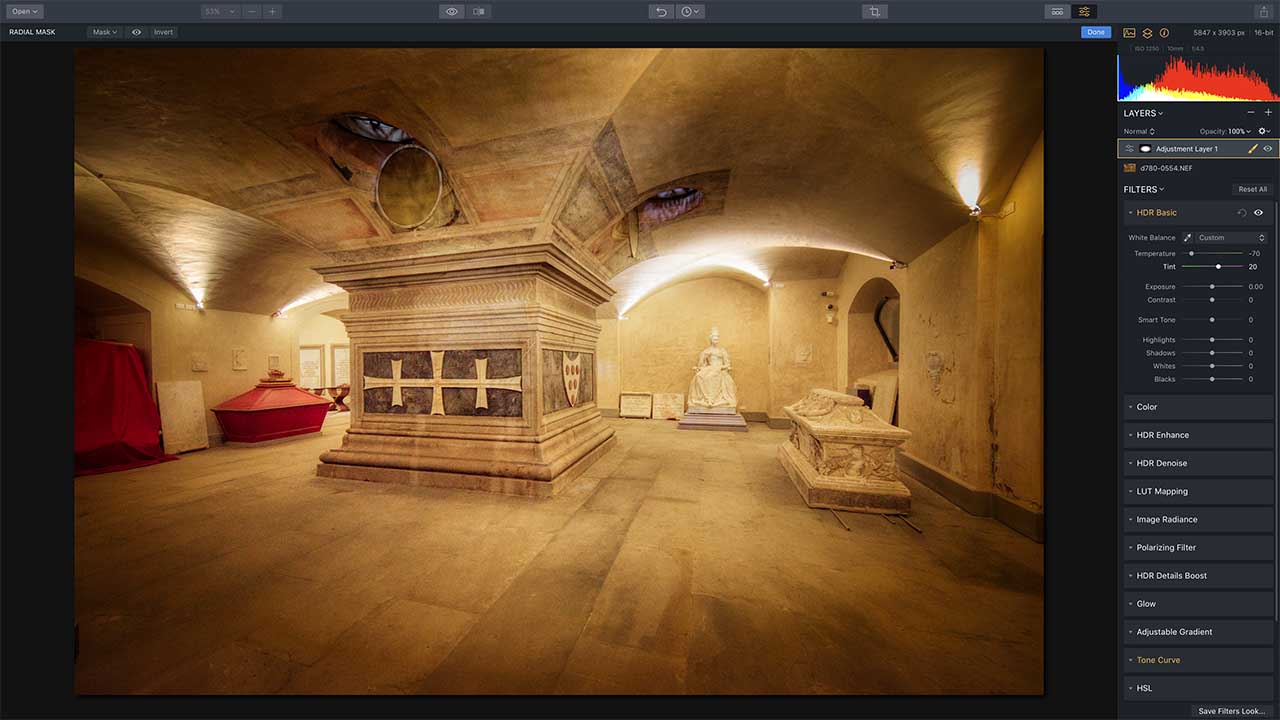
We’re not restricted to a curves adjustment with this new Adjustment Layer. Over in the side bar you’ll see that all of Aurora HDR’s adjustment Filters are available, so we can take this opportunity to tweak the white balance for the centre part of our picture too.
The Radial Filter remains adjustable as long as the Mask tool is active (yellow). When you deselect it, the mask becomes permanent.
Our image looks great already, but we’re going to try out a couple more things to see if we can improve on it and to show how you can use more Adjustment Layers to refine your pictures. To do this, we’ve created another Adjustment Layer so that any new Looks we apply now are combined with the adjustments we’ve applied.
The ‘Crunchy Split Tone’ Look in the ‘Artistic’ category gives us a very different and more dramatic image, for example.
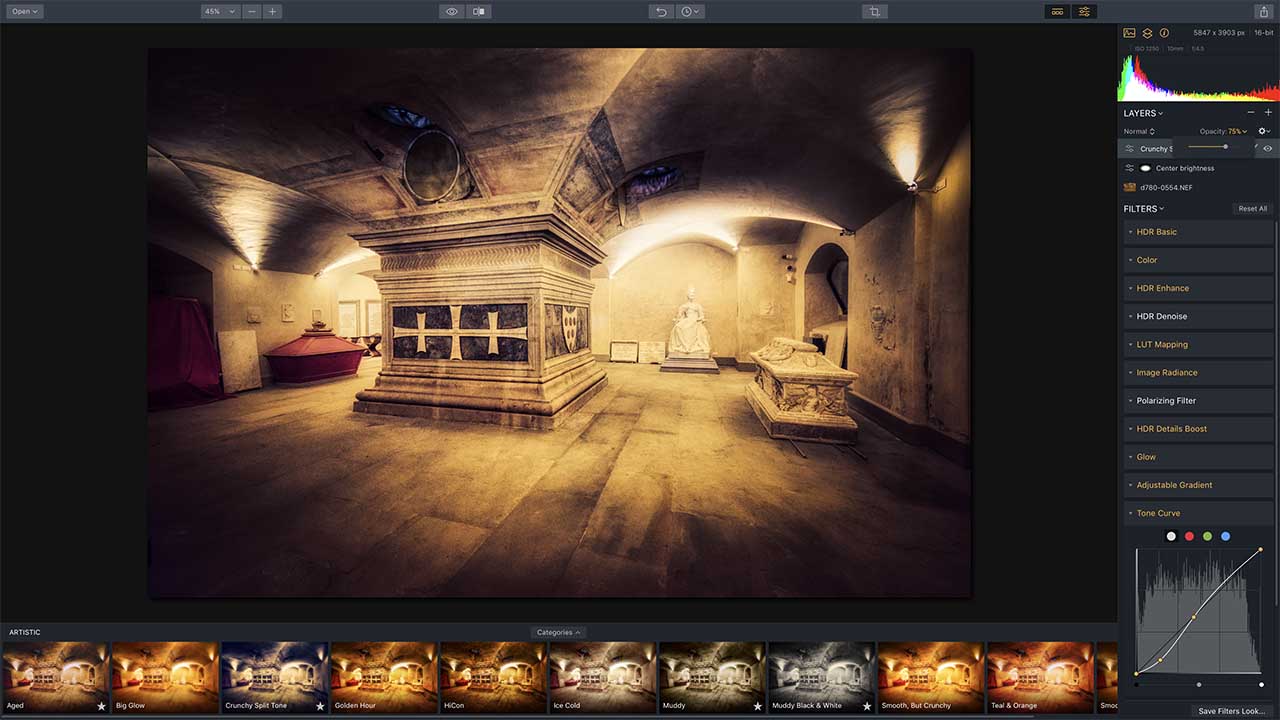
We’ll finish with a couple of general Aurora HDR layer tips. First, you can make your workings much clearer if you give your Adjustment Layers names – this is especially useful if you save your photos as work in progress and want to come back to them again in the future. Second, you can adjust the opacity of Adjustment Layers.
Our Crunchy Split Tone effect looks a little heavy at full strength, so here we’ve reduced the layer opacity to 75%. Third, you can experiment with Adjustment Layer blend modes to achieve an even greater variety of effects.
We’ve only looked at Adjustment Layers in this Aurora HDR tutorial, but that’s probably more than enough to be going on with for now!
There are two other layer types, though. ‘Add New Image Layer’ lets you add a new sky to a landscape shot, for example, or a background texture, and you can use the mask tools to blend it in with your picture.
‘Add New Original Image Layer’, meanwhile, does exactly what it says, adding in a copy of your original image on a new layer. This can be useful if you need to restore some of the details, colours and areas of the base image to your HDR composition.
It’s especially handy if you realise you’ve gone just a little bit too far and saves you having to work your way back through scores of individual adjustments!