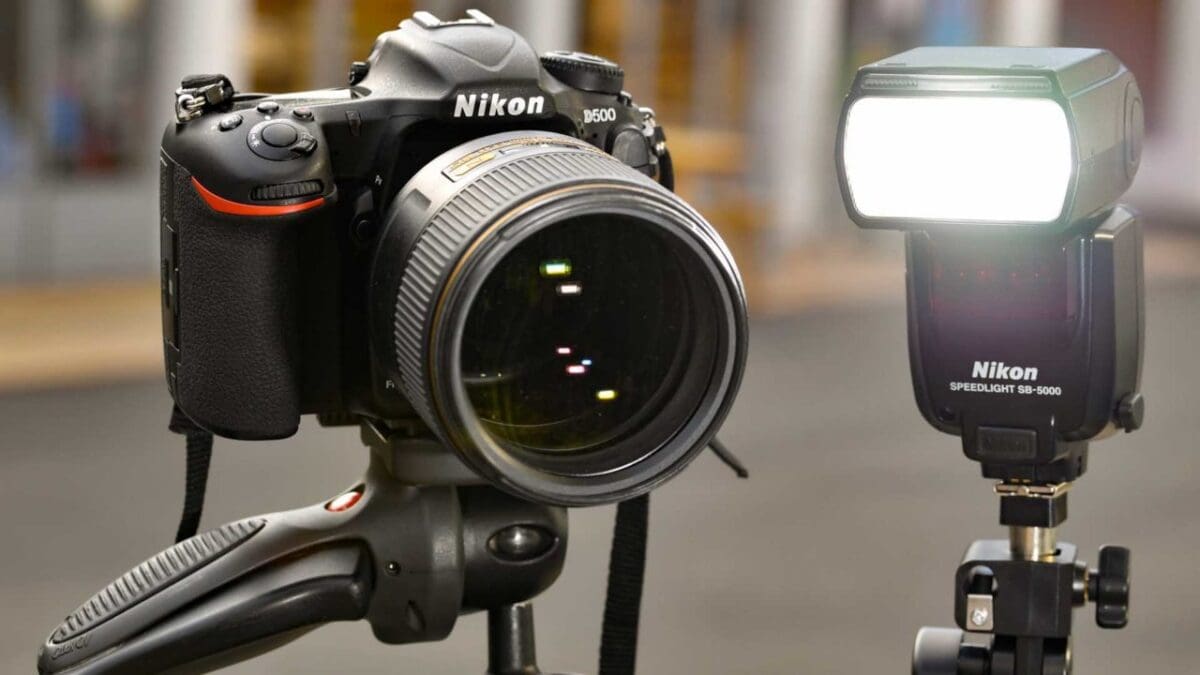


It’s never been easier to shoot with wireless flash and there’s a range of relatively affordable solutions available. The latest solution from Nikon on the D5, D500 and D850 DSLRs using the Nikon Speedlight SB-5000 flashgun, gives you the ability to shoot TTL, high-speed sync flash and works via radio transmission.
That’s a big deal. It means you no longer need direct line-of-site between devices and it’s often more reliable, particularly when shooting in bright light.
You can also control the flashgun direct from your DSLR. That’s helpful because you can adjust the mode or power of multiple flashguns without moving from your shooting position.
In this post, we talk you through setting up the Nikon Speedlight SB-5000 for shooting with wireless flash. We’ll also show some of the features and benefits to help you produce better off-camera flash pictures.
What you’ll need
- Nikon D5, D850 or D500 DSLR
- Nikon Speedlight SB-5000 flashgun
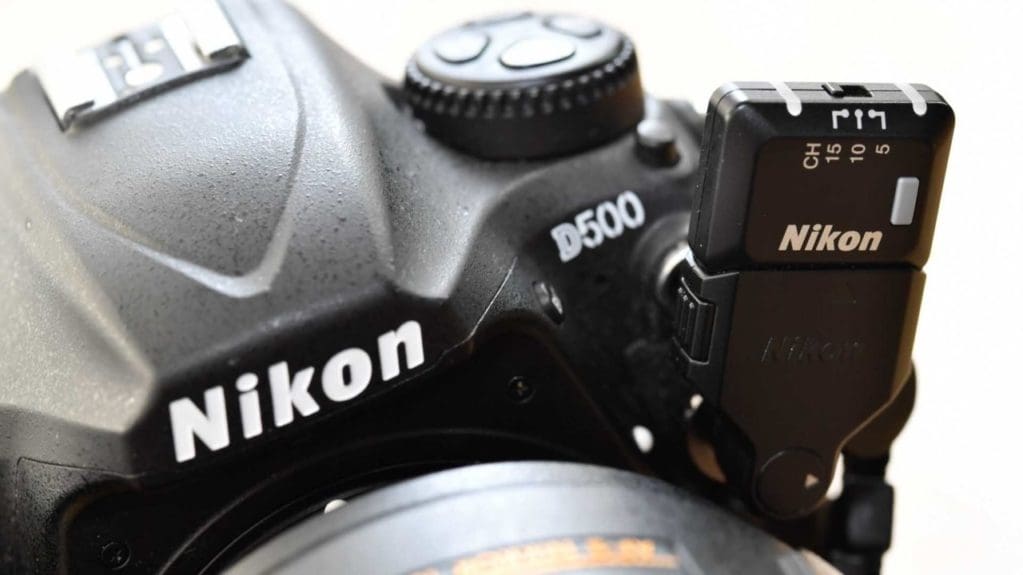
- WR-R10 wireless controller
- WR-A10 adapter for DSLRs with a 10-pin connector
How it works
The Speedlight SB-5000 is the first Nikon flashgun to include a radio remote slave. That means it can receive a radio signal to fire the flash. Currently only the Nikon D5, D850, D500 & D7500 DSLRs fully support this. They allow you to take advantage of the new six-channel radio-frequency i-TTL controls.
However, even these DSLRs don’t control the SB5000 natively. You still need the Nikon WR-R10 wireless controller to send a signal to the flash. The latest DSLRs, including the D7500, as well as the new mirrorless Z7 and Z6, allow you to plug the WR-R10 directly into a port. But for DSLRs like the D5, D850 and D500 with a 10-pin connector port you’ll also need the WR-A10 adapter.
The necessity to purchase the controller and adapter has been something of a bugbear with Nikon shooters. Hopefully, these can be built into cameras in the future. But for now, they’re required to be able to fire the flash via radio signal. That is unless you have two SB-5000 flashguns, in which case one sits on the hotshoe and acts as a master, sending the radio signal to the second SB-5000. This second flash is set up as a slave to receive the radio signal.
In this post, we’re looking at the set up using the WR-R10 controller and WR-A10 adapter on the D500.
How to set-up Nikon DSLRs for wireless flash
First, we need to pair the D500 and SB-5000 to set up the radio connection. Connect the WR-A10 to the D500’s 10-pin connector and plug in the WR-R10 controller. We need to put the flashgun and controller on the same radio channel. There are three options – 5, 10 and 15. Most of the time it doesn’t matter which channel you use, so any of the three are fine.
If there are other flashes operating on the same channel, however, you might fire other peoples’ flashes and they may fire yours. In which case set them up on different channels.
Step 1
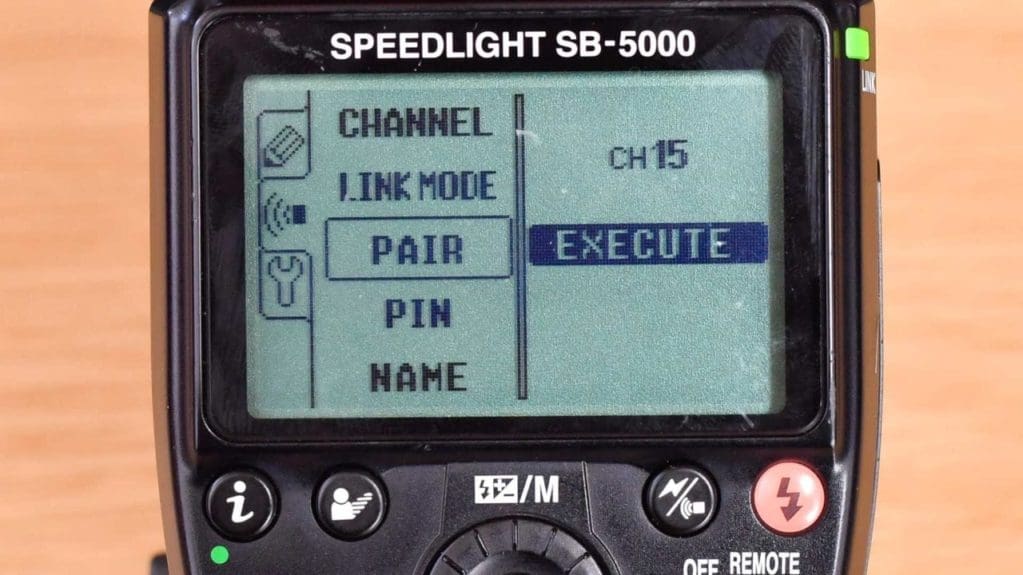
Flick the SB5000 into REMOTE mode, hit the MENU button and in the CHANNEL menu, select the same channel as is set on the WR-R10. In my case it’s channel 15.

Step 2
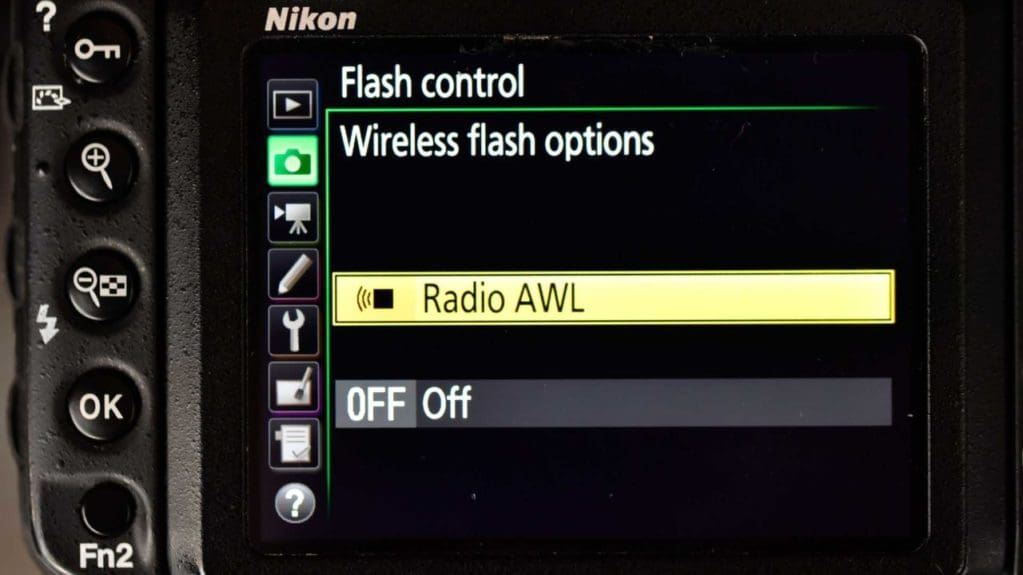
On the D500, hit the MENU button and under the PHOTO SHOOTING MENU go down to Flash Control. If the option for Flash Control is greyed out you haven’t plugged in the WR-R10 properly. Then set the Wireless flash option to Radio AWL.
Step 3
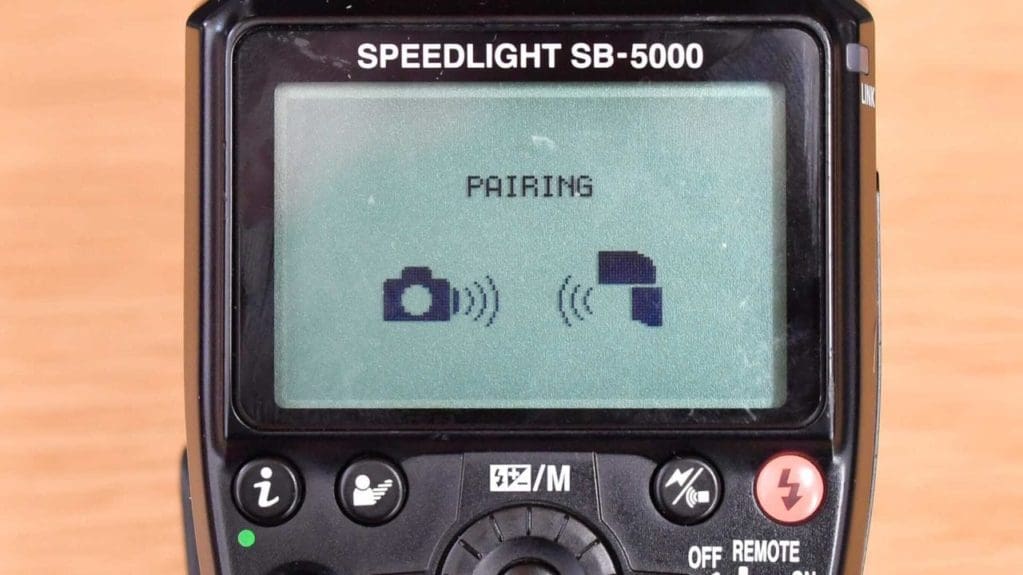
Go back to the SB5000 menu and down to LINK MODE and check it’s set to PAIRING – it should be as that’s the default, but worth checking. Now go down to PAIR and across to EXECUTE.
Step 4
Press the grey button on the front of the WR-R10 and you’ll see a green flashing LED, indicating the WR-R10 is now transmitting a radio signal. Whilst the green LED is flashing, press OK on the flash to execute the pairing. It’ll take several seconds, but if successful you’ll see a message saying Connection Established and the LINK LED on the SB-5000 will light up green.
The camera and flash remember the connection, so you only need to pair device’s once. And as long as the SB-5000 is set to REMOTE, RADIO AWL is turned on and you haven’t changed the channel, they’ll connect automatically. If you use the SB-5000 on the hotshoe at any point however, RADIO AWL is automatically turned off, so you need to remember to turn it on again. That’s caught me out a couple of times.
Group Flash Options
Now you’re nearly ready to shoot some wireless flash pictures. But first, we need to understand the flash controls, to be able to set the flash mode and power.
In the Flash Control menu on the D500, go down to Remote flash control and select Group flash. This allows you to control up to 18 flashguns in 6 groups (A/B/C/D/E/F), so you can set the flash power for the key (main) flashes, fill-flashes and background flashes independently. That’s pretty advanced. It means you’ll need a bunch of expensive SB-5000 flashguns, but you can use the same Group flash feature to control just one flashgun as well.
Typically, I use it just for a single flash to light my portrait and occasionally another one or two flashes to light the background or create a rim light effect. I’ve never used it with more than three flashguns.
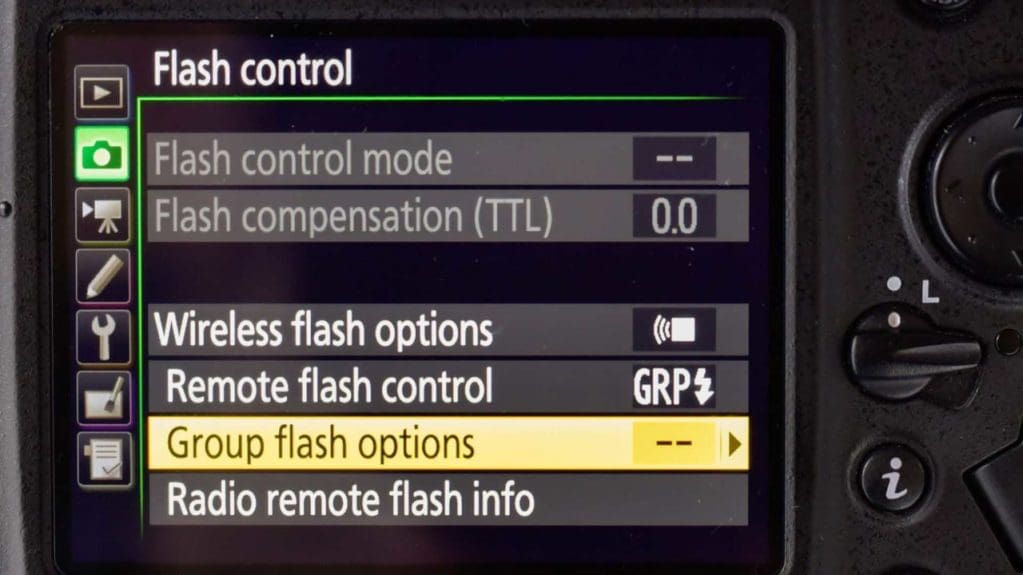
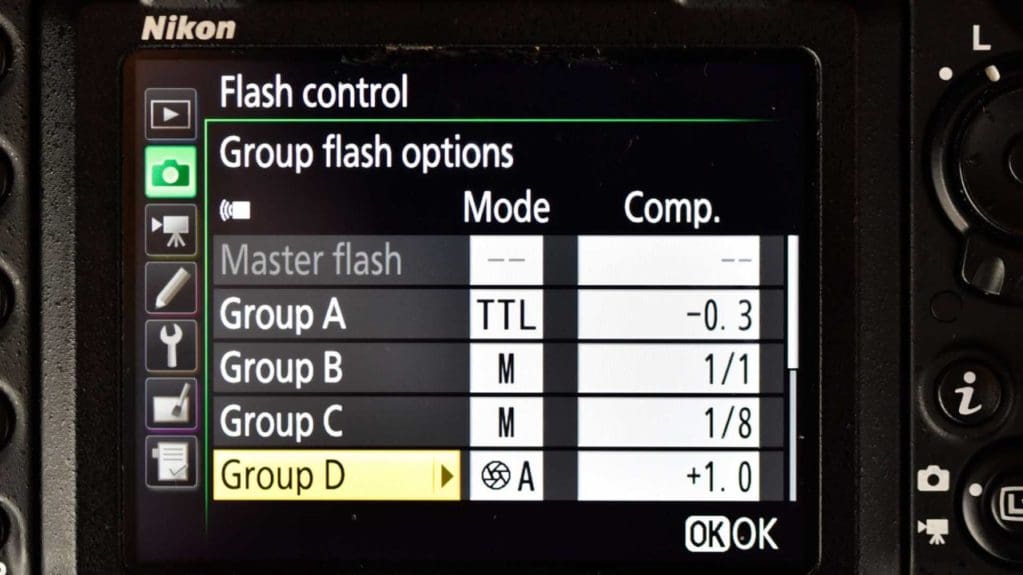
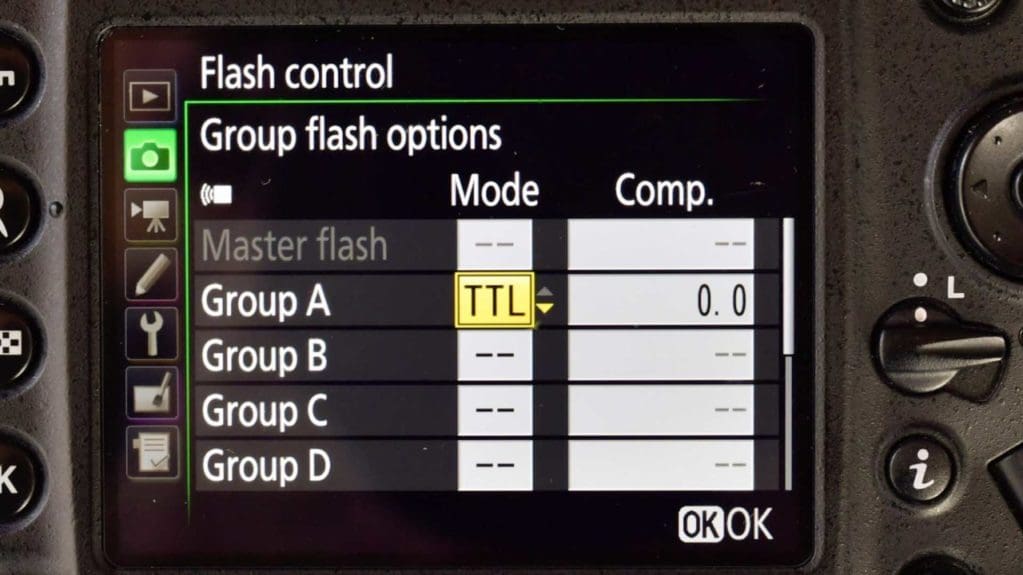
Next go into the Group flash options menu, which is where you set the mode and power (called Comp for compensation) for each group.
Under Mode you have 3 options; TTL – where the flash power is set automatically based on your camera settings and subject distance, A – Auto Aperture for non-TTL flash to set the power output based on subject distance and exposure settings, and M – manual to set the flash output manually.
TTL or Manual Mode?
TTL is really easy to use, as the flash power is set automatically based on your exposure settings. It also takes account of the ambient light and you don’t need to buy or mess about with a lightmeter. The downside is it can get a bit confused, particularly with flashes that aren’t positioned close to your principal subject, where it can set the flash power to accurately light something you’re not interested in, which is annoying.
The alternative is to use Manual mode. This gives you a consistent flash output on every shot (as long as the flash has fully recycled). And you can set the flash output in stops between full power 1/1 and minimum power 1/256. The quick and easy ‘fudge’ way to use manual is to guess what power you need, take a shot, review the image on the LCD screen and adjust the power accordingly. If you want to do it properly though you need a lightmeter. This enables you to set the flash power correctly for the ISO and aperture settings you’re using.
That’s a tutorial for a different article though, here we’ll talk you through the setting up TTL flash.
Setting up the flash groups
Step 1
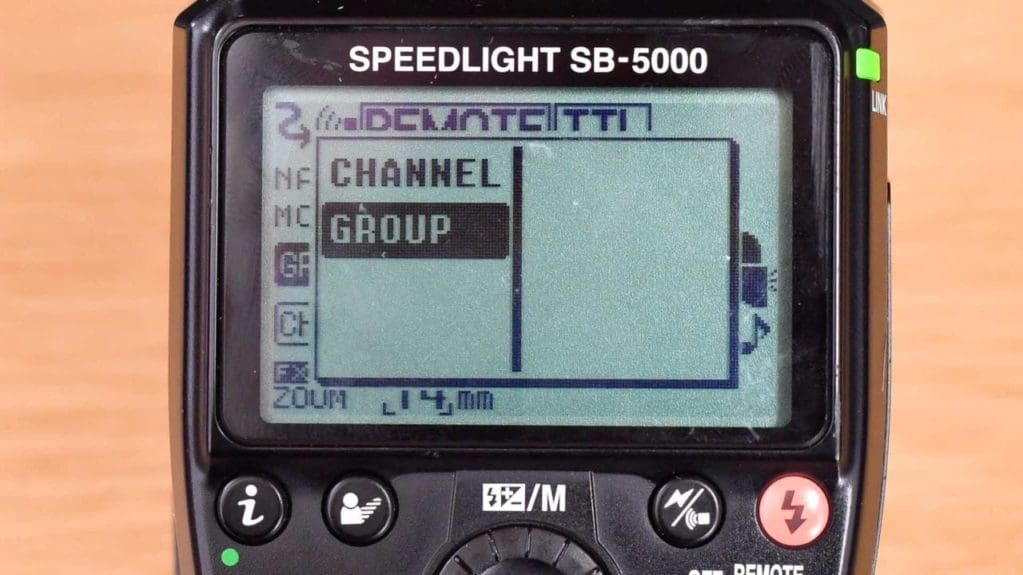
We’re going to put the key light on Group A. With the SB-5000 set to REMOTE, hit the i button, scroll down to GROUP and select A.
Step 2
Now on the D500 go to Flash control in the PHOTO SHOOTING MENU. Go to Group flash options and under Group A scroll across to the Mode option and select TTL.
Step 3
Okay, you’re ready to shoot. Position the flash – either using a light stand, or even better get a mate to hold it – and take a shot. Now review the image on the LCD screen to assess how well the TTL worked.
Step 4
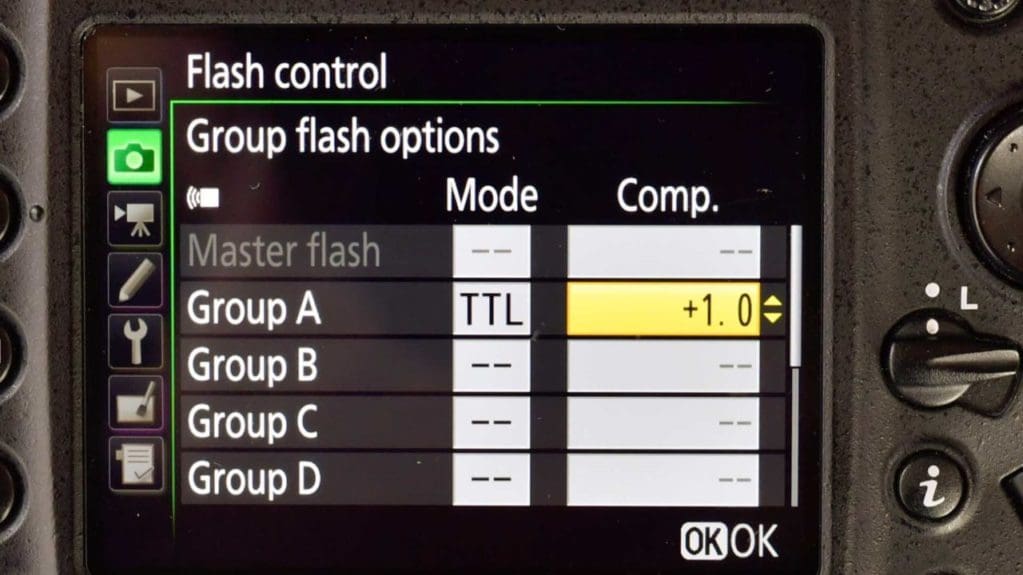
If the TTL flash output is either too bright or not bright enough, you can adjust it using the Comp setting. Back to Group flash options and under Group A scroll across to Comp and increase the flash compensation to positive values for brighter flash output or negative value for duller flash.
Step 5
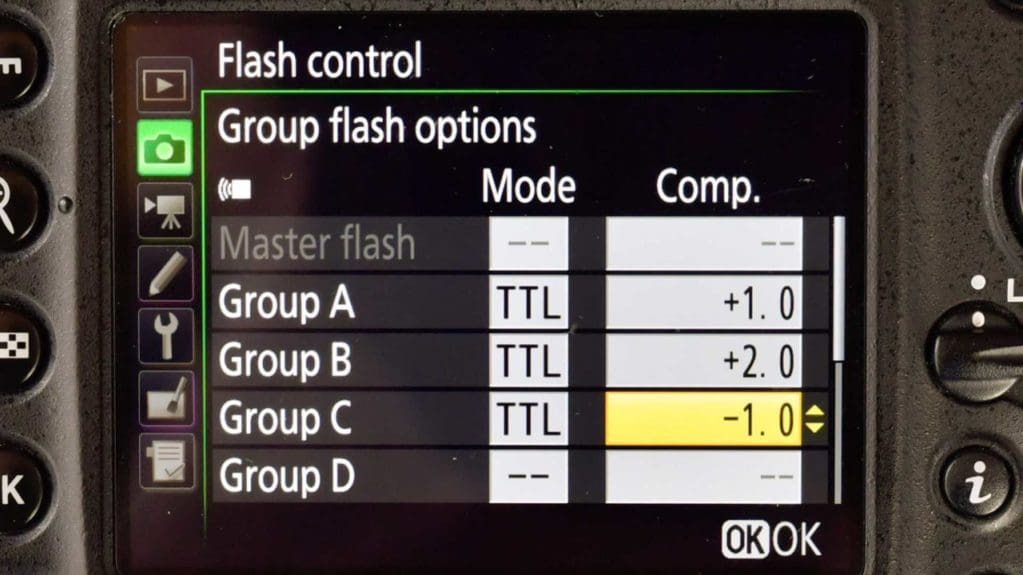
With your key light set up you can now add a background or fill-flash for more advanced and creative flash pictures. Use Groups B and C so you can control the output of these additional flashes independently.
So that’s it. It sounds complicated written down, but once the D500 and SB-5000 are paired it’s actually quick and easy to adjust the mode and power using the Group flash options. If you want to shoot high-speed flash, there’s one other setting to adjust. Go to the CUSTOM SETTINGS MENU and under Bracketing/flash go to Flash sync speed and set 1/250 s (Auto FP).
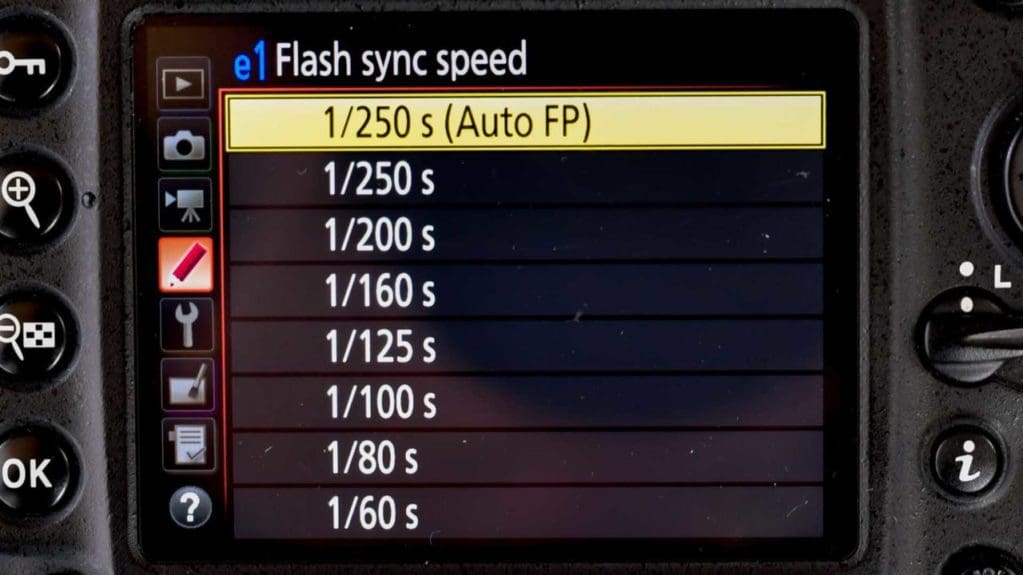
FP stands for Fast Pulse, so now you can use shutter speeds faster than the usual maximum sync-speed of 1/250th of-a-second, which is really useful if you want to shoot very wide aperture portraits outdoors.
We hit the woods with a model in tow to show you what’s possible with this setup.
Controlling the ambient light
Using this set up it’s easy to control the ambient light to create different effects.
With a single SB-5000 in TTL mode, the flashgun will automatically adjust the flash power for the exposure settings. So your subject is always going to be accurately exposed by the flash, but you can control how you expose the ambient light.
Using ISO 50 and 1/1000th of-a-second shutter speed in the first example, the ambient light is under-exposed and very dark. Simply increasing the ISO to 200 and using a slower 1/250th of-a-second shutter speed in the second picture records more of the ambient light. As a result, the background looks quite different.

Nikon D500, 105mm f/1.4E lens and SB5000 flashgun off-camera. ISO 50, f/1.4, 1/1000th.

Nikon D500, 105mm f/1.4E lens and SB5000 flashgun off-camera. ISO 200, f/1.4, 1/250th.
Create golden sunlight using colour filters
The SB-5000 comes supplied with incandescent (orange) and fluorescent (green) colour filters. These help you correct the colour of the flash for better results under artificial light. However, you can also use them for creative effects, such as recreating golden sunlight.
You can see from the behind-the-scenes shot below it was hardly golden Californian sunlight I was shooting in. An orange filter created that ‘golden hours’ warm lighting effect.
I used a softbox on the key light at the front to soften the flashlight falling on the model. Meanwhile, a ‘bare bulb’ flash behind her gave a harsher ‘rim light’ effect. Again, with the flashes set to TTL mode, compensation on the rear flash was set to +2 to enhance the rim light effect and replicate the look and feel of early morning sunlight.
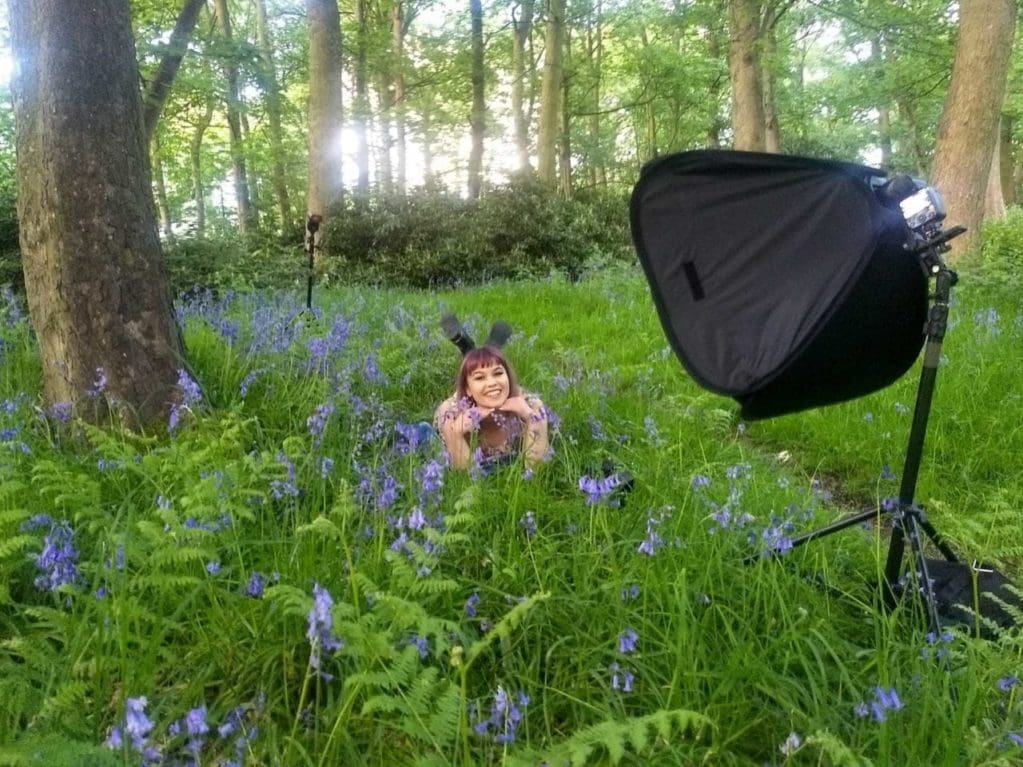
Behind the scenes – the light really wasn’t that good!

Nikon D500, 105mm f/1.4E lens and SB5000 flashgun off-camera. ISO 50, f/1.4, 1/200th.
How about using older Speedlight units like Nikon SB-700, etc instead of all this hyped-up promoting that users spend more money on an very expensive SB-5000. Clearly the dog wagging the tail. Be impartial, be helpful instead of promoting
This post was written by a Nikon user who bought the units involved. It’s a technique post to explain how to use the kit from an experienced Nikon photographer.