


When it comes to wildlife photography, birds in flight have to be one of the most challenging subjects. Their fast-paced movement, as well as the unpredictable changes in position, exposure and focus, means you have to practice a lot. It’s also really important to have your camera set up in the right way to give you the top performance. Otherwise, you’ll never lock on to those birds flying past!
Exposure Mode
Choosing an exposure mode for bird in flight photography really comes down to what you’re comfortable with and the conditions. If you are shooting a range of subjects in a day, switching from ground-based wildlife to birds in flight, an assisted mode such as aperture priority will be beneficial. This allows you to swap between subjects and get a good basic exposure for shooting. It means you can concentrate more on the focus and composition rather than shifting the shutter speed quickly to ensure the correct exposure.
If, however, you are focused solely on bird in flight photography, you may find manual exposure mode more consistent. This is especially true if you’re working from a static point with the birds regularly moving past.
Exposure
It’s a good idea to shoot a test exposure and then lock-in your settings to ensure accuracy and consistency. It means that even if a bird flies from bright sky to below a cliff you’ll have the correct settings locked. This ensures you don’t suddenly have a drop in shutter speed as the camera reacts to its perceived change in exposure and your image is ruined.
The angle of the light is an important consideration for all bird in flight photography. In the early mornings and late evenings with low sun, we often get fantastic light that lifts the undersides of birds plumage. It also allows for pretty simple exposures and great results.
As the light moves higher in the sky, however, and the birds become backlit, we need to apply some exposure compensation. This is of often +2/3 or a stop in order to gain detail in the shadows whilst being careful not to blow the highlights. This can easily be applied in both assisted and manual modes.
As a guideline, I often aim to set to around 1/2000 sec and f/5.6, and then vary my ISO in order to gain the right exposure. This gives me the flexibility to move up and down with the changing light for a bird in flight session on my Nikon D850 or D500. Depending on the style of images I’m after, I’ll vary this with slower shutter speeds to add movement or cater for smaller birds.
AF modes
One of the first areas you want to sort out is the AF mode. For wildlife photography in any form, you want to be in AF-C (continuous focus). But on modern high-end DSLRs, there’s also a range of further AF options that are useful in certain scenarios.
To change the AF mode on a Nikon camera you either have to go into the menu on consumer cameras and select your chosen mode, or on prosumer and professional cameras, press the button that lies on the AF switch (left side of the camera body by the lens mount) and then scroll the front and rear dials to select your chosen mode.
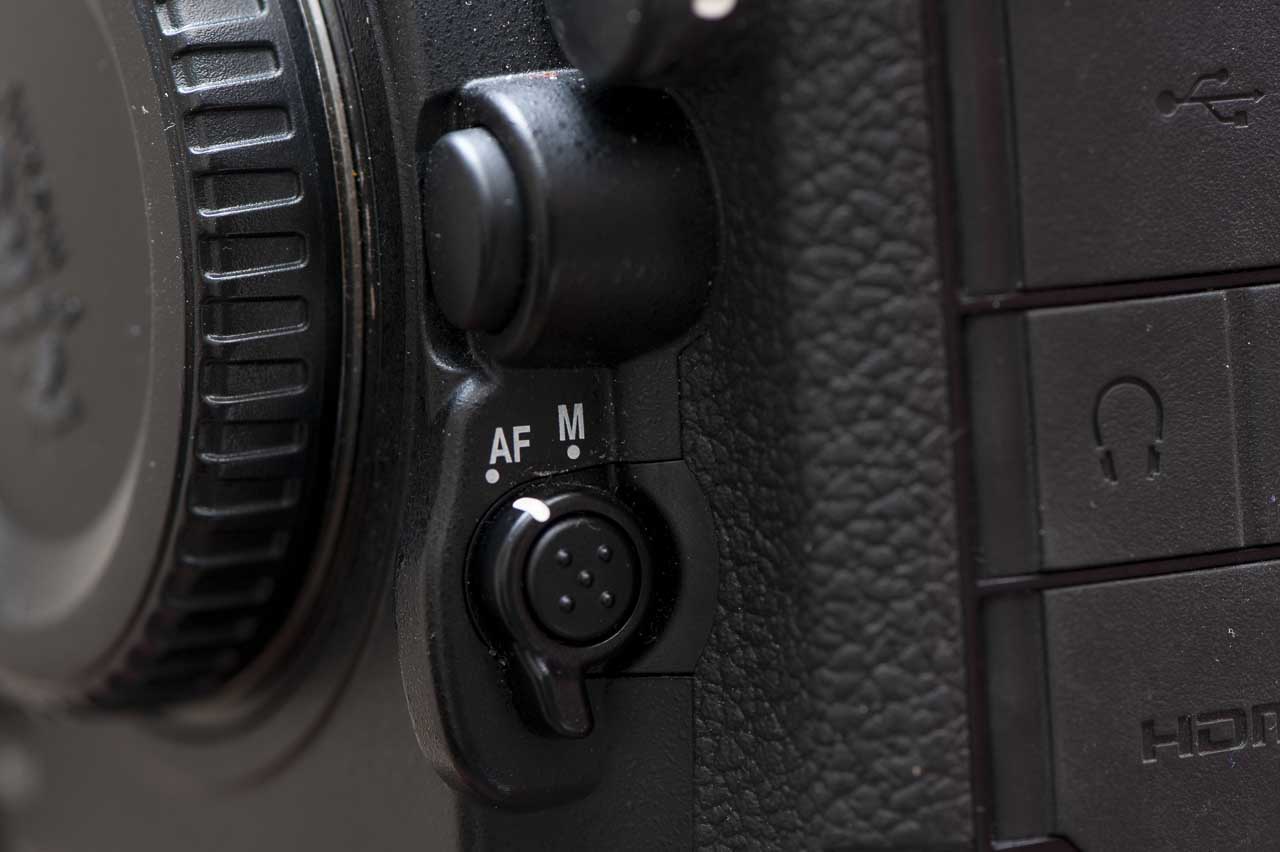
The side AF toggle on pro and prosumer Nikon DSLRs
- Check the price of the Nikon D850 at Amazon UK, Amazon.com, Wex Photo Video, Park Cameras, Adorama, BH Photo Video
Single Point AF
Single point AF mode is my go-to for most wildlife photography. It allows control over composition and accuracy of focus within the frame and helps me to target my subject’s eye.
However, it’s a challenge to us single point mode with birds in flight as it’s hard to keep the small area on them. However, because of its accuracy and the fact often you’ll already be in this mode, it’s a good idea to develop your bird following skills. I recommend practising holding the single point over them as they move.
Single point AF allows for very accurate tracking that is highly useful when pinpointing a subject
Dynamic-area AF
The Dynamic area modes on modern Nikon DSLRs give us a way of utilising 25, 72 or 153 AF points to attain focus. The mode shows a group of AF points clustered in the viewfinder. These work together to quickly asses and focus.
These modes are easier to use than single point mode with birds in flight as the larger group of points means if the bird moves away from the single detection point, it will still be tracked by the surrounding points helping to keep focus.
An additional benefit, especially in the 25 point mode, is the activated area of AF points is still small enough to enable artistic composition.
Working with dynamic 21 point AF for fast reliable focusing while still allowing for compositional framing
- Check the price of the Nikon D500 at Amazon UK, Amazon.com, Wex Photo Video, Park Cameras, Adorama, BH Photo Video
3D tracking
Ever since its introduction on Nikon cameras, 3D tracking AF has received lots of praise for its ability to accurately track focus on a given object or point. This mode enables you to select a single point from the AF system, and after initialisation, it is tracked in the viewfinder, even if you move.
This means that if you pick out a bird and activate the AF whilst the point is over it, it will be tracked in the viewfinder, keeping focus until you release the AF activation. This mode is incredible for keeping up with the action and following fast flying birds. It’s especially useful for fast-paced work and continuous bird in flight photography, such as on seabird islands.
Advanced setup
In addition to simply choosing the AF mode on your camera, you can customise it further to optimise it for bird in flight photography. Here’s a selection of useful features, but not all are available on all Nikon cameras)

- Check the price of the Nikon D5 at Amazon UK, Amazon.com, Wex Photo Video, Park Cameras, Adorama, BH Photo Video
Back Button AF
When it comes to photographing birds in flight (or any action), it’s essential to be in control of the precise moment the camera focuses and captures the image. Most cameras ship with the shutter button triggering both the shutter and AF activation. However, although this is convenient because when you depress the shutter the camera focuses, it also means that the camera won’t fire until it perceives the image to be fully in focus. This can hinder your shooting when working with fast-moving subjects.
A way around this problem is to use rear button focusing. This means assigning the AF activation to a second (rear) button. Consequently, this requires a separate button press to activate the AF, while the shutter release only has the primary job of taking images.
This can seem counter-intuitive at first, but with time and practise the separation of the two processes aids your action shooting.
In order to set up the camera for back button focusing, you’ll need to go into the Setup menu, to AF activation and then switch to AF-ON only.
On cameras with a dedicated button such as the Nikon D5, D850, D500 this will assign AF to the AF-On button. However, on those cameras that don’t, you’ll have to use the custom control assignment to program the AE-L lock button, found on all models, to take on this role.
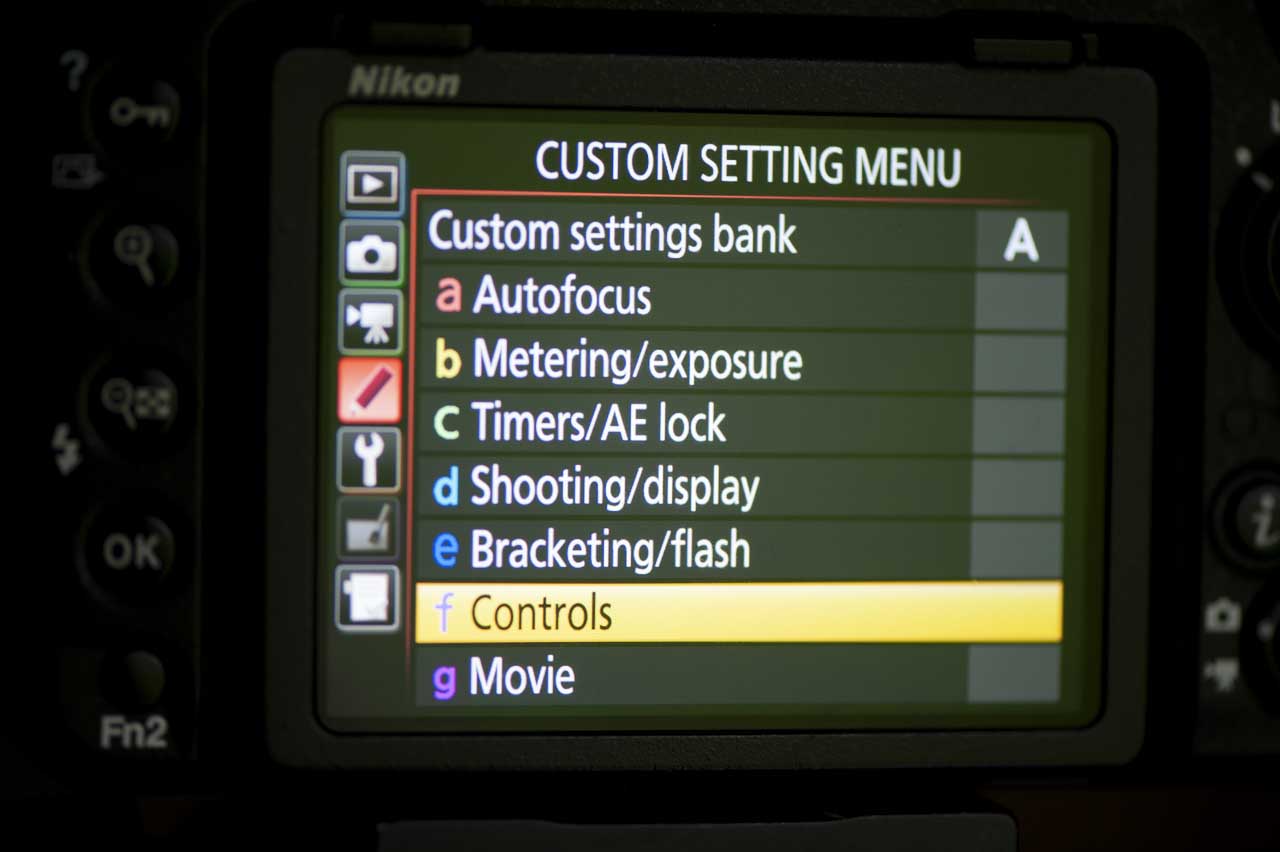
Programing custom controls
Secondary AF-ON
On some of the more recent high-end Nikon cameras we also have a joystick that’s available for AF programming. This is highly useful for positioning and moving AF points, however, it also can be pressed in to act like a secondary button that can be very helpful.
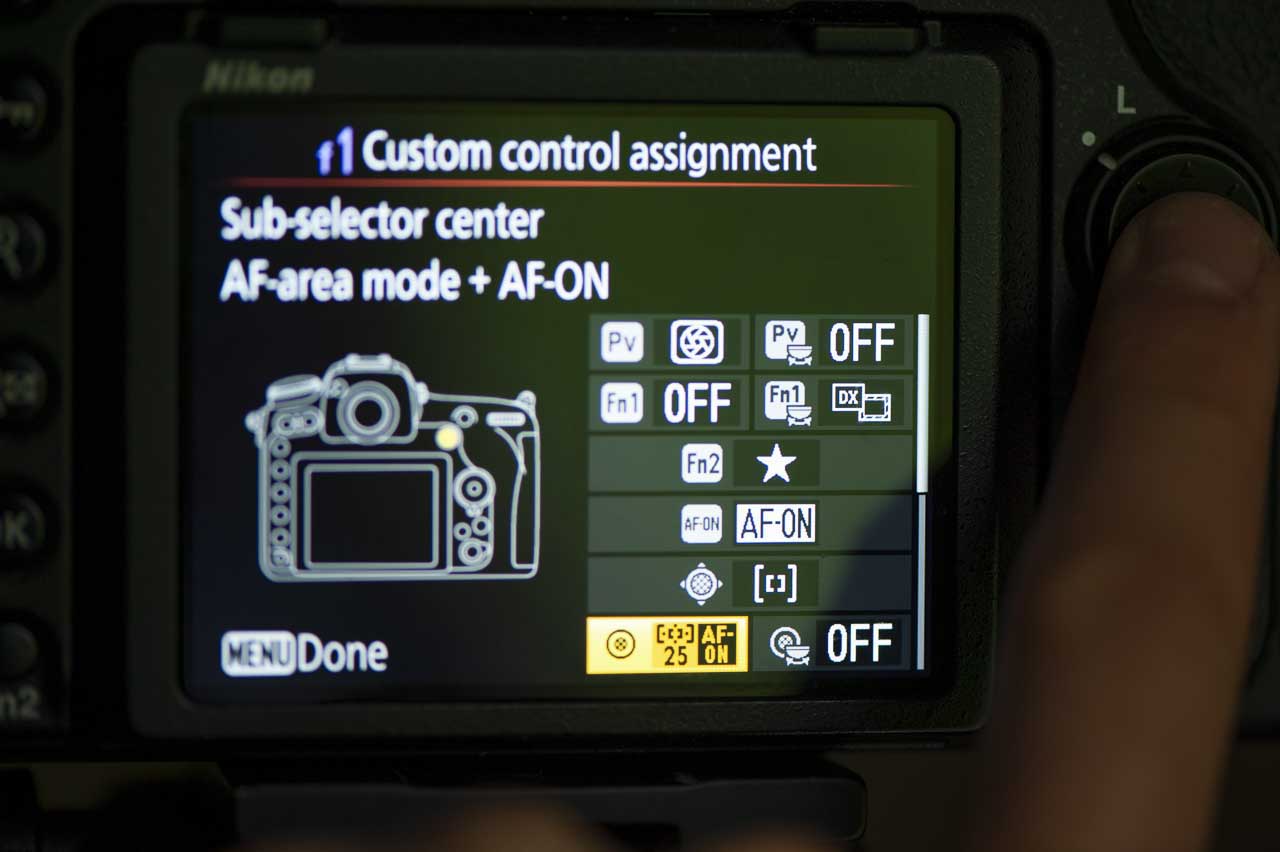
Programming control assignment to use a joystick press for AF mode switching on the fly
You can program the press to activate AF-ON in separate mode to your standard AF-ON. This is done via the custom control assignment and choosing the joystick. This allows us to have a secondary AF mode at our thumb tip, without the need to hold and scroll to swap modes.
![]()
I have mine set to the 21-point dynamic mode. This means I can swap from single point AF (my standard mode for wildlife on the ground) to a group selection in an instant for tracking birds in flight. It improves my keep rate hugely as well as boosting the speed of focus acquisition on the fly, excuse the pun…
This programming sadly is only available on those cameras that feature a joystick. In other words, the Nikon D5, D850 and D500, it also isn’t available on the Z 6/Z 7 as of right now (May 2019).
Disable AF modes
Sometimes more is certainly less. And when it comes to rapidly swapping AF modes in the field, having a vast number at your fingertips can sometimes be a hindrance rather than a help.
Often within my cameras, I only want to use two or three modes, Single point, Dynamic area 21 and then the 3D tracking. So having more makes my job harder as I have to cycle between them. Luckily, with modern Nikon cameras, you can change the number of modes available and turn off any you don’t need.
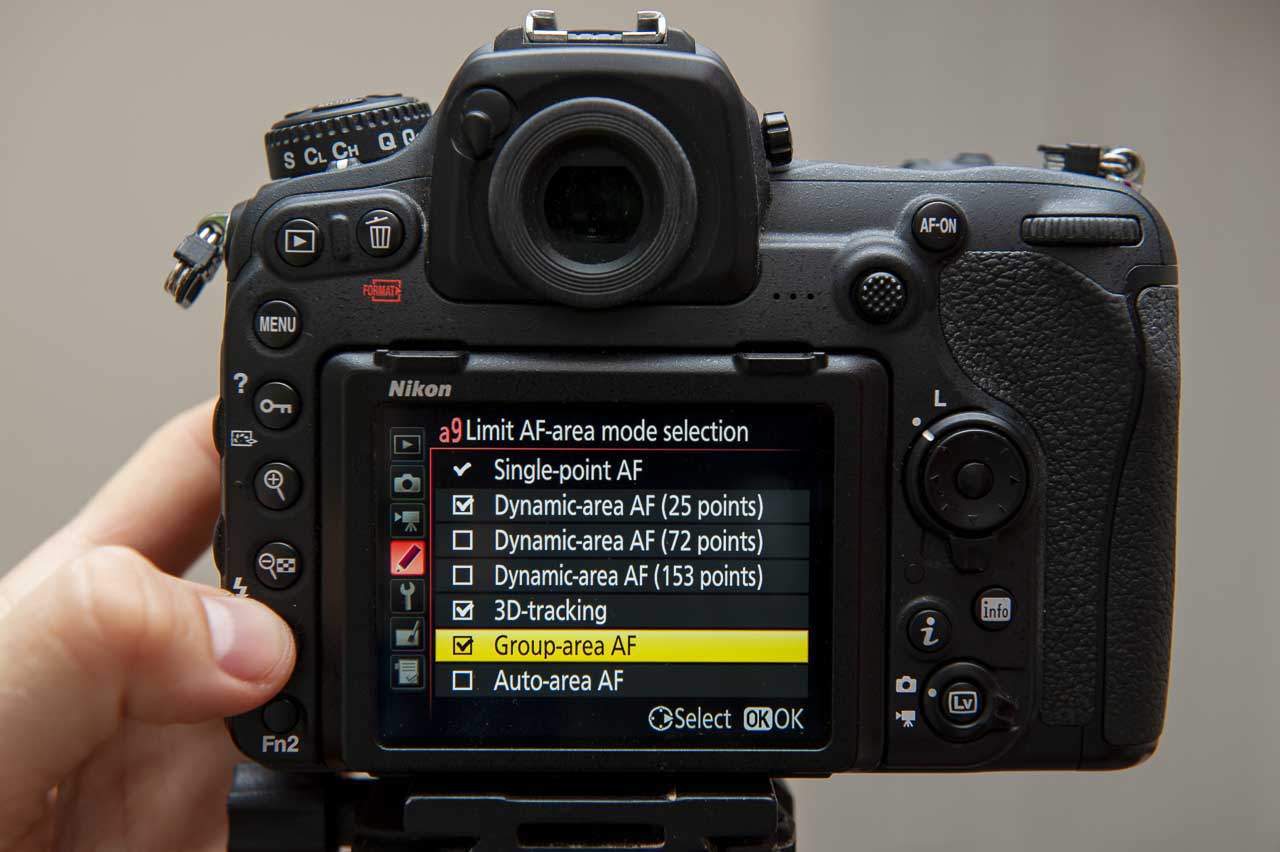
Disabling AF modes for easy access in the field
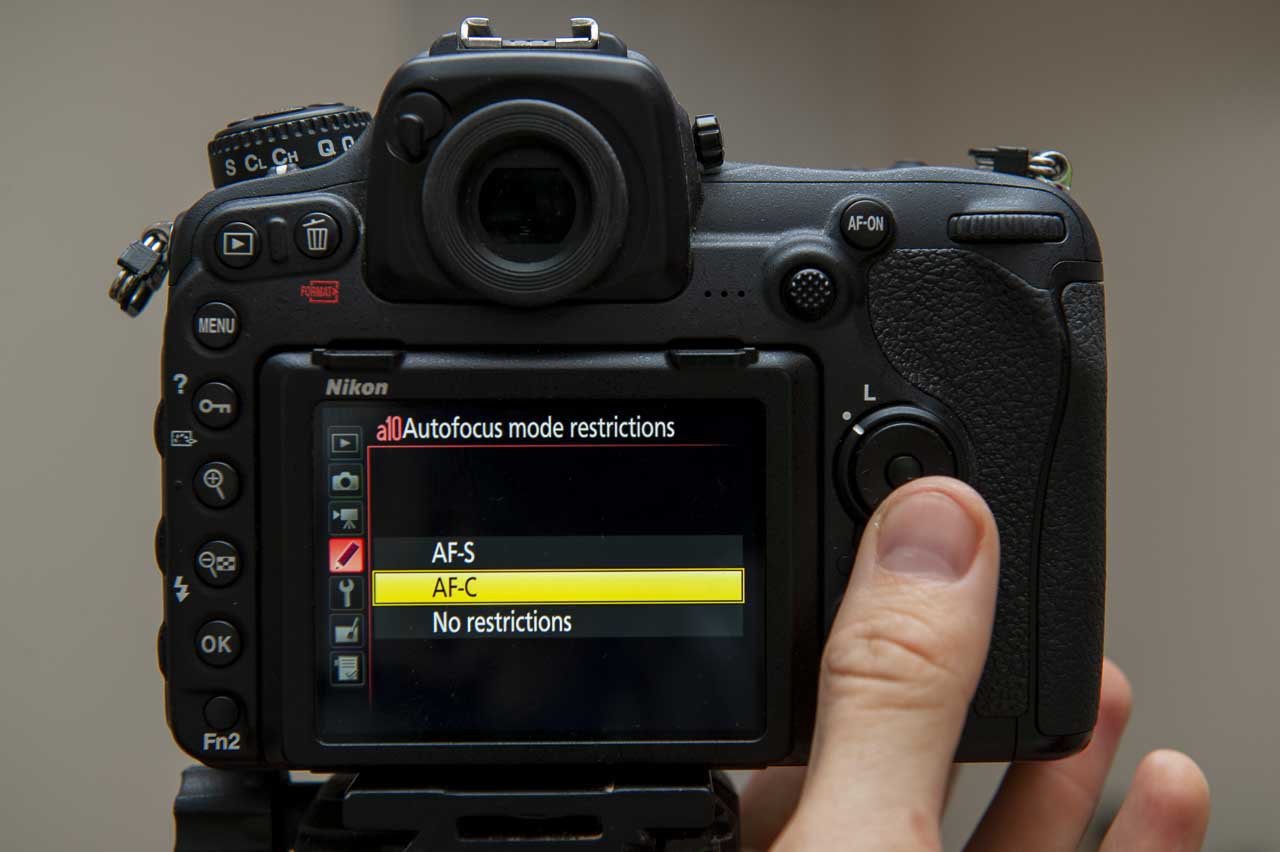
Within the custom setup menu, in the autofocus region, you’ll find the menu item ‘Limit AF- area mode selection. Toggling inside you can then uncheck any of the modes you don’t want to appear. To activate this, you then need to assign it for AF-C within the ‘Autofocus mode restrictions’ menu setting, switching it on for AF-C.
Applying AF mode restrictions to AF-C focusing
With the camera now only displaying the modes you’re after, swapping between them is faster and more efficiently. You’ll waste less time and get back to capturing the action quickly.
Techniques for Photographing Birds in Flight
Now with your camera programmed it’s time to get out and shoot. But I thought I’d add some easy techniques and ideas that can help you make some creative images.
Firstly, think about your stance. Handholding is often the most simple and convenient method for flight photography, so you’ll want to make sure you’re in the best position. Stand with your feet about shoulder width apart, one leg slightly forwards, with your elbows tucked in and your knees slightly bent.
This gives you a good position to work from and swing with your subject. It also helps you to concentrate on nailing the image in the viewfinder.
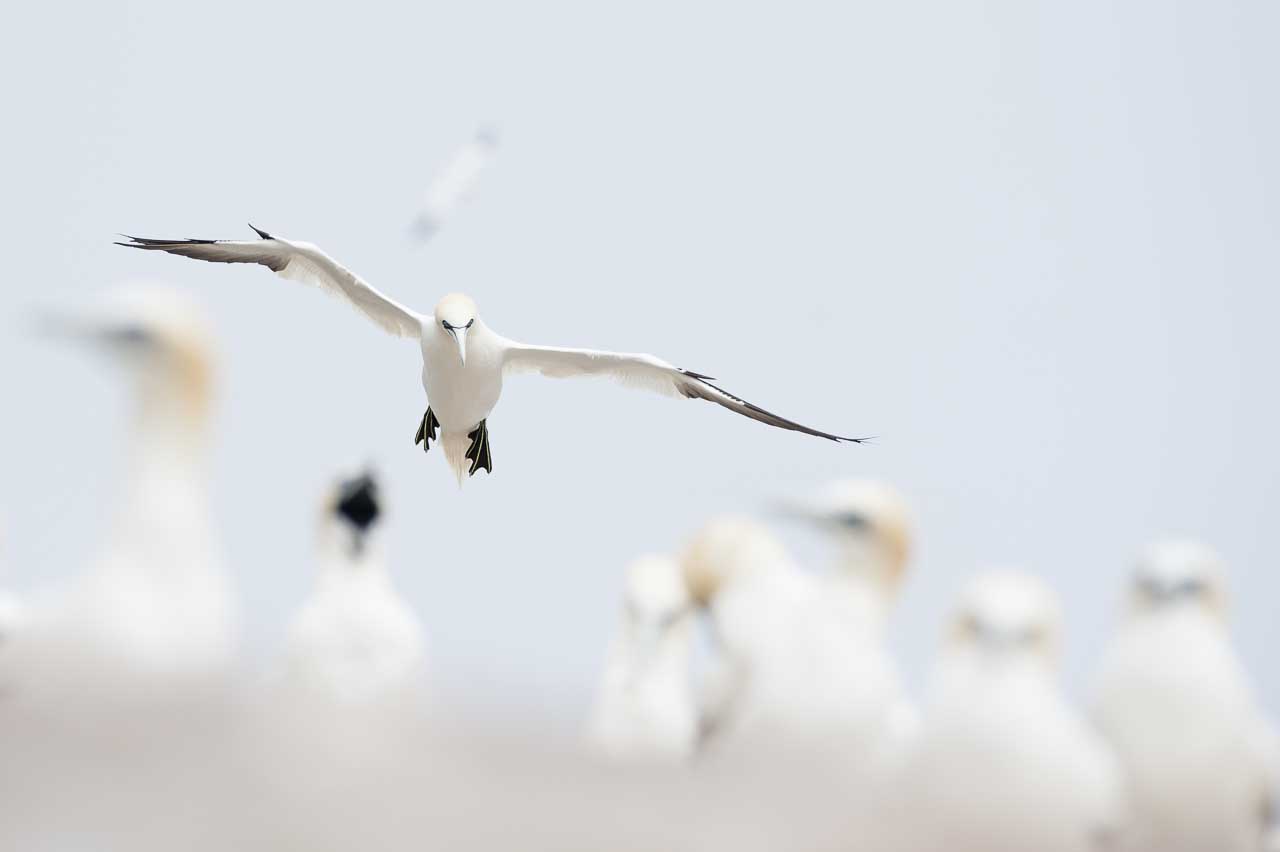
Consistency is key. In order to up your chances of a great image, you should work with birds constantly flying past to get your ‘eye in’ and nail the image you’re after. Working at locations with high volumes of flying birds such as sea bird colonies, nesting beaches or feeding areas will help increase your time with birds on the wing. Hence you’ll hone skills and in the future, when it’s just a single opportunity, you’ll be on point.
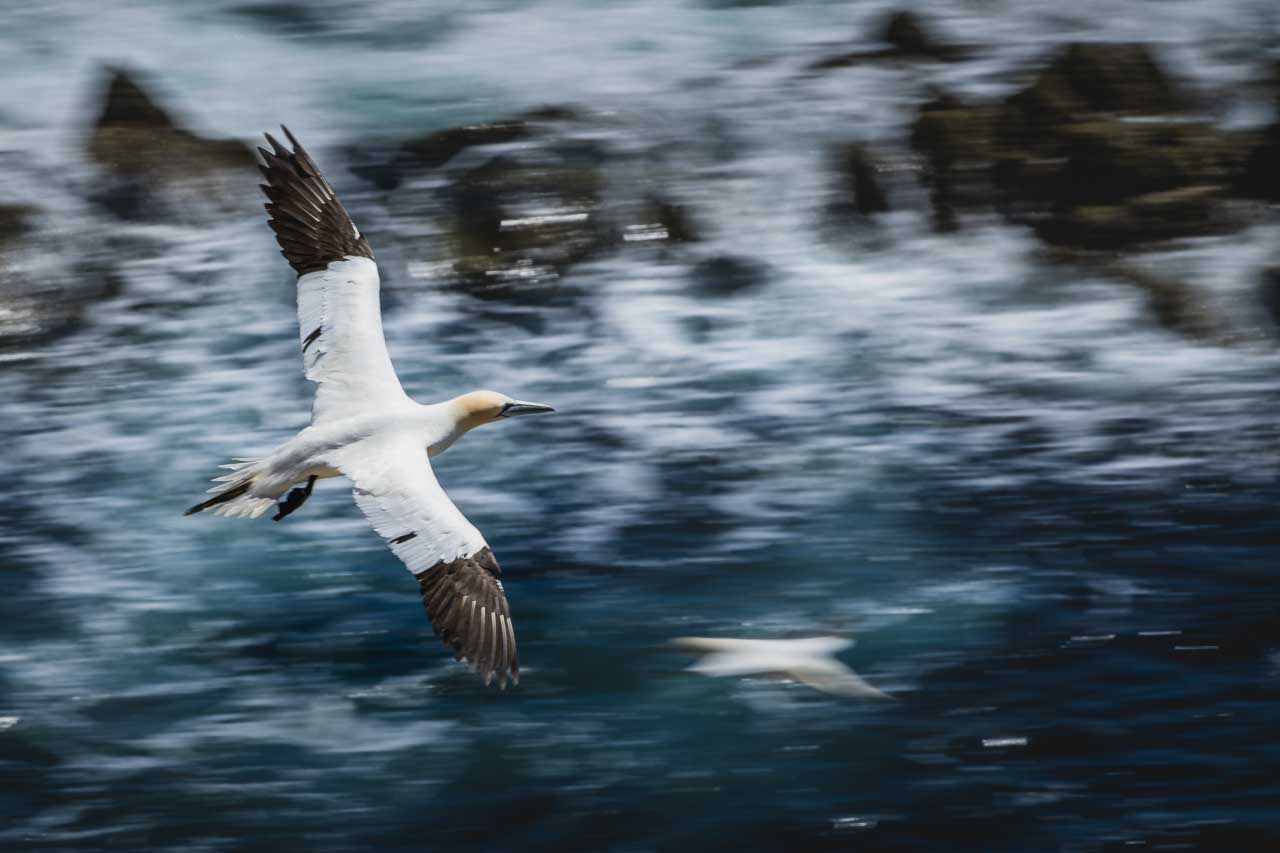
Working with a slower shutter speed adds movement, allowing for creative images
Think creatively!
If you’ve got the basics and you’re finding you can easily get sharp shots of birds flying past, mix it up a little and try to capture specific action, such as birds air breaking for landing or working with a slower shutter speed and panning. These more dramatic and creative shots can increase the photographic potential from bird in flight photography and often produce far more dramatic images than just standard static, frozen shots.
Hopefully, the above tips will help you set up your Nikon camera. It can be hard when you’re getting started with so much to think about, but persistence and practice always win through when it comes to wildlife photography!